Microsoft releases new versions of the operating system, but some innovations are useless. For example, we can easily do without a welcome screen and a lock screen if you don't have any information to hide from your family.
How to remove the welcome screen in Windows 10
Thus, many users want to get rid of unnecessary screens in order to increase the system loading speed.
How to show all local users on Windows 10 login screen?
In Windows 10/8.1, you can display a list of available local accounts on the system welcome screen. To log in to the computer, the user just needs to click on the desired account and specify its password.
To make Windows display all local users on the login screen, you need to change the value of the Enabled to 1 HKEY_LOCAL_MACHINE\SOFTWARE\Microsoft\Windows\CurrentVersion\Authentication\LogonUI\UserSwitch . You can change this setting through the Regedit GUI, using the “Reg Add” console command, or the Set-ItemProperty PowerShell cmdlet.
Reg Add HKLM\SOFTWARE\Microsoft\Windows\CurrentVersion\Authentication\LogonUI\UserSwitch /v Enabled /t REG_DWORD /d 1 /f or Set-ItemProperty -Path 'HKLM:\SOFTWARE\Microsoft\Windows\CurrentVersion\Authentication\LogonUI\ UserSwitch' -Name Enabled -Value 1
However, Windows automatically resets the Enabled parameter to 0 each time the user logs in. To ensure that the key value always changes to 1, the easiest way is to create a new scheduler job that will run when the user logs in.
The scheduler job must run one of the above commands. Such a task can be created manually using the graphical console taskschd.msc. But I find it much easier to create a scheduler job using PowerShell. In our case, the commands to create a new task might look like this:
$Trigger= New-ScheduledTaskTrigger -AtLogOn $User= "NT AUTHORITY\SYSTEM" $Action= New-ScheduledTaskAction -Execute "PowerShell.exe" -Argument "Set-ItemProperty -Path HKLM:\SOFTWARE\Microsoft\Windows\CurrentVersion\Authentication \LogonUI\UserSwitch -Name Enabled -Value 1" Register-ScheduledTask -TaskName "UserSwitch_Enable" -Trigger $Trigger -User $User -Action $Action -RunLevel Highest –Force
Let's make sure that the task appears in the Windows scheduler (taskschd.msc).
Perform logoff and user logon. The task should automatically run and change the value of the Enabled registry value to 1. Check the current value of the setting. As you can see, it is equal to one:
get-ItemProperty -Path 'HKLM:\SOFTWARE\Microsoft\Windows\CurrentVersion\Authentication\LogonUI\UserSwitch' -Name Enabled
After the next system reboot, the Windows 10 and 8.1 Welcome screen will display all local user accounts on the computer, not just the last user name.
Advice . Instead of standard user icons, you can show their avatar photos from Active Directory.
Advice . If the task runs successfully, but the list of users is not displayed, check whether the Interactive Logon: Do not display last username (in the Computer Configuration -> Windows Settings -> Security Settings -> Local Policies -> Security Options section).
There is a separate policy that makes it much easier to display a list of local users on domain computers. Go to the Computer Configuration -> Administrative Templates -> System -> Logon section and enable the Enumerate local users on domain-joined computers domain).
How to use the utility
You need to find and download this application to your device. Preferably from trusted sources to avoid infecting your computer with viruses. After this, the downloaded archive is unpacked into a convenient directory.
Important! Using the utility can lead to errors in the operating system, as it changes the original parameters. Although the probability is small, it is worth considering.
To launch the application, you need to find the GUI folder in the selected directory and open it. It contains the W10 Logon BG Changer executable file. It is necessary to launch the utility and work with it. For it to work correctly, you need to use administrator rights.
As soon as you launch the program, a warning information box will appear. If you agree to take the risk, just click on Yes and continue working.
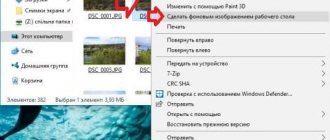
So, we come to the most important thing - directly changing the image on the welcome screen. After starting the program, a gray window will appear on the right. You need to select the file that will serve as the new background screensaver, which can be done by clicking on “Background file name” (in the Russian and English versions it is in the same place). There you find your file and then apply the changes.
Important! First find out what your screen resolution is and adjust the corresponding image to the size. Otherwise, problems may occur. However, remember that too light an image will not allow you to see what username is written. Of course, for a PC with one owner this is not critical, but for multi-profile devices it is very important.
The welcome screen appeared on devices running Windows back in G8. Some users like it, but others think that just entering a password is enough. If you want to remove the welcome screen on your computer, then use one of these simple methods.
Finding and changing the background of the welcome screen
Method 1. The simplest
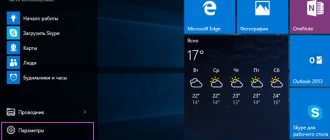
- Launch “Settings” through the menu or “Win” + “l”. Open "Personalization".
You can see what your window with a new photo will look like by pressing “Win” + “L”.
Method 2. Use tweaks.com Logon Changer snail
It is not advisable to use third-party snails, this may lead to crashes or various problems. Think carefully before doing the following:
- Install the application and launch it (through the installer window).
If you need to cancel everything, there is a button (second from the top) - “Revert Wallpaper”.
Method 3: Registry Editor
This method allows you to return everything to factory settings.
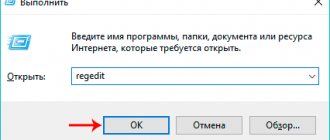
- Execute the combination “Win” + “R” and enter regedit in the line.
Video - How to remove the Welcome screen in Windows 10
Did you like the article? Save so you don't lose!
I did everything correctly, but not a single method helped
Windows 10 users often want to somehow modify the OS they are using. For example, put your own background for the welcome screen or remove it altogether. This article reveals all the details of this issue.
p, blockquote 1,0,0,0,0 —>
p, blockquote 2,0,0,0,0 —>
How to remove username from Windows Welcome screen?
Displaying your account name on the Windows login screen is convenient for end users, but reduces the security of your computer. After all, an attacker who has gained access to a computer can only guess the password (for this there are various methods of social engineering, brute force, or a banal sticky note with a password on the monitor).
You can disable the display of the last username through a GPO. Open the domain (gpmc.msc) or local policy editor (gpedit.msc) and go to Computer Configuration -> Windows -> Security Settings -> Local Policies -> Security Settings (Computer Configuration -> Windows Settings -> Security Settings - > Local Policies -> Security Options). Enable the “Interactive logon: Do not display last user name” policy. By default, this policy is disabled.
You can hide the username on the login screen through the registry. To do this, in the HKEY_LOCAL_MACHINE\SOFTWARE\Microsoft\Windows\CurrentVersion\Policies\System branch, create a parameter dontdisplaylastusername of type DWORD and value 1 .
Additionally, you can hide the username on a locked computer. To do this, in the same section you need to enable the policy “ Interactive logon: Display user information when the session is locked ” and select the value “Do not display user information” (Do not display user information).
This policy corresponds to the registry key in the same branch DontDisplayLockedUserId with the value 3 .
The login screen and Windows lock screen now display blank username and password fields.
Two Windows 10 login accounts and PIN
After the recent major Windows 10 update (October 2020 Update), I decided to clean up my laptop and “tighten up” a couple of inconveniences that had been hanging around for some time in the operating system.
About a month ago, for some reason, I began to be greeted by two accounts when logging into Windows 10 , both with my login, but one without my avatar, and the second with it. The message “Invalid username or password. Try again." . I had to press “Enter” on the keyboard and after entering my password, I safely got into the operating system.
It was clear that this was not a hacking of the computer (by evil hackers), but simply some kind of glitch in Windows 10 (in the system parameters, as before, one admin account is displayed, without other users). So I finally decided to deal with this annoying inconvenience.
I’ll tell you below how I easily overcame this problem and at the same time, about how you can log into your operating system more conveniently and quickly without reducing the level of security.