What is a monitor refresh rate and its purpose?
The monitor refresh rate (Hertz, NOM) is the speed at which images on the screen can change in a moment. It is customary to count in seconds, which means that the average frequency of 60 hertz is the possibility of changing 60 frames per second. Only hertz does not show the real picture of the monitor's capabilities. There is a physical problem: image transmission from the video card to the monitor is delayed due to the screen matrix. This means that a screen designed for a frequency of 60 Hz nominally produces up to 40 frames per second. This is enough to watch movies, but high-quality and smooth gaming requires high FPS (Frames per Second) values.
Since the hertz signal is responsible for the smoothness of the picture, it automatically affects the eye’s perception of what is happening. The less the visual organ uses peripheral and lateral vision, the less it gets tired, the slower the eye lens deteriorates, and the contraction of rods and cones stops. Accordingly, monitors with higher frequency capabilities have less impact and damage to the eyes.
Acceptable screen refresh rate
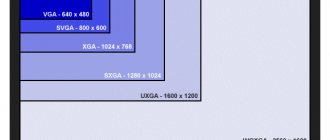
As mentioned earlier, the average frequency used in most modern monitors is 60 Hz. With this Hertz card you can safely watch movies, as well as play average-quality games (if the PC hardware allows it). However, for greater image quality and smoothness in more serious games, monitors with a frequency of 120–150 Hz or even more are required. Some cutting-edge monitors are already overclocked to 240 Hz.
It is advisable to leave the frequency of the 3D monitor at least 120 Hz: in this state, the screen will output 60 Hz to each eye, which means maintaining good picture smoothness parameters.
How to change the screen refresh rate on Windows 7, 10 via drivers
How to enable all cores on Windows 10: processor settings
Built-in video card drivers allow you to adjust the screen refresh rate at the software level. Such an intervention is absolutely safe and has an extremely positive effect on the performance of a computer or laptop.
Video card manufacturers often distribute specialized software along with drivers that expands the user’s ability to customize the image. The procedure for changing parameters is similar for all manufacturers, but there are some peculiarities. For this reason, it is advisable to separately consider how to change the hertz of a Windows 10 monitor on different video cards.
Instructions for NVIDIA video cards
Working with NVIDIA video cards involves using a special control panel, which can be opened in one of the following ways:
- Right-click on an empty desktop and select “NVIDIA Control Panel”;
- use the corresponding icon in the taskbar;
- find the program through the Start menu.
Changing the Hertz card through the NVIDIA utility is easy and simple
Now you need to go to the section with screen resolution settings. The corresponding item will contain the current value of the update frequency, which can be configured.
The proprietary utility will allow you to create entire profiles with individual settings that can be easily turned on or off with the press of one button. For NVIDIA, a similar option appears when you go to the “Settings” section in the “Change Resolution” tab. When you select the “Custom screen resolution” option, you will be able to configure your own mode.
Note! It is advisable to change the frequency sequentially by 1 Hz. A blank screen will indicate that the maximum settings have been enabled. For proper operation of the system, you will definitely need the latest video adapter driver.
Instructions for AMD Radeon video cards
The utility for AMD graphics cards is called AMD Catalyst Control Center. It is through it that all manipulations with the resolution and refresh rate of the screen are made. The utility can also be launched via the desktop, taskbar or command line.
Configuration via AMD Radeon utility
The required indicators can be entered in the “Additional system parameters” tab. There you can always create a custom resolution with the required refresh rate. The increase should be gradual and last exactly until the monitor goes off for a while.
Important! After setting all the necessary parameters, you can click the “Save” button and set the desired mode.
Instructions for Intel video cards
Working with Intel video cards is not much different from the instructions described above. The “Intel Graphics Settings” program is also launched here, in which you need to go to the “Basic Settings” section.
The Custom Resolutions tab includes all previously created modes and also allows you to create a new mode with unique resolution values and refresh rates.
. How to set the frequency through the Intel utility
How to see the Hertz voltage of a monitor on Windows 10
There are two main options to find out and change (if possible) the monitor's refresh rate: through "Options" or using the graphics driver settings:
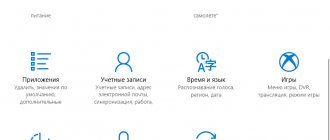
- Right-click on an empty space on the desktop and select the “Display Settings” menu item.
Right-click on an empty space on the desktop and select the “Display Settings” menu item.
- Next, click on “Advanced display options”.
Click on “Advanced display options”
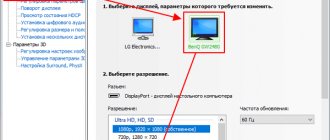
- On the additional settings page, we get acquainted with information about all monitors connected to the computer. Hertz is indicated in the line “Update frequency (Hz)”.
Hertzovka can be found in the line “Update frequency”
The second method is the graphics driver settings:
- Right-click on an empty space on the desktop and select “Graphics characteristics”. Depending on the hardware manufacturer, the name may be different (video settings, display settings, graphics settings, etc.).
Right-click on an empty space on the desktop and select “Graphics characteristics”
- Go to the “Display” applet.
In the Graphics Control Panel, click "Display"
- Next, select the display for which we want to find out information, and look in the “Refresh rate” column, which shows the installed Hertz screen speed.
Select the monitor and look at the Hertz value in the “Refresh rate” column
If you can't choose your screen refresh rate, but you know your monitor supports it
Operating system "Windows"
should automatically show all possible refresh rates that are supported by your monitor.
If in the Windows
you do not see the refresh rate that your monitor is guaranteed to support, then there may be certain problems with the system and you will have to troubleshoot them.
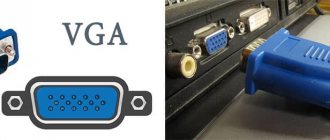
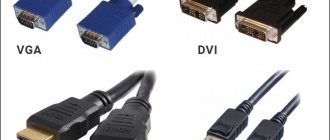
For example, you may need to update your graphics card drivers to enable higher refresh rates. Or, if you're using a slow computer-to-display cable that doesn't have the high bandwidth to carry enough data for a high-resolution, high-refresh-rate display, you may need to replace it with a faster cable. You may be using a low-spec integrated graphics card that does not allow you to set the screen to a high refresh rate.
Or, if the refresh rate drops when playing certain modern games, you may need to check your game's internal settings and adjust the settings accordingly.
In any case, changing the screen refresh rate settings is absolutely not difficult and will not require additional costs from the user. You just need to follow the described steps to achieve an acceptable final result.
How to change the monitor's Hertz on Windows 10
Changing the screen frequency in the driver program settings is very simple:
- go to the “Display” applet, as shown above;
- change the “Refresh rate” filter and click “Apply”.
Change the “Refresh Rate” filter and click “Apply”
It is also possible to change the frequency through “Parameters”:
- Open “Advanced display settings” as shown in the example above. Click on “Display adapter properties”.
In the additional parameters, click “Display video adapter properties”
- In the properties window, go to the “Monitor” tab, change the “Screen refresh rate” filter to the desired value and save the changes with the OK button.
In the properties window, go to the “Monitor” tab, change the “Screen refresh rate” filter to the desired value and save the changes with the OK button
In most cases, I use 60 Hz, since there is little point in setting it higher while working and watching movies. In addition, my monitors do not support stereo images. However, in rare cases, when I sit down at the computer to play, I immediately set the NOM to at least 100 Hz. The picture in the game immediately improves, drawdowns and frame losses become unnoticeable. Even the colors, it seems to me, change in a more saturated direction, the drawing of objects becomes more realistic.
How to quickly increase the screen refresh rate from 60 Hz to 90 Hz and higher
Reward accrued
This news was written by a site visitor and a reward was awarded for it.
Everyone has already heard about overclocking RAM, processors and video cards. The same can be done with the monitor. But display overclocking has the advantage of being a safer procedure than with a graphics adapter or CPU.
This is a great opportunity to increase the refresh rate for users who own 60Hz monitors. And to do this, you only need one utility and a few minutes of free time.
announcements and advertising
2080 Super Gigabyte Gaming OC for 60 rubles.
Compeo.ru - the right comp store without any tricks
RTX 2060 becomes cheaper before the arrival of 3xxx
Ryzen 4000
series included in computers already in Citylink
The price of MSI RTX 2070 has collapsed after the announcement of RTX 3xxx
Core i9 10 series is half the price of the same 9 series
The price of memory has been halved in Regard - it’s more expensive everywhere
Despite the fact that the already mentioned 60 Hz will be enough for comfortable gaming, this is not the limit. The higher the refresh rate, the smoother the picture on the screen will be. This is especially important for those who like to play shooters.
Note that IPS and VA panels are not as easy to overclock as TN panels. However, even in the second option, not everything is so simple and you cannot do without a lucky chance. Increasing the screen refresh rate from 60 Hz to 15-20 Hz is not difficult, but then you need to hope for luck.
So, let's start overclocking the monitor. First, you need to download the Custom Resolution Utility (CRU) from this link. Tested on version 1.4.1. The software is downloaded in a zip archive, so you need to unzip it.
Next, run the CRU.exe file as an administrator. Under the Detailed resolution block, click Add. After this, a new window will open in which you need to set the screen resolution and the desired refresh rate. Let's start with 75 Hz.
Then click OK and close the utility. Next, we return to our unzipped files in order to open, also as administrator, the file restart64.exe. After this, the screen will blink a couple of times, and the size of the shortcuts, if you have the desktop open, will increase. But ultimately, in a couple of seconds, everything will return to its place.
Now all that remains is to select the overclocked refresh rate. Go to the system settings from the Start menu, select the “Category” section and open the “Advanced display settings” section. In this menu, you need to click “Video adapter properties for display 1”, go to the “Monitor” tab and select the desired screen refresh rate in the parameters.
The same manipulations were done to increase the frequency to 90 Hz. You can see the result in the screenshot below. But when I tried to achieve a refresh rate of 120 Hz, nothing happened. In the last step, the corresponding frequency was not in the list of available ones.
Note that in some cases, if you select a very high refresh rate, this will become known a few minutes earlier. In such a situation, when you run restart64.exe, the display will remain black for half a minute. This means you need to tone it down and lower the frequency in the Custom Resolution Utility.
Based on materials from Hardware Times