Greetings, friends! Since you are reading these lines, then you probably need a presentation... Or maybe you are experiencing some difficulties, since you have never made such documents before? Today this is a quite popular item. The material will be useful to those who study and those who work. After all, you can make a cool visual aid that will be useful in your studies or work.
All you need is to install the Power Point package on your computer or laptop, and prepare text and multimedia content for your future project. Today's article is a simple cross-cutting example. In the following articles we will look in more detail at how and what to do.
Presentations consist of pages - slides, which are shown at a certain time interval in the form of images on a computer monitor. If you have a projector, then by connecting it you can present your material to a large audience. You can do this with beautiful music. Now we will formalize this matter with you.
How to add a new slide to a powerpoint presentation?
Open our Power Point. We will not choose the proposed styles for now. Let's select a blank document. This will create a new document.
We get to the main interface of the program. Those who have worked in Word will immediately see many familiar icons. That's right, the programs included in the MS Office package can be said to be relatives, since they are very similar.
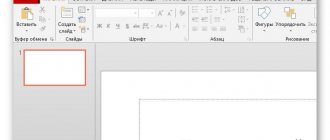
The title page is already ready. You can add the following slide sheets by clicking on this button:
There are already ready-made layouts that you can use. You can also duplicate already selected slides and so on.
Presentation software
Let's look at several options for applications for creating presentations on Windows 10.
PowerPoint
This program is familiar to many. Almost all users install a suite of Microsoft office applications on their computers, and PowerPoint is part of it.
Is the logo familiar? Let's take a closer look. Working with the program is quite simple:
- Launch the program.
- Switch to the “Design” and select the most suitable one from those offered.
- On the right there are buttons for settings: effects, fonts, colors, etc.
- Go to the "Main" . There is a button "Create slide" . Click on it and select the appropriate template. Please note that the structure can be customized as you need.
- Fill it out: place inscriptions, pictures, etc.
- Proceed to create the next slide. Do them as many as you need.
The design of the program is intuitive, so there is no point in explaining in detail about each button.
You can download the program from any torrent portal on the Internet.
LibreOffice Impress
This is a good alternative to PowerPoint. If the first option doesn’t suit you and you don’t know how to make a presentation on Windows 10, use LibreOffice Impress:
- Launch the program.
- Choose a suitable slide layout or create your own. Customize it however you like.
Again, everything is very simple and does not require much explanation. The program has an intuitive interface that even a complete teapot can understand.
How to add text to a powerpoint presentation
Let's work with the text. Let's take our title page and add text there by typing it. Many people prepare text and other materials in advance, and then simply copy them into their project.
Here's how I ended up with it. Everything is done quickly and easily. Since such material is easier to show than to tell, watch the video - how to add text to your presentation
How to transfer a presentation to a flash drive
There is nothing complicated about this, but first you need to save the presentation. For this:
- Click File.
- In the window that appears, click on the “Save As” button and select a directory to save the file.
- Connect the flash drive to the computer into the appropriate connector.
- Next, go to the folder with the presentation, right-click on the object and select “Send” – “USB drive F”.
Attention! The name and letter label of the flash drive may differ.
- Wait for the file copying process to complete and safely remove the USB drive.
Now you know which program to use to make a presentation on your computer and how to do it correctly. If you have any comments, questions or suggestions, please leave a comment.
Insert a picture into a powerpoint presentation so that there is text
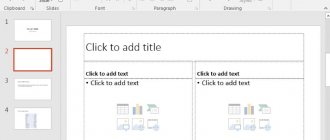
If we put up a picture, we need to add text underneath it. In order to insert the next slide, which will contain text and a picture, select the “Picture with Caption” layout:
After a little work, I ended up with this beautiful image:
Let's look at the video how this is done:
What programs can you use to make a presentation?
In order to make a presentation with slides on your computer, you will need a special presentation program. The most popular program of this kind is PowerPoint, which is included in the Microsoft Office suite of office programs. Therefore, if Microsoft Office is already installed on your computer, then you have the necessary program.
If Microsoft Office is not installed, you can install it yourself. You can download a trial version of Microsoft Office from office.com, which will work for 1 month. In the future, you will need to purchase the full version or purchase a subscription.
You can also make a presentation using free programs. For example, you can use the Impress program, which is included with the free office software LibreOffice. To do this, you need to go to libreoffice.org, download the LibreOffice software package and install it on your computer.
In this article we will tell you how to make a presentation using the example of PowerPoint from the Microsoft Office office suite. Since this software package is very common and most users already have it installed.
How to insert a table from excel into a powerpoint presentation 2020
The next step in my project is to add a table. Tabular material is quite often used when analyzing this or that information, as well as when summing up results. You can insert tables from Word documents, or you can create them directly in Power Point:
I got this sign. In it I simply listed what I considered necessary. You can also submit digital material. And indeed any material. Power Point allows you to work with almost any content:
You can insert tables from Excel in two ways - simply copy and paste the table first. The result will be similar to what you just got. Or use the Insert Table Wizard from the Insert menu:
We expand the resulting area, and insert the finished table from the buffer into it:
The table will appear in accordance with the slide layout settings. It will be necessary to adjust the sizes in case of large tables. Watch the video on how to insert tables:
Online services
Let's look at several online services for creating presentations. They are suitable if you need a simple presentation without installing any software on your computer.
PowerPoint Online
Almost all popular office programs from Microsoft can be opened online. To do this, you need to follow the link and select PowerPoint there, then:
- Create a Microsoft account and sign in.
- Use PowerPoint online.
The interface is almost the same as in a computer program, so creating a presentation is very simple.
Google Docs
If you use services from Google, then you probably know about Google Docs. It offers: Word, Excel and Presentations:
- Create an account with Goole Mail or log in if you already have one.
- Follow this link.
- Click on "Clean".
Here is another option for making a presentation on Windows 10.
Adding Animation to a Power Point Slide
Animation is the most important setting in any presentation. You can decorate your project with this tool, adding extra charm to it, making it stand out from others. Animation allows you to concentrate the attention of listeners on the material being presented; it should be unobtrusive and enjoyable.
It seems that the developers have managed to create a wide enough set of tools to make effective use of animation. You can present inserted objects (like our just created table, headings and subheadings) with various effects - fade, fade, rotate, zoom, and so on. Moreover, you can do this when entering a document, when exiting a document, as well as during viewing:
The purpose of a presentation is to make an impact on the audience. For example, by changing the behavior of an object, you can achieve the desired effect. You can create animation on absolutely any element of the presentation. One at a time or all of them, assigning each their own animation and effect. This can be any element - title (text), table, photo. Let's see how it works to make it clear what we're talking about:
As a result of this simple manipulation, our presentation takes on a completely different look. It is only important to practice and set up the effects correctly so that the titles, for example, are animated at the beginning, important content in the middle of viewing, and some additional content at the exit of the slide.
Instructions for using Microsoft PowerPoint
All of the above-described applications and online services are in one way or another similar in appearance and functionality to the PowerPoint application. Therefore, once you understand how it works, you can easily create a presentation in any other program.
Of course, it is impossible to explain all the features of PowerPoint in one article, since there are too many of them. The steps below will help you master the basics, which will be enough to create a simple but complete presentation.
Creating a slide
When you launch the program, you will see that one slide has already been created. It has two blocks - a title and a subtitle. These blocks will appear on all slides unless disabled in the settings. They can be filled with text and pictures or deleted by clicking on their outline and pressing the Delete key.
Click on an empty space in the list and select the “Create slide” function
To create another slide, just click on an empty space in the slide list area and select the “Create Slide” function.
Background fill
The background is one of the most important parts of a presentation. You can do it in different ways, but they are all combined in one section, which you can access by following these steps:
- Right-click on the slide in the list of all slides and select the “Format Background” function.
Right-click on the slide and select the “Background Format” section
- Select from the available methods of filling the background (filling with a monolithic color, creating a gradient, installing repeating patterns, or loading an image from the computer memory or buffer) as needed.
Selecting appropriate settings for the background
Using a template
A template is a ready-made presentation into which you can insert your text. Templates are distributed free of charge on the official Microsoft website.
- Go to the list of templates and choose the one that suits you best. Click on it.
Choose your favorite topic
- Use the "Download" button to download it.
Click the “Download” button
- Navigate to the downloaded file and run it using PowerPoint.
Launch the downloaded file via PowerPoint
Done, now you have a designed presentation that you can fill in with your text and supplement with any elements (pictures, inserts, tables and others).
Editing text
Text is practically the main component of a presentation. A large number of functions are provided for editing it, ranging from changing the size and font to setting the shadow, style and frame.
- Click the “Home” tab and find the standard settings for editable text in the “Font” block.
The “Font” block contains standard text settings
- Click the Format tab to see more settings related to color and appearance. Please note that it appears only when you focus the mouse on a text element, that is, from the moment you click on a block of text with the left mouse button.
You can apply different strokes and formats to text in the “Format” tab
Adding sound
If you want to accompany the entire presentation or one of the slides with an audio track, go to the “Insert” tab:
- Find the last “Multimedia” block and click on the speaker icon.
Press the “Speaker” button
- The program will prompt you to choose which file should play while the slide is shown. Indicate the path to it.
Showing the way to the music
- After successfully adding music, a small speaker icon will appear on the slide icon located in the list of all slides, indicating the presence of sound.
An icon appeared in the list of slides and on the slide itself
Overlay animation
Animation allows you to make the transition from slide to slide more interesting. For example, a slide that is being closed may shatter into pieces or curl into a tube.
- The animation is configured in the “Animation” tab of the same name. In it you can familiarize yourself with the complete list of standard transitions and choose the one that is most suitable in your case.
Choosing an animation for a slide
- If animation is added to a slide, its icon in the list of all slides will contain an asterisk. The slide is indicated by an asterisk symbol
The animation is shown only in presentation viewing mode. When scrolling through slides without this mode, you cannot see anything.
View Mode
Once you've completed one step of creating a presentation, save it and go to preview mode to check how it looks with all the effects and additions at the moment. There are two ways to launch it: press the F6 key on your keyboard or go to the “Slide Show” tab and start the show from the first element. To exit full screen mode, use the Escape key.
Click on the “View Mode” button and select “From the Beginning”
How to set a transition between slides in a presentation?
Transitions between slides are an effect that are also of great importance. Many people set up transitions first, then animation. There are more than two dozen effects; the developers divided them into simple, complex and transitions with dynamic content. They also look very good. Let’s open “Transitions” in the menu and see how effective it is.
Again, you can’t do without video. It's better to see it once:
Transitions can be customized for each slide. Thus, in combination with animation, you can select effects to suit your taste.
How to prepare a presentation for a speech?
Please note that in some cases different problems may occur. The fact is that most users insert various music, videos, photographs, drawings, and so on into their presentation. And at the same time they do not think that these objects are on their local computer. As a result, the future report in front of a live audience may fail.
Remember! Always check the functionality of your project before performing. Make sure everything is working correctly.
The fact is that in most programs, when you insert a video, an object will be created that will indicate the path to the desired file. And when you open the project on another computer, these videos will not be found.
The easiest way before the report is to transfer everything (presentation and multimedia files) to a laptop or computer to which the projector will be connected. It is advisable to move them to the desktop or to the root folder of drive “D” - this will make them easier to find. After that, check that the correct path to the videos is set everywhere.
Only after this can you calmly repeat the plan and content of the report.
Inserting video and audio into a presentation
And finally, I’ll tell you how to insert sound or video into a presentation. By the way, video clips in the presentation are still not such a predominant thing. Maybe a short clip of one or two minutes. Mostly textual, of course, graphic material predominates more. For example, Smart - Art objects are typical layouts of diagrams that display connections, any work, production processes, algorithms, hierarchies, and so on.
What if this information was given audio accompaniment? For example, record the speech and comments in advance and include them in the presentation. And during the show you can focus on something else. Let him drone on, all you have to do is press the buttons. So, go to the “Insert” menu section and find that...
... you can record a video from your computer or insert a link to it from the Internet. You can do the same with sound. You can record sound from a microphone, or you can download a ready-made recording from your computer via Explorer:
To make it easier to understand, let’s insert another slide (selecting the “Two Objects” template). I already have a title ready. We also change the “Slide text” subheadings:
You can choose any other template you need. You can design any slide to your liking and insert any content there.
If we want to insert a video from the Internet or computer, the program will offer us the following download options:
Next, we can choose video design styles, as well as make video editing, i.e. simply put, cut it off. I cut from 59 seconds and ended at 01:19.139 seconds.
It's the same with sound. Go to the “Insert” menu and try to insert sound files through the corresponding panel:
After inserting a sound, we find ourselves in the sound control panel. It provides a set of tools for customizing the audio, and you can also trim the file:
You can customize the sound background for one or all slides, in the background, and so on. Experiment! Below is a short video on how to style the design:
As you can see, Power Point provides quite a wide range of opportunities for creativity. If you master it, you can do very beautiful and impressive things. And it's quite simple.
The main thing is to have the right material at hand. Then the process will go easily and quickly. You can easily present and defend your work - from essays and coursework to real work projects. Good luck to you!
Author of the publication
offline for 5 days
Creating slides
The creation of the first slide is where work in Microsoft PowerPoint begins. To create an initial slide, follow these steps:
- Click “Start”, “All Programs”, select “Microsoft Office”. We look for the desired program in the list.
- PowerPoint will open. The first slide is created automatically. It consists of a title and a subtitle.
- Let's fill in these fields. Enter a title and subtitle.
- In order to create a new slide, just select the appropriate function on the toolbar or right-click in the left menu and select “Create Slide”.
- The next slide will have a different structure: title and slide text.
- If you need to change the structure of the slide, you must click on the “Slide Layout” button and select the appropriate option.
This way you can create any number of slides. All these slides can be designed accordingly. The white background can be replaced in the following way.
- Go to the “Design” tab and select a suitable theme.
- All slides will automatically change their design.
- If you want a specific theme to be applied to individual slides, you should right-click on the theme and select the appropriate option from the list. For example, “Apply to selected slides.”
- As you can see, the first slide has a distinct design from the second.
Work with text
The text should be prepared in advance. It needs to be proofread and checked for errors. Only in this case can you prepare a high-quality presentation.
To work with text, the PowerPoint editor has special text blocks. The text in them can be printed or copied and pasted in the standard way (Ctrl+A – select, Ctrl+C – copy, Ctrl+V – paste).
You can format the pasted text. To do this, on the toolbar you can select the font type and size, spacing, text orientation, bulleted and numbered lists.
It's also worth noting that you can insert a WordArt object instead of a title. To do this, go to the “Insert” tab and select the letter “A”, which is responsible for WordArt objects.
Next we write the text. Using the orientation buttons, we change the location of the text.
In this way we add text for all slides.
IMPORTANT! Don't put too much text on your slides. All material should be presented concisely. The person who will watch the presentation should not be busy reading. He should have time to listen to the speaker.
Adding pictures and working with them
If you add a picture to your presentation, it will become more interesting. However, we recommend using no more than two high-quality pictures for one slide. Overcrowding one slide with images would be inappropriate.
There is a whole block in the PowerPoint editor for inserting an image. Just go to the “Insert” tab and select “Drawing”, “Picture”, “Snapshot”, “Photo Album”.
It is worth noting that no matter which method you choose, you will need to indicate the storage location for the image.
After selecting a picture and adding it to the slide, the position and size can be changed. To do this, you should use the dots in the corners of the picture.
Also, if the picture is in the way, you can specify its location “in the background.” In this case, the text will be superimposed on top of the image.
Adding tables and graphs
If you need to prepare a business presentation in which you need to use statistical data, the program has a function for inserting tables and charts. You can insert a table from Excel or draw and fill it out in the editor.
In the first case (insert from Excel), you should do the following:
- Select “Insert”, “Table” and “Insert with Excel”.
- Next, select the filled cells from the original table, copy and paste them into the presentation table.
If there is no completed table, you should click “Table” and select the number of rows and columns. During selection, the table dimensions will be displayed in the presentation window. However, they can be adjusted.
Then fill out the table with the necessary information.
You can also add graphs and charts to your presentation. To do this, in the “Insert” tab, you need to click on the “Diagram” button or select the same icon on the slide itself.
Then select the chart type.
The Excel file will open. Filling the table with data.
After filling out the table, we return back to the presentation. A diagram will appear here.
Thus, the presentation can be used to provide reports and compare data.
IMPORTANT! After closing the Excel file, the chart will not disappear.
Working with video and audio
You can also add video and audio to your presentation. To add a video. You should do the following:
- Go to the “Insert” tab and select “Video”. Next, indicate “From file” or “From website”.
- Next, we indicate where the video is located. Select the video and click “Insert”.
- It will take some time to insert the video. Do not click the “Cancel” button. The larger the file, the longer it will take
To add audio, click on the “Sound” button and point to the file.
If you want the sound to last throughout the entire presentation, in the “Playback” tab, in the “Start” section, set the value to “For all slides.”
You can also adjust the volume of the music. To do this, just click on the “Volume” button and specify the sound level.
To prevent the sound icon from appearing on slides, you should set o.
Adding special effects
By special effects we mean transitions between slides, the appearance and disappearance of text. To add special effects, you need to select the first slide, its title and go to the “Animation” tab. Here we click “Add animation”.
Next, select “Login”.
Specify “On click” or set the time range for the animation to occur.
It is worth noting that animation will have to be set for each title and text separately. All animated elements will be indicated by numbers.
You can also set an output for each element. This is a special effect with which a title, picture or text will disappear. This function is located in the same section as the input, you just need to scroll the slider down.
After designing the first slide, you should move on to the second and set animation for each element separately.
Saving and viewing a project
After designing all the slides, you need to set up the presentation. Go to the first slide and press “F5”. The project preview will start. We look and study the shortcomings. Let's fix them. Then go to the “Slide Show” tab and click “Demo Settings”. We indicate how the slides will change (by time or manually), display parameters, and the order of the slides.
Then click “Save As...” and indicate where to save the presentation.
You can launch the presentation by double-clicking.
Watch the video to see how to create a presentation:
Online presentations in Slides and Prezi
I’ll say right away that both services are paid, but after registration the user has access to interesting functions. In particular, you can create a presentation in the developer's own format, while adding a moving or zooming effect. Of course, all the basic functions are available here: the ability to select templates, modify them at will, add your own materials, etc.
From such a small selection of presentations, I’m sure each of you will choose something to your liking!
Analogues of PowerPoint
Oddly enough, greed is the best engine of progress. Microsoft Office software, which includes PowerPoint, is very expensive today. Not everyone can afford it, and not everyone likes to get involved with piracy. Therefore, it is quite natural that all sorts of similar applications appear and exist, in which you can work no worse, and in some places even better. Here are some examples of the most common and interesting analogues of PowerPoint.
Read more: PowerPoint analogs