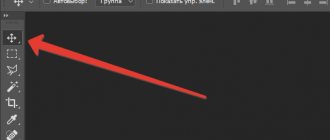
Method No. 1
See also: “How to save photos in Photoshop CS6 and CC”
Ctrl key and click on the layer thumbnail. The process that selects the outline of the object will load. This is the easiest and most common method, but it has the disadvantage of not being the fastest.
After this, you need to click “Edit - Copy”
then go to “Editing - Paste”.
Using the move function (V key), we need to position the copy of the file on the screen the way we want to see it. This copying method can be repeated many times, that is, create as many copies as needed. But as a result, a lot of time will be wasted.
If we have a time limit, we can choose a faster method. After selecting the desired object or layer, use the hotkeys Ctrl C (for copying) and Ctrl V (for pasting). Most advanced PC users are familiar with these combinations, because they are used in many programs. By the way, the selection process can also be speeded up using the hotkey combination Ctrl+A .
Copy methods
1.
The most famous and common method of copying objects.
Its disadvantages include the large amount of time it requires to complete. Ctrl
button and click on the layer thumbnail. A process is loaded that will highlight the outline of the object.
The next step is to click “Edit - Copy”
, then move to
“Editing - Paste”
.
Using the Move tool (V)
, we place a copy of the file as we want to see it on the screen. We repeat these simple manipulations repeatedly until the required number of copies is recreated. As a result, we spent quite a lot of time.
If we plan to save a little time, then the copying process can be speeded up. Select “Editing”, for this we use the “hot” buttons on the keyboard Ctrl + C (copy)
and
Ctrl + V (paste)
.
2.
In the
“Layers”
, move the layer down, where the new layer icon is located.
As a result, we have a copy of this layer. The next step is to use the Move Tool (V)
, placing a copy of the object where we want it.
3.
With the layer selected, click the set of buttons
Ctrl + J
, and as a result we get a copy of this layer.
Then, as in all the above cases, we type “Move” (V)
. This method is even faster than the previous ones.
Another way
This is the most attractive of all methods for copying objects, and it takes the least amount of time. Pressing Ctrl and Alt
, click on any part of the screen and move the copy to the desired space.
All is ready! The most convenient thing here is that you do not need to carry out any actions to make the layer with the frame active, use the Move tool (V)
We don't use it at all.
By holding just Ctrl and Alt
and clicking on the screen, we already get a duplicate. We advise you to pay attention to this method!
Thus, we have studied ways to create copies of a file in Photoshop!
A selection in Photoshop is an area of an image outlined using some tool that creates a selection. You can perform various manipulations with the selected area: copying, transforming, moving and others. The selected area can be considered an independent object.
This tutorial will show you how to copy selected areas.
As mentioned above, the selected area is an independent object, so it can be copied in any available way.
Let's get started.
The first method is the most famous and widespread. These are the keyboard shortcuts CTRL+C
and
CTRL+V
.
In this way, you can copy the selected area not only within one document, but also to another. A new layer is created automatically.
The second method is the easiest and fastest - the keyboard shortcut CTRL + J
. A new layer with a copy of the selected area is also created automatically. Works only within one document.
The third method is to copy the selected area within one layer. Here we will need the Move
and the
ALT
.
After selecting the area, you need to take the Move
, hold down
ALT
and drag the selection in the desired direction.
Then ALT
.
If you also hold SHIFT
, then the area will move only in the direction in which we started moving (horizontally or vertically).
The fourth method concerns copying an area to a new document.
After selection, press CTRL+C
, then
CTRL+N
, then
CTRL+V
.
What are we doing? The first step is to copy the selection to the clipboard. Secondly, we create a new document, and the document is automatically created with the size of the selection.
The third step is to paste into the document what was on the clipboard.
The fifth method is to copy the selected area onto an existing document. Move Tool comes in handy again.
.
Create a selection, take the Move
and drag the area to the tab of the document to which we want to copy this area.
Without releasing the mouse button, wait until the document opens, and, again without releasing the mouse button, move the cursor to the canvas.
These were five ways to copy a selection to a new layer or another document. Use all these techniques, as you will have to act differently in different situations.
Did you like the image on the site? Or maybe you found something cool and funny on social networks and want to copy it to your computer? Or a friend sent you a photo, but you don’t have one. What to do? How to copy an image from a website?
Having opened the desired image by clicking the left mouse button, click on the image with the right mouse button. A window will open in front of us, in which several action options are provided to choose from. This includes the “Copy Image” action. Using this action, we will place this image on the clipboard.
Now you can paste it into a WORD text document or into the Paint program. The Paint program is standard. We are looking for her like this. There is a Start button at the bottom of the monitor. By clicking it, we will see the list “All programs”. Select “Standard” - “Paint”. Then at the top of the menu select “Edit” - “paste”. Here it is, your image. To save it on your computer, you need to select “File” - “Save As” from the menu. In the pop-up window, select the file destination and name. Click “Save”.
But the “Copy image” action is not optimal in this situation. It is better to select the “Save Image As” action. A window will immediately appear in which you need to specify the path for the file, as well as the name. Click “Save” again.
You can even copy an image from a movie, whether you watch it online or download it to your computer. Let's learn more about how to copy an image from the screen. To get the image without all the unnecessary things, you need to set the movie to full screen. And now, when that same picture appears on the screen, we pause and look for the “PrintScreen” key on the keyboard in the upper right corner. Click, thereby sending the image to the clipboard. Read what to do with it next in the section Where to put the image from the clipboard?
It also happens that the image needs to be duplicated, a copy of the image needs to be saved on another computer drive or in another folder. Learning how to copy an image in this case is easy and simple. Select the image or its shortcut and right-click on it. In the window that opens, select “Copy”. The same effect can be achieved by pressing the “Ctrl” and “c” keys simultaneously. The image is now on the clipboard. Select the location where the copy will be stored (folder or disk). In an empty space, right-click. Let's select "Insert". Pressing the “Ctrl” and “v” keys simultaneously will give the same result.
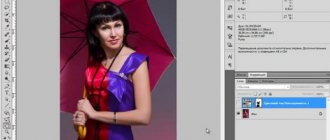
Often you have to face the fact that you need to copy an image, or part of it, to work with Photoshop. Let's look at how to copy an image in Photoshop using the Adobe Photoshop program as an example. If you need to cut out only part of the image, you must first select this part, and then click “Edit” - “Cut” or “Edit” - “Copy”. The choice of action depends on whether you want the selected part to remain in place or not. Now just select the place where you want to put the selected part, click “Edit” - “Paste”.
Good day everyone, my dear friends. That's what I told you about. But what should we do next with her now? In the same article I mentioned that they can be copied, moved, transformed, scaled, etc. But if we talk about all this here, then we definitely won’t fit it into one article. Therefore, I will talk about one thing.
I decided to do this in this way: let’s leave transformation and scaling for articles on relevant topics, but today I’ll just tell you how to copy a selected area in Photoshop. And we will learn how to do this both inside one document and by copying this area to another document.
Ready? Then what are we waiting for? Go!
Let's say you have selected some area or object, and now you want there to be a lot of such objects on the document. It is more than possible to do all this. Moreover, I will even show you 2 methods, and you decide which one you like best.
1 way
Let's say you have selected an object and want to copy it. Nothing could be simpler. Press copy combination. Do you know her? Correct CTRL+C
. We automatically create a new layer, but don’t pay attention to that for now. In a few lessons we'll get into layers and you'll find out everything.
These are the simple ways I wanted to show you. But in general, for a good mastery of Photoshop and each tool separately, I recommend that you watch this wonderful video course, thanks to which you can easily master Photoshop. The course is beautifully structured, everything is told in human language, and it is designed for any level of user. Be sure to watch it if you want to learn how to work in Photoshop.
Well, I guess I’m done for today. I hope that the article was useful and interesting for you. And by the way, what method do you use (or decided to use)? Write in the comments.. Well, I wish you good luck in your further conquest of Photoshop. See you. Bye bye!
Best regards, Dmitry Kostin
Method No. 2
See also: “Replacing colors in Photoshop: how to use”
We need to go to the layers section and move the layer down to where the button for creating a new layer is located.
As a result, the created copy will appear on the second layer. And using the move key (V) we can position the copy the way we want.
Working with layers
Before duplicating a layer in Photoshop, let's understand the concept of a layer. Layers are an essential part of any image editing process. I would like to note that without the ability to create them, users experienced enormous inconvenience, since working on one canvas seems difficult and uncomfortable. Fortunately, this editor has everything users need. A layer is a local space in which you can apply individual settings and edit them independently of other layers.
The vast majority of users split their image into many layers to make it easier to work and correct defects if they suddenly appear. Each layer can be applied with a special mask, many filters and other blending options.
Method No. 4
See also: “How to make a cover for a book or course in Photoshop”
This method is considered the most practical, since copying the file will not take much time. You need to simultaneously press the key combination Ctrl and Alt , then click on any part of the screen and move the copy to the desired location.
Ready! The convenience is that you do not need to perform actions related to the activity of the layer and frame and use the move key. By holding down the combination, we will already get a copy. It is best to choose this method. At least we most often use this method.
Thus, we learned all the ways to copy a file/object in Photoshop.
In our separate lesson “How to copy a layer in Photoshop” you can learn all the ways to copy layers.
How to copy and paste an element in Photoshop. How to copy in Photoshop
A selection in Photoshop is an area of an image outlined using some tool that creates a selection. You can perform various manipulations with the selected area: copying, transforming, moving and others. The selected area can be considered an independent object. This tutorial will show you how to copy selected areas.
As mentioned above, the selected area is an independent object, so it can be copied in any available way.
Method 1: Keyboard shortcut
The first method is the most famous and widespread.
These are the keyboard shortcuts CTRL+C
and
CTRL+V
.
In this way, you can copy the selected area not only within one document, but also to another. A new layer is created automatically.
"Copy"
.
"Insert"
.
The second combination that allows you to quickly create a copy of a layer is CTRL+J
. A new layer with a copy of the selected area is also created automatically. Works only within one document.
Method 2: "Move"
The second option is to copy the selected area within one layer. Here we need a tool
"Move" and the
ALT
.
If you also hold SHIFT
, the area will only move in the direction in which we started moving (horizontally or vertically).
Method 3: Copy and create a document
This method involves copying an area to a new document.
Method 4: Copy to an adjacent document
The fourth method is to copy the selected area to an existing document on another tab. Move Tool comes in handy again.
.
These were four ways to copy a selection to a new layer or another document. Use all these techniques, as you will have to act differently in different situations.
Before using any clipboard command or drag-and-drop copying, compare the dimensions of the source image with the dimensions of the target image. If the copied fragment is larger than the target image, then some of the copied pixels, when pasted or dragged, will end up outside the border of the image window and will not be visible. If you want to see hidden pixels, move the layer using the Move
(Move).
The size of the selected area in Photoshop can change when you paste or drag for another reason: this is due to the resolution of the target image. If it is higher than the resolution of the original image, the copied portion will appear smaller when pasted or dragged. Conversely, if the resolution of the target image is lower than the resolution of the source, the copied portion will be larger.
If you want the fragment to retain its size before copying it, compare the resolutions (and sizes, if you wish) of the source and destination images using the Image > Image Size
(Image > Image Size). To learn how to insert into a smaller image, see the “Inserting a fragment into a smaller image” section.
Copy and paste a selection
To turn the selection into a new layer, choose the command
Layer > New > Layer Via Soru (Layer > New > By copying) or
Layer Via Cut
(by cutting). This is discussed in more detail in Chapter 7 of Photoshop Tutorials, section “Turning a selected area into a layer.”
First copy method
into this
Duplicate layer.
First copy method
into this
Duplicate layer.
If what you want to copy (multiply) is on a separate layer or can be easily dragged into a separate layer, then there are no problems... in the Layers
right-click on the layer and select
Duplicate Layer... from the menu.
Or use
the main menu
at the top (also through the item Layer – Duplecate Layer...).
Second copy method
I use it often, but not many people know it. It is very convenient when you need to quickly make many copies of a selected area on one layer.
Select the desired area using a selection (lasso or rectangular selection, whichever is more convenient). Next, hold down three buttons on the keyboard: Ctrl + Shift + Alt, click on the selection with the mouse and drag it to the side. Eventually you will receive a copy.
selections on the same layer.
Third copying method
I also use it often.
This is copying the selection to a new layer
.
It's simple... Having a selection, right-click on it and select Layer via Copy
.
one of the selection tools is selected in the Tools
The article is about a small nuance that allows you to use the copy to new layer function. Not everyone knows about the mode in which this convenient command works in Photoshop. The lesson is intended for a beginner audience.
It often happens that it is necessary to transfer an already selected part of the image to the transparent background of a new layer.
To do this, click once on the Magic Wand tool. And then you will have access to the Layer via Copy function, which can be easily called by right-clicking the mouse. In the Russian version, this will mean copying to a new layer. Select this line, and your selected area will immediately appear on a new layer. That's all the wisdom.
Often, beginners find this simple operation difficult precisely because the Photoshop program does not execute this command in all modes. It does not display a context menu in Pen, Lasso, Move, or other modes. She silently demands that the instrument, namely the Magic Wand, be displayed. And then the context menu, when you press the right mouse button, immediately becomes bright and ready for use.
This article will help speed up the performance of Adobe Photoshop. It explains in detail all the settings related to performance. Additionally, I am attaching explanatory screenshots taken by me...
The article provides a method for getting rid of the background by selecting and moving the image onto a created transparent file….
A short informational article about choosing a home printer for printing photos. The emphasis is on choosing between inkjet and sublimation...
A short excursion on the topic of copying in our favorite program Photoshop. I have already briefly mentioned in previous topics how to do this. But today we will talk about this in more detail.
How to copy an image in Photoshop?
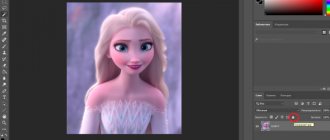
For example, I’ll take an image of the sky and insert an image of a bird onto it. Open Photoshop, open a picture with the sky and a separate picture with a bird.
How to copy an image in Photoshop? Now select the Rectangular Marquee Tool (the dotted rectangle on the toolbar) or press the English letter M. Select our bird, press Ctrl+C, go to the image with the sky and paste Ctrl+V.
Now you can use the Move Tool or press the letter V and drag the bird to the location you want. So the bird flew across the sky. Now let's learn how to copy layers.How to copy a layer in Photoshop
In fact, copying a layer in Photishop is even easier than copying objects.
Let's try to “reproduce our birds.” Please note that after copying the bird we have two layers. Select the layer with the bird, click on it and drag it to the add a new layer button.After that you
Bottom line
Now you can select objects in a picture in Photoshop and cut or move them. Before choosing a selection method, be guided by the recommendations described in the article. The quality of the result depends on how correctly you have decided on the type of drawing and the appropriate tool for the job.
Thematic videos:
Photoshop cut object and paste into another picture
How to cut an object and paste it onto another background in Photoshop
How to Cut and Paste an Object in Photoshop - 4 Best Methods
You can use the Move tool to copy selections as you drag them within an image or between images, or you can copy and move selections.
You can use the Move tool to copy selections as you drag them within or between images, or you can copy and move selections using the Copy, Copy Combined, Cut, and Paste commands. Dragging with the Move tool saves memory because it doesn't use the clipboard.
When a selection or layer is pasted between images of different resolutions, the pasted data maintains its pixel dimensions. This may result in the inserted fragment having incorrect proportions relative to the new image. Use the Image Size command to make the source and destination images the same resolution before copying and pasting, or use the Free Transform command to resize the pasted portion.
Note.
Depending on the color management settings and color profile of the file (or imported data), a message may appear indicating that the color information of the file (or imported data) is being processed.
Understanding the copy and paste commands
Copy
Copies the selected areas on the current layer.
Copy Merged Data
Creates a merged copy of all visible layers in the selected area.
Paste
Pastes the copied selection to another part of the image or to another image as a new layer.
If there is already a selection, the Paste command places the copied selection onto the current selection. If there is no current selection, the Paste command places the copied selection in the middle of the viewport. Paste In Place
If the clipboard contains pixels copied from another Photoshop document, the selection is pasted into the same relative location within the target document that it occupies in the original.
Paste In or Paste Outside
pastes the copied selection into or outside another selection in the image. The original selection is pasted onto a new layer, and the border of the final selection is converted to a layer mask.
Copying a selection
- Select the area you want to copy.
- Choose Edit > Copy or Edit > Copy Merged Data.
A more or less experienced user of Adobe Photoshop is already familiar with the concept of layers. Layers are an important component of a graphics editor, which makes image editing easier and also provides a great advantage when working with images. Not everyone knows all the functionality of the layers panel, although some functions will be useful for professionals. For example, how to copy a layer in Photoshop CC to another image? In addition to this issue, we will consider duplicating layers, moving them and shifting them.