Instructions for copying discs to a computer
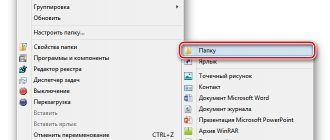
First of all, open the drive and insert the disc into it. Then click on the computer line (on the right side).
The entire contents of the disk on your computer or laptop will open in front of you.
Highlight it in blue (hold down the left mouse button and move up from the bottom of the window or vice versa) and, now pressing the left button, click in the “copy” tab that appears.
Now select the location (folder) where you want to save the copied video on your computer and, pressing the left key in it, click on the “paste” line.
After this, all the contents will appear on your computer, if, of course, you do it correctly - as described.
There are of course many other ways. You can simply drag and drop files (videos) and copying will occur automatically or use hotkeys.
Try the method described above for now, and over time you will learn the rest. Good luck!
Hello dear ladies and gentlemen. It seems to me that, sooner or later, every person who uses DVD discs in their activities comes to the idea of the need to copy information from DVD discs to the computer hard drive. There are several reasons for this. Some people are annoyed by the noise of the operating drive. Others care about saving the DVD drive. Due to frequent use, the drive mechanics quickly wear out and become unusable. And someone just wants to make a backup copy for themselves. And accessing information on a computer’s hard drive takes much less time.
The reasons may be different, but everyone has the same problem. How to do it? If the disk is not overwrite protected, this can be done very simply using the “Explorer” or “Total Commander” file manager. With a protected disk, things are somewhat more complicated. We will not talk about copyright protection here because... We are all adults and understand what we are talking about. The need to save a copy of a licensed disc for personal use happens very often, and there is nothing criminal about it. How to copy Audio files, see here
In order to copy a protected DVD disc to your hard drive, you need a special program. And there are several such programs. One of the best programs available today is the free DVD Decrypter program. On July 6, 2005, its further development, for obvious reasons, was stopped. Today, the current version of the program is DVD Decrypter 3.5.4.0, released on May 21, 2005, 6 years ago. You can download it here https://www.dvddecrypter.org.uk/.
After installing the program, a shortcut will appear on the desktop, double-clicking on it will open the main program window, after which the question of how to copy a DVD will no longer arise.
The program's default settings are well made and you don't need to do anything at first. Just, just in case, you need to check that in the “Mode” menu there is a checkmark next to the “File” item. Insert the disc into the drive. The program itself will analyze the disk and display information at the bottom of the window: Ready and then, as in our case, 80 file selected (80 selected files) and their total volume. In the right window it will open all the files that are on the disk and immediately select them for copying. It will select the least loaded disk on the computer and create folders in it for storing files. In our case it is G:\UNDEFINED\VIDEO_TS\. If this does not suit us, click on the folder icon and select the storage location for the copied files yourself.
We click on the largest button in the program window and the program will begin copying the DVD to our computer in its entirety. In the window that opens, we can monitor the progress of copying.
Here in the Information window you can see the copying speed (Read Rate), time since the start of copying (Time Elapsed), remaining time (Time Remaining), time remaining until the end of copying (Total Time Remaining). After copying is complete, a window will appear,
where we are told that the operation was completed successfully, 80 files were copied, 0 were skipped. Click “OK” and go to our folder with the copied files \VIDEO_TS. Here we are in for a little disappointment. In this folder we will find all these 80 files that were copied. There will be advertising files, a warning about liability for unauthorized copying, and a bunch of other files. But we don’t need all this. Let's try to figure out what we need. DVD files are strictly structured and they come in three types:
VTS_01_0.VOB these files store video, sound, subtitles.
VTS_01_0.IFO is a service file that contains information about what and where is located in VOB files.
VTS_01_0.BUP service file containing a backup copy of IFO files.
Since a film of several GB is recorded on a DVD disc in separate files no larger than one GB, the files of the main film can be easily identified there. They go strictly in order, starting from (for example in our case) VTS_07_1.VOB to VTS_07_6.VOB and the size of all of them, except the last one, will be approximately 1GB. But we do this for general education.
The program itself can select the main movie files. For this you need
go to the “Edit” menu, select “Select Main Movie Files” (select the main movie). The program will instantly select only the main movie files and highlight them in the right window. Next, click the “Copy” button. After copying is complete, go to our folder with files and find 7 files in it. One IFO file and 6 main movie files 1-6.VOB. All files are in good quality.
The only drawback of this program is that it does not know how to combine copied files into one for playing in the player. You'll have to watch the film in parts. Or maybe this is for the better, the parts are not small. In order to combine them into one file for viewing, you need another program and another article.
volboris.ru
Cloud storage
With the development of Internet technologies, many people prefer to store data on cloud (online) storage. This allows you not to fool your head with flash drives and disks. The most popular cloud storage services today are Google Drive and Yandex Drive.
Downloading information from such online disks is not difficult. First, you will need an account on the appropriate service. If you have an email on this resource, you can also use it to log into cloud storage. You will be taken to your account, which will display all the files available to you. This includes both files “uploaded” by you and files of other people to which you have access. Further, the storage algorithm differs for each Internet platform:
For Google Drive:
- select the necessary files;
- open the “advanced” menu and select “Download”;
- in the window that appears, select the file format;
- Click the “Download” button.
For Yandex Disk:
- open the page with the required file;
- Click on the “download” button (to the right of the file).
Yandex Disk has a download limit. It is 50 GB. That is, a larger file cannot be downloaded.
Other cloud storage systems operate in the same way. Go to the website (some services do not require registration, others can only be accessed through your own account), look for the file you need and click the “download” button. There are options here: the file can start downloading immediately, sometimes you need to specify the download path, sometimes you need to specify the file extension.
Nowadays, disks are no longer used so often; even new computers often don’t have disk drives, and small laptops don’t even have them - they take up too much precious space. In this article we will look at how to correctly copy the contents of one CD/DVD disc to another.
How to copy a data disk to another disk
If you have regular files on your disk, for example, mp3 files or various kinds of documents, then copying the disk is as easy as shelling pears. There is no need to even resort to special programs. Just select all the files and folders on the disk and copy to any folder on your computer. Then insert a blank disk into the drive and open it in Windows Explorer. Copy or drag files previously copied from another drive there. All that remains is to right-click on the disk icon and select “Burn”.
If you are copying, for example, an audio disc, then you will not be able to simply copy it to your hard drive. To do this you need to make a full disk image. Then deploy this image to a new disk. Windows does not have a built-in tool for creating images, so we will use a simple and free program called Small CD-Writer (virus tested). It's simple, first you create an ISO image and then burn it to disk.
Common errors when copying discs
Even if you have 2 CD/DVD drives installed in your computer, you should not make copies on the fly. This is simpler, no intermediate step is needed, but it is not very reliable.
When writing data to disk, do not select the maximum speed, as this also increases the likelihood of recording errors.
If you have any questions, we will definitely help you!
Do you ever need to download or
copy a disc to your computer?
For example, you were given a DVD with some files (videos, games, music, documents, etc.) for a while, which you need to quickly return, and you don’t have time to watch everything right away.
Let's say you need to quickly copy one thing from a disk, for example, download a video or game from a disk to a computer. Or you need to copy music from a disk to your computer. Or do you need to transfer the disc to your computer?
in its entirety.
Another reason why you may need to copy a DVD disc to your computer
, this is if you are going to often use information from the disk. In this case, completely copying the disk to a computer and launching the already copied disk from your PC protects the disk itself and the drive (disk drive) from frequent use.
In addition, the launch speed of files already on the computer is higher than the launch speed of the same files launched from a disk through a floppy drive.
To understand how to copy files from a disk to a computer
I’ll look at this process using the example of two different disks. First, let's see how to copy the "" disc in the Windows 7 operating system, and then we'll look at how to copy the files of another CD in Windows XP.
How to copy files from a DVD to a computer
For those who are familiar with computers, this article may seem completely inappropriate, not worth special attention and wasting their time reading. But I know from myself that it’s not easy for a novice user to figure everything out right away and I’ll write how to copy files from a DVD to a computer.
In order to copy files from a DVD disc you need to:
1.Go to “My Computer” and open the DVD-RAM drive. Sometimes it becomes necessary to make a disk with a complete copy of a film with a wedding video and give it to relatives or simply save a duplicate just in case. I recommend reading the article about “How to copy a video from one DVD disc to another DVD disc” (to a “blank”). 2.Select the desired folder with files on the disk (if there are several of them) and right-click on it. In the opened contextual
Find “copy” in the menu and left-click.
3.Find a folder previously prepared for saving on your computer and open it. Next, click here with the right mouse button and in the context menu look for “insert” and press the left mouse button.
Another way to copy files from a DVD disc and save it on your computer to the folder you need is the standard copy method provided by the Windows operating system. I will not rewrite paragraph 1. Next, having opened the DVD disc, select the folder with the files and left-click. In the left window, look for “copy folder” and left-click. In the window, find the folder in which you want to save the files from the DVD. Select it with the left button. And just copy it by left-clicking on “copy”.
And finally, there is a very simple way to prepare for copying files from a DVD disc to a computer. You can open the folder intended for saving on the computer and simply drag and drop, using the left mouse button, folders with files from the DVD-CD disc into this folder.
Read the continuation of the topic in the article Copying a DVD to a computer How to burn a DVD with data
maks-1.com
DeepBurner Free
DeepBurner Free is a free utility that has all the necessary basic functionality. It can work with both CDs and DVDs, as well as multisession media. Makes it possible to copy information from ISO images, as well as record music or movies. The interface is created in the same style as the design of the Windows OS. There is a module that monitors new updates for free.
How to copy video from disk to computer
If you borrowed a disc from a video DVD or CD and liked the contents, then in order to watch it several more times in the future (offer it to others), then it would be a good idea to copy it to a computer, or even better to an external hard drive or flash drive - it’s more reliable.
The process of copying video is similar for all drives and there is nothing complicated.
Difficulties arise only if you want to record a video (for example, a movie) onto a DVD disc for viewing on TV through a player - copying will not work.
Then you will need a DVD burning program. A lot of them.
I won’t dwell on the recording process, but will only describe the easiest and fastest way to copy a video from a disk to a computer.
Instructions for copying discs to a computer
First of all, open the drive and insert the disc into it. Then press start and click on the computer line (on the right side).
The entire contents of the disk will open in front of you. Highlight it in blue (hold down the left mouse button and move up from the bottom of the window or vice versa) and, now pressing the left button, click in the “copy” tab that appears.
Now select the location (folder) where you want to save the copied video on your computer and, pressing the left key in it, click on the “paste” line.
After this, all the contents will appear on your computer, if, of course, you do it correctly - as described.
There are of course many other ways. You can simply drag and drop files (videos) and copying will occur automatically or use hotkeys.
Try the method described above for now, and over time you will learn the rest. Good luck!
vsesam.org
How to transfer video from cassette to disc
To record a movie from an analog type of media, that is, a cassette, you will need to use a special device - a TV tuner. It should be noted that purchasing it is quite expensive, and mastering it can take quite a long time. It’s more rational to digitize a video cassette in a video store, or even better, to master simple ways to digitize a video cassette at home without a TV tuner.
Video saved from a tape is also recorded to disk through the “Create” tab of the Pinnacle Studio main menu. Select "Create DVD"
, the utility offers you to choose from several menu options. Double-click on the option you like, then enter new data. Then the “Select disc to burn” window will open. Insert a blank DVD into your PC and select it from the drop-down menu.
Pay attention to the possibility of creating an ISO image and introducing additional settings: video type, screen resolution (it is better to choose 16:9), quality (high (9000 Kbps, AC3 Stereo)). Click Next
, wait for the recording to finish.
How to copy CD files to your computer
Do you ever need to download or copy a disc to your computer?
For example, you were given a DVD with some files (videos, games, music, documents, etc.) for a while, which you need to quickly return, and you don’t have time to watch everything right away.
Let's say you need to quickly copy one thing from a disk, for example, download a video or game from a disk to a computer. Or you need to copy music from a disk to your computer. Or you need to copy the entire disk onto your computer.
Another reason why you may need to copy a DVD disc to your computer is if you are going to frequently use the information from the disc. In this case, completely copying the disk to a computer and launching the already copied disk from your PC protects the disk itself and the drive (disk drive) from frequent use.
In addition, the launch speed of files already on the computer is higher than the launch speed of the same files launched from a disk through a floppy drive.
To understand how to copy files from a disk to a computer, I will consider this process using the example of two different disks. First, let's see how to copy the "Osteochondrosis - No" disc in the Windows 7 operating system, and then we'll look at how to copy the files of another CD in Windows XP.
How to copy from a disk to a computer in Window 7
So, first, let’s look at copying the “Osteochondrosis – No” disc in Windows 7.
I sell this disc on a separate page here.
Therefore, this article is also additional help and instruction for my clients who buy the physical disk version of the course and who need to download the disk to their computer for easy learning.
Insert the disc into the drive. Go to the Start menu -> All Programs -> Accessories -> Explorer:
On the left side of Explorer we find the disk that was inserted into the drive and click on it with the left mouse button. A list of all folders and files located on the disk will appear on the right side.
Now to copy all these files i.e. the entire disk to your computer, you must first select all these files. Let's use hotkeys. To do this, you can simply press Ctrl + A on your keyboard:
This way we will select all the files:
Yes, the files are selected.
Now to copy we use another hotkey combination - Ctrl + C:
Thanks to this function, all selected files are temporarily stored by the computer (the computer places them in its Clipboard). And now you need to find a place on your computer where to save all these disk files.
To do this, create a separate folder on your computer, for example, NOT on the system drive. Let's call this folder Osteochondrosis:
The process of copying the disc to your computer will begin:
If the copying process has not started, it means that the copy functions using hot keys did not work on your computer. In this case, use the copy functions using the mouse, as shown below on the example of another drive in Windows XP.
After the disk files have been copied to the computer, the disk can be unloaded from the drive - the disk is no longer needed.
That's it for copying the disk!
Now you can run the copied disk on your computer by simply clicking on the autorun.exe file. The course menu will appear for studying it without a physical disk:
How to download video from disk to computer
There may be a need to copy a disc not as a whole, but as individual parts of it, for example, you just need to copy some video from the disc or some music, and then view or listen to it on your computer or on your mobile device (phone, tablet, etc.). P.)
To do this, you also need to start the disc and use Explorer to find the desired folder on the video disc. Next, you need to select the necessary video or music files by simply holding down the Ctrl button on the keyboard and clicking on the desired video files.
Select the required videos, right-click on any selected video file and then Copy:
Thus, these files are stored by the computer in the Clipboard.
All that remains is to create a separate folder on your computer and paste the copied videos there using Ctrl + V, or right-click and select Paste in the window that appears:
The selected files will be copied to this folder on your computer.
We looked at the process of copying both the entire “Osteochondrosis – No” disc and individual videos to a computer in the Windows 7 operating system.
Now let's look at similar copying of another disk in Windows XP.
How to copy a DVD disc to a computer in Windows XP
The process of copying a disk to a computer in Windows XP is the same, only now we will additionally consider how to use not the keyboard hot keys, but use the mouse.
On the left side of Explorer we find the disk that was inserted into the drive (as shown in the picture below).
Since the Explorer screen is divided into two parts, you can clearly see the contents of the disk and select the necessary (or all) files on this disk to copy them to your computer. The left side displays the contents of the disk folders, and the right side also displays the files:
To select all files for copying, left-click just below the last file and, while holding this left mouse button, select files upward to the first file until all files are selected (as can be seen in the picture above).
Thus, all these files are placed in the computer's "temporary memory" (Clipboard). Now you need to decide where to paste (copy) these files on your computer.
Create a separate folder to copy the disc to your computer.
In my case, on drive D, I created a folder DISKS, in which I have various disks that I copied earlier. And now I created another one in it: Confident PC user:
Now in this folder I right-click and in the window that appears, left-click on: Paste.
Copying files from the CD begins, which becomes clear from the operation of the drive (it made noise when reading information) and the window that appears:
After copying is completed, the copied files will already be on the computer and you can unload the disk from the drive.
You can now start the disk on your computer by clicking on autorun:
That's all! If you need to download a disc to your computer or copy some files from a disc, for example, from 5 films that are on the disc, you need to copy two of them, then, while holding down the Ctrl button on the keyboard, select the necessary files with the left mouse button.
After selection, release the Ctrl button and right-click on any selected area. In the additional menu that appears, select: Copy. Well, you already know the rest!
As you can see, the process of copying or downloading a disc to a computer, whether in Windows 7 or Windows XP, is very simple. You can follow the same principle if you have a different operating system.
Good day. If you have looked at my blog page, it means you need computer help or just want to read something informative to expand your knowledge. I will try not to disappoint you. Today I will talk about how to burn a folder with files to disk. As it turns out, this task causes difficulties for many users. After all, it’s not every day that you have to cut blanks...
Copying a hard drive in Acronis True Image
One of the functions of this useful program is disk cloning, which, by the way, can be configured very finely depending on the tasks of a particular user. To avoid possible errors during the operation, you do not need to use Acronis True Image from a running OS - it is recommended to launch the application using a boot disk. Therefore, you will need an Acronis BootCD/DVD distribution, which will need to be unpacked onto a DVD or even onto a flash drive, for example, using the UltraISO, UNetbootin, etc. applications.
After creating bootable media, you can proceed directly to cloning:
- Boot from the drive created using Acronis BootCD/DVD.
- In the main Acronis window, open the Tools and Utilities section.
- On the right in the list of utilities, go to “Disk cloning” and select the automatic process mode. Click Next.
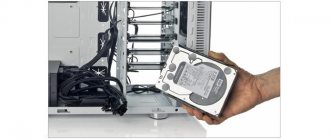
- Left-click on the source disk with the copied information, click “Next”.
- In the next window, select the target disk to which you plan to clone the old HDD. The target drive can be either an HDD or a high-speed modern SSD.
If copying is done to a solid-state drive, then the usual situation will be when its capacity will be less than the connected HDD. In this case, Acronis True Image will display a message about the need to exclude some files and folders from the cloning process.
Typically, only the system is transferred to an SSD, so for precise copying you can select only the main partition of the disk (usually “C”), excluding partitions or individual files with unnecessary information from the process. If the disk capacity allows you to clone the old drive completely, you can click “Next”, after which the process of sector-by-sector low-level disk copying will start.
Note that the application is paid, but it is feature-rich, works very quickly and, as was shown, has the ability to select data on the hard drive for transfer.
Kinds
First, let's figure out what the marks CD, DVD, +R, -R, +RW, -RW mean.
CD and DVD
There are two types of disk media - CD (Compact Disc - compact) and DVD (Digital Versatile Disc / Digital Video Disc - digital multi-purpose / video). It is generally accepted that CDs are intended for recording data - documents, music and pictures, and DVDs are for recording video. This opinion is wrong. Both types are suitable for storing any files. The only difference between them is in capacity - a CD can only hold 700 megabytes, while a standard DVD can record files up to 4.7 gigabytes in size. Although new generation discs can hold up to 45 gigabytes of information, which is achieved by superimposing 3 recording layers on top of each other.
R and RW
In the disk designation you can find the English letters R and RW, which indicate how many times this media can be used. The letter R means one-time use, and RW can be rewritten several times.
Plus and minus
Friends, many of you have probably noticed that the type of blank is sometimes indicated with a plus and sometimes with a minus. A plus indicates that additional information can be written to the disk without erasing the data already there, and a minus, accordingly, means that this cannot be done. Thus, if a disk medium says CD+R, it means that it is disposable, but you can add new ones to existing files.
Which disks to use
To copy video to disk, you can use absolutely any disk. There are CD/DVD/Blu-ray disc formats. Each format differs in the amount of information capacity. For example, a CD has only 700 MB of memory, and a DVD has 4.5 GB.
Also, we must not forget about the video file format; it can be either 700 MB or 4.5 GB in size. The difference is in the quality and volume of the video. But for purposes such as transferring video to a disk, it is better to use disks with a large capacity, since it is possible that you simply may not have enough space when recording to a disk, which is why it will be irrevocably damaged. Therefore, before you begin any actions, you need to take care of choosing a disk.
Cleaning
Used RW blanks can always be erased and then the necessary information can be written onto them. In different versions of Windows, the sequence of actions that need to be performed to clear the media of data already present there is somewhat different. Let's take a closer look at each OS version.
XP
To clean up a disk in Windows XP, perform the following steps:
- We insert it into the drive.
- Open it - go to “My Computer”, find the desired disk (usually it is signed as (E:) CD or DVD+/-RW drive), double-click on it quickly or right-click (right mouse button) and select Open.
- Right-click anywhere in the free space and start cleaning by selecting “Erase this...” and clicking “Next” in the window that opens.
"Seven"
In the seventh version of the operating system in question, the sequence of actions is slightly different:
- Insert the media into the drive.
- We open it, to do this, go to the “Computer” through the “Start” menu and make two quick right-clicks on the CD / DVD drive.
- You can try to delete only unnecessary files, for which we right-click on them and look for the “Delete” item; if there is one, select it and wait for the result.
- If there is no command for deletion, then at any point in the empty space, right-click again and start cleaning by selecting “Erase” or something similar, click “Next”, wait until the cleaning is completed and click “Finish”.
"Ten"
You can completely clear disk media in Windows 10 using two commands - “Format” and “Erase this...”. At first, the procedure for running both commands is the same:
- We insert the blank into the drive.
- Launch “Explorer” by clicking on the corresponding icon in the “Start” menu or on the “Taskbar”.
- Expand the “This Computer” directory.
- We find the item with the designation of the drive, right-click and select one of the commands “Format” or “Erase...”.
- In both cases, confirm the action by clicking the “Next” and “Finish” buttons.
Tell me, dear reader, do you have a lot of legal software? Or maybe you listen to legal music? Yeah, I’m talking about the same thing... But someone is losing quite a lot of money on this... And naturally, this someone is trying in every possible way to protect their disks from copying, or to tie their product to the disk so that it cannot be used without this very disk . The first option is currently popular among manufacturers of legal discs with software, music, and video; Well, the second one is actively used both by the manufacturers themselves and by pirates (have you often come across games that “don’t work” without a disc? It’s quite easy to “wean” a game from a disc, but who wants to lose money? Even those 80 cents that cost pirated compact... that's why they don't fight it...).
The “treatment” for the “second option” is quite simple - from the emulator to the game patch. By the way, a large archive of such patches can be found at https://www.gamecopyworld.com/.
But in the matter of protecting compacts themselves from copying, everything is much more complicated: a lot of methods have been invented, although this mass “costs” almost the same