06/18/2018 Category: SettingsAuthor: Denis Dolgopolov
A built-in microphone is present in almost all laptops, but is absent in every desktop computer. Built-in microphones are usually of low quality or are positioned in such a way that only part of the sound reaches them. Therefore, users of both laptops and computers should resort to installing an external microphone.
- Activating and setting up a microphone
using standard Windows tools - Using third party programs
Audacity
- Free MP3 Sound Recorder
- Sony Sound Forge
- Physical protection
- Microphone check
Attaching a microphone to your device
All laptops and computers always have a special input for a microphone: it is round and red-pink. It is located next to the headphone port. Sometimes both inputs are combined into one, but this is rare.
On laptops, the entrance is located on the left or right side. In older models it can be found on the front.
The entrance is located on the side
On computer units, the main inputs are located in the front, and the spare inputs are located in the back. Most builders try to provide as many USB ports as possible, as well as two sets of headphone and microphone inputs.
There are rear ports
To connect the microphone to the device, just insert the wire into the port. After this, the computer will automatically install the necessary drivers and assign the new microphone as the main one. Done, you can start recording audio.
If the microphone does not work as well as you want, refer to the “Microphone settings” section. If the computer refuses to see or work correctly with the microphone, read the “Solving possible problems” section.
Activating and setting up the microphone
The microphone has several parameters, the adjustment of which will change the quality of the recorded sound. If you change the values correctly, you can achieve a significant improvement in quality even on a cheap microphone. You can manage minimal settings using built-in Windows tools. If you want to do more professional sound tuning, you will need the help of third-party programs.
Using standard Windows tools
The tools built into Windows 10 allow you to make minimal microphone settings: change its recording volume, turn on sound amplification, select the desired microphone and test it.
- Using the system search bar, expand the control panel. This is where the settings we need are located.
Opening the control panel
- Go to the "Sound" block. If you can't find it, use the built-in search bar located in the upper right corner.
Open the “Sound” tab
- A list of speakers will open. Go to the Recording tab to see all the microphones your computer has ever connected to. If the computer sees the device, a green arrow will appear next to the corresponding icon.
There is a list of microphones
- In this case, the computer can see, but not use the microphone. Double-click on the desired microphone to open its properties. Indicate that you need to use this device. Also in the expanded window you can see the name of the microphone and the port to which it is connected.
We indicate that it is worth using this microphone
- If you want to check how your voice will be heard on the recording or in the speakers of your interlocutor, go to the “Listen” tab. Specify the device to which the sound will be output and activate playback. When you say something into the microphone, you will hear the result.
Selecting a microphone and output device
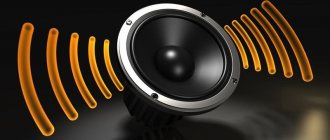
- The Levels tab allows you to control the microphone volume. The first slider controls the capabilities of the microphone itself, and the second slider controls the software amplification of the resulting sound. The higher the value of both sliders, the louder the recorded audio will be.
Specify sensitivity
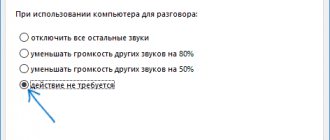
- In the additional tab you can select one of the proposed recording modes. Depending on the microphone, different options may be offered. When choosing the most suitable one, it is worth considering that an increase in hertz leads to both an improvement in quality and an increase in the volume of recorded data. In the same tab, you can select exclusive mode parameters, that is, allow or prohibit programs from taking the microphone for themselves without giving it to other applications until the work is completed.
Select a mode and turn on monopoly
This is where the settings that can be made using standard Windows capabilities end. If you are not going to record your voice professionally, then these should be sufficient.
Using third party programs
There are a huge number of third-party programs that allow you to control the microphone and apply various effects to the resulting sound. Perhaps the company that created your microphone has a proprietary application - you can find out about it on the manufacturer’s official website. Below are just some of the most convenient and well-known applications.
Audacity
Audacity is an audio recording program that allows you to create and manage multiple tracks separately. The official website where you can download the free version is https://www.audacityteam.org/download/. You can trim, speed up and slow down an audio track, overlay another track on top of it, or create an effect.
There is a large selection of effects
All functions are easy to use and intuitive. The main features are displayed on the main panel of the program: selection of microphone and speaker, start and end of recording, list of tracks, volume of sound and recording. Additional functions are located at the top of the window, which can be opened using various menus. You can also control the application without a mouse, using only hot keys, which significantly speeds up the recording and processing procedure.
Free MP3 Sound Recorder
This program is intended for those who need to record sound quickly and without any problems. It is as simple as possible and has a minimum of buttons that allow you to start, pause and end recording. The interface is designed so that you don't have to understand the program. You can download it for free on the developer’s official website - https://www.freesoundrecorder.net.
The simplest recording program
Sony Sound Forge
This program is a professional editor that allows you to work with sound at a studio level. The downside is that you won’t be able to work with it at the proper level right away—you’ll have to learn. It has many built-in functions that help you change the sound, process it and improve it. Don't be afraid of its interface, because after some time, having understood it, you will understand that there is nothing superfluous in it.
Sony Sound Forge has a lot of features
You can download the trial version or buy the full version on the official website - https://www.magix.com/int/music/sound-forge/.
Audacity
Audacity is an audio editing program that allows you to record your voice from a microphone. On the finished recording, you can remove background noise, apply effects, increase the sound volume and combine several tracks into one.
The application is fully compatible with the Windows operating system (32 and 64 bit). The utility requires Windows XP and newer to operate. A completely Russian version of the program is available for download on the official website. The distribution model of the audio editing utility Audacity is free.
After launching the application, you need to perform basic microphone settings. In the main window of the utility, users can select the desired microphone for work. You can also select the number of channels for recording: mono (1 channel) or stereo (2 channels).
In the upper right part of the interface there is an indicator that shows the level of microphone frequency fluctuations in real time. By right-clicking on this area, users can open the options. In the window that opens, you can set the following parameters for the indicator: refresh rate time (in seconds), style, display type, orientation.
To adjust the microphone recording level, you need to use the slider located on the program toolbar. To start recording audio from the microphone, you must press the “Record” button or use the “R” key on your keyboard.
In the "Effects" section, you can apply various effects to the recorded file. This will help improve sound quality, correct any existing microphone defects, and drown out background noise.
Audacity benefits:
- simple and convenient interface with Russian language support;
- free distribution model;
- ability to eliminate background noise;
- adjusting the microphone recording level;
- built-in indicator for monitoring the level of frequency fluctuations.
Flaws:
- no voice processing tools.
Noise Removal
Most cheap microphones record sound with noise. This is due to the fact that more expensive models automatically eliminate all interference that comes along with a person’s voice. If you have a microphone that cannot do this itself, you will have to manually clear the sound of noise.
Physical protection
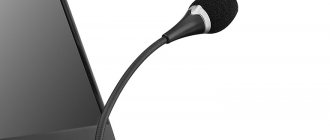
On all microphones you can see a black tip. It not only protects from dust, but also prevents extraneous noise from passing through, since it is so weak that it gets stuck in it and is muffled. If your microphone does not have an attachment, purchase one or make one from improvised materials (the first option is better, since they are very inexpensive).
The nozzle protects against noise
Eliminating noise-producing objects also helps eliminate noise. Close the window and turn off any unnecessary electrical appliances near the computer. Move the microphone away from the computer itself, otherwise there is a high chance of recording the whirring of the cooling system.
Software cleaning
Reducing the sensitivity of the microphone allows you to get rid of noise. The sound it produces will become quieter, but the noise will no longer be recorded. The necessary settings can be made using the system tools described in the “Standard Windows tools” section. In the “Levels” tab you can control the volume - drag the sliders to the left until you achieve the desired result.
Move the sliders to the left
Using third-party programs you can also remove noise. Almost all applications have a function that allows you to do this. For example, in Audacity, just expand the “Effects” tab and select the “Noise Removal” mode. By specifying the necessary parameters, you will erase all existing defects from the track.
Video: removing noise from recordings
Windows 10 Settings
In the “ten” settings there is an easy way to check the microphone. Call up the parameters using the Win + I keys, go to the “System” section and go to the “Sound” tab.
We need the Test Microphone tool. Without doing any unnecessary actions, just talk into the microphone (if it is integrated in the laptop, just say a couple of phrases loudly). If the device is working properly, the slider should show a blue line. This means that the microphone responds to voice.
Also make sure that the Input Device is set to the correct one. If the slider does not respond to external sounds, you can immediately run device diagnostics - “Troubleshooting”.
The troubleshooting service will automatically detect current problems with your microphone equipment and offer to fix them. We haven't identified any problems.
Do not exit the sound options, but go to the “Sound Control Panel”.
There we click on the active input device and select “Properties”.
In the equipment properties we need the “Levels” tab. Many audio experts recommend setting the gain to 20 dB.
Microphone check
If you want to check if the microphone is working, you don't have to download third-party programs. For example, you can use the “Listen” tab discussed in the “Standard Windows Tools” section. Using it, you can display the microphone recording on the speakers and, accordingly, hear whether the microphone is working and what quality the sound is.
The second option is to use the built-in Voice Recorder app. You can find it using the system search bar. Once you open the app, start recording, say something, and end it. Listen to the result and understand how well the microphone performs.
You can check the microphone through “Voice Recording”
The same experiment can be done through any third-party program, but it’s faster to use built-in tools.
How to check
It will not be a secret to anyone that the most common software that uses the functionality of a camera and/or microphone is Skype.
Therefore, the task posed in this article can be accomplished using the capabilities of this application, but this is not what we will talk about.
You can check the operation of the microphone exclusively using the operating system itself and this action will take literally a few minutes, since all that needs to be done is:
Stage 1 – activity check:
- Right-click on the corresponding icon on the quick access panel and open the “Recording Devices” section;
- In the window that opens, go to the “Sound” tab (Read more about if there is no sound on the computer);
- Please note that the list contains a microphone connected to the computer;
- The microphone must be active and must be set to the default device status;
- Right-click on it and select “Properties”;
- Go to the “Levels” tab and check the microphone volume level.
Stage 2 – sound recording test:
- Open “Start” and “Settings”;
- Select the “Confidentiality” section;
- In the “Application permissions” block, open “Microphone”;
- In this section, check for activity in the parameter – “Allow applications to access the audio recording device”;
- Scroll down the page and find the “Voice Recording” application and activate it;
- Next, click on “WIN + S” and enter “Voice Recording”, then launch it;
- A window will open in which you need to click on a button in the form of a microphone and record sound (voice, music, ambient sounds) for the desired duration;
- Listen to the recording and evaluate the quality of the captured sound, which in general will show the level of performance of the microphone.
Further steps will depend on whether it was possible to record at all and on the immediate quality of this recording.
How to control multiple microphones
There are situations when several microphones are connected to the device. For example, almost all laptops have a built-in microphone, and after connecting an external one, the system begins to see two recording devices.
To switch between them, just use the “Sound” section of the control panel. In the “Recording” tab you can see a complete list of microphones. By double-clicking on one of them, you can select it as the main one and start working only with it.
Specifying which microphone to use
Also, most third-party programs provide the ability to select one of the available microphones. Usually there is a special button for this, displayed on the main screen of the application. For example, the screenshot shows the implementation of selecting a recording device in Audacity.
You can also select a microphone in a third-party program
Enabling the integrated microphone
To enable the built-in microphone on a Windows 10 laptop, follow these steps:
- Right-click on “Start” → select “Control Panel” from the context menu.
- Select the “Hardware and Sound” item and in the drop-down menu of the panel, click on “Manage audio devices”.
- Left-click on the “Recording” tab. A window opens with the inscription “Microphone”. In this window, click “Properties”.
- On the “General” tab, select the “Use this device” line, and then click “Apply”.
- Finally, you need to go to the tab called “Levels”, then in “Microphone Gain” move the slider to the +20.0 dB position and activate the changes made.
Can't turn on the camera on your laptop? Read the setup instructions.
Troubleshooting Possible Problems
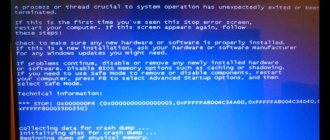
When starting to work with a microphone, you may encounter unexpected difficulties. The main one is that the microphone does not work, that is, it is connected to the computer with a cable, but the operating system does not see it or does not want to record sound. To resolve this issue, please follow the instructions below.
Microphone check
First of all, before dealing with the system parameters, you need to make sure that the microphone itself is not broken. The only way to do this is to try connecting it to another computer. Changing the port also sometimes helps: if your computer has several microphone inputs, change the currently used port to another one.
If the microphone does not work with several devices at once, it is most likely the problem. In this case, you will have to replace it or contact service for repairs.
Checking the volume
If you manage to determine that the microphone is ok, it is worth checking the audio settings. In the microphone properties described in the “Standard Windows Tools” section, open the “Levels” tab and set the slider values to maximum. Try recording the audio again and check the result.
Driver setup
Driver is a utility that ensures compatibility between the device and the operating system. In our case, the driver helps the microphone and computer work. By default, the system itself must find a suitable driver and install it as soon as the microphone connects to the device. But perhaps this did not happen or the process was not completed correctly. You need to manually check the drivers:
- Right-click on the “Start” icon and select “Device Manager” from the drop-down list.
Open the device manager
- Find the “Sound Devices” block in the list and expand it. Find your sound card by name, right-click on it and start installing drivers. Try performing an automatic search; perhaps the system will be able to find the necessary files and install them on its own.
Select the card and start updating the drivers
- If the auto search does not produce results or the board is not in the list of devices, you will have to look for the drivers yourself. Press the Win + R combination to bring up the Run window. Enter the request dxdiag.exe in it to open information about the computer.
Execute the dxdiag.exe request
- On the “Sound” tab, you can see the name and code of the sound card available on your computer.
Go to the “Sound” tab and look at the number
- Go to the resource https://devid.info and enter the code you received earlier in the search bar. Using it you can get information about the device and download suitable drivers.
We find information about the card and look for drivers
- After downloading the drivers, go back to Device Manager and start the update again, but this time select manual mode. Specify the path to the driver files and complete the installation procedure. Problems with the microphone should disappear.
We indicate manual installation and the path to the drivers
Disabling Monopoly
It is possible that the microphone refuses to record sound because it is already being used by some program. By default, monopoly is enabled, and you can disable it in the microphone properties described in the “Using Standard Windows Tools” section.
Close all applications that may be associated with the micron, and then open one. There is a chance that some program did not close completely, but went into the background, taking away the rights to the microphone. Therefore, it is better to restart your computer to ensure that all running applications are completed.
Troubleshooting
If the device does not work or does not work correctly, you should run the Windows troubleshooting program:
- Click on the settings icon (gear image) in the Start menu.
- In the Settings window, select Update & Security and then Troubleshoot in the left sidebar.
- In the “Sound Recording” section, click on the “Run the troubleshooter” button and follow the further recommendations.
Most common errors can be corrected this way.
Noise Elimination
Not all audio cards offer built-in noise reduction. If you are lucky and this option is provided, in the properties window you will see an additional “Improvements” tab. Here you can enable or disable active noise and echo cancellation.
Otherwise, you will have to resort to adjusting the sensitivity and pregain in the “Levels” tab. It is better to turn off the latter completely, and reducing the sensitivity level will reduce the background. Try to find a middle ground between the signal volume and the amount of interference.
A foam pad can also improve the situation. It not only cuts off sharp air vibrations caused by the speaker's aspiration, but also dampens low-amplitude mechanical noise.
Do not forget that most of the noise and interference is not produced by what is happening in your room, but by electromagnetic interference. Therefore, it is unlikely that it will be possible to eliminate them completely. To do this, you will need to additionally shield all wires, as well as components installed on the computer.
Checking the microphone volume
You can test the volume in the microphone properties window (Control Panel > Sound > Recording > Default Device). You should go to the “Listen” tab and check the “Listen from this device” checkbox. Now your computer is working to amplify the microphone. You can adjust the volume in the “Levels” block.
Driver Update
If everything works fine, there is no need to install a driver. You probably won't have to update it manually either. Windows 10 independently monitors the relevance of the software. However, in most cases, the system installs only the basic components necessary for normal operation. In this case, additional features may not be available.
Therefore, it is better to download from the vendor’s official website and install the latest version of the software package for your audio card. To find out its manufacturer and driver version, right-click on the Start menu and select “Device Manager” from the context menu. The required data is located in the “Sound Devices” block.
Disabling Monopoly
To get professional-quality recordings or achieve minimal latency, Windows 10 provides an exclusive access feature. If you enable it, the first application to access the microphone will receive exclusive rights to use it. In this mode, the system prohibits all other programs from connecting to it.
But if you are not involved in audio recording professionally, it is better to disable the option. This can be done in the “Advanced” tab of the microphone properties (Control Panel > Sound > Recording > Active device).