Category: Soft Published 12/03/2015 · Comments: · Reading time: 6 min · Views: 667
Hello!
I tried working with cloud disks:
- Google Drive,
- Dropbox,
- Mega
- Cloud@mail.ru,
- OneDrive (ex. SkyDrive),
- iDrive.
I still use all of them (except Mega and OneDrive). Sometimes.
But the leader in convenience and my constant assistant is Yandex.Disk.
What is the Yandex.Disk cloud service?
I'll explain it quite simply.
Somewhere in another galaxy, in another city, far away, there is a building owned by Yandex. It contains rooms for powerful servers that store terabytes of data.
On some server, space is allocated for your files. To do this, you just need to create an account in Yandex. Well, to put it simply, a mailbox.
That's all.
Click here
And you are here
The first advantage of Yandex.Disk is that all controls are absolutely logical. No instructions needed. Everything is clear at first glance.
The second advantage is that there is enough free space for storing files for most needs. They give you 10 GB right away. For inviting friends another 10 GB. For enabling the option to auto-upload photos from a mobile phone - another 32 GB. In total, you can easily connect 42 GB, and if with invitations, then 52 GB.
Yes, there are clouds where they immediately give 100 GB for free, but they are inferior in convenience to Yandex.Disk.
What is Yandex.Disk?
So, Yandex.Disk is a cloud storage that allows you to remotely store user files. This thing is useful if the OS on the computer (or some of its components) is not stable. In this case, there is one hundred percent confidence that important files will not be lost and will always be at hand. Yandex.Disk was created relatively recently as an alternative to foreign cloud storage (Google Drive, Dropbox, OneDrive, and so on). Millions of domestic users have already appreciated the service. And even setting up Yandex.Disk did not cause any significant problems. So why don't we try it? Moreover, it is completely free. Upon registration, the user is provided with 10 gigabyte cloud storage. This is quite enough to evaluate all the capabilities of the service. If in the future you need more gigabytes, they can be purchased at a very reasonable price.
Yandex.Disk features
So, what can Yandex.Disk offer the user? Will he be able to follow and like them? It is worth noting that this cloud service has quite extensive capabilities.
- Instant download of files. If you install the appropriate application from Yandex on your PC, you can upload files to Disk by simply dragging it from one window to another.
- Automatic download. There is an option to automatically upload photos and videos from a smartphone or other device. For this, Yandex.Disk offers unlimited storage.
- Automatic synchronization. If the files on your PC or smartphone have been even slightly changed (even just renamed), then Disk will instantly synchronize the files in the cloud and bring them into exactly the same form.
- Supports any file types. You can upload any files to cloud storage. And the internal system will provide a full opportunity to view them.
- Download to PC in archive. When downloading folders from storage to a PC (for the purpose of restoring them), they are packed into an archive in order to reduce the folder size.
In general, Yandex.Disk has a lot of features, but it takes a very long time to consider them all. Therefore, let's dwell on what has already been listed. Now let's talk about how the initial setup of Yandex.Disk is carried out.
Initial setup
What should you do at the very beginning? First, you should register an account on Yandex (if you don’t already have one). Without it, you will not be able to use cloud storage. What do I need to do?
- Open the browser and load the Yandex home page.
- Among other contents, there will be a “Create mail” button. Click on it.
- Now let's come up with a login. It should consist only of letters of the Latin alphabet and numbers.
- We come up with a password (do not use one that is too simple).
- Enter your first and last name.
- Click the “Create” button.
- Log in to your account (mailbox).
- Click on the user avatar button (in the upper right corner of the window) and select “Disk”.
- Click on the “Create Disk” button.
- We look next to the button that says “Download Yandex.Disk” and download the version for Windows.
- We install the program in the standard way.
- We launch it, enter the newly created username and password and click the “Login” button.
Now Yandex.Disk is installed on your computer with standard settings. This means you can move on to other options. For example, to synchronization settings.
How to provide a link to Yandex Disk to download a file?
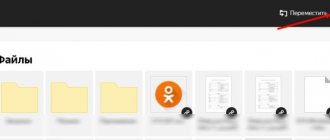
So, before you give a link to a file, it naturally needs to be downloaded. When you go to the main page of your disk, you see all the default folders. Plus those that you created yourself.
In the upper left corner we see a blue button labeled “Download”. Click it and the Explorer folder on your computer will open, from where we select the file. After selecting it, you will see the following window in which the file is downloaded.
When the file is downloaded, its download window will be highlighted in yellow. You will see two lines nearby. One will contain the address for a link to the file, and the second will contain the inscription “upload to social networks”.
Sync folders
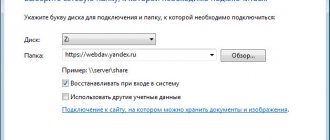
Now let's move on to other settings of the Yandex.Disk application. Setting up folder synchronization is one of the most important settings. What needs to be done for this very setting? The algorithm of actions is extremely simple. Even beginners will not have any problems:
- In the system tray, right-click on the “Yandex.Disk” icon and select “Settings” from the menu.
- In the window that opens, move to the “Synchronization” tab.
- The window below contains folders that can be synchronized. You need to select the ones you need by checking the appropriate box next to them.
- Click “Apply”.
- Click "OK".
Synchronization will begin immediately. If something changes on your computer in these directories, then corresponding changes will immediately begin in the cloud storage. Now let's talk about how to set up notifications. This is no less important.
Organization of convenient file storage
To structure downloaded photos, you can distribute them into albums, move, add and delete. You can assign a name to the album and change it later. It is needed for convenient storage of files. Set up access both for individual photos and for the entire photo folder.
To create an album you need to do the following:
- In the Yandex.Disk menu, select the menu item “Albums” .
- Then click on the “Create Album” .
- In the gallery that opens, mark the photos that need to be added to the album. Write down the name of the album. Click the “Create” .
- After creating an album, we see the album cover, its name and photos.
Note! As a rule, the default cover is the photo marked first.
By default, all files that are uploaded to Disk are personal: they are available for viewing only through authorization of the account into which they were uploaded.
Access to an album can be changed to public simply by moving the toggle switch to the right of the sharing link (public link).
It is possible to see a separate photo of a public type even without registration, but only by following a key link. It is received and transmitted by the user of the account through which the file was downloaded.
You can share (that is, send to someone) a separate photo by copying and sending a public link to the addressee by email, as well as directly to a social network account.
Downloading photos
The next logical question after moving files to cloud storage will be how to download photos. You can download the album to your own device by clicking on “Download as archive” in the upper right corner of the cover.
To download an individual photo, you will need to click the “Download” under the photo.
Thanks to the web version and Yandex.Disk applications, you can quickly and easily save photos for downloading, share them with friends and publish them on social networks. The user-friendly storage interface helps you quickly master all the features and functions.
Setting up notifications
Notifications from Yandex.Disk help monitor changes in the structure of cloud storage directories and the general status of Yandex.Disk synchronization. In principle, setting up notifications is not required. It is already configured automatically. But if you need to turn off notifications, you can do this in the following way:
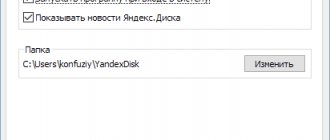
- Go to the Yandex.Disk settings and move to the “Basic” tab.
- Uncheck the box “Show Yandex.Disk news”.
- Move to the “Advanced” tab.
- Uncheck the box “Show notifications about shared folders”.
That's all. Now Yandex.Disk will work quietly in the tray and not disturb the user. Now let's move on to setting up other service parameters. Let's talk about autoloading.
Setting up startup
Autoloading in the application is enabled by default. It allows you to automatically download files from a connected camera or any other device to your computer. Many people are not happy with this state of affairs, as it wastes traffic. But this option can be configured. How? Very simple:
- Open the Yandex.Disk settings again.
- Move to the “Startup” tab.
- Uncheck the box “Offer auto-uploading of photos and videos.”
- Click “Forget devices”.
- Confirm the action by clicking the “Forget” button.
Now Yandex.Disk will not download all data from the connected device to the storage without asking. Traffic saved. Now let's talk about such a thing as setting up Yandex.Disk in Linux.
Yandex.Disk and Linux
No matter how strange it may sound, there is a similar application for Linux and Mac OS. There is also a program for Android and iOS. However, there is no point in considering setting up Yandex.Disk on Android (or any other mobile platform). All the same. But the option with Linux needs to be considered in more detail. In principle, the application itself is exactly the same as in Windows. The only differences are in the installation process. Let's look at it.
- Open a terminal and enter the following command: “echo “deb https://repo.yandex.ru/yandex-disk/deb/stable main” >> /etc/apt/sources.list.d/yandex.list”. Press "Enter". This command will start downloading the application from Yandex servers.
- Then enter “sudo apt-get update”. With this action we update the lists.
- Now type “sudo apt-get install yandex-disk” and press “Enter”.
- It is necessary to install the application icon (user interface), since by default the client in Linux runs exclusively in the background. Type “sudo apt-get install yd-tools”.
- We make the necessary settings using the Yandex.Disk user interface. You will need to log in to your page.
That's all. Now Yandex.Disk is installed in Linux. And it will work no worse than in Windows (if not better). Now let’s look at user reviews about this cloud storage.
How to install the Yandex.Disk application on Android
You will need Yandex.Mail - the old one that you already use, or you can.
On your computer (not on your mobile phone!) follow the link
A window will open
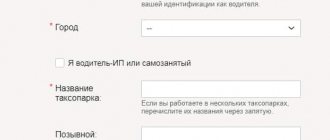
- indicate your mobile phone number (1 in Fig. 2),
- enter the code from the picture (the so-called captcha, which is needed to confirm that you are a person and not a machine bot) - 2 in Fig. 2,
- click “Get” (3 in Fig. 2).
Rice. 2. Enter the phone number, the code from the picture, click “Receive”
After entering the phone number and captcha (code from the picture), a message will appear:
"SMS sent
An SMS with a link to an application or mobile website was sent to the number you specified.”
Please note that sometimes SMS arrives with some delay (up to 5 minutes).”
Take the phone and open “Messages”:
It is possible that a window will appear asking how exactly to open the link:
You will be prompted to install Yandex.Disk:
Rice. 7. It is proposed to install the Yandex.Disk application on your smartphone
Rice. 8. Permissions for installing the Yandex.Disk application on a smartphone
Here you can only click on “Accept”, because the information listed in Fig. 8 is provided to us for information purposes only. If you do not agree with this, then there is only one option left - to refuse to install the Yandex.Disk application on your smartphone and, accordingly, to refuse the 32 GB gift.
Click “Accept”, after which the application starts downloading on the phone:
Rice. 9. The Yandex.Disk application is being installed on your smartphone
The screen shows that the Yandex.Disk application on the smartphone will take 11.4 MB.
The installation takes 1-2 minutes, and at this time the message “Installing...” flashes on the screen. When the application is installed, a message will appear:
How to get 32 GB as a gift on Yandex.Disk
Yandex.Disk is inextricably linked with Yandex.Mail, so next you are asked to log in to your Yandex.Account. To do this, use your username and password for Yandex.Mail:
Rice. 11. Enter your username and password to log in to Yandex.Mail
Then several messages will appear on the screen in turn, advertising the capabilities of mobile Yandex.Disk:
- “Photos from all devices”, click “Continue”,
- “Convenient to share”, click on “Continue”,
- “Bring all documents with you”, click “Continue”.
Finally, the “Enable startup” window will appear:
Rice. 12. Enable auto-upload to get 32 GB on Yandex.Disk
- Autoloading must be enabled (this is a condition of the promotion!)
- upload at least one photo,
- receive “for good behavior” 32 GB on Yandex.Disk,
and only then you can get smart: disable autoloading, remove Yandex.Disk from your smartphone, etc.
You can upload photos to Yandex.Disk both on a smartphone and on a computer – in general, wherever is more convenient for you. Upload a photo and receive the promised gift:
A similar message will also be sent to Yandex.Mail; it can also be read on a computer:
“Hello, Nadezhda!
Congratulations, you received an additional 32 GB on Yandex.Disk under the Mobile AutoUpload promotion.
Use the extra space: - to upload photos and video archives; — saving backup copies of important documents; — creating shared folders with friends and colleagues.”
How to disable Yandex.Disk autoload on Android
It was necessary to enable auto-upload in order to upload at least one photo and get 32 GB. After that, you can disable autoloading in the Yandex.Disk settings.
Do you know where this requirement comes from - turn on auto-upload and upload at least one photo, and only then receive 32 GB as a gift? Yes, everything is very simple and is based mainly on the psychology of behavior of the vast majority of users on the Internet. People receive a gift and do nothing else out of happiness. On the one hand, this is true - “it works, don’t touch it!”
On the other hand, there are users who want to keep everything or everything under control. Not everyone likes autoloading and it’s not suitable for everyone, so I recommend looking into the “Settings” of Yandex.Disk on your smartphone and checking what “ ” is configured there.
To do this, open the Yandex.Disk application.
- In the upper left corner, click on the icon of three small horizontal stripes,
- A menu will open in which you need to tap “Settings”:
Rice. 14. Yandex.Disk settings
By tapping “Settings”, we can edit the behavior of Yandex.Disk on a smartphone:
Rice. 15. Turn off startup and change settings from Wi-Fi + Mobile. only on Wi-Fi
In Fig. 15 “Auto upload photos” is turned off. It remains to deal with mobile traffic and Wi-Fi.
Attention. The Yandex.Disk application is supported by the Android platform no lower than version 4.0.3.
The Yandex.Disk application for Android allows you to manage files on Disk. You can install the application from the Google Play page.
Attention. If you use two-factor authentication, to authorize in the Yandex.Disk application you need one generated by the Yandex.Key mobile application.
To update the list of files and folders, pull it down. While the app is requesting new data, "Updating" appears at the top of the screen.
Open the folder where you want to download the file and click the icon.
User reviews about the service
So, we’ve already figured out how to set up Yandex.Disk on a computer step by step. Now it's time to study users' opinions about this cloud storage service. It’s worth noting right away that those who use Yandex.Disk are very satisfied. According to them, this service has saved their personal files more than once. For example, there were situations with a hard drive failure. And only Yandex.Disk helped restore lost files. Many also note the high speed of the service. The service interface also received praise. It is simple and clear. Moreover, it is completely in Russian. Perhaps they just spoil everything. But this opinion is subjective.
Filling the gaps - expanding horizons!
- CompGramotnost.ru » Disks, files, folders » Get 32 GB on Yandex.Disk for free until July 3: the “Mobile Autoload” promotion
From April 3 to July 3, 2020 (3 months), the “Mobile Autoload” promotion is running: you must install the Yandex.Disk application on your smartphone (based on Andro) before July 3 >
This promotion is carried out to encourage users to use the Yandex.Disk mobile application on their smartphones.
As a result, you will have 10+32=42 GB on Yandex.Disk.
Do you think it's worth using? If your answer is yes, let's move on.