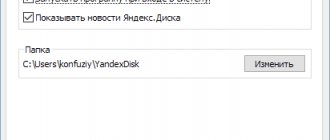
Cloud storage Yandex Disk can be connected to your computer as a network drive using the WebDAV protocol. After connecting a network drive, you will be able to work with Yandex cloud storage from your computer, as with a regular drive in the Windows operating system.
In Yandex.Disk, you can store your files in the cloud, interacting with the storage using a special client program, or managing your data through the web interface using a browser.
When using a special program from Yandex, your files will be stored simultaneously on your computer and in cloud storage, and when using the web interface, your data will be stored only in cloud storage.
You can also use Yandex.Disk as a network drive. This will allow you to access your cloud storage files directly in File Explorer. The Drive will be connected to the computer using the WebDAV protocol.
Network drive via WebDAV
WebDAV (Web-based Distributed Authoring and Versioning) - translates something like this: web tools for distributed development and version control. It is a set of extensions that sit on top of the HTTP protocol that allow users to collaboratively edit and manage files on a remote web server.
After connecting Yandex.Disk as a network drive to your computer, you will have access to all the contents of the cloud storage in this account. In this case, Yandex.Disk connected using WebDAV will be accessible only when an Internet connection is connected. If Internet access is disabled, then in this case, access to the network drive will be terminated.
Another feature of using Yandex.Disk using the WebDAV protocol is that all the data in this cloud storage will be located in the cloud and not on your computer. You work with cloud storage as a regular disk on your computer, and all data will be physically located on a remote Yandex server.
If you already have a client program installed on your computer and you use cloud storage on your computer, then when you connect Yandex.Disk via WebDAV, you can additionally connect to your computer a network drive with your other Yandex cloud storage.
You may have several cloud storages in Yandex. This is a fairly common occurrence, since many users may have several email accounts in Yandex. Yandex.Disk is linked to an email account, so these users will automatically have several cloud storages that they can use.
Yandex disk API
API (Application Programming Interface) is a shell used for programming applications. Using this Yandex software, third-party developers integrate online storage functionality into their own programs. The kit is distributed free of charge on the official website with the tech subdomain. In addition to compatibility with Windows applications, Mac OS X, Windows Phone, IOS and Android mobile platforms are supported.
For web programmers, Yandex has introduced packages that, using widgets, easily integrate storage into the operation of the site.
The API is implemented on the open WebDAV protocol, which is based on HTTP (HyperText Transfer Protocol). The program allows you to instantly upload a file to the server if it has already been synchronized by the service user. The functionality works on the principle of checking checksums. When they match, instant loading occurs. The function is called “Deduplication”.
The disk programmers, in addition to the API, for the convenience of developers, have also released a full-fledged Yandex SDK package, available in Java, as well as object-oriented programming languages C Sharp and Objective-C.
How to connect Yandex.Disk as a network drive to a Windows computer
To connect a network drive in the Windows operating system, you will first need to right-click on the “Computer” or “This Computer” icon on the Desktop or from the “Start” menu. Then you will need to select the context menu item “Map network drive...”.
Otherwise, you can connect a network drive from the Explorer window opened in the “Computer” tab. There you will need to select “Map network drive”.
Next, the “Map network drive” window will open. In this window you need to select a letter for the new network drive. By default, Windows automatically selects an available letter of the alphabet. You can change the drive letter if you need to.
In the “Folder” field you will need to enter the following address:
https://webdav.yandex.ru
By default, the “Restore at login” option is activated.
You may also be interested in:
- How to transfer Yandex.Disk to another hard drive partition
- We store files on Yandex.Disk
After completing the selection of settings, click on the “Done” button.
Next, the “Map network drive” window will open.
After successfully connecting the network drive, the “Windows Security” window will open.
Here, in the “User” field, you will need to enter the login for your Yandex.Disk account. Since the login is tied to a Yandex mailbox, please note that in this case, you will not need to enter the full email address, but only the login (what comes before the “dog”).
In the "Password" field, enter the password for your account. Then, activate the “Remember credentials” option so as not to re-enter your data every time you connect to a network drive. Next, click on the “OK” button.
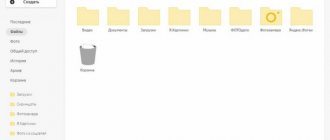
After this, the Yandex.Disk cloud storage will be opened in the Explorer window. All files and folders located in this particular cloud storage will be displayed here.
In the Explorer window, all network drives connected to your computer will be displayed in the “Network Location” area.
Now you can use the Yandex cloud as a regular disk on your computer.
Connecting to Yandex Disk via WebDAV client
There is only one sad thing about pleasant communication with Yandex Disk: the small allocated volume.
Even if there is an opportunity to add space, it is still not enough. The author puzzled for a long time over the possibility of connecting several Disks to the computer, and even so that the files were stored only in the cloud, and shortcuts were stored on the computer.
The application from Yandex developers does not allow you to work with several accounts at the same time; standard Windows tools are not able to connect several network drives from one address.
A solution has been found. WebDAV technology and CarotDAV . This technology allows you to connect to storage, copy files from your computer to the cloud and back.
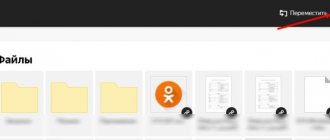
Using CarotDAV you can also “transfer” files from one storage (account) to another.
You can download the client from this link.
Tip: download the Portable version and write the folder with the program to a USB flash drive. This version allows the client to work without installation. This way you can access your storage from any computer. In addition, the installed application may refuse to launch its second copy.
So, we have decided on the tools, now let's start implementation. We launch the client, go to the menu “File” , “New Connection” and select “WebDAV” .
In the window that opens, assign a name to our new connection, enter your Yandex account login and password. In the “URL” we write the address. For Yandex Disk it is like this: https://webdav.yandex.ru
If, for security purposes, you want to enter your username and password each time, then check the checkbox indicated in the screenshot below.
Click "Ok" .
If necessary, we create several connections with different data (login-password).
The cloud opens by double clicking on the connection icon.
To simultaneously connect to several accounts, you need to launch another copy of the program (double-click on the executable file or shortcut).
You can work with these windows as with regular folders: copy files back and forth and delete them. Management occurs through the client's built-in context menu. Drag-n-drop also works.
Summarize. An obvious advantage of this solution is that the files are stored in the cloud and do not take up space on your hard drive. You can also create an unlimited number of Disks.
Among the minuses, I note the following: the speed of file processing depends on the speed of the Internet connection. Another disadvantage is that there is no way to receive public links for sharing files.
For the second case, you can create a separate account and work as usual through the application, and use disks connected through the client as storage.
Here's an interesting way to connect Yandex Disk via a WebDAV client. This solution will be convenient for those who plan to work with two or more cloud storages.
We are glad that we were able to help you solve the problem. Add the Lumpics.ru website to your bookmarks and we will be useful to you. Thank the author and share the article on social networks.
Describe what didn't work for you. Our specialists will try to answer as quickly as possible.
Did this article help you?
NO
How to disconnect a network drive Yandex WebDAV
To disconnect webdav yandex disk from your computer, you will first need to click on the “Computer” or “This Computer” icon, and then in the context menu you should select “Disconnect network drive...”.
In the “Network Drives” window that opens, you will need to select the desired drive, and then click on the “OK” button.
After this, the Yandex.Disk network drive will be disconnected from your computer.
How to upload photos to Drive
You can add files to Yandex cloud storage from any device: Windows, Linux, Symbian, Android and iOS connected to the Internet. A web version of Drive and special applications for each PC system and mobile devices are available.
Working with the web version
You can go to the web version of Yandex.Disk right here.
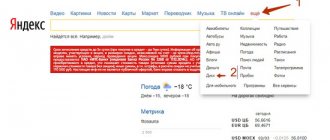
To upload photos to Yandex.Disk, just click the yellow button with an arrow and the words “Upload” (in the mobile version - only the arrow).
Note! To download a file larger than 2 GB from a computer, you will need to install the Yandex.Disk program.
In the window that opens, you can choose two ways to upload photos.
Method 1
From any open folder, just drag one photo or several selected ones by holding the left mouse button.
Method 2
- Click the “Download” .
- In the window that opens, you need to find the desired file from the device and click on it.
- Having marked the desired photo, just click on the button "Open", the file will be automatically sent to cloud storage.
Important! Already during the download process, you can add files using the “Load more” button.
How to upload photos to Yandex.Disk in the mobile application
- To upload a photo in the mobile application, you need to open the menu: with three horizontal sticks.
- Then we select a location on Yandex in the photo storage: where we will upload the files. To do this, click on one of three menu items: “Disk”, “All photos” or “Offline” .
- For example, select the “Disk” . Select the folder into which we will upload the photos.
- Go to the “Photos” folder and click on the plus , which is located in the upper right corner.
- All that remains is to select the download source from the list that opens. For example, select “Photo from gallery” .
- Then all you have to do is tick the photos that need to be transferred to the “Photos” and click on the “Done” in the upper right corner.
You can enable the auto-upload option and no longer worry about the safety of each new photo. The next previously unloaded photo will be uploaded to cloud as soon as your device is in the wi-fi zone.
Connecting auto-upload of photos to Yandex.Disk
To enable the function of automatically uploading photos to Yandex.Disk, you must perform the following steps:
- Go to the settings of the Yandex.Disk mobile application.
- Next, in the settings menu, select the item “Auto upload photos” .
- Then, place the slider in the “Auto upload photo” , thereby enabling auto upload.
After connecting auto-upload, your pictures and video files will automatically go to the Yandex Disk cloud storage.
How to upload a video to Drive
- To download a video on a website page, you must first follow the link. Then, at the top of the page click the button "Download".
- In the explorer window that opens, you need to find the desired file (video) and click "Open".
- During the download process, it is possible to add other videos to the list.