Create a note
Step 1 . In order to make notes, you first need to select a fragment (sentence or element) to which the note will be applied, or put a pointer at the end of the file.
Select the fragment to which the note will be applied
Step 2 . Next, you need to go to the “Review” tab, which is located on the top panel.
Go to the “Review” tab
Step 3 . In the tab that opens, find the “Notes” group and click the “Create note” button. A note can also be created using the keyboard shortcut Ctrl+Alt+A. You can change this keyboard shortcut in Word Options.
Find the “Notes” group and click the “Create note” button
Step 4 . In Word 2020, the note is entered in the field that appears; in Word 2013 and 2010, it can also be entered in the review area.
In the “Note” field enter the text
Enable Note Display
Before you make changes, you need to make sure that the notes are displayed:
- in Word 2020, you need to go back to “Review” and find the “Notes” subgroup;
Edit note and reply
Responses to comments are also slightly different between versions of Word:
- in Word 2007, 2010 and 2013, in order to respond to a comment, you need to select it, then go back to the “Review” section and click “Create a comment”. Or use the combination Ctrl+Alt+A;
Select the required note, go to the “Review” section and click “Create a note” - in Word 2020, you need to right-click on the note and select “Reply to Note”, or click on the button located in the window of the note itself.
Click on the button located in the note window itself
On a note! To change a note, you just need to click on it and make the necessary changes.
How to make a note in Word
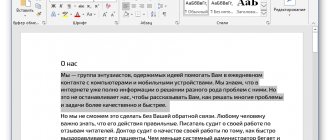
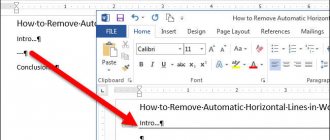
- Select the text or place the cursor where you want to make a note. Next, we will look at an example of how to make a note to the text in Word . But you can add a note not only to text, but also to an image, table, etc.
How to make a note in Word – Selecting text to insert a note in Word
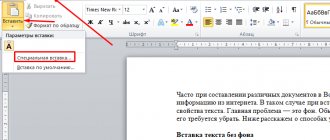
- On the Review tab, click New Comment.
How to make a note in Word – Insert a note in Word
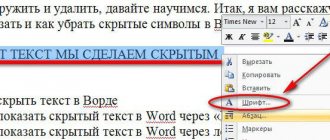
- Type your note in the pane that appears on the left side of the window if you're using Word 2020.
How to make a note in Word – Entering a note in Word 2016
If you have Word 2013, 2010 or 2007 installed, enter a note in the callout in the field on the right side of the document.
How to make a note in Word – Entering a note in Word 2010
- When you're finished, you can close the note window by pressing the Esc key or clicking anywhere outside the note box.
How to make a note in Word – Complete a note in Word
- Now, when you hover your cursor, a note will appear in a pop-up window.
How to make a note in Word – Note in Word
Now let's move on to the question of how to delete a note in Word .
Changing username(s) in notes
Step 1. Go to the “Review” tab, “Tracking” group.
Go to the “Review” tab, “Tracking” group
Step 2: Click the Corrections Options button (in Word 2016) or Corrections (in Word 2013 and 2010) to bring up the dialog box.
Click the “Corrections” button
Step 3. In the window that opens, click the “Change username” or “Change user” button.
Click the “Change user” button
Step 4. In the “Personalize Microsoft Office” section, enter the desired username, and then click the “OK” button.
In the “Personal settings for Microsoft office” section, enter the user name and click “OK”
On a note! If you want to always use them, then check the box next to "Always use these values regardless of Office sign-in status."
How to delete a note
Step 1. To delete, right-click on a specific note and click “Delete note” .
Step 2. To completely delete all notes in a file, you must:
- Go to “Review”, find the “Notes” subgroup.
How to Hide a Note in Word 2010
Notes may interfere with document viewing. You can hide them so as not to be distracted from working on the text:
- Open a Word document with comments and go to the “Review” menu tab.
Go to the “Review” menu tab - Uncheck the Notes box in the Show Corrections drop-down menu.
Click on “Show corrections” and uncheck the “Notes” box.
Reference! To return notes removed in this way, it is enough to again about in the list of displayed corrections.
.ya-page_js_yes .ya-site-form_inited_no { display: none; }
| Let's say someone asks you to edit a report. If you have a hard copy of the report, you can use a red pen to mark spelling errors or add comments in the margins. However, you can also do all these things in Word 2010 using In this tutorial, you will learn how to use Corrections , Add | ||
>>Return to contents of lessons
Share
About the Correction When you enable Corrections option, all changes made to the document appear in the form of multi-colored Color The markup will vary depending on who is reviewing the document, so if there are multiple reviewers, you can tell at a glance who made the changes. To enable Corrections:
Adding or removing notes Sometimes, instead of changing something, you can make a note about part of the document. Comments appear in the right margin and can be read by the author or any other reviewer. To add a note:
To delete a note:
To delete all notes:
Attention!!! We will be adding new lessons to our site from time to time, so bookmark this page in your browser or add it to your Favorites folder so you can easily return to it later. | |||||
How to delete a note
Step 1. To delete, right-click on a specific note and click “Delete note” .
Right-click and click “Delete Note”
Step 2. To completely delete all comments in a file, you must:
- Go to “Review”, find the “Notes” subgroup.
Go to “Review”, find the “Notes” subgroup Select the drop-down menu under the “Delete” item.
Select the drop-down menu under “Delete” Click “Delete all comments in the document.”
Click “Delete all comments in document”
How to remove comments from a specific reviewer
In Word 2020 you need:
- Go to the “Review” section, “Tracking” subsection.
Go to the “Review” section, “Tracking” subsection. Call the “Show corrections” drop-down menu and select “Specific users”.
Call the “Show corrections” drop-down menu and select “Specific users”
- Next, in the list, select the name of the user whose comments you need to delete.
- In Word 2013 and 2010, the path looks like this: Review—Track—Show Revisions—Reviewers.
In Word 2010-2013, the deletion path is “Review”, “Tracking”, “Show Corrections”, “Reviewers”
Enable Note Display
Before you make changes, you need to make sure that the notes are displayed:
- in Word 2020, you need to go back to “Review” and find the “Notes” subgroup;
Go to “Review” and find the “Notes” subgroup in Word 2013 and 2010, in the “Review” tab, find the “Tracking” item;
In the “Review” tab we find the “Tracking” item, then you need to click the “Show corrections” button and check the box next to “Notes”. Likewise, notes are hidden.
Click the “Show corrections” button and check the box next to “Notes”