12/10/2015 windows | for beginners | programs
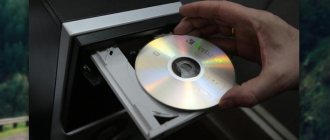
A Windows 10 boot disk, despite the fact that now flash drives are mostly used to install the OS, can be a very useful thing. USB drives are regularly used and overwritten, while the OS distribution on a DVD will lie and wait in the wings. And it will be useful not only for installing Windows 10, but, for example, for system recovery or password reset.
This instruction contains several ways to create a bootable Windows 10 disk from an ISO image, including in video format, as well as information on where and how to download the official system image and what mistakes novice users can make when burning a disk. See also: Windows 10 bootable USB flash drive.
Loading an ISO image to burn to disk
If you already have an OS image, you can skip this section. If you need to download an ISO from Windows 10, then you can do this in completely official ways by obtaining the original distribution from the Microsoft website.
All you need to do is go to the official page https://www.microsoft.com/ru-ru/software-download/windows10 and then click on the “Download tool now” button at the bottom of it. The Media Creation Tool utility will load, run it.
When the utility is launched, you will need to consistently indicate that you plan to create a drive for installing Windows 10 on another computer, select the required OS version, and then indicate that you want to download an ISO file for burning to a DVD, specify the location for saving it, and wait until it finishes downloads.
If for some reason this method does not suit you, there are additional options, see How to download Windows 10 ISO from the Microsoft website.
Burn Windows 10 bootable disc from ISO
Starting with Windows 7, you can burn an ISO image to a DVD without using third-party software, and I'll show you this method first. Then I will give examples of recording using specialized programs for burning discs.
Note: one of the common mistakes of novice users is that they burn the ISO image to disk as a regular file, i.e. the result is a CD that contains some kind of file with an ISO extension. It’s wrong to do this: if you need a Windows 10 boot disk, then you need to write exactly the contents of the disk image - “unpack” the ISO image onto a DVD disc.
To burn the downloaded ISO, in Windows 7, 8.1 and Windows 10 with the built-in disk image burner, you can right-click on the ISO file and select “Burn disk image”.
A simple utility will open in which you can specify the drive (if you have several) and click “Burn”.
After this, all you have to do is wait for the disk image to be written. At the end of the process, you will receive a Windows 10 boot disk ready to use (an easy way to boot from such a disk is described in the article How to enter the Boot Menu on a computer or laptop).
Using programs
In addition to the above utility tools, you can also use special software to transfer data to disk. Numerous programs and utilities allow you to take advantage of advanced pre-configuration functions, as well as transfer multimedia files with better quality.
Astroburn Lite
The ability to burn a DVD in Windows 10 for further playback and installation of programs/systems is preferable for many. But among users, the Astroburn Lite utility is considered a common option, which has been used for several years. With its help you can create bootable disks and much more. You can read information about the process of installing and downloading the utility in this article. And the entire process of burning an image to disk is described in detail in one of our works devoted to recording boot disks.
BurnAware Free
But Astroburn is not the only one that is a reliable assistant when transferring data to a drive. Another popular burning program that you don't have to pay any money to use or go through a grueling authorization process is BurnAware Free. The installation process, as well as the nuances of operating the program, are described in detail in our special material, which you can study at this link.
- After opening the program, select the required option. In our case, this is recording a disk with data.
- In the window that opens, select the empty area in the middle, apply RMB to it and select “Add files...”.
- In the desired directory, select the files to record and click “Add”.
- When ready, click “Burn” and wait for the process of transferring data to disk to complete.
CDBurnerXP
Don't be alarmed by the "XP" prefix in the name, as this development is fully supported by PCs with Windows 10 installed on them. An easy-to-learn program allows you to easily and efficiently transfer the required data, be it documents/photos or ready-made images. Let's look at the last option.
- Download the program from the official website and install it on your computer.
- After launching CDBurnerXP, select the required option and click “OK”.
- Next, we need to select an iso image on the disk. This can be done by pressing the “Browse” button.
- Select the required file in the directory and click “Open”.
- The program itself will select the optimal recording settings, but if you wish, you can change the recording speed, etc. After making sure that the image is selected correctly, click “Burn disc”.
- In the information window, you can monitor the recording process and get a summary of the approximate completion of the image transfer. Remove the disc after burning is complete.
ImgBurn
If you intend to create an ISO file and subsequently burn it to disk, and you are firmly convinced that the function of creating an Audio-CD or DVD-Video disc will not be useful to you, then we recommend using the services of the ImgBurn program. Its functionality is designed only for working with images, and it itself is very easy to learn.
- First, download the program through one of the many mirrors. Install it on your computer.
- Launch ImgBurn. From the available list of functions, select the one we need.
- By clicking on the small icon, we call up Explorer, in which, in the directory we need, the file to download is located.
- After making sure that the disc is in the drive, press the start recording button.
- Upon completion of the process, the recorded image will be checked by default. If there are no errors, then the disk is ready for use.
The above methods are suitable for a wide variety of tasks. You can rely on integrated Windows services or third-party software to transfer any type of data to disks.
Rate this article:
( 1 ratings, average: 5.00 out of 5)
About the author: Alexander Condes
Regular author of the site. Computer Literacy Specialist
- Related Posts
- How to customize, remove, pin, move the taskbar in Windows
- How to fix Inaccessible Boot Device error on Windows 10
- Disable and remove Xbox DVR on Windows 10
Creating a boot disk in UltraISO
One of the most popular programs for working with disk images in our country is UltraISO, and with its help you can also make a boot disk for installing Windows 10 on your computer.
This is done very simply:
- In the main menu of the program (at the top), select “Tools” - “Burn CD image” (despite the fact that we are burning a DVD).
- In the next window, specify the path to the file with the Windows 10 image, the drive, and the writing speed: it is believed that the lower the speed used, the more likely it is that the recorded disc will be read without problems on different computers. The remaining parameters should not be changed.
- Click "Burn" and wait for the recording process to complete.
By the way, the main reason why third-party utilities are used to burn optical discs is precisely the ability to adjust the recording speed and its other parameters (which in this case we do not need).
How to burn files from your computer to disk
For novice computer users, recording to external storage media such as CDs and DVDs may pose some difficulties.
However, there are very, very many ways to record. I will highlight two methods: the standard one and through a special program for working with disks - Nero. The first method is to transfer the files to a disk folder. Such files are being prepared for writing, but are not being written yet! Once the files are ready to be written to disk, when you click on write, all the files are written to disk at once. Then such files cannot be deleted separately. To delete a file from a disk, you will first need to save all the files on your computer, clean the disk, re-prepare those files that need to be written, and, in fact, write them.
Burning discs
So now let's try burning the files to the new drive.
The first method is standard.
Insert the disk into the drive, open “Start”>”Computer”>”DVD RW drive” (or CD RW drive).
We will use the most common method of recording discs (“With a CD/DVD player”). Enter the name of the disk (for example, “MyDisc”). Click “Next”. A folder opens into which you need to drag files from your computer and prepare them for writing. After this, the folder will look like this:
After that, right-click and select “Burn to disk”.
After that, enter the name of the disk and click the “Next” button.
Then, we wait for the files to be written to disk. Typically, recording time on a DVD-RW disc is 30 minutes. But not always. Much depends on the selected recording type and volume.
To complete the recording procedure, click the “Finish” button.
The disc was successfully burned!
The second method can only be used if the Nero program is present on the computer (tested on Nero 7).
It is enough to look either on the computer desktop for the following icon, or in the “Start” menu>”All Programs”>”Nero 7 Ultra Editional”>”NeroStartSmart”.
If there is such a program, then we launch it accordingly (if Windows 8 is installed, we launch it using the administrator). Next, click on the left arrow to expand the functionality of the program (a list of programs is displayed).
Then, move the mouse pointer (do not click anywhere) on the items “Data”> “Create DVD with data”.
On the left in the “Open with:” window, select the “Nero Express” program. and click on the green arrow on the right:
Nero Express will open. In the empty field in the center of the program you need to move files from your computer that need to be written to disk. At the bottom there is an indicator of recording availability. At the moment, you can record a volume of information of no more than 4500 MB (highlighted in green). If the amount of information exceeds the permissible norm, the indicator shows that there is “excess” information. It is necessary to reduce the amount of information, because it doesn't fit on the disk. After that, click the “Next” button.
Enter the name of the disk, put two checkmarks, according to the figure below and click “Burn” (when burning a one-time CD/DVD-R disc, it is better not to check the first checkbox, because if errors occur during recording, a lot of problems will appear, as a result which the disk may be damaged)
This way, you can be sure that the information will be opened on another computer (or device).
In the future, if there is space left on the disk, it will be possible to write more data. If you turn off the second checkbox for creating a multisession disk, then the empty space on the disk is filled and no information can be written to the disk in the future.
Click “Record”.
A window opens with current write operations to the disk.
After recording, if there were no errors, a window will appear indicating that data verification has been successfully completed.
Then, click the “Next” button.
Close the program (by clicking on the cross in the upper right corner).
If such recording is not planned on disks in the near future, then the project does not need to be saved.
Congratulations, the disc has been successfully burned!
Published: 2014-05-16 17:43:01