Flash cards have become an inseparable part of the life of all modern people. With their help, we share information with each other, transfer important documents, or easily store our favorite music and photos on them. It is easy to record information on this medium. And there are several ways to remove it.
Instructions
1. Insert the flash drive into the USB port. Wait for autostart. If you don’t have one, open “My Computer” and launch the flash drive independently. Select the file to delete. You can also delete several files at once. Select them with the mouse while holding the Ctrl key. Once the files are selected, press Delete on your keyboard and confirm your selection. Or right-click and select “Delete” from the menu. And you can simply drag the selected files to the trash, and they will be deleted. 2. However, there are times when a flash drive, to put it crudely, “glitches.” In this case, it may not open, freeze, or refuse to perform any operations on files. Occasionally flash drives do this for no apparent reason. In this case, only complete deletion of information from the flash drive will help. This operation can be performed with the help of formatting. Open “My Computer”, select the flash drive, but do not open it. Right-click and select “Format” from the menu that appears. Click “Get Started.” The process may take several minutes. However, when it ends, your flash drive will be absolutely clean. There won't even be any viruses left on it. Take care of your flash drives and keep them “clean”.
Experienced PC users may not have any problems with deleting information from a flash drive, but for beginners this may be an insurmountable obstacle.
How to clean a flash drive from unnecessary files?
How to clean a flash drive from unnecessary files? Nothing could be simpler. Option 1. If there is absolutely nothing you need on the flash drive, then simply format it. Open the “Computer” folder and right-click on the flash drive icon. Select Format. In the window that appears, agree to everything and click OK. In theory, the flash drive will be cleared of all information when formatted. If something doesn’t work out or there is no access to some folders, or some information on the flash drive is still needed, then there is Option 2. Open the flash drive folder, select all the folders there, hover the cursor over the selection and click the right mouse button . Select the “Properties” item and remove all the checkboxes from the attributes. If he asks if this also applies to the contents of the folders, confirm this. Click OK. In principle, this operation can be carried out separately for each folder that does not want to be deleted. After clearing folder attributes, all folders should be easy to delete. By the way, there shouldn’t be any problems with formatting it. Good luck!
>Tip 1: How to clean a flash drive
Possible solutions to the problem
When you enter the question “I can’t delete a folder from a flash drive” into a search engine, the browser usually produces a bunch of information from which you have to select the appropriate problem and solve it. In fact, this is not very difficult to do even for a beginner.
If files from a flash drive are not deleted, what to do with hardware protection
Modern drives have a special lock on the device case. It is he who enables or disables the blocking. It is enough to switch it, and you will be able to save or remove information from the media.
If a folder is not deleted from a flash drive, what to do with software protection?
For an experienced programmer, there are many options for how to remove non-deletable files with software lock from a flash drive, but the average person can try simpler methods:
- Formatting. If there is no valuable information on the drive, then you can do this with the right mouse button and in the options set the file system (NTFS) and the cluster unit size (4096 bytes).
- Removing the virus. If the system perceives a removable disk as a virus and blocks the entire process of working with it, you should check the USB with any antivirus and, if possible, destroy it.
IMPORTANT. If after all the manipulations there is an empty folder left on the USB, you need to restart the PC and delete it again.
How to delete all data from a flash drive if it is being used by another process
This is a fairly common problem and you just need to close this mysterious program if it is known or use a third-party utility (Unlocker, LockHunter, Iobit Unlocker, etc.). Unlocker is one of the best programs to remove undeletable files.
- It integrates independently and quickly into the system.
- Right-click to select the USB drive and click on the line “Unlocker”, “Delete process”.
- If the program cannot perform an action immediately, it will offer to do so the next time the system boots.
- When you “Unlock” a file, it will become free, making it easy to delete.
IMPORTANT. All of the listed applications have a huge disadvantage; they will not be able to warn you about the erroneous deletion of system files.
Presence of errors
It may be that the disk is damaged or the contents are not recorded correctly, then the system generates an error. In this case, you can eliminate it. In the root USB folder, right-click “Properties”, “Tools”, “Check for errors”.
When formatting a flash drive, you need to understand that there can be many usual ways to delete information, but in the case of non-deletable data, the Unlocker file manager can be a good assistant.
Deleting data from a flash drive using special software
In addition to all of the above, it is worth noting another option - shredder programs, which not only delete files from a flash drive, but also completely erase any information from it (not even visible to the user’s eyes). For example, one of the most striking representatives of this “fauna” is Eraser HDD software. The program does not require installation as such, that is, the user just needs to launch it from a shortcut that can be located on an external drive (or even another flash drive). With its help, you can quite quickly and easily delete absolutely all information without the possibility of recovery (using standard operating system tools, this possibility still remains). Of course, there are other analogues, for example, Safe Erase 5. With its help, the user can delete information from a flash drive using one of six methods (for example, overwriting information 35 times). Unfortunately, coping with this program is not as easy as it might seem at first glance. This is due to several aspects: firstly, the program is entirely in English, and secondly, its interface is a little confusing, which can lead to minor problems. The program itself is paid, but users can download either its soft version or download a special tablet.
Why can't you delete files from a flash drive?
If, after all the above manipulations, files are not deleted from the flash drive, this may mean the following:
- Hardware protection.
- Software protection.
- The folder is being used by another program.
- Presence of errors.
If you don’t understand why you can’t delete files from the flash drive, you can try restarting your computer in safe mode and logging in as an administrator. In the folder properties, find the “Security” tab, where you click on the “Advanced” button. Select the “Owner” item and assign yourself to it. Then, using the task manager (Ctrl+Alt+Del), close all processes and try to delete the information again.
How to erase a flash drive and delete files completely
- The standard formatting procedure will help you completely delete files from an external storage device.
- Connect the flash drive to the PC.
- Go to Explorer and select “My Computer” or “Computer”. The name depends on the OS version.
- On the USB drive, click the right mouse button and select the “Format” line in the menu.
- Next, a window will appear where you can select the file system, as well as configure the volume label and cluster sizes. If these values do not mean anything, then we leave everything unchanged.
- Click on the “Start” button.
- Now all you have to do is wait a few minutes and the portable drive will be completely cleaned and ready for use.
However, the standard procedure for formatting an external drive does not protect it from the possibility of recovering information, so it is better to use specialized programs that will more reliably cope with the task of erasing files.
- We use the CCleaner utility.
The utility is completely free and can be downloaded from the official resource.
- Download and install the program. Let's put it to work.
- On the left panel you can see a row of buttons, select “Service”.
- Go to the “Erase disks” tab.
- In the window, select the flash drive (of course, you must first insert the flash drive into the computer).
- The remaining checkboxes must be removed so that the mark is only opposite the flash drive.
- Click on the “Erase” button. After this, the disk will be automatically completely cleaned of all files.
- If the user is using a PC on a Mac system, then the best option would be to use the specialized Disk Utility application.
- Insert the flash drive into the computer.
- Let's launch the application. In the panel on the left, select the disk that symbolizes the flash drive.
- Click on the “Clear” button.
- Next, a window will appear where you will need to select the cleaning quality. We adjust the quality using the slider. It is best, of course, to choose the maximum quality; it will completely protect the portable drive from possible file recovery.
- Confirm the action with the “OK” button. After this, the disk will be automatically cleaned.
Formatting using utilities
Windows cannot format the memory card and that’s it! Then we turn to the almighty Internet and download helper programs.
When working with third-party software, you should be very careful. It is imperative to choose the correct name for the micro SD, otherwise you can cause serious harm to your computer. The choice of file system type also matters. Remember that 32 GB memory cards use FAT32. For more venerable colleagues - exFAT. Additional programs will always clean the drive completely; in this case, creating a backup copy of the data is mandatory.
I will give the most common of them:
- AutoFormat Tool. Quite easy to use. Working with it doesn't take much time. I recommend running as administrator.
- HDD Low Level Format Tool. A thorough program that does low-level formatting. Remember, you will not be able to restore files after using it.
- The utility requires installation on your computer. Intuitive and easy to use.
Standard Formatting
To format using standard system tools, you need to open the Computer and select the removable media that you want to clean from the list of devices.
Right-click on the flash drive icon, select “Format” from the menu - you will see the “Format” window, where you can select the file system and determine the cluster size.
The smaller the cluster size, the lower the speed of the drive, but the disk space will be used more efficiently.
To complete the process, you must click the “Start” button, after which a warning will appear that all data will be cleared, confirming by clicking the “OK” button that the device will be formatted.
By default, formatting is performed in the Fat32 file system, but it is known that NTFS is more fault-tolerant and reliable, so we recommend choosing this system.
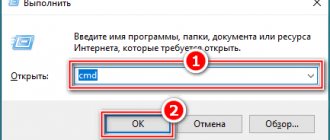
You can quickly format the drive using the command line. To call it, use the Win+R combination by entering the “cmd” command.
In the console, enter the following command, making sure to specify the drive letter:
In this case, the flash drive will be formatted in NTFS format, and the console window will provide additional information about the device.
Causes of the glitch
If a file ends up on a flash drive, but immediately after moving it there are problems with changing or deleting it, this can happen for the following reasons:
- no rights to use the file. Often you need administrator rights to change a file. This can be easily fixed - just restart the computer and log in to the system not through an account, but through an administrator;
- The antivirus program blocks it. The antivirus program even quarantines files that are on a flash drive. To check the presence of a file in the “treatment”, you need to go into the program and delete it there;
- The flash drive is write protected. Some flash drives have a button on the case that turns on protection against writing data from it. This can be fixed by disabling this button;
- the system uses the file. The glitch can be corrected by restarting the computer or deleting the file in safe mode;
- someone is using a file over the local network. Restart your computer or delete the file after some time.
If the listed causes of errors were easily corrected without additional intervention, then you don’t have to resort to formatting.
Ways to remove unnecessary files
If Windows, after the above points, still prohibits deleting the file, then you can use other easy methods. If the question arises of how to clear a flash drive of files that cannot be deleted, then you can use simple options for deleting them.
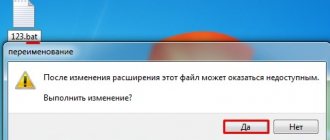
Rename
Sometimes it is enough to change the file name so that it can be deleted. To do this, right-click and select “Rename” After which you can delete the file.
Move a file
If the file can be moved, then you can cut/drag it to the desktop and delete it there.
Button combination
Select the file and press Shift+Delete. The selected file will be deleted forever even without being added to the computer's recycle bin.
Formatting
To do this, you need to go to “My Computer”, find the flash drive among the drives and right-click. A list of actions will be displayed, you need to select “Format” and click “Next” or “Start”.
Removal using programs
CCleaner is downloaded from the official website. The utility is free and open to the public. After downloading, a window will appear, in it you need to click on “Service”, then “Erase Disks”. The program will show the disks on which you can erase information; you will need to select the desired flash drive and click “Erase”.
Second effective program
Unlocker is the official Windows utility; it can also be downloaded quickly and for free. The main thing when downloading is not to agree to the toolbar and uncheck the Toolbar. After downloading, right-click on the unnecessary file and select “Unlocker” in the list of actions, after which Windows will ask for permission to enter data, we agree. A window will appear with four options for action, you need to select “Unblock all”, a window will pop up again, select from “No action” - “Delete” or “Move”.
If after deleting the file is still not deleted, then you need to first rename it, and then just delete it. After deleting, an unnecessary object goes to the trash, where it will also need to be deleted forever. If problems arise and the utility writes “The flash drive is empty,” you will need to create a folder on the media and place the file there. After this, the removal will be successful.
The flash drive was not removed correctly
If, when using files from a flash drive, the computer displays an error related to unsafe removal of the disk, then this can be corrected. To do this, you need to insert the flash drive into the slot, select “safely remove device” in the taskbar and remove the flash drive. After this, restart the computer and repeat deleting the files.
Reboot
Click “Start”, then “Run” and enter msconfig – “Ok”. A system window should pop up, where you need to select the “Startup” button. The selected action will contain the names of the files, where you need to select the name of the file that will not be deleted.
If there is no similar “spy” on the list, then it can be destroyed in another way. To do this, click on the “Disable All” button, then “Change” and “Close”. After the action, a window will pop up about the change after a reboot. Restart your computer and try to delete the unnecessary file again.
System Restore
Through “System Settings”, select the “General” item, where you need to click on “Run system recovery” – “Restore the computer to an earlier state” – “Next”. After these actions, a calendar will pop up, where you will need to select the day when the file was not yet on flash drive (at least approximately).
After clicking “Next” the system will be restored to that day. Don't worry about the safety of your files; they won't be damaged.
Command line
Type chkdsk c: /f/r and click “Next”. Note: C is the name of the disk; if it is written differently, then you need to enter the desired letter. A window will pop up where the system will offer to scan the disk after the first reboot. At this suggestion, enter Y and “Enter.” If the disk is called differently, the check will start immediately. Select “Exit” and “Next”
After this, you can delete unnecessary files. If the drive is called “C”, then you need to restart the computer and simply delete the file from the drive in the usual way.
Conclusion
The above options are applicable for any system glitches, so they can be used if necessary. However, a failure in deletion may not always be caused by the system; sometimes the flash drive itself or any other drive is to blame.
If the above options did not help the flash drive, and it continues to prohibit the deletion of some files, then it has failed. Such a drive must either be replaced under warranty or purchased a new one. Otherwise, the drive will selectively block files without the ability to view or delete them.
How to clear your computer's cache memory
Cache memory has been used in the Windows operating system since the earliest versions. It is a temporary storage of information that can be used by RAM. It is easier for the system to find the necessary data in the cache, and not through an external memory module. Thus, cache memory is a way to quickly access the most popular files. Storing information in a cache Any personal computer has several types of such memory: - thumbnails; — DNS (Domain Name System); - memory cache. If these storage areas are not cleaned periodically, the performance of the computer will noticeably decrease and its performance will slow down. An inexperienced user may not immediately notice any problems or deterioration in performance, but an experienced programmer knows that clearing the cache should be done regularly. By cleaning and deleting temporary files, a significant amount of space on your hard drive is freed up, and this also allows you to solve problems with Internet access. How to clear DNS On your computer, you need to find the command line by clicking the “Start” button (or the Win + R key combination). If you click on this line, a black screen will appear with a cursor at the text entry position. There you need to enter the phrase ipconfig /flushdns. After this, press the Enter key. When the system completes the cleanup, it will notify the user accordingly. How to clear the memory cache You need to right-click anywhere on the desktop to bring up a menu with functions. Select “Create”, then “Shortcut”. In the line indicating the path to the file location, indicate:
% WINDIR% \ system32 \ rundll32.exe In this text, the % sign is the directory where the operating system files are located. To start cleaning, click the “Next” button. To make it easier to use, you can immediately assign a name to the shortcut, for example, Cache clear. How to clear the thumbnails cache Another method is no less simple and fast, but also allows you to free up significant space and improve the performance and operation of the operating system. Through the “Start” menu, find the “Utilities” item. It should have a "Clean up disk" function. The user can specify exactly the disk that he wants to free from unnecessary junk and unnecessary files. Then all you have to do is click “Ok” and wait until the system performs the required actions. Special programs for cleaning your computer One of the programs that allows you to promptly get rid of temporary data and empty the recycle bin is CCleaner. It also successfully copes with unnecessary information from Internet browsers. The program is easy to install; after downloading it to your computer, you need to select the language to use and in a few minutes you can already evaluate the benefits of its options. In CCleaner, you need to select the “Service” item, where all programs and applications available on the PC will be displayed. Files that are checked will be deleted (you can either remove them or select them yourself). In this case, the necessary documents will not be affected. The first cleanup with CCleaner can take about 10 minutes or more. The process will free up anywhere from a few megabytes to tens of gigabytes of free space, depending on how long ago the last purge was. When installed on a computer, the memory will be automatically re-read and checked for unnecessary information. The program will notify the user about this, offering to delete files. In the settings you can set the time and frequency of automatic cleaning. For example, every time you turn on your computer or shut down your work. In addition, the program allows you to configure startup, correct and delete unnecessary information, which also takes up additional space in the PC memory.
Formatting with Flashnul
Download the special utility flashnul. This is a utility for testing removable drives and you need to work with it very carefully, otherwise you may damage data on other drives. Here is the link (you need to copy and paste into the address bar: https://shounen.ru/soft/flashnul/index.html
)
Unpack the program to some disk, for example, D
.
Then the path will be like this: D:\flashnul
.
Now, using the same Win+X key combinations, we launch our command line, where we enter the following command:
cd D:\\flashnul
Once we are in the directory with the utility folder, we need to identify the flash drive.
We write the following: flashnul –p
In the list that appears, find the number of your flash drive and remember it. You can remember the letter, it doesn’t matter.
Let's say that your flash drive has the letter M, then you need to write a command that will erase all data to zero:
flashnul M: –F
Now let’s run a test for controller errors, which will also destroy data:
flashnul M: –l
At the end of the test, run formatting again through the control console
. And the error should no longer appear.
I hope this article fully helped you get rid of the problem of formatting flash drives and memory cards.
Update as of March 26, 2016
I noticed that users are having problems with the Flashnul utility. It consists of an error that flashnul is not an internal or external command. The solution here is simple. First, open the command line and go to the directory where you unpacked the flashnul program, for me it’s drive E. In the line we simply write “E:”
.
Now go to the flashnul directory, to do this you need to enter “cd flashnul”
.
After this, you can enter all the other commands described above. Good luck to you. I am attaching a screenshot of the actions.
Can't format a flash drive even using the methods indicated by yours? You can try using the Usbflashinfo program. After launching the program, click on “get information about the flash drive”
.
VID
and
PID
lines . You copy and paste the values that are indicated in them into a search engine. It is possible that there is a special utility for this memory controller that can be used to perform the formatting procedure. Here is the download link: https://www.antspec.com/usbflashinfo/
You can also use the website flashboot.ru. There are many different programs for flash drives and memory cards from well-known manufacturers.
It happens that no matter how hard you try, but the result is zero, then you just have to throw out the flash drive and buy a new one, hoping that it will not fail for a very long time. If you purchased it recently, then return it under warranty, since you may have a defect. Now you basically know what to do if the flash drive cannot be formatted.
Greetings, dear reader! Remember where we store our favorite and dearest photos and videos? Right! On little helpers, microsd. Everything about them is good, both price and volume. Only one thing is bad. Often an error message pops up on your computer when formatting. Then the question very acutely arises: “The memory card is not formatted, what should I do?” Let's figure it out because you still need to know. After all, we use microdrives in smartphones, cameras, recorders, and readers.
Formatting a memory card removes all old files from it, detects damage and eliminates them. Before formatting, be sure to back up important files on your computer.
VIDEO: How to delete a folder or file that cannot be deleted?
It’s a shame and a shame when you have a flash drive, but you can’t transfer information from your computer to it. When you try to perform this action, the operating system calmly says: “No.” And of course, immediately “dark thoughts” immediately creep into your head: they say, the data is not loading, which means the USB drive is broken, as they say, it has given up its life. However, one should not rush to make such statements. The file or folder may not be transferred to the flash drive due to the fact that it is write-protected. That's all!
Protection is divided into hardware and software. Accordingly, each type of write lock has different disabling methods. Let's learn how to use them. A removable drive should not lie idle, especially if it is brand new, just purchased.
The folder is being used by some program on the PC
The system will refuse to allow you to delete a directory or file if it is currently being used by some program. This will be written in a special notification window. The process (program) that uses this file must be indicated there.
You need to manually end the process in the Task Manager to finally delete the document successfully:
- Remember the name of the process or program that is currently using the problematic folder or file.
- Call up a special menu using the combination Ctrl + Alt + Delete. Select “Task Manager” from it. Or right-click on the panel at the bottom of the screen and select the same manager.
- Find in the list of processes the program that is interfering with the deletion of files. Select it and click on “End process” or “End task”, depending on the version of Windows.
Kill the process of the program that is currently using the file
Agree to force close the program
If the removal still does not work, use a third-party utility for cleaning, for example, Unlocker or any other similar one (LockHunter, IObit Unlocker and others):
- Download the program from the official developer resource. Install it on your PC.
- Right-click on the folder or file you want to delete in Explorer. Select the menu item with the name of the third-party utility. In our case it is Unlocker.
Select Unlocker from the menu
If the process you terminate starts again and prevents you from deleting the file, you probably have viruses on your PC. Check with your antivirus for threats and remove them. To do this, we recommend using a full scan.
Removing protection from a flash drive through group policies
Now let's take a closer look at the protection parameters installed directly in the settings of Windows operating systems. There are two sections for this: group policies and the system registry. By and large, they duplicate each other in some settings, but the priority of the registry settings is higher.
To begin with, if the folder from the flash drive is not deleted, let's consider the actions in the Group Policy Editor. It is called through the “Run” console using the gpedit.msc command.
In its parameters, you need to find the section for access to removable storage devices, enter the options for prohibiting writing to removable drives and disable it, and then save the changes.
How to recover deleted data from a phone memory card
If you notice any problems with the memory card (some data is displayed incorrectly, the flash drive is not recognized by a mobile phone or PC), you need to immediately back up files from the card, format the device, and check it for malware and errors. If the media is working again, the copied information can be transferred back.
If you delete some or all files from a flash drive, you should try to restore them yourself. This can be done in two ways:
- software;
- hardware
The choice of one method or another depends on what you want to get as a result. If the task is to recover lost data, then it is better to resort to the first method
The hardware method is used when the lost information does not play an important role, and the main goal is to restore the flash drive. At the same time, resuscitating files is much easier than repairing the media
To return lost information at home you will need:
- a computer with Windows OS installed;
- card reader with SD adapter;
- special resuscitation program.
The sequence of work when recovering deleted files looks like this:
- Special software is installed on the computer, which can be paid or free. Of course, licensed programs are considered more reliable, but free software is also quite suitable for home needs.
- The gadget turns off, after which the storage medium is removed from it and connected to the PC using an SD adapter and card reader.
- The installed resuscitator is launched, with the help of which previously deleted files are saved to the hard drive.
Fixing problems with deleting folders on a flash drive
Most often, such problems are associated with the fact that some process is currently using the file located in the folder, which makes deletion impossible. In addition, all directories have access levels for different categories of users, which also affects file management. Therefore, we advise you to familiarize yourself with each common option, and only then proceed to follow the instructions.
Method 1: Disabling write protection
Flash drives with a hardware write protection function are now quite rare, but before moving on to more complex methods, we recommend checking whether such a switch is available on the media you are using. If the protection feature is enabled, you will not be able to copy or delete any files. This can be corrected by simply moving the switch in the opposite direction. You can get acquainted with its appearance by paying attention to the image below.
Method 2: Granting delete rights
As mentioned earlier, one of the most common reasons for difficulties when deleting a folder is the lack of rights to carry out such an operation. Most often, such restrictions are set manually by users, but sometimes this happens automatically. This situation can only be corrected by changing access rights through the folder owner’s computer.
If you did not create the directory located inside the flash drive, you should also try this option, be sure to take into account all the notes that will be indicated in the following instructions.
- First of all, boot the operating system in safe mode so that no unnecessary processes are launched, and third-party settings that may interfere with changing rights are not activated. Read more about this operation in our separate material below.
Read more: How to enter Safe Mode in Windows 7/Windows 8/Windows 10
Go to This PC and open your removable device.
Right-click on the required folder and select “Properties” from the context menu.
Here, go to the “Security” tab.
Click on the “Change” button.
O next to “Full Control” and apply the settings.
However, the possible availability of special permits should not be ruled out. Check them out by going to the "Advanced" section.
Click on "Change Permissions".
Now find the element you need, select it and click on “Edit”.
Scroll down the list. There you need to make sure that actions related to deletion are in the “Allow” state.
After applying all the changes, try getting rid of the required folder again.
If this method fails, you will still receive a notification that you do not have permission to delete the required directory. Then we recommend logging into the OS under an administrator account, if this has not been done previously, and trying to clean the library again.
Method 3: Correcting media errors
Sometimes problems with deleting files are due to errors on the media or bad sectors. This happens quite rarely, but there is nothing difficult about checking for errors. Therefore, we decided to put this method in this place.
- Right-click on the flash drive in the “This PC” section and go to “Properties”.
Find the “Service” tab there.
In the "Check Disk" category, click on "Run Check".
Set the scan parameters and run it.
Upon completion, you will be notified of any errors found and future fixes.
After successfully solving various errors and bad sectors, it is recommended to reconnect the media, and only then try to remove the required library again.
Method 4: Terminate the interfering process
We have already said earlier that deletion will not complete successfully when the files in the folder are used by some program. A warning will appear on the screen, where the name of the process will be displayed. It will need to be completed manually if you are sure that no other important or system actions are happening to the objects. This can be done through the standard “Task Manager”.
- Launch "Task Manager" through the context menu on the taskbar or by holding down the key combination Ctrl + Shift + Esc.
Go to the "Processes" tab.
Find the interfering program.
Right-click on it and select “End Process”.
Confirm the action when prompted.
After that, go to the USB drive and try to delete the directory. If some software prevents you from doing this again, you will have to use special programs. We'll take Unlocker as an example:
- Download and install Unlocker. It will automatically be built into Explorer.
- Right-click on the folder to display a context menu. Then select the "Unlocker" option.
From the action pop-up menu, select “Delete.”
Click on the "OK" button.
If Unlocker is not suitable for you for some reason, use any similar software that allows you to clear your device of non-deletable files and folders.
Constantly restarting a process, especially an unknown one, is a direct symptom of a computer being infected with viruses. In this case, after deleting the folder, you will need to perform an analysis for the presence of threats so that similar problems do not arise in the future or even more serious malfunctions appear. You will find detailed guides on combating computer viruses in our other material by clicking on the link below.
Clearing a memory card on Android
To clear the entire drive of information, you need to format it. This software process will allow you to quickly delete all files from your memory card, so you don't have to erase each file individually. Below we will look at two cleaning methods that are suitable for the Android OS - using standard tools and one third-party program. Let's get started!
Method 1: SD Card Cleaner
The main purpose of the SD Card Cleaner application is to clean the Android system from unnecessary files and other garbage. The program independently finds and sorts all files on the memory card into categories that you can delete. It also shows how full the drive is of certain categories of files as a percentage - this will help you understand not only that there is little space on the card, but also how much space each type of media takes up.
- Install this program from the Play Market and launch it. We will be greeted by a menu with all the drives that are in the device (usually built-in and external, that is, a memory card). Select “External” and click “Start”.
After the application checks our SD card, a window will appear with information about its contents. The files will be divided into categories. There will also be two separate lists - empty folders and duplicates. Select the desired data type and click on its name in this menu. For example, this could be “Video Files”. Remember that after moving to one category, you can visit others to delete unnecessary files.
Select the files that we want to erase, then click on the “Delete” button.
We provide access to the data storage on the smartphone by clicking “OK” in the pop-up window.
We confirm the decision to delete files by clicking on “Yes”, and thus delete various files.
Method 2: Built-in Android Tools
You can also delete files using standard tools of the most popular mobile operating system.
Please note that depending on the shell and version of Android on your phone, the interface may differ. However, the procedure remains relevant for all versions of Android.
- Go to “Settings”. The shortcut required to go to this section looks like a gear and can be located on the desktop, in the all programs panel, or in the notification menu (a small button of a similar appearance).
Find the item “Memory” (or “Storage”) and click on it.
In this tab, click on the “Empty SD card” option. We make sure that important data will not be lost and all necessary documents are saved to another drive.
We confirm our intentions.
A formatting progress indicator will appear.
After a short period of time, the memory card will be cleared and ready for use. Click “Finish”.
USB Disk Storage Format Tool
So, the first one is USB Disk Storage Format Tool. You can download it from the official developer’s website; they distribute it absolutely free.
After installing the program, you will need to run it, but before that you need to remember to plug the drive into the USB port. Now let's talk about how to clear a flash drive of files using this software. In general, everything is simple here. At the very top, in the drop-down list, you need to select the connected flash drive to format. Next, select the file system (must be NTFS) and check the box next to Quick format.
If formatting doesn't help
If the device cannot be cleaned using standard means, you can try to restore it using the control panel.
Launch the Control Panel.
Next System and Security /Administration.
Then Computer Management .
In the Disk Management section, select your disk and right-click on it - “ Create simple volume ”
The volume creation wizard will start, in which we click on the “Next” button, and then “ Finish ”.
A new volume will be created. Before further use of the flash drive, it must be formatted using standard means, as shown earlier.
Quick Format option and complete it.
SSD settings for Windows 10
The folder from the flash drive is not deleted: what to do with protection?
So, first, a few words about protection. First of all, pay attention to the presence of a special switch on the flash drive itself. It can be located under the cap or directly on the body. Most often, next to it there is a designation like Write-protect or Lock. Just move the slider to the off position and try deleting the desired directory again.
However, it also happens that even after this the folder on the flash drive is not deleted. What to do in such a situation? Here you will have to check the attributes of the non-deletable directory itself or the files attached to it.
Using the RMB menu on the selected object, go to properties and check that the “Read Only” attribute setting item is not checked. If there is one, remove it and then repeat the removal. But protection can be installed not only in this form. Sometimes it is activated in the operating system settings. We will dwell on this separately, but for now we will continue to consider the simplest solutions.