BitLocker on Windows
- Suitable for: Windows PC owners.
- Advantages: ease of use.
- Disadvantages: available only in maximum and corporate versions of the OS.
How it works
The standard encryption feature appeared in Windows Vista. It allows you to encrypt the contents of any disk and provides access to it only after entering a password. However, there is one caveat: BitLocker is not available in basic editions of Windows.
How to set a password
Find BitLocker through search and open.
Click "Enable BitLocker" next to the desired drive in the list.
Wait for the initialization process to complete.
Oh, enter the code combination twice and click Next.
Select one of the recovery key archiving options and click Next.
Specify the desired location for storing the key and click “Save”.
Click Next again.
Select "Encrypt used space only" if the drive is new, or "Encrypt the entire drive" if it already contains files. Click "Next".
Oh and click Next again.
Click "Start Encryption".
Wait for the process to complete. If necessary, it can be paused using the Pause button.
Now, when you connect a flash drive, a notification will appear indicating that the disk is encrypted. Click on it to unlock.
Enter your password in the window that opens and click “Unlock”.
Now the flash drive will appear in Explorer.
Using system tools
When using a flash drive, various situations may arise when installing and using special utilities is difficult or impossible. And this is where the system capabilities of Windows OS come to the rescue.
Method 1: BitLocker
If you have Windows 7 or higher installed, the system provides encryption of drives and their partitions using the standard BitLocker tool.
There are two ways to launch this tool:
Start Menu - Control Panel - BitLocker Drive Encryption
My Computer - Removable Disk - Enable BitLocker
- So, the launch of BitLocker is accompanied by synchronization,
after which the user is asked to choose the method of unlocking the disk with a password, or using a smart card.
- At the same time, you can also display the “Help and Support” menu and become more familiar with the capabilities of the utility. However, we check the box and enter the password, click “Next” for further work.
- The next message prompts the user to choose how to save the key (it can be saved to a file or printed).
- Select “Save the recovery key in a file” and get a window for selecting the folder to save the key.
- We save the key and receive a text file with the appropriate name in the folder specified for saving.
- At the same time, the text file contains the recovery key and identifier.
- However, let's return directly to the program and perform the next step. The “Next” button takes us to disk encryption.
- Click “Start encryption” and wait for the process to complete.
- It is perhaps worth noting that encryption takes quite a long time and it directly depends on the volume of data. However, the system displays a completion message.
- You need to check the final result. If you open “My Computer”, you can see a rather unusual flash drive icon, which means that the media is password-protected.
- If the flash drive is connected to the computer, the system displays a message asking you to enter a password.
- At the same time, it is possible if it is the user’s personal PC and is guaranteed not to be used by strangers. After entering the password, the autorun window appears and the removable media can be used as usual.
It is worth noting that this tool is quite easy to use and even an inexperienced user can cope with encrypting a flash drive. In addition, BitLocker does not require downloading and installation, which means that it can be freely used in any situation.
Method 2: blocking by the archiver
If there are many different files stored on a flash drive and assigning a password to each one would be too long or impossible, then you can move them into one archive and set a password for the entire archive at once. This method is more convenient and reliable, because you can wrap all the data on the media in one archive, put a password on it and extract the necessary files if necessary (you can work with most files without extracting them from the archive).
To set a password for the archive, follow these instructions:
- On the flash drive, select all the necessary files and right-click on them. Find the “Add to archive” item in the drop-down menu.
- A window with archive settings will appear. On the main page, in the “General” tab, you need to come up with a name for the archive and select an extension. It is best to choose the zip format, because... To open rar archives, another computer must have an appropriate archiver.
- Next, go to the “Advanced” tab. There you can configure recording and encryption settings in more detail, do this as you wish. To set a password, find the “Set Password” button on the right side of the screen. Sometimes this button is located in the “General” tab.
- Now create a password and enter it in the two fields. The passwords in both fields must match. You can also enable the display of symbols when entering a password.
This is a quick way to password-protect large amounts of information on Flash media, but if you forget or lose the password, it will be extremely difficult to restore access to the archive.
In addition to the above methods and software, of course, there is a fairly large amount of various software that is installed on a computer, flash drive or other media, has varying efficiency and level of complexity, so each user can choose the most appropriate solution for ensuring the security of personal data.
Archive password
- Suitable for: those who don’t want to bother too much.
- Advantages: works in any OS.
- Disadvantages: a compromise option.
How it works
Not quite a complete solution, which nevertheless has the right to life and is quite effective for a small number of files. Instead of encrypting the entire disk, you can use the ability to set a password for the archive, which is available in any archiver, for example WinRAR. In this case, the folder with the necessary files is archived, which are retrieved only when the code combination is entered. At the end of the work, a password-protected archive is created again, and the original folder with the files is deleted.
How to set a password
Select the folder for which you want to set a password and call the context menu.
Select "Add to Archive".
Specify the desired archiving parameters and click “Set Password”.
Enter your password twice and click OK.
Click “Ok” again.
Wait until archiving is completed.
Now, when trying to extract files, you will need to enter the previously specified password. You can view the contents of the archive without an access code.
Setting a password on an SD card on Android
You can set a password on the disk either using built-in resources or by installing special programs.
To password-protect a memory card on an Android device, click “Menu” - “Settings” - “Device location and protection” - “Registration data storage” - “Set password”.
If you want to encrypt not the entire card, but individual files, then install the program. The most popular applications in this category are Folder Lock and LOCKit.
Each application on the list is regularly updated and improved to expand the security capabilities of your device and make it even more convenient to use.
Disk Utility on macOS
- Suitable for: Mac users.
- Advantages: proprietary Apple solution, ease of use.
- Disadvantages: cannot be used for a flash drive with files, only for a formatted device.
How it works
Starting with High Sierra, macOS introduced the ability to format disks into the APFS file system, which allows the use of encryption and, accordingly, allows access to the contents of the disk only after entering a password. This is a standard feature, so it is highly stable and simple.
How to set a password
Open Disk Utility through Spotlight or from the Applications → Utilities folder. Click on the “View” icon and select “Show all devices”.
Select the disk in the list on the right, click “Erase” and in the “Partition Scheme” item select “GUID Partition Scheme”.
Now select “APFS (encrypted)” from the “Format” drop-down menu.
Set a password, add a hint, and click Select.
If necessary, change the disk name and click “Erase”.
Wait for all changes to be applied.
When the process is complete, click “Done.”
Now, every time you connect a flash drive to your Mac, you will be prompted to enter an unlock code. Enter your password and click “Unprotect.”
The drive will then appear in Finder.
Protect your flash drive with VeraCrypt
There is an opinion among users that BitLocker does not provide as effective protection as special third-party programs. If you also think so and want to find another way to put a password on a flash drive, use VeraCrypt - a powerful free program for data encryption in Windows, created on the basis of the defunct TrueCrypt project. First of all, go to the developer’s website, download the program and install it on your computer. By default, VeraCrypt uses English, so after launch we immediately go to Settings – Language and change the interface language to Russian.
Now we connect the flash drive and get down to business. In the VeraCrypt “Tools” menu, select “Volume Creation Wizard”.
In the wizard window you will be asked to select a protection option. If you need to encrypt the flash drive completely, you should select the “Encrypt non-system partition/disk” option. You can also encrypt part of the flash drive by selecting “Create an encrypted file container,” which we will demonstrate now. Select the appropriate item, and then click “Next”.
In the next window, set the switch to the “Regular VeraCrypt volume” position.
Next, in the “Volume Placement” window, specify the path to the container file on the flash drive.
It is clear that we do not have it, but it should be so. We create it on the spot in the Explorer window; you can give the file any name and extension. In our example, the file is called data.db.
Click “Next”.
We leave the encryption settings at default, then specify the desired container size and come up with a password.
Now, finally, let’s begin formatting and marking the volume, having first read the “IMPORTANT” note and followed all the recommendations indicated in it.
As a result, a file will be created on the flash drive that cannot be read by any program.
To save data to it, it needs to be mounted. To do this, return to the main VeraCrypt window, select any free letter, click “File”, specify the path to the previously created container and click the “Mount” button.
The program will immediately ask for an access password.
After you enter the password and click “OK,” a virtual volume will appear in the “This Computer” section, which is essentially an encrypted area of the file system of your flash drive. You can work with it like any other partition; when the work is completed, all that remains is to unmount it by clicking the button of the same name in the main VeraCrypt window.
You can use a flash drive with an encrypted container only on computers with VeraCrypt installed. If you want to be able to work with the drive on a PC without VeraCrypt, you will need to download the program files to a flash drive using the Portable Disk Setup feature.
Disks utility in Linux
- Suitable for: Linux PC owners.
- Advantages: ease of use.
- Disadvantages: cannot be used for a flash drive with files, only for a formatted device.
How it works
Modern Linux distributions have an analogue of BitLocker and disk encryption in APFS. The function works in the same way: after setting up, the flash drive can only be viewed after entering the password. It is important not to forget it, since an encrypted disk cannot be formatted without it. Of course, after setting a password, the flash drive will only work with Linux and will not be recognized in other operating systems.
How to set a password
Open the standard “Disks” utility through the search.
Select your flash drive in the side menu and click the minus sign to delete the partition. Please note that all contents will be destroyed! If necessary, save important files first.
Click "Delete" to confirm.
Now create a new partition by clicking the plus sign.
Specify the partition size and click “Next”.
Select the type “Internal disk for use with Linux systems only (Ext4)” and check the box next to “Password protected volume (LUKS)”. Click Next.
Set a password and repeat it, and then click “Create”.
Now, when you connect a flash drive, the system will prompt you to enter a code combination to unlock the drive.
Selecting a data protection method
Nowadays, there is a huge amount of all kinds of software specializing in information protection, because in addition to “independent” programs, almost every flash drive manufacturer has its own solutions that differ in certain features.
Method 1: USB Safeguard
USB Safeguard is a portable utility that does not require installation on a computer.
In order to run it, you must first “reset” it to a flash drive. At the same time, when the program is launched, it “requires” reformatting the disk space of the flash drive to NTFS.
- The utility automatically restarts and the user is prompted to read the license and agree to its terms.
- After the “I Agree” button is pressed, a window appears requiring you to enter a password, confirm it, and provide a hint.
- Enter the password, click “OK” and receive a message stating that the password has been successfully set.
- Now the working window of the flash drive looks like this:
- And in order to enter the application that is displayed, you need to enter a password.
- After the password is entered and the “Open” button is pressed, the user is directly presented with a protected section in which information can be saved.
- At the same time, each restart of the flash drive requires similar manipulations with entering the password, and the user can call up a hint if he forgets it.
Based on the results of using the program, it can be noted that it is quite convenient for regular use, does not take up much space on a flash drive, which allows you to “fill” the media’s memory almost “to capacity.” The only difficulty may be the English interface, which will cause some difficulties for users who do not have sufficient experience in using a PC or at least basic knowledge of English.
Method 2: Lim Block Folder
This program is designed to password protect individual folders that can be located on flash drives and other removable media. Lim Block allows you to separately encrypt each folder and set different passwords for them. In addition, for greater security, you can set a separate password directly on the program so that strangers will not be able to use it.
- So, when starting work, the user is greeted directly by the work field, where you can select various actions, such as, for example, setting a password to launch the utility.
- However, we need to encrypt the folder with the data located on the flash drive, and therefore we click the adjacent button with the image of the folder and get the opportunity to select a specific folder for which encryption is required.
- After selection, the folder is displayed in the work field, and the icon on the left side of the window becomes active.
- After clicking on “Lock”, a window appears with fields for entering and confirming a password,
- And after entering the combination, the program asks if you need to install a hint.
- After all the manipulations, the desired folder is still displayed in the work field, but the icon located below becomes active, by using which you can remove the password.
- When checking the contents of a removable drive, it turns out that the password-protected folder is not displayed among others (even if you enable the display of hidden files).
That is, if before starting to work with the program, there were three folders with files on the flash drive,
then after all the manipulations we get, simply put, a “secret” folder that cannot be detected by an outside user.
Based on the results of the utility’s work, we can conclude that it quickly and efficiently copes with all tasks, and also provides reliable protection for encrypted files. At the same time, it has a simple and accessible interface that even a beginner can understand.
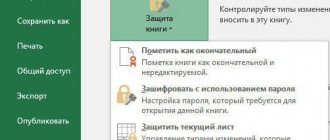
Method 3: Block office data
If the media contains Word, Excel documents, or a PowerPoint presentation, then access to them can be secured by setting a password for the documents. The main disadvantage of this method is that you will need to set a password for each file manually, and if there are a lot of them on the flash drive, this will take a lot of time.
Let's look at the process of blocking a Microsoft Office file:
- Before downloading the document to a separate medium, go to the “File” section, and then select “Save as...”.
- In the window where you will be asked to specify the save location and desired extension for the file, to the left of the “Save” button there should be a “Service” drop-down list. In it, find the “General Settings” item.
- Next, a window opens where you need to set a password. Come up with it and confirm, then apply the changes and save the file.
Thus, even if someone gains access to the media, they will not be able to view or make changes to the documents. However, it will be able to view other, unprotected files without any problems.
Method 4: block using your phone
This method is only suitable for memory cards and only for owners of smartphones running the latest versions of Android or iOS. It is important to note that to block cards, it is also necessary that the phone itself be protected with some kind of password, which you can set through “Settings”, going to the “Security” section, and then to “Screen Lock”.
It is important to note that this method does not work on all phones, and the settings interface may vary slightly depending on the smartphone model. Instructions:
- Go to “Settings” and find in the menu either the “Security” or “Device Location and Security” tab (the name depends on the phone model).
- Next, find the item “Registration data storage” and there should be a “Set password” button.
- Set a password and confirm the action.
VeraCrypt application
- Suitable for: those who need maximum compatibility.
- Advantages: works in any OS.
- Disadvantages: relative complexity.
How it works
One of the most popular free disk encryption applications, VeraCrypt, allows you to provide many different locking settings. It can create separate protected containers and fully encrypt selected drives. To unlock and connect such a drive to the file system, you will need to enter a password. At the same time, thanks to the availability of versions for various platforms, the flash drive can be blocked on one computer and read on any other with VeraCrypt installed.
How to set a password
Download the application from this link and install. Open VeraCrypt and click Create Volume.
Select the Create a volume within a partition/drive option and click Next.
Next, check Standard VeraCrypt volume and click Next.
Enter your account password (user or administrator) to continue and click OK.
Find your flash drive in the list based on size and name, and then click OK.
Click Next again.
Confirm the selected settings by clicking on the Yes button.
Click Yes again to confirm formatting the disk. Keep in mind that all files on it will be deleted!
Select an encryption algorithm. You can leave AES, which is offered by default. Next, click Next.
Enter the password to unlock the flash drive and click Next.
Choose the first option if you do not intend to store files larger than 4 GB on a flash drive, or the second option if you plan to. Click Next again.
Check the box next to Quick format for quick formatting and click Next.
Move the mouse inside the program window until the progress bar is filled and click Format.
Click Yes to confirm deleting the disk contents.
When the process is complete, click OK.
Now click Exit to exit the disk creation interface. All is ready.
To unlock the flash drive, open VeraCrypt and click Select Device.
Find the drive in the list and click OK.
In the main application window, click the Mount button.
Enter the password to unlock the flash drive and click OK. Now it will connect to the system and appear in the file manager.
When you are finished working with the flash drive, launch VeraCrypt, select the disk and click Dismount to disconnect.
Third Party Applications
Programmers have released many different programs that allow you to organize high-quality data protection on flash drives. Here are just a few of them:
Rohos Mini Drive
Using this compact and free utility, you can effectively password protect a specific partition on your drive. Alas, it is impossible to “lock” the entire drive with its help. A special feature of this utility is that it creates a special partition on the flash drive where it writes protected data. The free version of Rohos Mini Drive can work with 8 gigabytes of information.
Next, let's look at the functionality of the program in more detail:
- After launching the program, click “Encrypt USB drive”
- Rohos Mini Drive independently identifies the flash drive. Select the item: "Disk options" .
- Next, set the drive size and letter. It is better to choose a file system like a flash drive. Click OK to confirm the selected parameters.
- At this stage, enter the password twice and click “Create Disk”.
- Now a password-protected sector will appear on your flash drive. To gain access to this sector, you need to run one of the files: run the file “Rohos mini.exe” if the utility is installed on this computer or “Rohos Disk Portable.exe” if this utility is not on the computer.
- After starting the program, all you have to do is enter your password and click OK .
- The protected drive will appear in the list of hard drives. You can transfer your most valuable data to it.
To hide our secret drive (in our example, drive R), we find the Rohos program icon in the tray, right-click on it and turn off the drive.
To protect yourself in case you forget your password, we recommend creating a password reset file. To do this you need to do the following:
- Open the Rohos disk and select "Create a backup copy" .
- Select "Password reset file" .
- Next, in the window that opens, enter the password that you created when creating the disk, click “Create file” and select a location to save it on your computer.
USB Flash Security
Another free program, easy to learn, with a minimum number of settings. However, it allows you to effectively protect data on a flash drive using a password.
To download this utility, go to the website: https://kashu-sd.co.jp/en and download the program by clicking on the button: “Download Free edition (up to 4GB,v4.1.13.19)”
After launching, the program itself will determine the capacity of the flash drive, its size and file system. All you have to do is click on the “Install”
Next, a warning will appear that during the operation on the flash drive, all data will be destroyed, so transfer it to your computer in advance. Of course, this will create certain inconveniences when working with a flash drive, but this is the peculiarity of this program.
Next, you need to enter a password and password confirmation. in the “Hint” in case you forget your password. Then click “OK”.
A window will appear again warning you that the disk will be formatted and all data will be deleted. You need to check the box and click the “Begin the installation” .
Now your flash drive will be displayed in the section: “Devices with removable media”
When you open the flash drive, you will find the file “UsbEnter.exe” that you need to run.
In the window that appears, you need to enter your password and click “OK.”
Now your flash drive has acquired secret status, and you can transfer the corresponding files to it.
How to put a password on a flash drive 8 GB, 16 GB, 32 GB
It doesn't really matter how much capacity your drive has. In any case, you can use one of the given tips :
- if your drive is no more than 2 GB, then you can use the trial version of USBSafeguard, RohosMiniDrive, or use the same BitLocker, you can also archive files.
- if the drive has large volumes, for example 8, 16 or 32 GB, then we recommend either purchasing a USBSafeguard license, or using the same BitLocker if you have Windows, or using the free TrueCrypt data encryption program.
Using an encrypted flash drive
If, after encrypting a flash drive, you go to “My Computer” and look at this flash drive, you will see that it is recognized as an unformatted flash drive.
For all other programs, the flash drive will be recognized as unformatted
If you try to view the contents of an encrypted flash drive, Explorer will prompt you to format it.
There is no point in using an encrypted flash drive without entering a password.
To use an encrypted flash drive, go to the main VeraCrypt program window. Then select a free letter to mount the flash drive and click the “Device…” button
Select the drive letter to connect the decrypted flash drive
A menu will open with a list of available drives. Select the encrypted flash drive and click OK.
Select the flash drive from the list of devices
You will return again to the main menu of the program. Click the "Mount" button
After selecting the flash drive, click “Mount”
Now enter the password to decrypt the data on the flash drive.
Enter the password to decrypt the flash drive
After you have entered the password, confirm your entry by clicking on the “OK” button.
Click "OK"
Once you have entered the correct password, you will see the local drive appear. This disk will contain all your data, which you will have access to as long as the flash drive remains mounted.
The decrypted volume was successfully mounted
A local disk with your data will appear
After finishing working with the encrypted data on the flash drive, select the flash drive in the list of devices and click the “Unmount” button. After this, no one will read your data without knowing your password.
Click "Unmount"
Once you unmount the flash drive, the local disk will disappear and no one will be able to read your encrypted data.
After unmounting the flash drive will be unrecognized again
Please note: Always unmount the VeraCrypt volume before physically removing the flash drive from the computer. Otherwise, the encrypted data on the flash drive may be damaged and the entire volume will be unsuitable for decryption.
Always unmount your VeraCrypt volume before removing the flash drive from your computer
In case you inserted an encrypted flash drive into your computer, Windows may prompt you to format the flash drive. There is no need to do this, as in this case you will lose your encrypted data!
No need to agree to format a flash drive using Windows