Methods for creating a local Wi-Fi network
To create your own Wi-Fi network, you need to have two things:
- modem with Internet access;
- a laptop or computer with a network adapter that provides access to a Wi-Fi network: if the device is able to see the Wi-Fi network and connect to it, then it can distribute it.
Windows 7, 8 and 10 have built-in tools that allow you to create a network. But if for some reason they are not suitable for you, then you can use third-party programs that simplify the setup process.
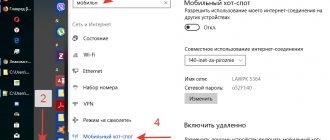
How to set up a router
In Iota, bypassing restrictions on WiFi routers is not required, since the device was originally designed to connect to the Internet. Routers have a connector to which a modem from the Yota company is connected. This is the best option for using the connection on other gadgets.
To connect and distribute the Internet, the subscriber can use OpenWRT or dd-wrt firmware. In them, the user has the opportunity to change TTL parameters using the graphical interface and command line. But purchasing such a device is not available to every client, so it is worth considering other available methods of distributing a connection via WiFi.
In order for the device to distribute the Internet, the setup will have to be done through a computer, since changing the TTL through the smartphone itself is impossible. The process of changing data is described in detail; you just need to follow the instructions for changing parameters on your PC.
Read about Yota Tariffs Yota Tula region and Tula in 2020 for phone: official website
How to end a giveaway
Once the Wi-Fi network is no longer needed, it can be closed. To do this, in the command line console, opened with administrator rights, you need to enter the command netsh wlan stop hostednetwork.
We close the network with the command netsh wlan stop hostednetwork
To restore the network, follow the steps described in the “Creating a network” paragraph. If at the same time you want to change the password, then execute the command from the second step of the “Create a network” item, entering a new value instead of Y.
How to quickly distribute wifi from a laptop - 3 simple commands
From time to time I come across situations when I need to quickly set up Internet distribution via WiFi from my laptop and there is no special program at hand. And now my router has given up life and left the house without the Internet. And not so long ago, a friend’s phone refused to connect to my router and we quickly organized an additional wifi signal from my laptop, which saved the situation. And 3 commands help me with this: netsh wlan set hostednetwork mode=allow netsh wlan set hostednetwork mode=allow ssid=FastWifi key=12345678 keyUsage=persistent netsh wlan start hostednetwork
Below the cut I will tell you in detail how and what needs to be done and show you the example of setting up Windows 7.
I must say that the guide I am describing is not very unique. You can find a similar guide on the Internet, but I think that a well-designed and up-to-date guide on Giktayms will be very easy to read and use.
Step 1:
First, we need to turn off the Internet on our laptop.
Step 2:
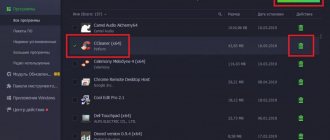
Now we find the command line. To do this, open the “Start” menu and enter the query in the search line - cmd
Now we run it as administrator by right-clicking on the icon that appears.
Step 3:
Enter the first command: netsh wlan set hostednetwork mode=allow
Note:
The standard CTRL+C/CTRL+V does not work in the command line, but by copying a line you can paste it by right-clicking in cmd and selecting “paste”
If all is well, then we get this picture:
Step 4:
Enter the details of your network to be created, its name and password, using the command: netsh wlan set hostednetwork mode=allow ssid=FastWifi key=12345678 keyUsage=persistent
Where “FastWifi” is the name of the network, and “12345678” is the password for it.
This is what we get:
Please enter only English letters and/or numbers for your login and password.
Step 5:
And finally, enter the command that will launch our access point: netsh wlan start hostednetwork
We see:
Step 6:
Now we need to transfer the rights from our current Internet to our new “router”. To do this, go to the “Network and Sharing Center”, there follow the link “Change adapter settings”.
Find your Internet icon, right-click on it, select “Properties”. Next, select the “Access” tab, check the box “Allow other network users to use this computer’s Internet connection” and in the “Connect to a home network” list, select our new connection that we just created.
Step 7:
Turn on the Internet and enjoy the result
If you want to give full access rights, and not just access to the Internet through a browser, then in the “Accesses” tab, click “Settings” and check all the necessary boxes.
Total:
Ultimately, you only need to remember 3 commands:
- netsh wlan set hostednetwork mode=allow - netsh wlan set hostednetwork mode=allow ssid=FastWifi key=12345678 keyUsage=persistent - netsh wlan start hostednetwork
And you can set up the Internet in 5 minutes, and on the configured computer you will need only 2 commands: - netsh wlan start hostednetwork - to start the access point - netsh wlan stop hostednetwork - to stop the access point
ps It is worth noting that this method is still temporary, since when you restart the laptop, the network turns off and you need to start it again via the command line, so I recommend looking at high-quality wireless routers so that you don’t have similar problems at home.
We distribute WiFi using built-in Windows tools.
All you need for this is just a wireless adapter or card that supports MS Virtual Wi-Fi technology - all modern wireless adapters support it. First you need to go to the “Network and Sharing Center”. To do this, look for the network connections icon on the right side of the clock and right-click on it:
In the menu that opens, select “Network and Sharing Center.” Next, you need to find the “Setting up a new connection” section.
Click on it and launch the “Connection or Network Setup Wizard”:
In it you need to select the item “Set up a wireless computer-to-computer network” and click Next.
This window is informational - just click Next.
Now you need to enter the parameters of the Wi-Fi wireless network being created: “Network name” or SSID; It is better to leave the “Security Type” as default – WPA2-Personal. In the “Security Key” field, enter the so-called WiFi password - an alphabetic, numerical or mixed sequence of no shorter than 8 characters. Check the “Save this network settings” checkbox. Click the Next button.
Everything is ready and you can connect your tablet or smartphone. But you need to additionally enable and configure sharing. To do this, click on the “Enable Internet connection sharing” button.
Sharing enabled. Click the “Close” button. All that remains is to configure it. To do this, open the “Network and Sharing Center” again:
Here you need to select “Change advanced sharing settings” in the menu on the right. The following window will open:
If you want connected devices to see open folders and network printers on this computer or laptop on the network, check the “Enable network discovery” and “Enable file and printer sharing” checkboxes. After this, you need to click the “Save changes” button.
At this point, the wireless network settings are complete, the laptop will distribute Wi-Fi and you can connect devices to it: tablets, smartphones, media set-top boxes and TVs.
Wi-Fi distribution without borders
The operator has clearly divided tariff plans for each type of equipment and connection method. If the established rules are violated, the data transfer speed is limited. To determine which gadget has a SIM card installed, the provider uses:
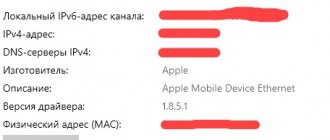
- IMEI is a unique digital code. It is assigned individually for each device. Moreover, on Apple devices it is impossible to change this parameter.
- TTL is a number that reflects the maximum number of devices that data can be transmitted through. It is used to identify the “duration” of traffic. Most often the indicator is 64.
Users simply change this data to start modem mode on Yota. This can be done manually or using an installed application. Moreover, you don’t need to pay anything, just download the program from the official website and complete the algorithm of actions.
How to remove the limit on iPad and iPhone
You can also remove restrictions from devices that run on the iOS operating system. Bypassing Yota blocking is not difficult; the subscriber only needs to follow a simple algorithm of actions. First, a SIM card is inserted into the device, after which you need to connect to the Internet. If the network does not connect automatically, the subscriber must:
- go to the gadget settings section;
- find a Cellular connection point and go into it;
- open Cellular Data;
- then in the window that opens, fill in the APN data, where internet.yota is indicated;
- All other parameters are left empty and the changes are saved.
Read about Yota Current tariffs of the Yota operator (Yota) in 2019
The iPhone should be restarted after these manipulations, and after rebooting the gadget should connect to the network. Bypassing the restrictions is not so difficult; to do this, you need to specify the value not 64, but 63 in the TTL item via a computer. To do this, it is more convenient to use automatic TetherMe; you will first need to download this program. First, enter the command sysctl -w net.inet.ip.ttl=6, then the data is saved and the device is rebooted.
Using a modem to transfer data
There are several ways to distribute a Wi-Fi network from Iota to third-party devices. To configure, you must run the command line with admin rights. To do this, the subscriber must:
- go to the Windows search bar, and then enter CMD in it (the search bar is located in the “start” menu on the computer;
- The user will see the search results, select the required item, and right-click on it;
- Now the run as administrator line is selected in the menu;
- a window will pop up on the screen in which the subscriber writes “netshwlansethostednetworkmode=allowssid=WiFikey=22233344 keyUsage=persistent”;
- where the word Wi-Fi is indicated, you should write the name of the selected network;
- Also in the registered address there are numbers “22233344”, they should be replaced with any other digital combination.
When the procedure is completed, a driver will be installed on the laptop or PC, and a network adapter will be created that operates wirelessly. To start the work, you need to register “Netshwlanstarthostednetwork”. If you need to stop work, the word “start” changes to “stop”. Then the client proceeds to general access settings:
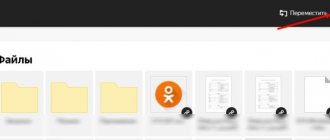
- in the program tray, the user should find the WiFi icon, and then click on the network management item;
- if modification of parameters related to sharing is required, all items are checked, only “Password” is skipped;
- if it is necessary to modify the network adapter, the subscriber goes to the required tab, and then clicks on “Properties” and goes to “Access”.
- in this tab the client can allow other devices to use this network;
- after clicking on the network connection item, the user selects a suitable connection and saves the selected data.
- note
- The process can be simplified using the VirtualRouterPlus utility. When it is installed, a new password and network name are set, and an active connection is additionally connected. This is how Yota is bypassed.
Read about Yota Eta technical support phone number