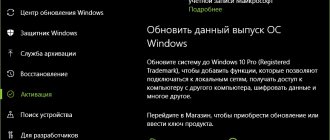
IPv6 protocol activation
Activation and productivity of protocol version 6 is possible with a wired connection to the network of an Internet communication provider.
Also, to perform computer work using IPv6 without access to the Internet, you need to check with your provider whether the company uses a DHCP server. IPv6. Important! If the Internet is distributed through a wireless router, the connection will need to be made in the router settings. To check whether it is possible to activate Windows 7/8/8.1.10 operating systems that are already ready to work in IPv6 networks, you need to go to “Start”, then “All Programs”, select “Accessories”, then “Run”, in the window that appears write “ ipconfig" and run the command by clicking the ok option
Lack of response can only mean one thing - manual configuration is required
To check whether it is possible to activate Windows 7/8/8.1.10 operating systems that are already ready to work in IPv6 networks, you need to go to “Start”, then “All Programs”, select “Accessories”, then “Run”, in the window that appears write “ ipconfig" and run the command by clicking the ok option. Lack of response can only mean one thing: manual configuration is required.
Note! IPCONFIG is a command that is used to display the current TCP/IP protocol settings specified during automatic configuration of DHCP network interfaces
Setting up IPv6 (if the protocol is supported by your provider)
If your Internet provider uses the modern IPv6 protocol, then in most cases manual configuration of the settings is necessary. Almost all providers use a server for automatically distributing unique IP addresses to all their subscribers, this is called a DHCP server. If this protocol does not have access to the Internet (network), this means there is a technical error on the provider’s side.
What to do? First, you need to restart your computer or laptop, in some cases this helps fix the Internet connection error, however, if this does not help, then you need to call the technical support of your Internet provider and wait for the problem to be resolved on their part. There is an important point here: you can try to reboot only with a direct cable connection to the computer, without a router.
Manual setting of IP and DNS for TCP/ IPv6
Everything is simple here. On a computer running Windows OS, press the Win + R key combination and enter the ncpa command in the “Open” line. cpl – then click “OK”.
Go to the connection properties of the network card (by default it is called “Ethernet” or “Local Area Connection”). To do this, right-click the shortcut and click “Properties”. Next, on the “Network” tab, look for the line “IP version 6 (TCP/IPv6)” and go to “Properties” as shown in the figure below:
Here you can opt for manual configuration and specify the IP and DNS provided by your provider yourself - “Use the following IPv6 address” and “Use the following DNS server addresses”. If there is no static data, you can check it with the technical support of your Internet provider.
How to fix No IPv6 network access
Classic profiteroles with custard
Sometimes, when connecting to the Internet via a Wi-Fi network or via a regular cable, a problem arises that the phrase “Without network access” is written in the connection window. For inexperienced users, this inscription may cause panic, although there is nothing terrible about it, and the problem can be solved in just a few clicks. To understand the essence of the problem, you need to understand what IPv6 is. Any device that has the ability to access the Internet receives its own IP identifier or IP address when connected to the network. This is a unique symbolic name that provides a connection and without it you cannot use the Internet. In the 70s, when the Internet just began to emerge, a protocol was created for connecting, or rather obtaining, IP addresses, which was called IPv4. Each address in this protocol consisted of 32 bits, which were represented by four numbers of 8 bits each separated by dots. The point is that the number of such addresses was huge, but not infinite. At that time it seemed that this was quite enough, but the 2000s showed that the developers were very mistaken then. It was estimated that by 2009 all IP addresses would be occupied and new users would not be able to connect to the network, so a new version 6 of the protocol, called IPv6, was created. The peculiarity of this protocol is that when a new subscriber connects, the provider automatically assigns him an IP address. That is, the user does not need to enter data manually. A no-access problem means that these addresses have not been assigned. It’s worth mentioning right away that you won’t have to enter anything by hand and to solve the problem you just need to do a few simple steps.
- In the lower right corner next to the clock, find the connection icon and click on it. In the window that opens, find the line “Network and Sharing Center.”
- Find the required connection in the window that appears and click on it, after which another window will open.
- Click on the “Properties” button.
- Find the line with IPv6 and check if it is checked. If not, then install it. The problem will most likely go away on its own. If the checkbox is checked, but there is no connection, then you need to select this item and click “Properties”.
- Put a dot on the inscription “Obtain an IPv6 address automatically” and do the same “Obtain a DNS server address automatically”.
- After this, the system will make a request to the provider’s servers and the problem will be resolved.
After completing all the steps described above, the system will receive an IP address, which the provider will assign automatically, and everything will work as it should. If desired, the user may not use the DNS server addresses of his provider and use the servers of Google, Yandex or other options. They can be found on the Internet, and in order to access them you need to put an o and enter the found addresses from the Internet in two fields. (For more details, read the article DNS server is not responding, what should I do?) Another solution to the problem would be to reset the network adapter settings. To return all settings to their original and working state, enter the command “cmd” in the “Start” menu in the search bar. After this, a black window will open where you need to enter “netsh int ip reset resetlog.txt” and confirm the entry. After this, all that remains is to restart your computer and start using the Internet.
How to reset network settings
If the computer notifies the user that there is no Internet connection due to lost settings, they can be restored by performing the following steps:
- We launch the command line.
- We write the cmd command.
- In the window that appears, enter “netsh int ip reset resetlog.txt” and confirm the action.
- We reboot the computer.
- Testing the functionality of the Internet.
If the problem concerns more complex PC settings, you should seek help from a professional technician. To properly connect your PC to the Internet initially, you need to ask your service provider for configuration settings. Most often, this information is individual and may differ in each individual case.
Instead of an afterword
Asus rt n10
It remains to add that IPv6 without access to the Internet (network) is not the biggest problem for modern users who use the IPv4 protocol on their home/office terminals or local servers. In fact, by default the IPv6 system, although it is declared to be supported by the same Windows systems, is nevertheless deactivated so as not to create unnecessary difficulties for users.
For that matter, the issue of activating and configuring this protocol is only relevant when this technology is supported by the operator providing provider services. Otherwise, you don’t even have to try to configure anything.
IPv6 vs IPv4 advantages
Implementing Anycast DNS
Now let's dig a little into history. Initially, a protocol of this type was created back in the 70s of the last century and received the abbreviation IPv4. With the population of the Earth at that time (just over five billion), no one seriously thought that this system was capable of creating only four billion addresses. It was believed that this would be enough for all generations.
The protocol itself implied the use of a 32-bit address consisting of eight digits. This is how so many identifiers could be generated. As it turned out, IPv4 was ineffective (although it is still used). The fact is that the increase in the number of mobile devices in recent years has put developers at a dead end (each device must be assigned a unique, never repeated external and internal identifier).
It was then that the understanding came that the system needed to be replaced. First, the ST/ST2 protocol was created, which received the unofficial name IPv5. In practice, it was not widely used. It was only used as an add-on to IPv4, and then only by some companies that tested it.
A global breakthrough was IPv6 technology, which involves generating an IP address 128 bits long. If anyone hasn’t realized yet, there are millions of times more options for creating unique combinations here. In general, according to many leading experts, the number of generated addresses is practically unlimited.
Please note that the protocol itself, as surprising as it may sound, was developed back in the early 90s, and only now received distribution and software support, and even then not from all providers. Thus, if a user sees a notification that the system has the IPv6 protocol installed without access to the Internet, it may very likely be that the provider itself does not support such Internet access technology. In other words, it simply does not have a DHCPv6 server installed, which is responsible for all addresses.
There is Internet access, but the error remains
This situation may well exist. The reasons may be different - most often when connecting through a proxy server. However, there is only one solution. Press Win+R, enter gpedit.msc - this will take you to the Local Group Policy Editor. In the menu on the left, go through the following items: “Local Computer” Policy - Computer Configuration - Administrative Templates - System - Internet Communication Management - Internet Communication Settings. Now, on the right side of the window, find and enable “Disable active probing for network connection status indicator.” In Windows 10, this setting is called "Turn off active network connection health checks." Please note that now, even if there is truly no connection, the message will not appear.
Setting up IPv6Teredo in Windows 7.8
There are two ways:
1. Use a ready-made batch file for your city (run as Administrator!), written for the average user of the Russian version of Windows 7/8, and then check its functionality.
2. Or make the necessary settings yourself:
— — — — — — — — — — — — — — — — — —
Step I. Remove unnecessary ones
My Computer (context menu) – Device Manager View – Show hidden devices.
Feel free to delete only what is related to Teredo, ISATAP, 6to4 and IPHTTPS:
We check through the command line (start -> run -> cmd, or the key combination WIN + R)
Step II. Service setup
First we need to enable the "IP Auxiliary Service" service (if it is disabled)
My computer (context menu) –> Management -> Services Look for “IP Auxiliary Service”, call properties, set the startup type to “Automatic”
Step III. Purpose of DNSv6
For this I can recommend using Google DNS IPv6
Without setting up DNSv6, you will not be able to open sites in the browser using their domain name. We do not touch the IPv4 settings.
Step IV. Installing and Configuring Teredo
Launch “Local Group Policy Editor” Start – Run – gpedit.msс (Editions: Professional, Corporate, Ultimate)
(Installing gpedit.msc in Windows 7 Starter, Home edition)
Default Teredo classification -> Enable -> Enabled state Teredo update frequency –> Enable –> 30 Teredo state –> Enable –> Corporate client Teredo client port -> Not specified Teredo server name –> Enable –> Select from the list:
Let's move on. For more productive operation of IPv6, we completely disable other tunneling technologies:
6to4 Relay Name -> Disable 6to4 Relay Name Resolution Interval -> Disable 6to4 State -> ENABLE -> Disabled State IP-HTTPS State -> Disable ISATAP Router Name -> Disable ISATAP State -> ENABLE -> Disabled State
Step V. Configuring the interface/routes
Start – Run – cmd (or key combination WIN + R)
And in the “Interface List” section, find out the Teredo interface (if there is none, reboot)
It remains to execute the last 2 commands
wait a few seconds and check IPv6 functionality:
Method one. 6to4 relay
- Real IP address (static, that is, permanent): 82.193.89.206
- Router: ZyXEL NBG-418N v2
- Provider: Balticom
- "Server" IPv6: 192.88.99.1
In order for it to work, you need to make sure that the IP address 192.88.99.1 is available. This IP is called "6to4 Relay anycast address". The IP address is “floating” and, depending on the provider, can be located in different regions. In my case, it is located in Russia. You can check availability with the ping command or traceroute to find out where it is located.
Next, we need to configure the router itself. First, we set up the Internet using the IPv4 protocol (or simply wan)
Go to Network -> WAN
Next is the IPv6 tab
All that needs to be specified is our anycast IP address and a couple of DNS servers. The router will generate the remaining parameters itself.
I won’t explain how it works, but I’ll try it another time when I write how to set up MikroTik.
After this you need to make sure that everything works. It is enough to ping google dns ipv6
On the router the final result will be like this
What is IPV6 without Internet access
Today, Internet users use IPv4, which was created at the end of the last century. Each IP address consists of a 32-bit system and displays 4 numbers of 8 bits. This address approach allows us to obtain more than 4 billion unique IP addresses.
At the beginning of the Internet’s popularity threshold, it seemed more sufficient, but time passes, the information world develops and the old is replaced by the new, and this new one is IPv6. In 1992, the unique technology IPv6 without access to the Internet entered the ranks; the length of the IP address reached 128 bits, so the available numbers of identifiers increased to limitlessness.
Important! The name IPv6 or Internet Protocol version 6 is a new protocol format for simultaneous use with ipv4, the task of the new technology is to simplify the operation of routers
Solving problems with Internet access in Windows 10
The solutions that we considered for the “seven” and “eight” are also suitable for the “ten”. But the Wi-Fi restriction in the “top ten” can be removed in other ways. First, you should select the network type:
- Right-click on the network icon in the tray.
- Select Network & Internet Settings.
- Go to the "Edit connection properties" section.
- Place the marker on "Private".
If the Internet on the laptop still does not work, return to “Network and Internet Settings” and click on “Reset Network”. Next, follow the prompts.
What to do if IPv4 without internet access or no network access
To begin with, I advise you to follow a few simple recommendations and try to determine the cause:
Restart your computer or laptop. It's a reboot, not a shutdown. If you are connected through a router, then reboot the router by completely turning off the power for a minute. Remember what you did before the Internet stopped working, and the status without Internet access appeared next to IPv4
It is very important. Maybe you changed some settings, or installed something. If your Internet is connected directly to your computer (without a router or modem)
then, if possible, connect it to another computer. It is possible that the problem is with the Internet provider. Call your provider's support and ask. If you have a router installed, and the Internet does not work on any device that is connected through it, then the reason is in the router itself, or the provider. We call support and check the router settings (after rebooting it). If the Internet does not work on only one computer, then we are looking for the reason on it. More on this below in the article. Temporarily disable your antivirus.
Let's look at some more serious decisions.
Running troubleshooting
Right in the “Status” window, click on the “Diagnostics” button.
The “Problem Diagnosis” will start and then the result will appear. Most often you can find the following errors:
Depending on the problem you find, you may be able to apply the solutions in the following articles (if Windows doesn't fix it automatically):
If the error was not detected, or the tips from the articles linked above did not help you, you can also check the TCP/IPv4 protocol settings.
Setting up an IPv6 Internet connection on a Windows 7, 8, 10 computer
The second option occurs when the computer is connected to the Internet directly with a cable, and not through a router. How to properly configure an Internet connection via IPv6 on Windows 7, 8 or 10?
To do this, go to the “Network Control Center”
Next in “Changing adapter settings”
Then we find the connection through which you access the Internet from this computer - cable Ethernet or wireless. Right-click on it and open “Properties”
And we find here the section “IP version 6 (TCP/IPv6)”
Double-click on it with the left button and get into the IPv6 settings.
- By default there are no parameters here, which is relevant for most cases. However, your provider may require you to enter some data to connect.
- And vice versa, if the checkboxes are set to “Obtain IPv6 automatically” and “Obtain DNS automatically”, and there is no access to the Internet, then it is very likely that the provider requires you to specify your own parameters here.
You should check with your internet service provider for this information. But what we can do right now is to register public DNS servers for IPv6 from Google. Perhaps they will help get rid of the Internet access error using this protocol.
Check the box “Use the following DNS server addresses” and enter the values:
- DNS1 - 2001:4860:4860::8888
- DNS2 - 2001:4860:4860::8844
Why WiFi doesn't work on Windows 8
Let's clarify the reasons
WiFi connection problems on a computer with Windows #8212 are not uncommon. To understand why this is happening, before setting up wifi on Windows 8, you need to clarify whether the wireless connection worked on this PC before or did not exist initially. Because in each case the reasons will be different. And they most often consist of the following.
There has never been a Wi-Fi connection on the computer
- The Wi-Fi adapter is missing or not turned on.
- The driver for the Wi-Fi adapter is not installed.
- The access point signal level is low (or there is no signal).
- Incorrect connection settings.
Laptop power management
Mobile PCs are trying to save energy in an extravagant way: they cut down on the power of the adapter. Prohibit disabling the Wi-Fi module.
- Lower right corner of the desktop: right click on the Network icon.
- Open Network and Sharing Center.
- Click the Adapter Properties tab.
- Select your wireless interface.
- Right click.
- Expand Properties.
- Click Customize... below the name.
- Open the Power Options tab and disable turning off the device.
![Error [Steam API dll is missing]](https://rec-ip.ru/wp-content/uploads/oshibka-steam-api-dll-otsutstvuet-330x140.jpg)