On a local network, you can not only exchange files, but also share a printer. A very useful feature for both home and office. In this article, we will look at the process of setting up a network printer on a computer with Windows 10. I will show you the entire process: from changing the printer sharing settings to connecting the network printer on other computers on the local network. I have already checked everything on my equipment and took the necessary screenshots. I managed to set everything up, everything works great, which means everything will work out for you too.
But first, let's figure out how it works, how you can use this connection diagram, and what the nuances are. When you understand how something works and works, it’s much easier to customize it.
What is a network printer for and what is it?
As a rule, we have several computers, but there is only one printer, and it is connected to one computer. And in order to print from different computers or laptops, you need to connect to the printer directly each time (using a USB cable), move the printer, etc. This is very inconvenient. If all your computers are connected to the same network (to the same router or switch), then they are on the same local network. You just need to change some sharing parameters in Windows settings and all computers will be able to not only exchange files, but also access the printer that is connected to one of the computers on the local network.
For example: our printer is connected to a PC, and the PC is connected to the router via a network cable or Wi-Fi. On this desktop computer we set up printer sharing. And you can send files for printing from all computers and laptops that are connected to the same router.
Note! This connection method is relevant for those printers that do not have the ability to directly connect to the router. Many modern printers support remote printing. This means that they can be directly connected to the router using a Wi-Fi network or network cable. Such a printer will also be accessible from all devices on the local network. But we no longer need to configure a network printer on a specific computer. And we won't need to keep this computer always on so that other devices can print. The printer operates autonomously, is always on the local network and is ready to print from any device.
If the printer does not have network interfaces (LAN, Wi-Fi), then all that remains is to connect it to a computer and set up access via the local network. Previously, in Windows 10, this could be done using a homegroup. But since it was removed in Windows 10 1803 and in new versions there is no longer such a function as “Home Group”, you will have to configure it manually (without a setup wizard).
You can print to a printer connected to a computer running Windows 10 from other computers running the same Windows 10, Windows 8, Windows 8.1, Windows 7. But problems may arise with Windows XP. But today this is no longer very relevant.
Surface Pro
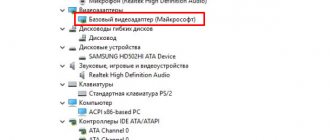
Windows 10 generally does a good job of automatically finding and installing both wireless devices and wired printers. However, sometimes you may still encounter certain problems when connecting an older generation printer. This is not only because the device is no longer supported, but also because the software currently lacks basic drivers for printers and scanners.
If you or your company are still working with older dot matrix, inkjet or laser printers (from HP, Canon, Epson, Brother, etc.) that Windows 10 refuses to automatically recognize, you may need one of several methods for installing incompatible devices. However, you will have to delve into the advanced settings and install drivers.
Here we will describe several possible sequences of actions that will allow you to use an older generation printer that is not supported, or that the computer simply does not see.
How to install a printer using advanced settings
If the system does not automatically recognize your old printer, you can add it manually, depending on the connection type and the age of the printer.
Important : Before you continue, make sure your computer is connected to the Internet and can download additional drivers through Windows Update.
Install manually
If you are trying to connect your printer via a USB cable or wirelessly, do the following:
- Open Settings.
- Select Devices.
- Select Printers and Scanners.
- Select Add a printer or scanner.
- Wait.
- Select The printer you want is not listed.
- Select My Old Generation Printer, I need help finding it.
- Select your printer from the list.
- Click Next.
- Enter the printer name.
- Click Next.
- Select Don't share this printer.
- Click Next.
- Select Print a test page to make sure the printer is working.
- Select Finish.
Once you complete these steps, you will be able to use your printer.
Manually install a wireless printer
In this case, you can create a connection manually via an IP address. Do the following:
- Open Settings.
- Select Devices.
- Select Printers and Scanners.
- Click Add a printer or scanner.
- Wait.
- Select The printer you want is not listed.
- Select Add a printer using a TCP/IP address or host name.
- Click Next.
- Open the Device Type list and select TCP/IP
- In the Host name or IP address field, enter the printer address, for example, 10.1.2.175. Important: if you do not know the TCP/IP configuration of your printer, you can find this information on the built-in screen of the device, otherwise you can check with the manufacturer.
- In the Port name field, enter the default name (recommended) or a new name.
- Check the box next to Request printer information and automatically select a driver (recommended).
- Click Next.
- Provide a name for the printer.
- Click Next.
- Select Don't share this printer.
- Click Next.
- Click Print a test page to make sure the printer is working.
- Select Finish.
Once you complete these steps, your wireless printer will be ready to use.
Manually install a local printer
If the methods above did not work, or you are trying to connect an old printer via a USB cable that the OS does not see, do the following:
- Open Settings.
- Select Devices.
- Select Printers and Scanners.
- Click Add a printer or scanner.
- Wait.
- Select The printer you want is not listed.
- Select Add a local or network printer.
- Click Next.
- Select the port you are currently using in the Use an existing port section. For example, if you are using a USB cable, select USB, if you are using a parallel cable with a DB-25 adapter, select LPT1 port.
- Click Next.
- Select Windows Update.
Important: Windows 10 no longer supports major scanner and printer drivers, so when you click on Windows Update, be prepared to wait for drivers to download from the cloud.
- On the left, select your printer manufacturer.
- On the right, select a model.
Tip: If your printer model is not listed, select the closest driver. You can also select Disk to install the driver from the manufacturer.
- Click Next.
- Enter a name for the printer.
- Click Next.
- Select Don't share this printer.
- Click Next.
- Select Print a test page to make sure the printer is working.
- Select Finish.
How to install an old printer using incompatible drivers
If your printer is no longer supported by Windows 10, you can do the following:
- Open File Explorer.
- Locate the folder with the incompatible driver.
- Right-click and select Search for compatibility issues.
- Click Problem Finder.
- Check The program worked in earlier versions of Windows, but no longer works.
- Click Next.
- Select the version of Windows that is compatible with your printer.
- Click Next.
- Select Test program.
- Follow the instructions on the screen.
After completing these steps, the printer should install automatically and work without any driver issues.
If your printer is still not working, it may be time to look for a replacement.
Setting up a network printer in Windows 10
Important! The printer itself must be connected to the computer and configured (drivers installed). The printer must be turned on.
Before setting up the printer, it is advisable to configure the sharing settings in Windows 10 according to these instructions: How to set up a local network in Windows 10? Sharing settings and folder sharing in Windows 10. If this is not done, then during the setup process we will also have to change the sharing settings (I will show this).
Go to Settings, to the “Devices” section, to the “Printers and Scanners” tab. Our printer should be there. Click on it, then click on the "Manage" button.
Next, open “Printer Properties”.
In the new window, go to the “Access” tab. Check the box next to “Share this printer” . If you want, you can change the “Resource Name” (printer). Click on the "Apply" button.
If network discovery and sharing is enabled on your computer, then you're all set and the printer is already accessible from other computers on your home network.
Set printer sharing options
We have opened public access to the printer. But if sharing is disabled in Windows 10 settings, other computers will not be able to access the printer. You need to check/configure sharing settings.
To begin, set your connection to “Private” network status. Read more in the article Windows 10 home (private) and public (public) network.
You can open the settings we need through “Settings” – “Network and Internet” – “Sharing Settings”. Or click on “Network and Sharing Center” in the “Access” window (with printer settings). And then go to “Change advanced sharing settings”.
In the new window, on the “Private (current profile)” you need to “Turn on network discovery” and “Turn on file and printer sharing” .
Next, in the same window, on the “ All networks” , you need to “Disable sharing with password protection” (if you trust the computers on your network and do not want to enter the account password when accessing a network printer) and “Enable sharing so that network users..." (this does not seem to be necessary for the printer to work).
Access to the printer was opened, network discovery was enabled, and access from the network to the computer (to which the printer was connected) was also enabled. Everything is ready, you can connect this printer to other computers on the local network and print.
Connecting to a shared printer from Windows 10 computers
Since I checked everything on two computers with Windows 10 installed, let’s look at the process of connecting to a network printer using this system as an example. I’ll show you further using Windows 7 as an example. In Windows 8, everything is approximately the same.
Open “Settings” – “Devices” – “Printers and scanners”. Click on the “Add a printer or scanner” button. As soon as the search begins, click on “The printer you need is not in the list.”
Place the radio button next to “Select a shared printer by name” and click on the “Browse” button.
Explorer will open (Network tab). If you do not have network discovery and sharing enabled on this computer, a notification will appear at the top. Click on it and select "Turn on network discovery and file sharing." And if another window appears, then select the option “No, make the network to which this computer is connected private.”
Computers from the local network should appear. Open the computer on which the network printer was configured, select the printer and click on the “Select” button.
The printer is selected, click on the “Next” button.
We confirm the installation of the network printer driver.
After the installation is complete, you can simply click on the “Finish” button, or print a test page.
I printed a test page and everything works fine.
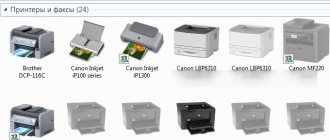
The network printer will appear in the Printers and Scanners tab. There you can open the print queue, change the printer settings, or remove it from the system.
Everything is working!
Solving connection problems
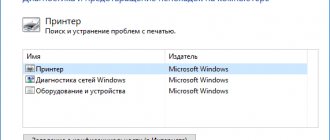
If you have any problems with connecting or printing in Windows operating systems, and the tenth version is no exception, you can use the built-in tool for detecting and troubleshooting equipment problems. Below are brief but detailed instructions:
- In the system settings, find the section with a list of printing devices. It is located in the "Printers and Scanners" section.
- Mark your device with the mouse and right-click to bring up the menu.
- In it, select “Troubleshooting”.
- The utility will launch and collect all the necessary information to fix the problems. Namely: it will restart the print server, check the availability and version of the driver, and remove the blocking of the network device. Next, it will offer to correct the found shortcomings.
Connecting to a printer in Windows 7 (8, 8.1)
Since you may have computers on your network running Windows 7 or Windows 8, I’ll show you another way (universal, it also works in Windows 10) of how you can quickly connect to a network printer.
Important! The computer from which you want to connect to the shared printer must have network discovery enabled. If it is disabled, then the explorer will ask you to enable it (see below).
Open Windows Explorer and go to the “Network” tab. If network discovery and sharing is disabled (a message appears), enable it (by right-clicking on the message).
Next, open the computer on which the printer is shared. Our printer should be displayed there. You need to either double-click on it with the left mouse button, or right-click and select “Connect”.
The search and installation of printer drivers will begin. Once the installation is successful, the printer will appear in the Devices and Printers control panel and can be used to print from any program. If you have problems installing drivers, pay attention to the recommendations below in this article.
Connection via Wi-Hi
Adding a device to the network
To take advantage of this advanced technology, your printer and router must support it. Depending on the type of PC, and it can be a personal computer or laptop, the “device” must be on the same network with the printing device and router. It will be easier to connect devices using WPS technology.
Look on the back or side of your modem for a small button labeled as such. Press once or for a few seconds. Wait until the Ready light stays on. Immediately perform a similar procedure on the printer body. If everything was done correctly, then the connection was successfully established and the printing equipment was added to the network. All that remains is to connect to it.
Button on the printer.
On the modem.
In some router models, the WPS function is configured through the settings, and not on the case. To get into the environment for changing router parameters, you should use the web interface. Please refer to the instructions for your model.
All methods of connecting a printer via WiHi. Detailed instructions for each of the above options.
Connecting to it from a PC
Now you can go online and see your printer among the network devices. Right-click on it and select “Connect”. Then the driver will be installed automatically, but if this does not happen, the installation disk will help correct the situation. You can find it in a box of equipment; it’s definitely lying around about two boxes long. In case of problems, pay attention to the subsection of this article “What to do if there is no disk”.
Several options for connecting a network printer. The method is through the Windows installation wizard, by name or IP address.
The computer does not see the network printer and does not connect
There are usually no problems on the part of the host computer (to which the printer is connected via cable). The main thing is that the drivers are installed, the system detects the printer and it is configured correctly according to the instructions above (the first part of the article).
But when connecting other computers to a shared printer, there are various problems and errors (0x00000002, 0x00000006, “access denied,” the computer does not see the printer, etc.). Typically, all these problems are related to sharing settings, printer drivers, or firewall (antivirus).
The computer does not see the printer on the local network
This problem rarely occurs. Typically, the reason is that the computer (or both computers to which the printer is connected and from which you are trying to connect to it) has network discovery and sharing disabled. In this article I have already written several times how and where to include all this. If your problem is that the printer (or other computers on the local network) are not displayed on the network tab, then check the sharing settings on both computers.
I wrote more about this in the article Shared folders, network computers, flash drives, and drives are not displayed on the “Network” tab of Windows Explorer.
Also temporarily stop the antivirus or its built-in firewall.
Error: “Windows could not connect to the printer. Access denied"
This error looks something like this:
The error code can be different: 0x00000057, 0x00000002, 0x0000000a, 0x00000006, 0x00000214, 0x0000007e, etc. It usually appears at the stage of connecting and setting up a network printer.
Solutions:
- We check the sharing options in the Windows 10 settings. I wrote about this above.
- On the computer to which the printer is connected, disable the antivirus/firewall.
- We check the allowed programs in the firewall settings. There, “File and Printer Sharing” should be enabled and “Private” should be checked (if you are using this profile).
You can try disabling (uncheck) this “File and Printer Sharing” item altogether.
- You can try disabling driver digital signature verification.
- If your computer name is written in Russian letters, change it in the system properties. Write the computer name in English letters.
Problems and malfunctions
If you looked at this section of our review, then something went wrong and the printer is not printing over the network. Even if all steps were followed exactly according to the instructions, there are circumstances beyond the control of the user that may cause malfunctions. To eliminate them, do the following:
- Disconnect the network (switch or router), printer, router, computer or laptop from power for a few minutes. Turn on in this order: network, router (if any), computer, printer.
- Change usb and ethernet cables.
- If you are using Windows 10 and the network printer is connected to your PC, then you should check that “Private Network” is enabled on both computers.
- Check whether network access is blocked by an antivirus or the built-in Windows firewall. If necessary, configure exceptions or disable protection altogether.
- There may be a software conflict with an older printer that was previously used. Use special utilities to completely remove old drivers and clean the registry.
- Run an antivirus scan.
- Double-check device access rights for different users on the “Security” tab in the printer properties.
- The message “Active Directory Domain Services is currently unavailable” - follow the link to troubleshoot the error.