When starting, NVIDIA GeForce Experience gives an error and does not start
When launching the GeForce Experience application, you may receive an error stating that the program cannot be opened. After this, any attempts to run the utility end with the following system message:
Ways to solve the problem:
- Reinstalling the program. The first way to resolve the error is to reinstall NVIDIA GeForce Experience.
Use the Windows Uninstall/Change Programs tool to uninstall the utility.
Go to the official website of the application and download the installation file. Reinstall, restart your PC and try opening the software again.
- Checking your computer for viruses. Viruses can cause errors when launching software. To check your system for malware causing crashes, download the useful CureIt utility from Dr.Web.
Go to the CureIt website and click download (free for home use).
Launch the file downloaded to your PC.
Click "Start Scan". The utility will run a full system analysis for the presence of malware: spyware, Trojans, etc.
Advice! Do not run a custom scan. It is very important to perform a complete analysis of the system for the presence of virus software.
If viruses are detected, add them to quarantine or delete them. Reboot your system and try launching GeForce Experience again.
- Fixing the registry. There may be problems with application entries in the registry. Often this problem causes startup errors.
To repair the registry, use CCleaner. Download and run the utility. The free version is sufficient for everyday tasks.
In the window that opens, go to the “Registry” section and click “Search for problems.”
Once the troubleshooting process is complete, click Fix Selected.
Major issues and glitches in the registry have been fixed. Restart your computer and try launching GeForce Experience again.
General solutions
There are a few more ways to fix GF Experience launching issue on Windows 7, 8, 10 that sometimes resolve the issue. They do not depend on the error and can be performed even for simple system prevention .
Virus check
The GF Experience program may not launch due to virus activity . You need to check the system for their presence (for example, using Dr.Web Cureit, AdwCleaner, AVZ, etc.) and restart the PC.
Memory test
It is worth cleaning the RAM (for example, using CCleaner). Delete unnecessary files , clear startup of unnecessary programs.
Registry errors
CCleaner is also suitable for checking errors in the registry. Such a check is needed if the program does not work properly , but is recorded in the registry as an executable task.
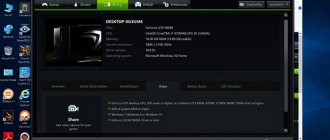
NVIDIA is the market leader as a graphics card manufacturer. They recently offered a useful feature called NVIDIA Share . Using this feature, the user can perform a number of tasks including recording, streaming and sharing their gameplay with others. It also allows them to take multiple snapshots of gameplay, allowing them to remember the moments that happen during a great game.
However, people using NVIDIA Share have reported that NVIDIA Share is not responding. If you are facing this problem, then this post may help you.
GeForce Experience account suspended
Many users complain: “I can’t log into Geforce Experience.” The next time you log into your account, an error may occur due to your profile being blocked.
The reason for blocking is a violation of the rules for using an NVIDIA Geforce Experience account.
Ways to solve the problem:
- Registering a new profile. The only way to solve the problem is by registering a new account. To do this, open the login window and click “Create an account.”
Provide new registration information: email, password, date of birth, nickname.
Confirm your new email and log in with your new account.
- Login via social networks. If you do not have an additional e-mail address, then use the login option through social networks.
If you have a profile on Facebook, Google, qq or wechat, then log into your account using them.
Share controls don't work. Share does not recognize the mouse, keyboard or gamepad. Solution
How to play if it is impossible to control the process? Problems with supporting specific devices are inappropriate here, because we are talking about familiar devices - a keyboard, mouse and controller. Thus, errors in the game itself are practically excluded; the problem is almost always on the user’s side. You can solve it in different ways, but, one way or another, you will have to contact the driver. Usually, when you connect a new device, the operating system immediately tries to use one of the standard drivers, but some models of keyboards, mice and gamepads are incompatible with them. Thus, you need to find out the exact model of the device and try to find its driver. Devices from well-known gaming brands often come with their own software packages, since a standard Windows driver simply cannot ensure the correct operation of all the functions of a particular device. If you don’t want to look for drivers for all devices separately, you can use the Driver Updater
. It is designed to automatically search for drivers, so you only need to wait for the scan results and download the necessary drivers in the program interface. Often, problems in Share can be caused by viruses. In this case, it makes no difference how powerful the video card is in the system unit. You can scan your computer and clean it of viruses and other unwanted software using special programs. For example NOD32. The antivirus has proven itself to be the best and has been approved by millions of users around the world. ZoneAlarm is suitable for both personal use and small businesses, capable of protecting a computer running Windows 10, Windows 8, Windows 7, Windows Vista and Windows XP from any attacks: phishing, viruses, malware, spyware and other cyber threats . New users are given a 30-day free trial. Nod32 is an antivirus from ESET, which has received many awards for its contribution to security development. Versions of anti-virus programs are available on the developer’s website for both PCs and mobile devices; a 30-day trial version is provided. There are special conditions for business.
Something went wrong GeForce Experience (something went wrong GeForce Experience)
Error: “Something went wrong. Try restarting GeForce Experience" appears very often after updating the application. Even restarting the software and rebooting the system does not help fix the situation with this failure.
Because of this, it is impossible to use the program’s functions: update drivers, optimize the game, start a live broadcast.
Ways to solve the problem:
- Restarting NVIDIA services. The error may be caused by failures of NVIDIA services in the operating system. To correct the situation, you need to try restarting the processes.
Open the Windows Control Panel. Go to the "System and Security" section.
Next, open the “Administration” section and select the “Services” tool.
In the window that opens, find processes associated with NVIDIA. Right-click on them and select "Restart".
After completing these steps, restart your computer.
- Disabling the antivirus. If you have an antivirus installed on your computer, disable it while working with GeForce Experience. Antivirus programs often run system scans without user knowledge, which causes some applications to malfunction.
How do I set GeForce Experience to turn on automatically?
Despite the fact that this program should be launched every time the system is activated, many users, trying to optimize the operation of their PC, remove almost all processes from startup, which is why various questions arise, like “why doesn’t GeForce Experience start?” If you rebooted your laptop, but the application for the video card still does not work, what should you do in this case? What can I do to get it to start again with the system?
For Windows 10 users, the solution to this problem is very simple. Open the “Start” menu and write “Startup” in the search. The system will prompt you to go to the appropriate section of the system parameters, which is what you need to do.
A whole list of different applications will open in a new window that have a launch rule with the system, but it is in your hands whether to activate startup or not. Find the GeForce Experience you need in this list and check the box next to it. You can make sure that your device has accepted the changes by restarting your PC and checking whether our program starts automatically.
We recommend using the Task Manager if you have problems to determine whether the program was trying to start or whether it was ignoring a condition given to it. Be that as it may, completely reinstalling the nvidia application may solve your problem in any case, since by default the GeForce Experience settings force the application to launch immediately after the system boots.
GeForce Experience won't launch after update
A common problem associated with an error starting the program after downloading the next update.
Ways to solve the problem:
- Clean reinstallation. The problem is solved by a clean reinstallation of the application. First, uninstall the utility from your computer.
Use the standard uninstall and change programs tool.
Once the process is complete, go to the official website of the utility and download it to your PC. Install GeForce Experience again.
GeForce Experience white screen
After launching the application, a white screen may appear in the software window. The program itself freezes and stops responding.
Ways to solve the problem:
- Reinstalling video drivers. The failure is due to a video driver problem. You need to uninstall the old driver version and download the new one.
To do this, go to the official NVIDIA website and go to the “Drivers” section.
Please indicate your graphics card product type, series, family, etc. Select your operating system version and click Search.
A new window with the driver will open. Download the installation file and run it on your computer for installation. Once the video driver reinstallation is complete, reboot the system. The white screen problem has been resolved.
On a note! Geforce Experience may also crash with a black screen; the procedure for resolving the error is the same.
Using and Settings ShadowPlay
As noted earlier, the shadowplay program comes with GeForce Experience, so in order to enable shadowplay nvidia and start recording, you must first open Experience, and then launch the button with the image of a movie camera and the words “ShadowPlay”. However, before you start recording anything, it is advisable to look into the options and configure everything appropriately.
There are 3 main sections with settings: “Mode”, “Quality” and “Sound”. The first point is responsible for how the game process will be recorded:
- In the background. Recording is ongoing and when you press hot keys, a predetermined time period of video will be saved to a file (the last 5 minutes (by default) or any other period that will be specified in the “background recording time” item).
- In manual mode. As the name may already suggest, the recording procedure is activated manually using hot keys and continues until the user stops it manually. A video file is also created by pressing a hotkey combination.
- Background and manual.
- Broadcast on Twitch. It is enough to install shadowplay, connect to the Internet and then, in addition to local recording on your computer, the user has the opportunity to live broadcast his game, which will be very convenient for popular gamers and bloggers.
Next is the “Quality” section, here we are provided with settings for setting the bitrate (Mbit/sec) and framerate (FPS). You can use the default settings or change them at your discretion.
- LiveJournal
- Blogger
Settings for setting bitrate (Mbit/sec) and framerate (FPS)
In addition to video recording, nvidia shadowplay is also a tool that provides audio stream capture, which can be obtained either directly from the game or from the audio input (if you turn on the microphone), or any other available source to choose from.
If shadowplay does not record or the recording does not meet the necessary requirements, you can additionally look at the “Settings” section of the GeForce Experience utility, where there are settings that allow you to: change the save folder for recorded files, enable recording not only of games, but also just the desktop and all manipulations on it, create a “frame in frame” effect by displaying video from a webcam in a small window, configure the microphone in Push-to-talk mode and much more.
NVIDIA GeForce Experience won't install
After downloading the application from the official website, a crash may occur due to an error when installing Geforce Experience. For example, the installer may write that the installation cannot continue.
Ways to solve the problem:
- Run the installation file as administrator. Right-click on the installer and select the following item:
- Disabling the antivirus. Antivirus may cause errors during software installation. This is due to the fact that it identifies certain types of files as suspicious, which is why crash protection is triggered.
Disable the antivirus on your computer before installing GeForce Experience.
Solving network and Internet problems
Problems with network access can also cause error code 0x0003 when launching GeForce Experience:
- If you have installed antiviruses or firewalls recently, try disabling them and see if that solves the problem.
- In a command prompt as an administrator, try running the netsh winsock reset and restarting your computer after it is completed.
- If you have Windows 10, try resetting your network settings using the system's built-in tools.
GeForce Experience failed to load driver
When a new version of video drivers is released, an error may occur that Geforce Experience does not load the driver.
Ways to fix the error:
- Check for a new version of the program. Make sure you have the latest version of the utility installed. Sometimes the notification about the release of a new version does not come immediately. This can become an issue of network failures making it impossible to load the driver.
In this case, the best option is to reinstall GeForce Experience. Remove the old version from your computer and download the new one from the official website.
Install the updated version, sign in and try downloading the driver again.
- Disable antivirus. The cause of network failures may be an antivirus that blocks access to NVIDIA servers. Disable the antivirus program if it is installed on your PC. This is especially true for anti-spyware applications.
- Disable your firewall. Another reason for failures to connect to servers for downloading video drivers is the Windows Firewall.
You can disable it through the operating system control panel.
- Launch Control Panel. Go to the "System and Security" section.
- Go to the Windows Firewall section.
- In the left menu, select the option to enable or disable the function.
- Turn off Windows Firewall.
Auto start doesn't work
If GF Experience does not start when the system starts, first of all you need to understand why the program does not load in the background when you turn on the computer (since it is added to startup automatically).
Checking startup
If the GF Experience process stops starting when the operating system (OS) boots, it's worth checking the startup list . You can use the CCleaner utility. The procedure in the program is as follows:
- Open the “ Service ” tab.
- Go to the “ Startup ” submenu.
- This menu shows all programs that start with the system. You need to find Nvidia GeForce Experience , in the “ Enabled ” column there should be the word “ Yes ”. If the program is not there, you need to completely reinstall by downloading it from the Nvidia website.
Why won't games launch on Windows?
Lack of RAM
When there are too many tasks in startup, the computer overloads, and some programs, including GeForce Experience, simply do not start. This happens especially often on devices with a small amount of RAM . But even in this case, PC performance can be optimized:
- First of all, you should delete unnecessary programs , files and folders, and also empty the trash.
- After cleaning the hard drive, you must clear RAM. You can do this using CCleaner:
- open the “ Startup ” tab;
- select unnecessary processes and disable them;
- restart your PC.
After this simple procedure, GeForce Experience should launch when Windows boots without any problems.
GeForce Experience does not record video
ShadowPlay technology allows you to record videos of gameplay. This Geforce Experience feature does not work as perfectly as we would like, and at some points errors occur when recording video: the original files are not saved on the computer because the program simply does not capture the image.
Ways to solve the problem:
- Installing the latest drivers. In 90% of cases, the error is due to the fact that you have an old version of the driver for your video card from NVIDIA installed. The solution to the problem is simple - remove the old version using the Windows operating system.
To do this, open the uninstall or change programs tool and remove the graphics driver.
Download the latest version from the official NVIDIA website or use GeForce Experience to download.
Recording does not start
The application starts, the video capture settings and the Share interface work. When I click "Record" nothing happens. What to do? Disable the in-game ShadowPlay overlay.
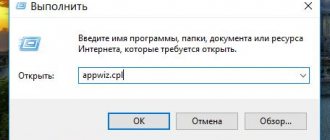
Open the registry. Press “Win + R”, then write “regedit”.
We follow the path as in the screenshot. Delete DefaultPathW and TempFilePath. Next, in the application menu, activate the in-game overlay. Now the question of why the Experience recording does not work will not arise.
GeForce Experience scan fails
To add games to the utility list, you need to scan your computer. Sometimes the process fails and projects do not appear in the general list.
Ways to fix the error:
- The location specified is incorrect. In the application settings you need to specify the section that will be scanned to add games to the list.
Open settings by clicking on the gear icon.
Go to the "Games" section. In the “Scan location” window – “Add”.
Specify the directory in which the games are located. After this, you can start the scanning process again.
- Utility failure. First, reboot the system. If this does not fix the error, then reinstall the application.
- Uninstall the application using standard Windows tools.
- Go to the official website and download the installation file. Complete the installation, log in and scan again.
Note! A missing certificate of authenticity may cause scanning to fail. This applies to pirated games and projects from independent developers.
Error code 0x0001 or 0x0003
When opening GeForce Experience, an error code 0x0001 or 0x0003 may appear.
Troubleshooting is also quite simple.
Installing beta drivers
To fix the error, you should try updating the drivers (the method was described above) or installing their beta version. It should be remembered that this version of drivers may be unstable , but at the same time it may contain fixes for some errors that appear in previous versions.
Allowing the service to interact with the local account
Using the command " services. msc " in the " Run " window, open a list of all services. You need to find NVIDIA Telemetry Container , open its properties. In the “ Login ” tab, check the box that allows interaction with the desktop. Then restart your computer.
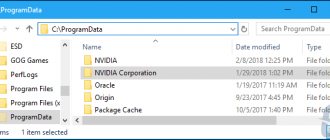
Checking Nvidia folders
In some cases, the directories in which Nvidia software is installed may not have the required permissions . To fix this, you need to change the ownership of these folders to the “ System ” group:
- C:\Program Files (x86) in Explorer .
- Select the NVIDIA Corporation , open properties.
- In the menu that appears, select the “ Security ” section and click on the “ Advanced ” button.
- This will open additional security settings for that directory. Owner line should be " System ". If this is not the case, you need to click on “ Change ”.
- A selection window will appear. At the bottom you need to enter “ System ”, click on the button on the right “ Check names ” and confirm by clicking “ OK ”.
- All that remains is to confirm the changes and restart the PC . After turning it on, you need to check if the error disappears.
What to do if the connection to sites keeps dropping
Removing drivers
There are several programs for completely removing the video card driver along with the utility. For example, you can use Display Driver Uninstaller. Procedure:
- Open the program.
- Select video driver.
- Click the “ Uninstall and reboot ” button.
- Restart PC .
After these steps, install the driver again (the method is described above in the section Updating drivers).
GeForce Experience does not see the video card
After starting the program, a video card detection error may occur. After this, you will not be able to use GeForce Experience features.
Ways to fix the error:
- Reboot PC. First, try restarting your computer. If the problem is not resolved, then proceed to the next step.
- Reinstalling the driver. Open the Uninstall and Change Programs Tool. Find your video driver and remove it.
Go to the official NVIDIA website, go to the “Drivers” section.
Provide information about your video card and click Search.
Download and install the driver. Reboot your system. After completing these steps, the problem should disappear.
Change owner and grant full access
If the problem only occurs with games located in a specific folder, then add the Everyone account to it as the owner and give full control. This way the client will have access to it.
Find the folder containing subdirectories with games that the client does not see. If they are located in different folders, repeat this procedure for each of them.
First of all, check the default installation folder of all programs C:\Program Files.
Right-click on it and select Properties. Go to the "Security" tab and click on "Advanced". Click on the "Edit" link in the owner position.
In the “Enter names of selected objects” field, type “All” and click on “Check names”. Once this account is detected, the text will become underlined. Click OK to add this entry as the owner of the folder.
In the Advanced Security Settings window, click the Add button to grant new permissions. Then click on “Select Subject”, enter “Everyone” again and check the names.
In the General Permissions field, check the Full Control box and click OK. Close all windows by clicking “OK”.
Open the client and check if it sees the installed games.