Fixing an error with denied access to a flash drive
If, when accessing a flash drive, the message “Access Denied” appears, then you need to figure out the reason, which, in turn, may be as follows:
- restrictions on rights by the operating system;
- software problems;
- virus infection;
- physical damage to the media.
Method 1: Using operating system tools
The cause of the problem may lie in restrictions on the part of the operating system. The fact is that many companies, in order to protect information, configure operating systems in their workplaces so that they prohibit the use of USB devices. To do this, the system administrator makes the appropriate settings in the registry or group policy.
If the drive works fine on your home computer, but an access denied message appears elsewhere, the reason may be due to special restrictions on the part of the operating system. Then you should contact the system administrator in the office where you work so that he can remove all restrictions.
The first thing you need to do is check access to the flash drive. This task is performed as follows:
- Go to This PC.
- Right-click on the flash drive icon.
- Select “Properties” from the menu that appears.
- Go to the “Security” tab in the window that opens.
- Go to the "Groups or Users" section and select your name.
To make changes to permissions, you must be logged in with administrator rights.
You should also check the registry settings:
- Go to the OS registry. To do this, click “Start” in the lower left corner, go to the empty “Search programs and files” field, or open a window using the “WIN” + “R” key combination. Type the name "regedit" and press Enter.
- When the registry editor opens, go sequentially through the specified branch:
HKEY_CURRENT_USER->SOFTWARE->MICROSOFT->WINDOWS->CURRENTVERSION ->EXPLORER_MOUNTPOINTS2-> [Drive Letter] Open the “SHELL” subdirectory and delete it. To do this, press the “Delete” button on your keyboard. If the virus has replaced the original autorun file of the flash drive, then by deleting this partition the path to the boot file of the drive will be corrected.
- After the system reboots, try opening the storage media. If it opens, then find the hidden autorun.exe file on it and delete it.
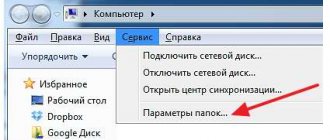
To show hidden files in Windows 7, do this:
- Follow this path:
“Control Panel” - “Appearance and Personalization” - “Folder Options” - “Show hidden files and folders”
In other systems, all the steps described above should help display all hidden files automatically. If such a file was present on the flash drive, it means that it was infected with a virus.
Method 2: Removing viruses
The reason for the above message may be due to a virus infection. The most common virus for USB drives is the Autorun virus, which was already mentioned above. It replaces the standard Windows service, which is responsible for connecting the media and selecting actions with it. A hidden file Autorun.inf appears on the flash drive, which blocks access. We have already talked about how to remove it. But this is far from the only virus that can be present on removable drives.
Therefore, be sure to check the flash drive for viruses with a good antivirus program - conduct a full scan of the operating system. To do this, it is better to use in-depth analysis. For example, in Avast it looks like the photo below.
The most correct option would be to use independent anti-virus software from another medium, for example Kaspersky Rescue Disk 10.
Dr.Web CureIt is also very popular. To create a boot disk or flash drive, you can use the Dr.Web LiveDisk image.
Such software starts before Windows boots and scans the system for viruses and threats.
Method 3: Data recovery and formatting
If these methods do not produce results, then you can try to format the flash drive, but the information on it will be lost. The fact is that the reason may lie in software problems.
Also, an error accessing a flash drive can appear due to failures in the operating system or improper operation of the drive - for example, it was removed during recording. In this case, the integrity of the boot file is compromised. You can restore the functionality of such a flash drive using special software or contacting a service center.
It could also be due to hardware problems. To rule out this option, do this:
- An antivirus program installed on your computer can block the flash drive. Try disabling it for a while and checking access to the drive.
If this is the problem, look at the settings of your antivirus program - perhaps they have some restrictions that apply to removable drives.
In any case, if a software failure occurs on the flash drive or files are damaged due to a virus, you should use a file recovery tool and then format the media. The first can be done using a special utility R-Studio. It is designed to recover information in case of file failures of a flash drive.
- Launch R-Studio.
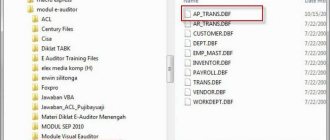
- The main window of the program resembles the Explorer menu in Windows. On the left are media and partitions, and on the right is a list of files and folders in the partition. Place the mouse cursor on the left side of the flash drive.
- Information with the contents of the media will appear on the right. Deleted folders and files will be marked with a red cross through them.
And formatting occurs as follows:
- Go to This PC.
- Right-click on the icon with the flash drive.
- Select "Format".
- In the window that opens, select the file system type and click the “Start” button.
If regular formatting of the USB drive does not help, you need to perform low-level formatting. To perform this procedure, use specialized software, such as Hard Disk Low Level Format Tool. Our instructions will also help you complete the task.
As you can see, if you establish the cause of the error and choose the most appropriate course of action for your situation, the problem with the “Access Denied” message will be solved. If you were unable to complete any of the steps described above, write about it in the comments, we will definitely help!
Thank the author and share the article on social networks.
Restricting access to USB ports
Let's look at 7 ways
, with which you can block USB ports:
- Disabling USB through BIOS settings
- Changing registry settings for USB devices
- Disabling USB ports in Device Manager
- Uninstalling USB controller drivers
- Using Microsoft Fix It 50061
- Using additional programs
- Physically disconnecting USB ports
Disabling USB ports through BIOS settings
- Enter BIOS settings.
- Disable all items related to the USB controller (for example, USB Controller or Legacy USB Support).
- After you have made these changes, you need to save the settings and exit the BIOS. This is usually done using the F10
. - Restart your computer and make sure the USB ports are disabled.
Enable and Disable USB Drives Using Registry Editor
If disabling via BIOS does not suit you, you can block access directly in the Windows OS itself using the registry.
The instructions below allow you to block access to various USB drives (for example flash drives), but other devices such as keyboards, mice, printers, scanners will still work.
- Open the Start menu -> Run, enter the command “ regedit
” and click OK to open the registry editor. - Continue to next section
HKEY_LOCAL_MACHINE\SYSTEM\CurrentControlSet\Services\USBSTOR
- On the right side of the window, find the “ Start
” item and double-click on it to edit.
Enter the value " 4
" to block access to USB storage devices.
Accordingly, if you enter the value “ 3
” again, access will be opened again.
Click OK, close Registry Editor, and restart your computer.
The above method only works when the USB controller driver is installed. If a driver has not been installed for security reasons, the Start setting may be automatically reset to 3 when the user connects the USB drive and Windows installs the driver.
Disabling USB ports in Device Manager
- Right-click on the “ Computer
” icon and select “Properties” from the context menu.
A window will open on the left side of which you need to click on the “ Device Manager
” link. - In the Device Manager tree, find the “ USB Controllers
” item and open it. - Disable controllers by right-clicking and selecting the "Disable" menu item.
This method doesn't always work. In the example shown in the figure above, disabling the controllers (the first 2 points) did not lead to the desired result. Disabling the 3rd option (USB Mass Storage Device) worked, but this only allows you to disable a single instance of the USB storage device.
Removing USB controller drivers
Alternatively, to disable the ports, you can simply uninstall the USB controller driver. But the disadvantage of this method is that when the user connects a USB drive, Windows will check for drivers and, if they are missing, will offer to install the driver. This in turn will allow access to the USB device.
Prevent users from connecting USB storage devices using a Microsoft app
Another way to deny access to USB drives is to use Microsoft Fix It 50061
(https://support.microsoft.com/kb/823732/ru - the link may open near the mituta). The essence of this method is that 2 conditions for solving the problem are considered:
- The USB drive has not yet been installed on the computer
- The USB device is already connected to the computer
Within the scope of this article, we will not consider this method in detail, especially since you can study it in detail on the Microsoft website using the link given above.
It should also be noted that this method is not suitable for all versions of Windows OS.
Using programs to disable/enable access to USB storage devices
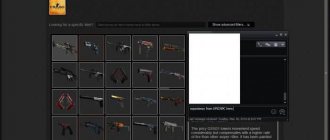
There are many programs for setting a ban on access to USB ports. Let's look at one of them - the USB Drive Disabler
.
The program has a simple set of settings that allow you to deny/allow access to certain drives. USB Drive Disabler also allows you to configure alerts and access levels.
Disconnecting USB from the motherboard
While physically unplugging USB ports on a motherboard is nearly impossible, you can unplug ports on the front or top of your computer by unplugging the cable that goes to the motherboard. This method will not completely block access to USB ports, but will reduce the likelihood of using drives by inexperienced users and those who are simply too lazy to connect devices to the back of the system unit.
! Addition
Fixing the error "Location is unavailable: Access to the folder or drive is denied"
Windows OS users encounter crashes and errors associated with various factors. Most often, these are software-type faults and are corrected by finding and eliminating the source of the problem. One of the errors that may appear when trying to view the contents of a storage device, for example, a flash drive or external HDD, is “The location is unavailable. Access denied". Usually the reason lies in Windows security policies, which set restrictions on access to removable USB drives; in some cases, the problem is caused by the activity of malicious software or incorrect user actions, and sometimes by the work of a system administrator when it comes to an enterprise.
The same error can be encountered when trying to open a folder and usually it consists of the user not having access rights. The failure often appears when connecting a second hard drive or network storage.
The problem of denied access to a flash drive, other media or folder can be solved independently using the built-in tools of the system, and a prerequisite is that you have administrative rights in Windows OS.
Enable access to flash drives and other USB drives in the Local Group Policy Editor
How to resolve the error “Location is unavailable. Access denied" is suitable for Windows 10, 8.1 or 7 Professional, Enterprise and Ultimate editions. To solve the problem, do the following:
There is no need to reboot the device, but the drive must be removed and then plugged in again after applying the settings changes.
Unlocking access to removable drives using Registry Editor
In a situation where access to an external drive is denied and the “Location is not available” error appears in Windows 10 or another version of the home edition, the problem can be solved using the registry editor. At the same time, any adjustments to the system registry should be made only if you have the appropriate skills, since incorrect user actions can lead to undesirable consequences for the system, including its failure. It's a good idea to make a backup before making any changes so that you can return to a copy in case something goes wrong.
You can unlock access to an external drive using the Windows Registry Editor as follows:
- Open the “Run” console (Win+R), enter the command regedit, press the enter key.
- In the editor, go to the HKEY_LOCAL_MACHINE section and then follow the SOFTWAREPoliciesMicrosoftWindows path and see if there is a RemovableStorageDevices subsection here.
- If yes, right-click on it and select the “Delete” option.
- Now we go to the HKEY_CURRENT_USER section in a similar branch and do the same here.
There is no need to restart the computer, but the drive must be disconnected and connected again.
What to do if access to a folder is denied
Most often, the problem is that the user does not have rights to open the directory. To fix the “Access to folder is denied” error and be able to work with the contents of the object, do the following:
- Right-click on the object and open “Properties”.
- Go to the “Security” tab, click “Advanced”, which will open a window of additional security parameters for the object.
- At the top of the window, basic information about the element, name and owner is displayed, in the line where the user who owns the catalog is indicated, click “Change” to change the owner.
- In the window that opens, you need to specify the new owner of the folder, click the “Check names” button, after which the computer name will also be added to the name if the profile is specified correctly. For Microsoft accounts, you can also use an email address. Click “OK” or the enter key.
- In the list of permission elements, find the required account and double-click. In the new window, all items in the “General Permissions” block should be checked.
- We return again to the folder properties, where on the “Security” tab we click the “Change...” button.
- Select the desired account and check all the boxes for it in the “Allow” column, apply the changes, click “OK” and close the window. The problem should go away.
Just like in the case of a folder, you can check whether there are any restrictions on the external drive. To do this, go to Explorer or “This Computer” (“My Computer”) and go to the properties of the object, then in the “Security” tab, click “Change...” and if certain actions with the disk are not allowed, then check these boxes.
The reason for the error with the message “Location inaccessible: Access to the folder or disk is denied” could be malicious software that has settled in the system or on the drive itself, which is not accessible, so it is worth scanning the computer and removable media with specialized software.
In some cases, the solution to the problem may be to format the drive, before which you should perform data recovery to prevent loss of information.
Other working methods for removing file write protection
If none of the above recipes helped, well, other methods on how to remove protection from a flash drive will probably work (the list will grow over time).
- Check your flash drive for viruses. Some malicious applications establish their own control over files; as a result, the flash drive is protected from writing data belonging to viruses. How to remove protection in this case? We recommend using .
- Check if the flash drive has a hardware button that allows you to physically unlock it (there is a switch on the side that needs to be moved towards the open lock). However, today such USB flash drives and SD cards are very rare - these are mostly old device models.
- Update the firmware of the flash drive, you can find the exact model on Google by chip vendor and chip vendor model, see Device Manager.
Conclusion
. Although it is not always possible to determine why a flash drive is write-protected, of the many methods described, at least one works. If none of the methods for removing protection from a flash drive helped you, all that remains is to replace the USB drive - in other words, buy a new one.
However, ask questions on the topic - you can do this through the sidebar on our website. We'll try to help.
Why do I see a message about disk access being blocked?
There may be several reasons, but they are all related to interference with OS security policies:
- Setting restrictions on the part of the administrator (in the case of corporate computer use). It is necessary to contact the administrator for clarification if the problem occurs on a work PC;
- Viral influence, influence of third-party software - run an anti-virus scan, remove applications that were installed recently and could cause the defect;
- The user himself makes changes to the settings, or it is done by an ill-wisher who wants to fray your nerves a little.
Let's move on to considering solutions. First of all, check to see if the security mechanism (Lock) on the drive itself is activated. Here is a useful article on the topic.
The author recommends:
The location is inaccessible, there is no access to the Windows 10 disk - what to do?
The instructions below are only relevant for OS versions higher than Home. Otherwise, go to the second method - using the registry.
- You must launch the Local Group Policy Editor. To do this, press the combination Win + R on your keyboard and enter the following command in the “Run” window that appears:
- To fix the “Location is unavailable” error when opening a flash drive or any other USB drive, you should go to the location located along the path on the left:
- Pay attention to the list of policies on the right and their status (Not configured, Enabled, Disabled). If you suddenly notice an active value, double-click on the desired line and deactivate the access ban in a new window:
- After applying all the adjustments, you need to double-check the same parameters here:
Administrative templates -> System -> Access to storage devices" w />
When you have completed the necessary operations, it is better to restart Windows 7 8 10, while removing the drive from the USB connector. And after restarting, connect and try to see if the error is resolved.
No access to the flash drive, access denied - how to fix the error using the registry editor?
- We call the execution console, as in the previous method, by pressing the Win + R button combination on the keyboard. Enter your query:
- After 5-10 seconds, a window will appear with a tree structure (left) and key values (right). Let's go here:
- Find the RemovableStorageDevices object and delete it by right-clicking on it:
- If there is no such line, then you should look in another section and then delete:
After these manipulations, you need to reboot the operating system, having first disconnected the flash drive from the USB connector. As soon as the OS starts, connect the external storage device to the laptop, check whether the problem with the inaccessible location and disk access failure is fixed.
Another solution to remove protection from a disk: use the diskpart utility
diskpart is a console utility included in Windows XP and higher, which allows you to flexibly manage hard drives, file volumes and partitions at an advanced access level.
We will try to access the problematic flash drive via the console, and then format the write-protected flash drive.
1. Open a command prompt (cmd.exe). Type "diskpart" to open the utility.
2. Type “list disk” to display a list of available disks on the system.
3. Determine where your USB drive is in the list. Enter “SELECT DISK n”, where n is your USB flash drive with a write-protected disk.
Be very careful!
Selecting the wrong media will result in you losing all data on the selected drive.
4. Type "clean" (you may have to repeat this command twice or three times). If nothing works, try other ways to unlock the flash drive.
5. Enter “create partition primary” to create a new partition on the USB flash drive.
6. Enter “select partition” to select a partition on the disk
7. Type "active" to make the drive active
8. Enter “format fs=ntfs” to format to NTFS (before formatting the flash drive, make sure you have selected the correct storage medium!).
By the way, the diskpart option is one of the best methods to format a write-protected flash drive without resorting to third-party tools.
Location inaccessible, access denied when opening flash drive - how to fix
If, when you connect any flash drive or external hard drive via USB and try to open its contents (this article discusses exactly this situation, if this happens with one specific drive, the problem may be different) you see the error message “The location is not available, there is no access to disk, access is denied", the reason in most cases is the security policies of Windows 10, 8.1 or Windows 7, which restrict access to flash drives and other removable USB drives: sometimes this is the result of actions of the system administrator (if we are talking about an organization), sometimes - own experiments with the system or even the operation of malware.
This guide tells you what to do if, when you try to open a flash drive or other storage device in Windows, you see a message saying that your access is denied and the location is unavailable. A mandatory requirement for you to be able to complete the steps below is to have administrator rights on the system; without them, this will not be possible. If, on the contrary, you need to restrict access to USB drives, more on that here: How to prohibit the use of flash drives and other USB drives in Windows.
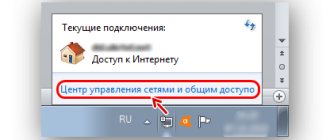
Setting up network access to a flash drive via a TP-Link router
Most likely, you won’t have to make any settings on the router at all. If the settings are factory settings and you have not changed the USB settings, then sharing is enabled by default.
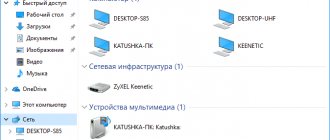
At the moment, there are routers on the market with the old control panel (which is green) and with the new one (blue). As far as I understand, on older models there is no access to the drive through Network Neighborhood. This means that the drive connected to the router will not automatically appear in the “Network” tab in Windows Explorer. You will need to add it manually.
We will start setting up with the simplest, and consider various nuances.
Connect the USB drive to the router
To begin, connect the drive to the USB port of your router. This could be a regular flash drive or an external hard drive.
I do not recommend connecting a drive that contains important information. Because there is always a risk of losing it. It is better to practice on a blank drive, or one that does not contain valuable information. Well, don’t change the settings when you don’t know what they mean.
If you have a green control panel, then you need to open the “USB Settings” - “Sharing” tab.
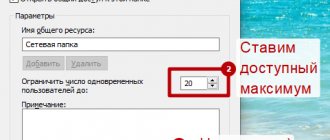
As you can see, the server is enabled by default. To set access settings and create new accounts, you need to uncheck the “Anonymous access to all volumes” checkbox. You can also disable access by clicking on the appropriate button.
On new routers with a new control panel, in the “Advanced Settings” section, open the “USB Settings” – “Sharing” tab. We gained access through Network Neighborhood. As you can see, you can disable it by simply unchecking the box next to it.
That's all. If you are interested in accessing files that are on a drive connected to the router from a phone or tablet on Android, then I recommend using the ES Explorer application. It has a network tab where the network drive will be displayed. If it does not appear automatically, then there is the opportunity to connect a network drive to the address \\192.168.0.1, or \\192.168.1.1.
If you can’t log in from a mobile device, write in the comments. I'll show you in more detail.
One of the obstacles to using a flash drive may be that the administrator has disabled the USB ports on your computer. can be done in different ways, therefore different methods of counteraction are required.
Enabling access to flash drives and other USB drives in the Local Group Policy Editor
If you have Windows 10, 8.1, or Windows 7 Professional, Enterprise, or Ultimate installed on your computer, you can use the Local Group Policy Editor to fix the problem. For home edition, proceed to the next method.
The steps to fix “Location Unavailable” for USB drives will be as follows:
- Press the Win+R keys on your keyboard, type gpedit.msc and press Enter. The Local Group Policy Editor will open.
- Go to Computer Configuration - Administrative Templates - System - Removable Storage Access.
- On the right side of the editor window, look to see if there are any policies that show “Enabled” in the “Status” column.
- If any are present, double-click on them and set them to “Not configured” or “Disabled”. Apply the settings.
- Repeat steps 2-4 in the similar subsection in “User Configuration”.
As a rule, a reboot after these steps is not required: the changes take effect immediately, but the drive will need to be removed and reconnected to the computer or laptop after completing the settings.
Another way to remove protection from a memory card/flash drive. Diskmgmt.msc utility
The protection removal method is suitable for both SD memory cards and USB flash drives. To implement it, we will need a standard Windows component for disk management - diskmgmt.msc.
- Start – Run. Type diskmgmt.msc into the text line and press Enter
- Right button on the partition you want to format (the letter and partition will help you determine)
- Select "Delete volume..." and confirm the operation
- In the context menu, select the “Create Volume” command
- Select primary partition
- Leave all parameters as default
- Click ok