Creating a network folder
If you have two hard drives on your computer (or 2 local drives, for example “drive C:” and “drive D:”), then it is better to use a different one on which Windows is installed, and on which there is more free space. Don't forget to estimate how many gigabytes of memory you'll need for your work over the next year and make sure that the drive you choose has enough of it.
- On the selected drive we create a regular folder, it can be called “Network Folder”, “Server” or whatever you like.
- Right-click on it and go to “Properties”.
- In the window that opens, uncheck the “Read Only” checkbox and go to the “Access” tab. Next, click on advanced settings.
- In the window that opens, enable the “Share this folder” checkbox. In the “Limit the number of simultaneous users to” field, increase to the maximum. And click on the “Permissions” button.
- In the window that opens, click on the “Add” button, and in the next “Advanced...” button.
- In this window, click on the “Search” button, find the NETWORK item, select it and click the “OK” button.
- In the window (Select: “Users” or “Groups”), also click “OK”.
- In the window (Permission for the “Name of your folder” group), select the “NETWORK” group and check the box to allow full access. Click “Apply” and then “OK”. In the remaining “Advanced sharing settings” window, also click “Apply” and then “OK”.
- At this stage, we have added, for our network folder, a user group that includes all computers on the internal local network. Now we need to add the same group in the security section of the same folder. Go to the “Security” tab, click the “Change” button and in the window that opens, the “Add” button.
- Then we perform the same actions as in points 5 to 7.
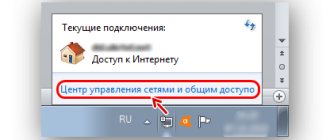
- In the remaining window, select the “NETWORK” item, check the box to allow full access, and then “Apply” and “OK”. Go back to the “Access” tab and click on the “Network and Sharing Center” link.
- Now we have created and configured a network folder. But our computer is not configured to communicate with the network. It does not transmit information to other computers or take it from them. What are we doing. In the Network and Sharing Center, in the Private and Guest or Public profiles, enable network discovery and file and printer sharing. And in the “All networks” profile – “Enable sharing so that all users can read and write files in shared folders” and “Disable password-protected sharing.”
The network folder is open! But how to get into it!?
How to share a folder under Windows 7
Often, in order to transfer information over an internal network and share access to data, it becomes necessary to share a folder (from the English Share - share, distribute) containing this data. Creating a shared network folder is one of the important elements of setting up a network on Windows 7, and the process is quite simple and takes only a few minutes.
So, let's take a closer look at how to create a network folder . On the custom folder, right-click and select “Properties” from the context menu.
In the “Properties” window that opens, find the “Access” tab and go to it.
Here, in the “Sharing network files and folders” section, there is a “Sharing...” button that you need to click on.
In the window that opens, first select the users who will receive access. To do this, select users in the list (point 1), or, for unlimited intranet access, select the “Everyone” option. Then click on the “Sharing” button (point 2).
After this, the opening process starts. Usually, this happens almost instantly, but Windows 7, just in case, warns the user that “This may take a few minutes.” During setup, a corresponding message and a progress bar are displayed.
After successful completion of the setup, a notification “Folder is open for public access” is displayed, as well as a visual demonstration of the new network folder and its address. By clicking the “Finish” button we confirm the completion of the setup process.
Now a lock symbol has appeared next to the icon, indicating that this is a protected Windows 7 network folder .
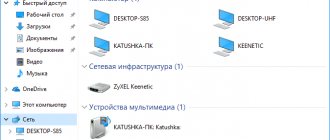
To check the availability of information from this folder via the network, open a new Windows window (for example, through “My Computer”), select “Network” in the left column, find the icon of our computer there by its network name, go into it and find the folder there “We’ll fix everything!”, using the example of which today we looked at creating a network folder .
In conclusion, I would also like to note that share a folder only if the user of the computer has a “default” login password. If it is not there, Windows will give you the opportunity to open the folder for access over the network. To do this, you need to set a password for your account, or create a new user whose account will have a password. Instructions on how to create a new account can be found in the same section.
What does “sharing” allow you to do?
To exchange files between devices, cloud storage (for example, Google and Yandex disk) or mail services (for example, mail.ru) are most often used. But in some cases they are inconvenient, since they require a stable Internet connection for both exchanging users: the first must upload the file, the second must download it.
“Sharing” a folder helps speed up the sharing process and eliminate the need for the Internet. By activating this feature, you will allow other users on your local network to view and change the contents of the folder. Also, with certain settings, the folder will become accessible from other accounts on the computer.
Once you have shared access, you can do the following: move any file to the shared folder, edit it, or delete it from any of the computers that have access rights. The access level can be adjusted for each user separately: for example, one of the group members can only be allowed to view the contents of a folder, and the second can edit it.
Activating and setting up sharing
It doesn't matter which folder you're going to share, the process will look the same. You can even open access to folders containing Windows system files, but this is not recommended, since a user connected to your local network could damage something there.
This is interesting: How to save a session in Mozilla - session manager for Firefox
Basic access settings are made through Explorer, and additional ones in the built-in Settings application and the taskbar.
Using a conductor
Through Explorer you can find any section. Once you have found the folder you want, do the following:
- Right-click on the folder and go to its properties through the menu that appears.
Open folder properties
- Expand the "Access" tab. First of all, you need to activate sharing of the element, so click on the “Advanced settings” line.
Click on the “Advanced settings” button
- Check the box to indicate that sharing should be enabled. Enter the folder name that will be displayed to other users and save the changes.
Check the box next to “Sharing”
- Returning to the “Access” tab, click on the “Sharing” button.
Click on the “Sharing” button
- Add accounts and users from your local network so they can access the folder.
Adding users with access
Done, once all the above steps are completed, other users will be able to access the folder. You may have to disconnect and reconnect to your local network for the changes to take effect.
A prerequisite for access is that network access is enabled. You can check its status using the instructions from the paragraphs “Using parameters” and “Using the control panel”.
Changing access level
If you want to limit or expand someone's rights to manage a folder, follow these steps:
- While in the advanced access settings (how to access them is described in paragraphs 1 and 2 of the instructions “Using Explorer”), click on the “Permissions” button.
Click on the “Permissions” button
- Select or add a new user to the list using the “Add” function, and then check the boxes next to the permissions you want to give him.
Specify the access level
There are three types of access: read - the user will only be able to view the content, change - will be able to change, full access - will be able to both read and change. Of course, when the “change” level is activated, reading is automatically enabled.
In addition to the main types of permissions, there are additional ones necessary for more detailed changes in access levels:
- While in the folder properties, select the "Security" tab. Click on the “Change” button to go to the access settings.
Click the “Change” button
- Check and uncheck the boxes next to the necessary and unnecessary permissions. Save your changes for them to take effect.
We indicate what rights the user has
Using parameters
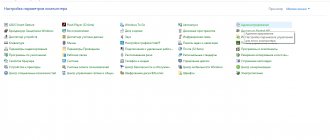
The built-in Settings application allows you to manage system settings. In it you can allow access to shared folders and peripheral devices such as a printer or scanner, as well as set some home network properties.
- Using the system search bar, find the Settings program and expand it.
Open the "Settings" program
- Go to the “Network and Internet” block.
Open the “Network and Internet” block
- Go to the Ethernet or Wi-Fi block (which one to choose depends on what type of protocol is used to connect computers on your local network), and then click on the “Change advanced sharing settings” button.
Click on the line “Change advanced sharing settings”
- Select the block with the connection type you are using (private, public, or "all networks" - universal). Set the conditions that suit you. If you want other users to have access to files that are shared through File Explorer, be sure to check the box next to “Enable file and printer sharing.” In the “All networks” block, you can activate the use of a password so that when trying to view the contents of a folder, a participant must enter a specific password to gain access.
Set permissions and enable a password if necessary
Using the control panel
If for some reason you cannot make the appropriate settings through the Settings application, use the Control Panel. It provides access to the same settings.
- Using the system search bar, find and expand the control panel.
Opening the control panel
- In the built-in search bar, enter the query “shared access” and expand the found block.
Open the “Network and Sharing Center” section
- Click on the line “Change sharing settings”.
Click on the button “Change sharing settings”
- Select the block with the connection type you are using (private, public, or "all networks" - universal). Set the conditions that suit you. If you want other users to have access to files that are shared through File Explorer, be sure to check the box next to “Enable file and printer sharing.” In the “All networks” block, you can activate the use of a password so that when trying to view the contents of a folder, a participant must enter a specific password to gain access.
Activate network access
How to enable folder access
To transfer information from one computer to another PC, it is not at all necessary to use a flash drive or any other media. To do this, it is enough to create a network local object.
This is interesting: How to change the IP address of a computer and why is it necessary?
How to do it in Windows XP
Review and configuration of the D-Link Dir-320 modem
To create a network group in Windows XP, the procedure is as follows:
- In the root of the local drive C or D, create a folder with any name. It is important to remember the name in order to know how to find and recognize it. An example of the name “Network”, right-click on it and select the “Properties” node from the drop-down list.
- In the access window, go to the “Access” section and check the box next to “Share that folder.” If necessary, check the box next to “Allow editing files over the network.”
At this point, the creation of the object can be considered complete.
Note! The object's icon will change, which means that the information is networked.
How to do it in Windows 7
The algorithm for creating a shared folder on the Windows 7 local network is as follows:
- In the root of the local drive C or D, create an object with any name. It is important to remember the name in order to know how to find and recognize it. An example of the name “Network”, right-click on it and select the “Properties” node from the drop-down list.
- In its properties window, go to the “Access” section, then “Sharing”.
- The next step is to select specific users and provide them with access to information based on their needs.
Finally, a window will appear notifying you that the object has become online. Click "Done".
How to do it in Windows 8
To create a local object in Windows OS, you need to repeat the algorithm for creating an object in Windows 7 OS. Next, the sequence of actions is as follows:
- Follow the path: “Control Panel” - “Network Center”.
- The screen will display the network being used, click “Change additional access settings.”
- In the profile you are using (public, guest or private), make changes: enable network discovery, enable access to printers.
- Go to the “All networks” tab and enable local access so that users on the local network can view the files contained in these objects.
Finally, you must save the changes.
How to do it on Windows 10
When creating a network object on the Windows 10 operating system, you need to completely repeat the algorithm for creating it in Windows 8.
Sharing files over a network in Windows 7
Update
A program appeared that almost completely repeated the actions described in the article without any dancing with a tambourine. You can download it here.
It happens that you connected two or more computers to a local network by wire or via Wi-Fi and discovered that the computers “do not see” each other. And these computers are controlled by Windows 7, while computers with the old but beloved XP perfectly detect each other on the network and see folders open for public access.
In Windows 7, the work with networks and sharing has been radically redesigned. “Network locations” appeared (home, work, public and domain networks) and this was done, of course, for the benefit of you and me, but it turned out, as they say, as always.
By default, Seven defines all new networks as public, and very strict security rules are set for them: network discovery is disabled (the computer is blind and cannot be seen by other machines), file and printer sharing is disabled (other computers do not see shared folders, folders, printers ), access to the computer from the network is password protected.
From the dark days of Windows Vista, many remember this network location selection screen that appears whenever the computer connects to a new network.
So, how to open access to files over the network in Windows 7 ( share files)? You can select Home network each time you select a network location. And you can configure your computer once for convenient use when connecting to any network with the inhabitants of which you want to share files. If you are concerned about the safety of your confidential data, simply do not provide access to it and try not to give files and folders full access (write and read).
We go to the network folder from another PC
After sharing our section on the local network, we move on to using it on another computer.
It looks like this:
- First, find out the IP address of the computer on which the open access folder is located. Launch the “Command Prompt” as indicated above and enter the command “ipconfig” (without quotes).
We are looking for an IPv4 address in the list. We remember our IP: 192.168.1.3 (you will have a different one).
- Let's move on to another computer that is already connected to your local network. In the search bar of the explorer, enter the IP address with two backslashes: “\192.168.1.3”. The data folders you are looking for will appear in front of you.
Restricting access to part of a network folder
Let me explain. Every computer has an account. You can make certain folders within a network folder accessible only from certain computers (or rather, from specific user accounts). If someone connects to your local network, they will not be able to get into it. Or an employee (computer) to whom you did not give access to this folder will also not be able to get into it.
The principle is the same as when creating a regular network folder. In the case of an open network folder, we open access to the NETWORK group, which includes all computers. In this case, we provide access only to specific users. Let's begin.
Create user accounts on a computer with a network folder
The first thing we need to do is write down on a piece of paper the account names and passwords from the computers that we want to give access to the protected folder.
- Turn on the computer that should have access to this folder. Press the Win+R combination on your keyboard, enter the command knetplwiz and click OK.
- The user management window will open. You need to accurately copy your account name onto a piece of paper and remember your password. If the username is not unique in the “User”, “User-PC” style, or something else, then it must be changed and a password must be set. Be sure to write down your full account name and password on a piece of paper! We turned on this computer to find them out.
The password must be checked by logging out and logging in using this password.
- Now you have the username and password from the other computer (to which we want to give access). We need to create the same user on our computer (on which the network folder is located). We perform the same actions - Win + R and the command knetplwiz. The Accounts and Users window will open. Check the box to require username and password. Click the add button.
- If the computer you want to give access to has a Microsoft account (you have an e-mail written on a piece of paper as a login), then you enter it and follow the instructions; if you have a regular (local) account, then click on the link below "Sign in without a Microsoft account." Next, click the “Local Account” button.
- Create an account exactly as written on your piece of paper. I used the user "Buhgalter". In the “User Accounts” window, click “Apply” and “OK”.
Important!
If at this step you added a Microsoft account (you have e-mail as a user), then you must log into this account on this computer, otherwise this user (on another computer to which you give access) will not have rights to enter a secret network folder.
Create a protected network folder and open access to users
- In a network folder, create a regular folder. In our case, let's call it “Finance”.
- After we have created all the necessary users on the computer with the secret network folder, we need to give these users rights to visit and edit the secret folder. Let's go to our folder, in my case it is “Finance”. Right-click on it and select “Properties”.
- Go to the access tab and click on the advanced settings button. In the window that opens, enable the “Share this folder” checkbox and click on the “Permissions” button. In the “Permissions for group...” window, click on the add button.
- Adding our users. To do this, in the window for selecting users and groups, click on the additional button. In the window that opens, click on search, select our user and click “OK”. Click additional again, find the next user, and so on until we add everyone we need.
- Now a list of our users has appeared in the window for selecting users or groups. Click on “OK” and in the remaining window we set the necessary permissions for our new users. To do this, select a user and check the boxes for the required permissions, then select the next one, and so on until we distribute the rights to everyone. Click Apply and OK. In the remaining advanced settings window, click Apply and OK.
Cancel inheritance of protected network folder rules in Win 10
We have opened access for our new pack to specific users, but our finances folder is located inside a network folder in which we have given permission to all network users (the “NETWORK” group) to read and edit the folders and files nested in it. Thus, our “Finance” folder inherits all the rules from the “Network Folder” folder. We need to disable this inheritance.
- In the properties window of our network folder, go to the Security tab. Click on the additional button.
- In the Advanced Security Settings window, click on the Disable Inheritance button. A question will appear offering 2 options. If we select “Remove all inherited permissions from this object,” then we will also remove our administrative rights to this folder and will no longer be able to do anything with it. And if we select the option “Convert inherited permissions into explicit permissions of this object,” then we can remove permissions that we don’t need, leave those that we need, and add new ones.
- We remove permissions for the “NETWORK” and “Everyone” groups. And in order for all files and folders inside our protected folder (Finance) to inherit the rules that we will set here, enable the checkbox “Replace all permission entries of a child object with those inherited from this object.”
- We have blocked access to unknown computers on the network. Now we need to allow access for our new users. To do this, in the security tab of the properties of our network folder, click on the change button. In the window that opens, click on the add button.
- Next we need to add new users and give them permissions. To do this, in the window that opens (Permissions for the group...), repeat everything in the same way as in steps 4 and 5 from the section “Create a protected network folder and give access to users.”
- We now have security permission for the right users. In properties, click Apply and OK.
- Be sure to restart all computers.
The protected network folder is ready! You can get to it by logging into the mapped network drive of our regular network folder, or connect a separate network drive for faster access.
How to Share a file or folder?
Right-click on the folder or file and go to Properties .
Go to the
Access and click on the Advanced settings Check the box next to Share this folder and click on the Permissions
Click Add
In the window that appears, click the
Advanced Click the Search in the middle right (1) - a list of services and users will appear in the lower field of the window (2). Scroll to the bottom and find Network . Select Network (3) with the left mouse button and click OK (4). OK again .
In the field highlighted in yellow, you can set the rights for users who will connect to you over the network. The differences between Full Control, Modify, and Read are shown in this table (from Windows Help). In short, the only difference between full access and modification is that with full access you can delete files. When you have configured the desired rights for users, click OK twice and go to the Security tab in the folder properties . Next, you need to perform steps similar to those we performed when setting permissions.
Click the Change .
In the window that appears, click
Add . Click the Advanced in the next window. Next, click Search and find Network . Highlight Network with the left mouse button and click OK . OK twice . In this window, as before in the access parameters, set the desired security parameters. If you leave the list unchanged, the folder will default to read settings. OK twice .
That's basically it. You can start transferring files over the network.
If, despite all the above measures, your computer is still inaccessible to others, try disabling the Windows Firewall or the one built into your Anti-Virus.
This is especially true for users of Eset Smart Security, which by default really likes to block all network connections. KIS also sometimes suffers from this.
If you couldn’t share the computer in this case, try to reboot and gain access to it by typing its IP address in the address bar of Explorer (in any window) (how to change the IP address, read the article Creating a wireless local network at home) . The address must be preceded by two backslashes (\).