Solving the problem with installing Kaspersky antivirus on Windows 10
On Windows 10, some products may not work correctly or may not install at all. For example, this can happen with Kaspersky antivirus. There are several options to solve this problem.
Fixing installation errors of Kaspersky antivirus on Windows 10
Problems with installing Kaspersky antivirus usually arise due to the presence of another antivirus. It is also possible that you installed it incorrectly or incompletely. Or the system could be infected by a virus that prevents the installation of protection. It is advisable that Windows 10 have the KB3074683 update installed, which makes Kaspersky compatible. Next, the main options for solving the problem will be described in detail.
Method 1: Complete removal of the antivirus
There is a possibility that you did not completely uninstall your old antivirus protection. In this case, you need to perform this procedure correctly. It is also possible that you are installing a second antivirus product. Usually Kaspersky notifies that it is not the only defender, but this may not happen.
As mentioned above, the error can be caused by incorrectly installed Kaspersky. Use the special Kavremover utility to easily clean the OS from components of an incorrect installation.
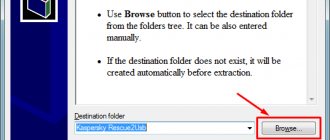
- Download and open Kavremover.
- Select your antivirus from the list.
- Enter the captcha and click “Delete”.
Method 2: Cleaning the system from viruses
Virus software can also cause errors when installing Kaspersky. This is indicated by error 1304. Also, the “Setup Wizard” or “Setup Wizard” may not start. To fix this, use portable antivirus scanners, which usually leave no trace on the operating system, so it's unlikely that a virus will interfere with the scan.
If you discover that your system is infected, but you are unable to cure it, contact a specialist. For example, to the Kaspersky Lab Technical Support Service. Some malicious products are very difficult to completely erase, so you may need to reinstall the OS.
other methods
- You may have forgotten to restart your computer after uninstalling the protection. This must be done so that the installation of the new antivirus is successful.
- The problem may lie in the installer file itself. Try downloading the program again from the official website.
- Make sure your antivirus version is compatible with Windows 10.
- If none of the methods help, then you can try creating a new account. After the system reboots, log into a new account and install Kaspersky.
This problem happens very rarely, but now you know what may be the cause of errors when installing Kaspersky. The methods listed in the article are easy and usually help overcome the problem.
Thank the author and share the article on social networks.
How to install Kaspersky on Windows 10
Many users do not always trust built-in protection tools and try to install Kaspersky on Windows 10 . This process can cause some difficulties during installation, but before using third-party antivirus software, it is better to consider the built-in functionality. Perhaps it will be quite enough to reliably protect your computer from the penetration of malicious files, and after that we will consider the nuances of installing an antivirus program from Kaspersky Lab and what problems you may encounter during this process.
After installing Windows 10, Kaspersky disappeared - we return the antivirus to work
Let's look at another important problem that some users encounter when using Windows 10.
.
This group is recruited mainly from people who have given preference to Aspersky Anti-Virus
, however, according to some reports, a similar problem appears with other applications.
Their number is not very large, but there are several solutions. And judging by some of them, the problem is not always in Windows 10 - other applications, including such as Aspersky Anti-Virus
, sometimes show their character! Read on to find out faster!
Common situation? You decided to upgrade your iron friend to Windows 10. Everything went well and everything works fine. However, at the same time, or maybe after a certain period of time, you discover that Aspersky
after upgrading to Windows 10. A little strange, considering that everything is fine with other programs.
But let's assume that some failure or discrepancy did occur. The correct solution would be to find the official website and download the distribution kit (installation program) of Aspersky Anti-Virus
. You recently bought a license for it, which will last for a considerable period of time.
You don’t really want to lose money, so you rather go to the desired site and download the installer. At the same time, you begin to remember where you keep your license key.
Either on your mailbox, or did you write it down somewhere?
The distribution has already been downloaded, and it seems that all that remains is to install it, so that nothing else reminds you that after installing Windows 10, Aspersky
, but here another funny thing happens.
For some reason the application becomes incompatible with your OS. Why, how and why? There are several versions. If one helps you with the Aspersky
, then, for example, you can start installing another application a little differently. Let's take a little look.
Built-in PC functionality
Windows Defender
The functions of this tool include checking for the presence of malicious code in the file when it is opened. If there is one, the file will be quarantined for immediate deletion. If the user decides to install third-party antivirus software, in this case this built-in function will be automatically disabled by the operating system itself.
Firewall
It is a firewall built into the OS that prevents the penetration of malicious files from a local or global network. To check if it is enabled, follow the path “Start” - “System Tools” - “Control Panel” (in the viewing field located at the top of the window, set large or small icons) - “Firewall” and make sure it is working.
SmartScreen
This tool is designed to block downloaded files from the Internet that contain malicious code inside. Also, if necessary, it does not yet make it possible to open sites where there may be built-in virus shells, which will subsequently lead to dire consequences. However, it is worth mentioning that this filter only works in the Edge browser, which is also Microsoft’s own development, but when using other programs to view Internet pages, the computer will be absolutely defenseless against such threats.
Any decent third-party antivirus always comes with a fee. If you can afford to spend some money, then it is better to do so, since, according to experts, the built-in software in Windows is not yet thorough and can easily let viruses into the system.
Rename the distribution
There is reason to believe that such blocking of access is removed immediately after you change the name of the source file. It is quite difficult to characterize exactly what is wrong here, but there are suggestions that this may be the result of the Windows 10 security system itself. After Aspersky
, some users managed to solve the problem this way. You, in turn, can try to rename the distribution. Those. if the file name was, say, kts16.0.0.614ru_8222 , then just try writing kaspersky , or any other combination of characters.
Selecting a different installation file
Because Windows 10 is still quite new, Aspersky Antivirus
considers it a beta version of the OS.
Such conflicts are quite common that the antivirus program did not want to be installed on an operating system type with a beta version. There was information about similar conflicts during the releases of Win7
and the later released
Win8
.
After the user loses Aspersky
and the problem with one distribution cannot be solved, you can try to use another one, i.e. an earlier version, or vice versa a newer one. Usually a couple of files are always offered, as the following picture shows us.
You can also try to take some other version, for example, not Internet Security
. It is quite possible that it will support your license and install.
One way or another, users manage to complete the solution to this problem. It even got to the point where some people contacted technical support because they had lost Aspersky
. Others simply switched to some other antivirus. But in most cases, the solutions mentioned first help. We hope that you were able to solve this problem too. Thank you for your attention!
Windows Defender
Its functions are to check opened files for viruses and eliminate all kinds of programs that pose a threat to the full operation of the device in real time.
Windows Defender blocks malicious objects and moves them to a quarantine zone for later removal. Defender updates occur automatically through Windows Update. When you install alternative antivirus programs, Windows Defender is automatically disabled.
When connecting any external media to your computer, it is advisable to first check it using the built-in antivirus 10. This is done like this:
- Click on “ Start ” and open “ Settings ”.
- Go to “ Update and Security ”.
- On the left select “ Windows Defender ”.
- Open the “ Home ” tab, in the scan options (on the right side of the window) and click Scan now.
- Check the box next to the folders that need scanning and confirm by pressing OK (or Enter).
How to fix an error when installing Kaspersky on Windows 10
Since this antivirus is maximally adapted to new versions of Windows, problems can arise for a very small number of reasons:
- The system already has an antivirus from another manufacturer installed (the built-in Windows Defender does not count);
- The system is already infected with some viruses that prevent the installation from completing normally.
The problem may also occur in older versions of Windows 10 operating systems that do not have the KB3074683 update, where Kaspersky and other antiviruses become maximally compatible.
Below we will look at common ways to fix the problem.
Option 1: Incorrect installation
You may be trying to install a second antivirus from Kaspersky. Typically, compatible versions of a product are interchangeable and installation simply upgrades to the appropriate version. But this does not always happen and antiviruses in the system begin to conflict. In this case, when installing Kaspersky, you will receive a notification that the system contains other products from the manufacturer that are interfering with the installation.
There is a possibility that you have previously installed other protection products from Kaspersky, but the installation was not completed completely or after some time you uninstalled this antivirus. However, there are still components in the system that prevent installation. In this case, you can finally get rid of them using a small program called Kavremover:
- Download this product from the developer's official website. This program does not require installation on your computer, which is a plus; you only need to run the executable EXE file.
- At the first launch, the OS will be scanned for the presence of other antiviruses from Kaspersky. Antiviruses from other developers may also be detected, but in this case it is not possible to remove them using this program.
- In the “The following products detected” section, select the detected Kaspersky that is interfering with installation.
- Next, you will need to enter a special code in the line above, which is displayed at the top of the interface. After that, click on the “Delete” button.
- Expect programs to be removed. Once the process is complete, restart your computer.
Option 2: Conflict with other antiviruses
Antiviruses from other manufacturers will almost always conflict with Kaspersky. The only exception is the standard Windows Defender, which is automatically disabled when a third-party antivirus is detected in the operating system.
If the system has an antivirus from another manufacturer, then during the installation of Kaspersky you will receive a corresponding warning. The installation may complete successfully, but then the antiviruses will conflict with each other, which will lead to many problems, which is why it is not recommended to install 2 or more antiviruses on Windows.
You can remove most antiviruses in the standard way - through “Programs and Features”:
- Open the “Control Panel” through a system search (magnifying glass icon or Win+S combination). Enter the name of the object you are looking for there. You can open it in another way convenient for you.
- In the "View" field located in the upper right part of the window, select "Small Icons" or "Large Icons" (whichever is convenient for you).
- Now in the interface, find the “Programs and Features” item. Open it.
In the list of programs, find an antivirus from another manufacturer. Select it by left-clicking and click on the “Delete” button that appears at the top.
Unfortunately, this method of removing third-party antiviruses does not always give an absolutely positive result. Sometimes data remains in the registry and on the hard drive, which may interfere with the subsequent installation of other antivirus products, including Kaspersky. In this case, it is recommended to use special programs designed to remove other software. For example, let's look at how to work with Revo Uninstaller:
- Download and install this program. We will not dwell on this in detail, since the entire installation process is described in detail by the installation wizard himself. It is worth noting that there are two editions of the program - Revo Uninstaller and Revo Uninstaller PRO. In the second case, you will have to buy a license to use the product.
- After launching the installed software, look in the main interface for the antivirus that is interfering with the installation of Kaspersky. Select it with a mouse click.
- Next, click on the “Delete” button located in the top menu.
- After this, the program will launch the built-in antivirus uninstaller. There you will only need to confirm the removal of the product using the appropriate button.
- Now you will need to set the “Advanced” scanning mode in Revo Uninstaller itself. Run a system scan for residual files using the “Scan” button.
- The program will detect old registry entries and residual files on hard drives. First, you will be asked to clean the registry. Click on "Select All" and then on "Delete".
- Do the same with residual files on your hard drive.
- Close the program and restart your computer.
Option 3: Virus infection
Viruses that are already on the system may prevent the installation of the Kaspersky anti-virus package. Several factors may indicate their presence:
In this case, you can use either portable scanners or the built-in Windows Defender. In the first case, no installation is required, plus the scanner leaves no traces on the system, but it is not always effective. The standard Defender is more effective in this matter and is already built into the system.
- Start Windows Defender. The easiest way to do this is using the system search bar, which is called by the Win+S key combination or by clicking on the magnifying glass icon. There you just need to enter the name of the object you are looking for.
- Then go to the Virus & Threat Protection section.
- Click on “Scan Settings”. It is located in the central part of the window.
Among the proposed scanning options, select the checkbox next to “Full Scan”. To start the procedure, use the “Run scan now” button.
It is worth understanding that those viruses that prevent the installation of any programs are deeply embedded in the system. They cannot always be removed using the built-in solution from Windows or third-party scanners. In this case, you will either have to contact Kaspersky technical support or reinstall the system. Fortunately, this very rarely happens.
Additional Tips
There are also a number of recommendations to solve problems with installing Kaspersky anti-virus on Windows:
- Do not forget to restart your computer after removing old antiviruses, if any;
- You may have downloaded a broken Kaspersky installation file. This problem occurs especially often when downloading an antivirus from a torrent or dubious sites. Download only from the official website of the developer;
- Make sure that the version you are installing is fully compatible with the current edition of Windows 10. This is relevant if you are trying to install an old version of Kaspersky;
- You can also try to create a new account in the system and try installing Kaspersky there.
Fortunately, problems with installing Kaspersky Anti-Virus on a Windows computer are very rare. The methods listed above almost always help resolve the problem. If you still have problems with the installation, write about your problem in the comments to this article.
Firewall
The latest OS from Microsoft also comes with Windows Firewall, which helps protect your device from malware on your local network and the Internet. You can make sure it is enabled like this:
- right-click on the “ Start ” icon (lower left corner);
- log into the control panel;
- Open the Windows Firewall and look at its status.
It is enabled by default. You can change the state (optional) in the “ Turn Windows Firewall on or off ” tab.
SmartScreen
The third tool for protecting Windows 10 is the Microsoft Edge , the brainchild of Microsoft, which is automatically downloaded to all users of version 10. It has a special SmartScreen filter that helps block malicious downloads and sites.
To check whether the above filter works, you need to do the following:
- Launch Microsoft Edge by clicking on the corresponding icon at the bottom left (on the taskbar);
- Click on the ellipsis in the upper right corner (directly below the cross);
- Open settings;
- Click “ View additional options ”;
- Go down to the very bottom. The last option must be enabled.
Selecting PC protection tools
There is an opinion that built-in Windows protection works somewhat worse than third-party antivirus programs. But its main advantage is that during operation it consumes a minimal amount of computer resources (memory, processor).
Not all PC owners are willing to entrust the protection of their device to Microsoft products; many want to use a proven antivirus. However, when you update the OS to version 10, some previously installed anti-virus assistants disappear due to incompatibility with the new system.
If the antivirus used before installing the new OS suddenly disappeared after switching to Windows 10, you should install it again. If the OS blocks the installation of antiviruses, then they are not compatible with this version of the system. Nowadays, most antivirus programs are compatible with the latest version of Windows. Microsoft considers the following PC security software providers to be reputable:
- 360 Total Security and Security Essential;
- VIRUSfighter Pro;
- Avast Free Antivirus, Internet Security, Premier;
- Emsisoft Anti-Malware 10;
- NANO Antivirus;
- G Data InternetSecurity, AntiVirus, TotalProtection;
- ESET NOD32 Antivirus, ESET NOD32 Smart Security, ESET NOD32 TITAN, ESET NOD32 Start Pack, ESET NOD32 Smart Security Family;
- Avira Free Antivirus, Avira Antivirus Pro;
- Chili Internet Security;
- Bitdefender Internet Security, Bitdefender Antivirus Plus 2020, Bitdefender Total Security 2016;
- Kaspersky Internet Security 2020, Kaspersky Anti-Virus 2020, Kaspersky Total Security 2020.
What to do if Kaspersky Anti-Virus is not installed on Windows 10
Formally, the Kaspersky Lab product is fully compatible with Windows 10. Actual compatibility also exists, but during installation and further operation of the antivirus, some compatibility problems were identified. Sometimes an already installed antivirus crashes after upgrading to Windows 10, and sometimes, on the contrary, Kaspersky is not installed on a Windows 10 already installed on a computer.
Regardless of the cause of the problem, you need to deal with it, since using this OS without an antivirus is already risky, and tomorrow, when virus writers get serious about the new platform, it will become completely stupid and dangerous.
Everything that will be discussed in our article applies not only to one particular program from the “Laboratory” set of programs, but to all similar tools: “Kaspersky Total Security”, “Kaspersky Anti-Virus”, “Kaspersky Internet Security” . For their normal installation and subsequent operation without failures and problems, use our recommendations. All cases of abnormal behavior of Casper on Windows 10 fit into the following scheme:
- Kaspersky disappeared from the system immediately after it was automatically updated to Windows 10.
- Errors are detected in the program.
- During the installation of the antivirus, errors occurred with numbers: 1316 or 1714.
- During the installation process, a message appears about damaged installation files.
- The antivirus stopped working after installing the service pack.
The antivirus has disappeared or the antivirus is not working as it should
It happens that after upgrading to Windows 10 (using “get”, for example), the previously installed antivirus disappears from the system. That is, it simply turns out not to be recognized as a working application. This only means that your version of the antivirus is not intended to be used on Windows 10. In this situation, uninstalling the old one and installing a new version of Casper will help. But you need to do this installation correctly, in the following order:
- First, download the utility for removing antivirus remnants from the system. You can get it here: https://media.kaspersky.com/utilities/ConsumerUtilities/kavremvr.exe.
- It then removes all traces of the old version from the system. Moreover, if the utility detects several programs, then after removing each of them you need to reboot the system.
- Then you need to reinstall the latest versions of the programs “Kaspersky Total Security”, “Kaspersky Anti-Virus”, “Kaspersky Internet Security”, specially designed for Windows 10. They can be obtained from the Laboratory website or purchased in retail chains.
When switching from versions prior to 15.0.2.xxx to versions older than 16.0.0.xxx, the following error window may appear:
Restart your computer. If this does not help and the error continues to appear, you will need to reinstall the programs, as in this case there are some compatibility problems.
Errors during the installation process
You may not be able to install Casper on Windows 10 due to the following error:
Instead of error number 1316, as above in the figure, a window with error number 1714 may appear - this does not change the essence of the matter. The compatibility of the product and OS let us down in this case too. To solve this problem, use the same method as before - install a new version.
Installing a new version will also be required when the installation fails with the following message:
The installer claims that it considers the installation files to be corrupt. But first, you need to delete all the contents of the “\ProgramData\Kaspersky Lab Setup Files\” folder on the Windows 10 system partition.
Error after system update
Let's say you successfully installed an antivirus in Windows 10 and used it just as successfully before receiving the Th3 update package. And after the system managed to install the service pack, compatibility was broken. The fact is that this package destroys the antivirus license. Moreover, the trial license cannot be restored. You can restore your commercial license by restarting your computer and then reactivating the product. This is a critical error that promises to be fixed.
WindowsTune.ru
Kaspersky Anti-Virus
Having chosen which antivirus to use to protect your PC, all that remains is to install it correctly. Among antivirus programs installed by users, the most common are products produced by Kaspersky Lab . To successfully install any antivirus programs from Kaspersky, you need to follow a certain procedure.
- You must first remove the current antivirus (if you have one). It is imperative to do this because the coexistence of several programs of this type can lead to numerous difficulties in the future.
- Check for compliance with system requirements for Kaspersky.
- Connect your PC, tablet or smartphone to the Internet.
- Download the installation file of the selected software from the official Kaspersky Lab website.
- Disable all running programs.
- Double click on the downloaded file.
- Click Install.
- Accept the license agreement and terms of use of Kaspersky.
- Wait for the installation to complete. Launch Kaspersky option is ticked and click Finish.
- After launching the antivirus, you need to activate it. To activate paid Kaspersky programs, you must enter a special code consisting of 20 characters, or select “ Activate trial version of the program. ” In this case, you will be provided with a fully functioning antivirus for free for 30 days.
- Next, a window will appear indicating successful activation. Click Finish.
The Microsoft Edge browser is not currently supported by Kaspersky antiviruses.
Installing Kaspersky antivirus program
Before proceeding with the direct installation of this antivirus program, you must meet certain requirements:
- other similar software must be removed from the system (the only exception is built-in tools), otherwise this can cause many conflicts that will significantly slow down the computer;
- take into account the minimum system requirements, which are always specified by the developer of programs and applications, including Kaspersky Lab.
If the above conditions are met, to install this antivirus you must do the following:
- Go to the developer’s website and download the installation package (although there are many of them, choose the one that is most suitable for solving problems directly on your computer).
- Close all programs that are currently running, after saving all documents.
- Run the downloaded file.
- Agree to the terms of the license agreement by clicking the appropriate button and the installation process will begin.
- After everything goes well, a corresponding window will appear on the screen in which you only need to click the “Finish” button.
- After this, in the main window of the program you will be asked to enter an activation key, which must be purchased for real money, using either one of the online payment tools, or purchase a license from dealers. But for evaluation purposes, you can also choose a demo version, which will work for 20 days from the moment of installation.
- At the last stage, the antivirus program will inform you that the installation was successful and the user only needs to close the window.
More on the topic: How to delete temporary files in Windows 10
As a rule, there are no problems with installing the Kaspersky antivirus program, but in some situations two unrelated problems may arise:
- The installation files are damaged.
In this case, you must first delete all content in the folder located in the following path: C:ProgramDataKaspersky Lab Setup Files. Next, download the antivirus again and try again.
If viruses have already penetrated the system, they can block the installation of any application that will be aimed at cleaning the computer from malicious files. In this case, first you need to use the Kaspersky Virus Removal Tool, which can be downloaded from the official website and is absolutely free. It does not require installation and only after downloading you only need to run the downloaded file and in the displayed window start scanning the entire system for viruses.
Other situations related to installation problems are atypical and in this case you should contact the technical service directly. Developer support.
grozza.ru
Complete removal of Kaspersky products
If Kaspersky disappeared as a result of updating Windows to version 10, you must first remove it completely. This can be done completely only with the help of special software.
Removal using standard Windows tools is not complete due to the complexity of this antivirus software.
To perform uninstallation from the Kaspersky website, you need to download the auxiliary program kavremover . After launching it, enter the security code,
in the license agreement window, click “ I agree ”, then Delete.
Wait for the process to complete and restart the PC. Perhaps the utility will find several antiviruses. In this case, after deleting each one, you should reboot the device. Next, download and install the antivirus (compatible with the latest version of Windows) again.
Urgent computer treatment
Sometimes, when you see that your computer is showing signs of virus infection, you need to act quickly and accurately. In this case, you do not have time to search, purchase and install an antivirus.
You can quickly scan and disinfect your computer using Kaspersky Virus Removal Tool . This is a free utility. You can download it on the company's website. The program is very effective for infected devices. Freshly downloaded, it does not require installation or updating and is immediately ready to use.
If any serious problem occurs, you should contact Kaspersky Lab technical support.
How to properly install Kaspersky Anti-Virus on a PC with Windows 10?
Many PC users often wonder why Kaspersky is not installed on Windows 10? The answer can be obtained on the official website of the antivirus developers. The news thread clearly states which versions of the program are compatible with the new operating system. However, in addition to knowledge about suitable versions of the defender, you also need to know all the intricacies of correct installation of the program.
Why doesn't Kaspersky install on Windows 10?
Sometimes Kaspersky does not install on Windows 10, and this may be due to a number of different reasons: from a system failure to a file being blocked by another system protection.
Why can't I install antivirus on Windows 10:
- The previous Kaspersky was not completely removed from the system.
- The OS is infected with viruses. They can block the installation of individual or all programs.
- The computer did not restart after installation.
- Problematic installer.
- A required Windows update is not installed.
- Problems with system files.
Which versions of Kaspersky are compatible with Windows 10?
The antivirus developer's website lists versions intended for Windows 10:
- Kaspersky Anti-Virus 2017;
- Kaspersky Internet Security 2017;
- Kaspersky Total Security 2017;
- Kaspersky Small Office Security 5.0.
It is worth considering that if Kaspersky Internet Security or Kaspersky Anti-Virus 15.0.1.415 with patch D or version 15.0.1.415 with patch C, version 14.0.0.4651 with patch J, version 13.0.1.4190 with patch M is installed on the PC, then After upgrading to Windows 10, the program will notify you that you need to download and install a version compatible with Windows 10.
IMPORTANT! A compatible version of the product will be installed on your computer only if the KB3074683 update for Windows 10 is installed. Otherwise, an error will appear.
After installing the program, the files will be placed in the directory: “CommonProgramFiles%AVKaspersky Internet Security”. You can customize the program to suit your needs.
Preparatory stage before installing Kaspersky anti-virus
In order to correctly install Kaspersky Endpoint Security 10 for Windows 10 to protect your PC and file servers, you should initially disable the built-in protection. Otherwise, the firewall may block the Kaspersky installation. To do this, do the following:
- Go to “Control Panel” and select “Windows Firewall”.
- A new window will open. In the menu on the left, select “Turn the firewall on or off.”
- Next we expose Fr.
- You may need to disable built-in Windows Defender. To do this, go to “Settings”, “Update and Security”, “Windows Defender” and disable all active functions.
After disabling system protection, Kaspersky Endpoint Security 10 antivirus for Windows 10 can be installed without fear of encountering an error.
Installing Defender on Windows 10
In order to install Kaspersky Endpoint Security 10 for Windows 10 or another suitable antivirus, you should do the following:
- We connect the PC or laptop to the Internet.
- Download the program installation file.
- Run the downloaded exe.file. Click “Install”. The Installer Wizard will launch. You must accept the license agreement.
- At the next stage, the program will offer to install the additional Security Network component. Click “Refuse” or “Accept”.
- Next, uncheck the box or leave it if we want to install the Google Chrome browser.
- The installation of the program will start. The installed defender on Windows 10 will need to be activated. Select "Try trial version".
- You will need to enter your login and name to register. After confirming the letter that will be sent to your e-mail, the antivirus will be activated.
IMPORTANT! When installing an antivirus, you should disable all programs that have access to the network or may affect the installation process.
The antivirus has disappeared or the antivirus is not working as it should
It happens that after upgrading to Windows 10 (using “get”, for example), the previously installed antivirus disappears from the system. That is, it simply turns out not to be recognized as a working application. This only means that your version of the antivirus is not intended to be used on Windows 10. In this situation, uninstalling the old one and installing a new version of Casper will help. But you need to do this installation correctly, in the following order:
- First, download the utility for removing antivirus remnants from the system. You can get it here: https://media.kaspersky.com/utilities/ConsumerUtilities/kavremvr.exe.
- It then removes all traces of the old version from the system. Moreover, if the utility detects several programs, then after removing each of them you need to reboot the system.
- Then you need to reinstall the latest versions of the programs “Kaspersky Total Security”, “Kaspersky Anti-Virus”, “Kaspersky Internet Security”, specially designed for Windows 10. They can be obtained from the Laboratory website or purchased in retail chains.
When switching from versions prior to 15.0.2.xxx to versions older than 16.0.0.xxx, the following error window may appear:
Restart your computer. If this does not help and the error continues to appear, you will need to reinstall the programs, as in this case there are some compatibility problems.