Group Policy is a way to configure computer and user settings for devices that are joined to Active Directory Domain Services (AD) as well as local user accounts. It controls a wide range of settings and can be used to enforce and change default settings for appropriate users. Local Group Policy is the basic version of Group Policy for computers that are not members of a domain. Local Group Policy settings are stored in the following folders:
- C:\Windows\System32\GroupPolicy
- C:\Windows\System32\GroupPolicyUsers.
When you need to open the Local Group Policy Editor in Windows 10, you can use the Command Prompt, Run, Search on the taskbar, the Start menu, or by using the Microsoft Management Console (MMC).
Let's look at the simplest options:
- Using the Start menu.
- Using the Run command.
- Using Windows Explorer.
- Using the command line or PowerShell
- Open the Local Group Policy Editor as a Management Console snap-in.
- Open Local Group Policy Editor in Windows 10 Home.
Open the Local Group Policy Editor using the Start menu.
- Open the “Start” menu and enter gpedit.msc at the top of the menu an icon will appear; when you click on it, the policy editor will open.
To view all applied policies under Computer Configuration, go to Computer Configuration\Administrative Templates\All Settings
To view all applied customization policies, go to User Configuration\Administrative Templates\All Settings .
Note: You can use search in the taskbar.
Open the Local Group Policy Editor as a Management Console snap-in.
- Open the MMC management console. (Click the Start button, type mmc , and press Enter.)
- From the File , select Add or Remove Snap-in .
- In the dialog box that opens, double-click Group Policy Object Editor and click Finish and OK.
Managing Group Policy Administrative Templates
Administrative Templates are Group Policy settings that are based on changes to registry settings. As you know, in Windows operating systems, most settings are stored in the system registry, and with the help of administrative templates, these settings can be centrally managed.
Administrative templates are available for both users and computers. Accordingly, policy settings specified on the user side are applied to users, and on the computer side - to computers.
Note. To be more precise, administrative template policies in the computer configuration modify the values of parameters in the HKLM\Software\Policies and HKLM\Software\Microsoft\WindowsCurrentVersion\Policies sections, and administrative templates in the user configuration - HKCU\Software\Policies and HKCU\Software\ Microsoft\Windows\CurrentVersion\Policies.
Let's take a practical look at what administrative templates are and how they work. For example, let’s take the first parameter “Disable context menus in the Start Menu” that comes across, located in the “Start Menu and Taskbar” section of the computer configuration.
As follows from the description, this parameter is responsible for showing the context menu in the Start menu.
Technically, administrative templates are a pair of XML files: a language-neutral file ( ADMX ) and a set of language-specific files ( ADML ). By default, administrative templates are located locally on your computer, in the C:\Windows\PolicyDefinitions folder. Each ADMX file corresponds to a specific Group Policy section; accordingly, the StartMenu.admx file is responsible for the “Start Menu and Taskbar” section. Let's open it in a text editor and find the section responsible for the parameter we are interested in.
It contains the name and scope of the parameter, the registry key responsible for setting it, as well as links to the description that is located in the corresponding language file.
Let's move on to the language file. For each language there is a special folder, for example, files for English are located in the en-US folder. We go to the folder with the desired language, open the StartMenu.adml file and find the lines with our parameter. They store the name of the parameters and their description, which we see in the editor when editing the policy.
Well, the result of applying this policy will be to change the value of the “DisableСontextMenusInStart” registry parameter in the HKLM\Software\Policies\Microsoft\Windows\Explorer section.
Thus, administrative templates are the most common instructions in XML format for changing registry settings (ADMX) and a description of the editable settings displayed in the Group Policy Editor snap-in (ADML).
Creating a central repository
Before the release of Windows Server 2008 and Vista, administrative templates had the adm extension and were just plain text files. These administrative templates had a number of disadvantages. For example, in a multilingual organization, it was necessary to create separate ADM files for each language, so when changing parameters, each template had to be edited separately. Additionally, when used, such templates were saved as part of a GPO, and if a template was used in multiple policies, it was saved multiple times. This increased the size of the SYSVOL folder and made it more difficult to replicate.
The transition to the ADMX/ADML format changed the situation for the better. And one of the advantages of this transition was the ability to create a centralized repository of administrative templates. Using centralized storage solves the problem of SYSVOL growth because the ADM folder is no longer created in each GPO, and domain controllers do not store or replicate unnecessary copies of ADM files. This helps reduce SYSVOL replication traffic between domain controllers and also simplifies the management of administrative templates in the domain.
By default, Group Policy Editor loads templates from the local C:\Windows\PolicyDefinitions . To create a central repository, you need to take this folder on any domain controller and copy it to the SYSVOL folder along the path \\domain name\SYSVOL\domain name\Policies . So for the test.local domain the path will look like \\test.local\SYSVOL\test.local\Policies .
If you then open the GPO and go to the Administrative Template section, the central store (retrieved from the central store) will be indicated as the source of templates.
Files in the central store are replicated to all domain controllers, which is very convenient when updating templates.
Template Update
Windows operating systems are constantly updated and receive new features. And in order for these features to be managed using group policies, it is necessary to regularly update administrative templates.
For clarity, I will give an example. In Windows 10 (starting with version 1607), it became possible to use long file paths. The policy responsible for this is located in the “Computer configuration\Administrative templates\System\Filesystem” section and is called “Enable Win32 long paths”.
But if you do not update the administrative templates, then the parameter we need may not be found in the specified path.
Fortunately, Microsoft regularly releases administrative template updates, we just need to find them and install them. At the moment, the most recent templates are Administrative Templates (.admx) for Windows 10 May 2020 Update (1903) v3.0.
The installer is a regular msi file that can be run on any computer.
After launch, you need to specify the folder into which the templates will be unpacked
and wait for the unpacking process to complete.
The resulting templates simply need to be copied to the storage, replacing the existing ones. To be on the safe side, you can save old templates. Not all language files need to be copied, but only those needed, for example, for Russian and English.
As a result of the update, the lost parameter appeared in its rightful place.
Adding templates
Using administrative templates, you can manage not only the operating system settings, but also various applications. For example, we want to centrally manage settings for programs from the Microsoft Office package (Word, Excel, Outlook, etc.) on client computers in a domain.
To do this, we will need to download from the Microsoft website and install a special package for MS Office. Please note that each version has its own set of administrative templates. If your company uses different versions of Office, then for each version used you need to download its own version of the templates:
For Office 2010 - https://www.microsoft.com/en-us/download/details.aspx?id=18968; For Office 2013 - https://www.microsoft.com/en-us/download/details.aspx?id=35554; For Office 2020, Office 2020 and Office 365 - https://www.microsoft.com/en-us/download/details.aspx?id=4903.
For example, let's take the Office 2020 suite and install it. The principle is approximately the same as when updating templates - run the installer,
select a folder to unpack templates
and get a set of files ADMX\ADML.
In our example, the template files are located in the admx folder. We take them and copy them to the general storage, along with the rest of the templates.
As a result, new sections are added to the Administrative Templates section, with which you can manage the settings of office programs.
This way you can also add templates for third-party software, such as Google Chrome, Adobe Reader and many others. Most major developers release administrative templates for their programs. Well, if there is no ready-made template, then you can create it yourself, it’s not that difficult.
And finally, some useful links:
https://getadmx.com - detailed description of administrative templates, including registry settings. https://support.microsoft.com - links for downloading administrative templates by OS version. https://docs.microsoft.com - ADMX schema description.
Open Local Group Policy Editor in Windows 10 Home.
As you already know, the Local Group Policy Editor app is available in Windows 10 Pro, Enterprise, or Education. Windows 10 Home users do not have access to gpedit.msc due to OS restrictions. Here is a simple and elegant solution that allows you to unlock it without installing third party apps.
There is an easy way to enable Local Group Policy Editor in Windows 10 Home by running just one batch file.
To enable Gpedit.msc (Group Policy) in Windows 10 Home
- Download the following ZIP archive: .
- Unzip its contents to any folder. It contains only one file, gpedit_home.cmd
- Right-click on the file.
- "Run as administrator" from the context menu .
All!
The batch file will call DISM to activate the Local Group Policy Editor. Wait until the batch file finishes running.
Please be aware that some policies will not work in Windows Home. Some policies are hardcoded for Windows Pro versions. Additionally, if you enable gpedit.msc using the provided batch file, changes to individual user policies will not take effect. They still require registry tweaks.
You can create the batch file yourself. Before you begin, we recommend that you create a system restore point so that you can undo the changes you have made to the system at any time.
- Open a text editor such as Notepad.
- Copy and paste the following lines:
@echo off pushd “%~dp0″ dir /b %SystemRoot%\servicing\Packages\Microsoft-Windows-GroupPolicy-ClientExtensions-Package~3*.mum >List.txt dir /b %SystemRoot%\servicing\Packages\Microsoft -Windows-GroupPolicy-ClientTools-Package~3*.mum >>List.txt for /f %%i in ('findstr /i . List.txt 2^>nul') do dism /online /norestart /add-package :"%SystemRoot%\servicing\Packages\%%i" pause
- In the “File” of the text editor, select “Save As” in the dialog box in the “File name” , enter - gpedit.bat and click the “Save” .
- Run the resulting batch file gpedit.bat as Administrator
- When prompted for Windows SmartScreen Filter, click More Details , then click the Run Anyway .
- In the User Account Control window, click the “Yes” button.
- Wait for the DISM utility to make changes and close the window.
All! The Local Group Policy Editor (gpedit.msc) is enabled and now you can launch it using any of the methods described above.
Some features of the Group Policy Editor (gpedit.msc)
Once you have finished installing the Group Policy Editor, we recommend that you pay attention to its capabilities. To do this, we have prepared a couple of examples with which we will show the most basic capabilities of the application. It combines literally every Windows setting you can find. The main thing is not to forget that by making many risky changes we can unintentionally damage Windows. Therefore, be careful when making any adjustments.
Disable Windows Defender
Windows Defender is a built-in system antivirus whose task is to protect its user from threats from the Internet and applications downloaded by him. In some cases, it may consume too many resources or start working when it is not needed. Therefore, the most common solution to this situation is to disable Windows Defender.
How to disable the built-in antivirus using the Group Policy Editor:
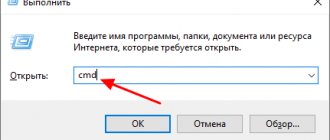
1. Open the Run using the Windows + R .
2. Type the command gpedit.msc and press the Enter .
3. Follow the following path inside the Local Group Policy Editor application: Computer Configuration > Administrative Templates > Windows Components > Windows Defender Antivirus .
4. Find the Turn off Windows Defender Antivirus .
5. Right-click the setting and click Edit .
6. Change the setting's status to Disabled .
7. Apply and save your changes.
Disabling Windows Updates
Often an operating system update starts at the wrong time, when we are not ready for it and, for example, are working. This disrupts the daily routine and, worst of all, such an update ends with a bug as a result of which the computer stops starting. The only effective solution in this situation is to roll back the update.
Is it possible to prevent unexpected Windows updates and gain control over this process? Easily! Using the Local Group Policy Editor, you can disable automatic operating system updates in two clicks. If you wish, you can start the update process manually.
1. Open the Run using the Windows + R .
2. Type the command gpedit.msc and press the Enter .
3. Follow the following path inside the Local Group Policy Editor application: Computer Configuration > Administrative Templates > Windows Components > Windows Update .
5. Right-click the setting and click Edit .
6. Change the setting status to Disabled .
7. Apply and save your changes.
As you have probably noticed, the functionality of the Local Group Policy Editor is very extensive. You can change every operating system setting in just one application.
“With great power comes great responsibility.”
Therefore, when you make changes in the Local Group Policy Editor, you also make adjustments to the registry. Remember this and be careful.
We hope the article was useful to you and helped you find answers to your questions.
Policy Plus
There is a good alternative to the built-in gpedit.msc application called Policy Plus. This is a third party open source application: PolicyPlus
Policy Plus is designed to make Group Policy settings accessible to everyone.
- The editor works on all editions of Windows, not just Pro and Enterprise
- Fully complies with licensing conditions
- View and edit registry-based policies in local GPOs, per-user GPOs, individual POL files, standalone registry user hives, and the live registry
- Navigate to policies by ID, text, or individual registry entries.
- View additional technical information about objects (policies, categories, products)
- Convenient ways to change and import policy settings
We recommend: How to restore Local Group Policy settings to default in Windows 10.