Among the hypervisor programs for Windows, which implement the ability to work on a physical computer with virtual machines (hereinafter referred to as VMs) and their operating systems (hereinafter referred to as OS), the tools of the developer company VMware are among the best. Main product VMware Workstation In many ways it is superior to both the Microsoft hypervisor Hyper-V and the third-party program VirtualBox.
Why Hyper-V VMware Workstation is more usable, more functional, and more flexible in settings. VirtualBox is more stable and reliable, primarily in terms of the correct operation of the host system (OS on a physical computer) and guest OS (installed on a VM) messages. VMware virtualization tools implement EFI VM firmware better than other hypervisors - a BIOS UEFI .
How to create a VM in the VMware Workstation environment and install Windows on it?
Host hardware requirements
Whatever hypervisor is used to work with the VM, the actual computer with the host system must meet the minimum requirements:
• At least a dual-core processor; • At least 4 GB RAM; • Support for hardware virtualization by the processor - Intel VT (Intel Virtualization Technology) or AMD-V (AMD Virtualization, also known as Secure Virtual Machine (SVM)) technologies.
Hardware virtualization technology must be enabled in BIOS . Only under this condition is it possible to work with either VMware products or other hypervisors.
An optional, but desirable condition for working with a VM is that the computer has at least two hard drives and that the VM virtual disk files are placed on a different hard drive than the one on which the host system is installed.
How to install VMware on PC?
The installation process for VMware Workstation is not complicated and does not take much time. Run the installation file, a window will appear with some files downloading. Wait for the end, literally half a minute.
After all the files are unpacked, a welcome window will appear. Click the “Next >” button in it
At the next installation stage, agree to the license agreement. Check the box as shown in the screenshot below and press the Next button again >
After agreement, the installer will prompt us to select installation options. Regular or custom VMware installation. I suggest leaving everything as is and choosing a regular VMware installation.
If for some reason you are not satisfied with the standard VMware installation path, you can change it in the next window. Click the “Change...” button and specify a different path for installing VMware if the situation requires it. If you are happy with everything by default, then just click the “Next >” button
At the next installation step, you will be asked whether to check for updates or not. I prefer to uncheck the box, if I need to, I will find out about the availability of a new version and others. Therefore, here it is at your discretion whether you want to leave the checkbox or uncheck it.
Next, I offer to help us improve this product. I propose to refuse such a kind offer and place such a responsible task on the shoulders of the developers themselves or other users. Uncheck “Help improve VMware Workstation”
In this window, I suggest leaving all the checkboxes unchecked, unlike the previous one. In this case, a shortcut will be created on the desktop, and the program can also be found in the start menu, where a VMware folder will be created from which you can also launch the program.
Here you are asked to click the “continue” button in order to begin installing the program on your PC. Let's press!
Now we can only wait for the VMware installation process to finish. As I mentioned above, you won’t have to wait long.
And the final stages need to enter the product license key in the appropriate fields.
And by clicking the “Next >” buttons and in the next window “Finish” we successfully complete the installation of VMware on your computer. Now the program is installed on your computer, and you can start using it.
Hypervisors from VMware
VMware is a developer of many specialized products, in particular for working with server technologies and virtualization technologies . Among the latest for use on PCs are Fusion for Mac OS and Workstation Pro in versions for Windows and Linux . All these are paid programs; a Workstation Pro license for Windows costs about 20 thousand rubles. The program has a monthly trial version, you can download it on the VMware website:
https://www.vmware.com/products/workstation-pro/workstation-pro-evaluation.html
Workstation Pro in the current version of the program 15 consists of several components - the network parameters editor Virtual Network Editor , the Workstation Pro and its stripped-down version Workstation Player .
Workstation Player is a so-called VM player. With its help you can create, configure VMs, and work with them. It's lighter and faster than Workstation Pro. And the license for the player costs less - about 12 thousand rubles. But the player is deprived of certain capabilities of a full-fledged hypervisor, in particular, working with the snapshot function. Workstation Player is both a component of Workstation Pro and a separate program. It can be downloaded from the VMware website and installed separately from Workstation Pro. The trial period in the player is active by default.
When starting Workstation Pro, the fact of using a trial period must be indicated.
VMware products, alas, do not support the Russian language. But on the Internet you can find and download a free crack for the Workstation Pro program.
VMware Workstation 15 - Local Virtualization
VMware Workstation Player is a free solution for local desktop virtualization that allows you to run virtual machines with various operating systems on your computer. The development of this software has been going on for more than 20 years. This is a great tool for a system administrator.
VMware Workstation Pro - paid version with advanced functionality.
VMware Workstation has a simple and intuitive interface.
VMware Workstation Specifications
- System Requirements Supports all systems with processors released in 2011 and later, except the following : Intel Atom processors based on the 2011 Bonnell microarchitecture (for example, Atom Z670/Z650; Atom N570)
- Systems with Intel Atom processors based on the 2012 Saltwell microarchitecture (for example, Atom S1200, Atom D2700/D2500, Atom N2800/N2600)
- Systems with AMD processors based on Llano and Bobcat microarchitectures (for example, Hondo, Ontario, Zacate, Llano)
- Systems with processors based on the 2010 Westmere microarchitecture (for example, Xeon 5600, Xeon 3600, Core i7-970, Core i7-980, Core i7-990)
- Ubuntu 14.04 and later
- More than 200 operating systems are supported, including the following. Windows 10
Comparison of VMware Workstation Player and VMware Workstation Pro
| Workstation Player | Workstation Pro | |
| General information | ||
| Creating new virtual machines | + | + |
| Creation of large VMs (16 CPU, 64 GB RAM, 3 GB virtual RAM) | + | + |
| Support for more than 200 guest OSs | + | + |
| Mass Deployment | + | + |
| Integration of host and guest systems | ||
| File sharing between host and guest OS | + | + |
| Executing VMs in Different View Modes | + | + |
| 3D graphics with DX10.1 and OpenGL 3.3 support | + | + |
| Device support | ||
| 4K display support | + | + |
| Supports a wide range of virtual devices | + | + |
| Support for USB smart card readers | + | + |
| USB 3.0 device support | + | + |
| Extended capabilities | ||
| Running managed virtual desktop environments with limited access | + | + |
| Control via REST API | + | + |
| Using the command line: vmrun | + | + |
| Working with encrypted VMs | + | |
| Tabbed interface with drag-and-drop support | + | |
| Simultaneous execution of multiple virtual machines | + | |
| Creating and managing an encrypted VM | + | |
| Pictures | + | |
| Advanced networking capabilities | + | |
| Cloning virtual machines | + | |
| Sharing virtual machines (using Workstation as a server) | + | |
| Connecting to vSphere/ESXi server | + | |
| Easily deploy vCenter Server Appliance | + | + |
| Remotely manage vSphere host power | + | |
| Security support based on Microsoft virtualization (guest OS) | + | + |
| Virtual Trusted Platform Module (vTPM) | + | + |
| Virtual network simulation (packet loss, latency) | + | |
| Renaming virtual networks | + | |
| UEFI boot support | + | + |
| UEFI Secure Boot Support | + | + |
Installing VMware Workstation Player
https://www.vmware.com/try-vmware.html
Download VMware Workstation Player (Free).
You will need an account on my.vmware.com. Currently available version of VMware Workstation 15.5.1 Player for Windows and Linux, 64-bit.
I'm downloading the Windows version.
I launch the installer.
To work you will need Microsoft VC Redistributable and a reboot.
Next.
I accept the license agreement, Next.
You can add an improved keyboard driver. Next.
You can enable checking for updates and join the CEIP sect. Next.
We choose where to place the shortcuts. Next.
Install.
The installation begins.
Installation completed. Finish.
They ask you to reboot. Yes.
Ready.
Getting started with VMware Workstation Player
When you first start you will be asked for a license.
No license required for non-commercial use. Continue.
Finish.
Now you can create or run a ready-made virtual machine.
Creating a virtual machine in VMware Workstation 15 Pro
So, at the time of writing this article, the current version of VMware Workstation is version 15. Actually, with its participation we will demonstrate the process of creating a VM. On the program home page, click on the function to create a new VM.
We offer two types of VM creation:
• Normal - a simplified version with most of the parameters specified by the program itself; • Selective – step-by-step wizard with the ability to select many significant parameters.
Let's consider the selective type.
Just click “Next” .
Using the browse button, specify the path to the Windows installation image. In our case, this will be Windows 10. After specifying the ISO , VMware Workstation will render a verdict in terms of the ability to enable the quick installation feature.
The latter is a simplified type of Windows installation with automatic selection of the installation location, creation of a user profile and post-installation of VMware Tools - software for guest Windows, responsible for its interaction with the host system. The Quick Install feature may not be available when using custom Windows distributions or later Workstation Pro updates to Windows 10 versions. In this case, you will need to go through the entire Windows installation process as you would on a physical computer. If this function is available, at the next stage of creating a VM, you must specify the edition of Windows, if there are several of them in the distribution, specify the account name and, if necessary, a password. Guest Windows, if desired, can be activated immediately by entering its license key. But this is optional.
The next step is to specify the name of the VM and its location. The latter should not be on the system drive C , and ideally, as mentioned, it is better to be on a hard drive that is different from the one on which the host system is located.
Next, select the BIOS . This can be either a regular BIOS (Legacy) or UEFI . The UEFI type can be selected for 64-bit Windows 7, 8.1 and 10.
If the computer processor has 4 cores, but the program itself did not select 2 cores for the VM, we do this manually.
We indicate the amount of RAM allocated to the VM. Minimum – 2 GB. More is better, but not at the expense of the memory left to the host system. It also needs at least 2 GB for background work.
Leave the network type selected by default.
We also leave the selected virtual disk controller type as default.
The disk type, again, is left as specified by default - SCSI .
Create a new virtual disk.
By default, we are offered a 60 GB virtual disk, but since we are creating a disk of a dynamic type, and this is initially assumed, we can increase the size, for example, to 100 GB. If you check the Allocate all disk space checkbox, VMware Workstation will create a fixed-type virtual disk. Check the box to save the disk in one file.
Here, if necessary, you can specify a path for saving the virtual disk other than the folder with the VM files.
And that's all, actually. At the last stage, the checkbox should be to enable the VM immediately after its creation. Leave this checkbox. And click “Done” .
In a couple of seconds, VMware Workstation will create the virtual disk. Then the VM will start, and in the program window we will see the Windows installation process.
VMware Workstation virtual computer 15 Pro 15.5.5.16285975 RePack by KpoJIuK
VMware Workstation
is a popular program for creating multiple virtual computers on one system. Designed primarily for programmers and system administrators who need to test applications running in different environments. VMware's proprietary MultipleWorlds technology makes it possible to isolate operating systems and applications within the created virtual machines. In this case, each virtual machine has a standard computer with its own processor and memory at its disposal.
System requirements:
·Windows 7, 8, 8.1, 10 (x64) ·Standard x64compatible personal computer. ·1.3GHz or faster CPU minimum. An AMD CPU that has segment-limit support in long mode An Intel CPU that has VT-x support
Torrent VMware Workstation virtual computer 15 Pro 15.5.5.16285975 RePack by KpoJIuK in detail:
Main features:
· Simultaneous launch of several guest operating systems on one computer · Launch of a virtual machine in the desktop windows of the main operating system and in full screen · Installation of virtual machines without re- disk partitioning ·Running operating systems already installed on a computer without reinstalling or reconfiguring them ·Running Windows operating system applications on a computer with Linux OS and vice versa ·Creating and testing applications simultaneously for different systems ·Running untested applications without the risk of disrupting the stable operation of the system or lose critical data Sharing files and applications between different virtual machines through the use of a virtual network Running client-server and web applications on one PC Running several virtual computers on one PC and simulating the operation of a local network
Major changes and improvements in VMware Workstation 15:
·
New REST API.
One of the most important improvements is the addition of a new REST API.
This API was introduced in Fusion 10 last year and has now been ported to the Workstation platform. The REST API allows users to automate tasks with virtual machines. Use commands to quickly deploy, configure, and remove virtual machines on the fly to speed up your development and testing process. API version 1.2 adds new capabilities to control NAT port forwarding and MAC-IP DHCP bindings, allowing users to create complex simulated virtual networks using the JSON standard over HTTP/S. · Updated interface.
Workstation Pro and Player receive an updated user interface that supports the latest HiDPI and 4K resolutions to scale both host and guest.
The developers have updated more than 500 feature icons, as well as product icons. · Stretch to full screen.
Guests can now be "stretched" to accommodate high screen resolutions without changing the system resolution.
Console windows can be made larger and more readable, and older low-resolution systems can look much better. · One-Click-SSH on Linux.
If you're running Windows 10 version 1803 or higher, you'll have access to the new "One-Click-SSH" feature to quickly open a secure shell to your Linux virtual machine.
This feature also works for remote vSphere, ESXi and Workstation hosts (requires a network connection directly to the virtual machine's IP address). · Improved graphics engine with hardware acceleration: DirectX 10.1.
The new version of Workstation adds support for Direct3D 10.1.
Users can now run games and applications that require DirectX 10.1. DirectX 10.1 adds Anti-Aliasing, , Geometry and Compute shaders and serves as a platform for many games and applications. · Added support for Sphere 6.7.
Workstation 15 supports ESXi 6.7 virtual hosts, as well as deploying vCenter Server Appliance 6.7 using the vCSA Deployment Wizard.
When connecting to remote environments, vSphere Workstation now receives information about data centers, hosts, and clusters, providing greater visibility into the topology of remote sites. · Other improvements
Improved NVMe virtual device performance Important security fixes (Spectre, Meltdown and L1TF) Virtual Trusted Platform Module Secure boot UEFI IOMMU VBS (Guard Guard, Credential Guard) support (guests)
Support for new guest operating systems
·Windows 10 ·Windows 8.X ·Windows 7 ·Windows XP ·Ubuntu ·Red Hat ·SUSE ·Oracle Linux ·Debian ·Fedora ·openSUSE ·Mint ·CentOS
DirectX 10.1 is an incremental update over DirectX 10.0. It provides higher image quality with support for multi-sample anti-aliasing (MSAA). DirectX 10.1 also supports Shader Model 4.1 and Cubemap Array. ·Hardware version 16 ·DirectX 10.1 support ·Graphics memory up to 3 GB What's new in version >>>
Assembly features:
Type:
installation
Languages:
English, Russian from Loginvovchyk
Treatment:
AMPED
The assembly contains only the most popular VMware Tools for Windows and Linux. The rest (linuxPreGlibc25.iso, netware.iso, solaris.iso, VirtualPrinter-Linux.iso, VirtualPrinter-Windows.iso, winPre2k.iso) are available for download separately. Or the program will automatically download them via the Internet if necessary.
Command line options:
Silent installation of the Russian version: /S /QR Silent installation of the English version: /S /QE Selecting an installation location: /D=PATH
The /D=PATH key must be specified as the latest one . For example:
Install.exe /S /QR /D=C:\MyProgram
Screenshots of VMware Workstation virtual computer 15 Pro 15.5.5.16285975 RePack by KpoJIuK torrent:
Download VMware Workstation virtual computer 15 Pro 15.5.5.16285975 RePack by KpoJIuK via torrent:
Windows installation
Even if you use the Windows Quick Install feature, you still need to monitor the process. Not all of its stages can be automated; our user choice may be required somewhere. It depends on the OS distribution. If the Quick Install feature is not available, we just need to go through the normal Windows installation process in the VMware Workstation window, just like we do on a physical computer. But the only difference is that you need to specify the unallocated space on the disk as the OS installation location - i.e. all the space on the new virtual disk of the VM. The boot and system partitions will be created automatically during the Windows installation process.
What's new in Vmware Workstation 14
Let's quickly talk about the innovations in this version of the second class hypervisor. Support now available:
- Windows 10 1803
- Windows Server 1803
- ESXI 6.5
Of course, this version also improves system hardware support. Includes compatibility with the latest processors, including Intel Kabylake and AMD Ryzen. Implemented support for UEFI Secure Boot for virtual systems, which increases security. Additionally, a Virtual NVMe virtual controller is included for fast SSD access (with support for vSAN testing).
VMware Workstation 14 has improved network management. New network settings allow you to simulate certain situations that will be useful during testing. To the previously existing functions for adjusting delay and packet loss, adjustment of distance and network quality has been added. This is required to check the fault tolerance of the applications being tested. Other additional options have also been added there, for example, setting the names of virtual network adapters, etc.
Added the function of scanning virtual machines to update resources. Systems located on local disks and USB drives, as well as remote ones, are supported. Added support for power operations and simple system power on/off for vSphere ESXi hosts. Remote management supports operations such as shutdown, reboot, shutdown, directly from VMware Workstation.
Improved OVF/OVA support. A new wizard has been implemented to deploy the vCenter Server Appliance for later testing. VCSA 6.0 and 6.5 are supported.
And that is not all. Among other things, the new version includes many different improvements: minor conveniences have been added, automatic virtual system disk cleaning has been implemented, the GTK+ 3-based interface for GNU/Linux has been updated, bugs have been fixed, etc.
Installing VMware Tools
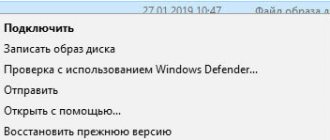
If you have not used the Windows Quick Install feature, after installing it normally in a VM environment, you must install the mentioned VMware Tools software. It adapts the VM window to the resolution of the physical screen, makes it possible to proportionally display the guest OS in a minimized VMware Workstation window, implements a shared clipboard between systems, and provides the ability to enable shared folders. To install VMware Tools, in the “Virtual Machine” menu, click “Install VMware Tools...” .
Next, in the guest OS environment, open the DVD drive and run the VMware Tools installation file.
After installing VMware Tools, the Windows guest must be rebooted.
VMware Workstation Pro 16.0.0 Build 16894299 (2020) English
Main features:
• Simultaneous launch of several guest operating systems on one computer • Launch of a virtual machine in the desktop windows of the main operating system and in full screen • Installation of virtual machines without re-partitioning disks • Launch of OSes already installed on the computer without reinstalling or re-configuring them • Launch applications of the Windows operating system on a computer running Linux and vice versa • Create and test applications simultaneously for different systems • Run untested applications without the risk of disrupting the stable operation of the system or losing critical data • Sharing files and applications between different virtual machines through the use of a virtual network • Running client-server and web applications on one PC • Running several virtual computers on one PC and simulating the operation of a local network
Key features of VMware Workstation:
• Full support for Windows 8 including automated installation, optimizations for easier management of the new interface (Metro), support multiple touches (multi-touch) when running on tablets. • Optimizations of the graphics subsystem including a more powerful video driver with more advanced capabilities, a new 3D driver for Windows 8 with the ability to work without hardware acceleration, an improved driver for Windows XP, faster and higher quality rendering in graphics applications (AutoCAD, SolidWorks and others). • Built-in OpenGL support in Linux clients, without the need for additional installation of VMware Tools, with faster and higher quality rendering. • Password protection to limit access to virtual machine settings, performance parameters, file transfer functions, options for connecting external devices and storage devices, etc. • WSX test service - a prototype of a new generation web interface based on HTML5 for accessing virtual machines from the browser (including tablets and smartphones) without installing any components. It is recommended to use Google Chrome browsers on Windows, Apple Safari on Mac OS, Ice Cream Sandwich browser on Android 4.0; Internet Explorer 10 is experiencing problems. • Downloading virtual machines from the VMware vSphere cloud system to your local computer. • Support for USB 3.0 in operating systems with appropriate drivers (Windows 8 and some Linux variants). • Improved implementation of nested virtualization using Intel VT-x/EPT and AMD-V/RVI extensions, which, among other things, results in lower resource consumption for 64-bit clients. • Limited support for the Microsoft Hyper-V hypervisor - the ability to install Windows 8 with the corresponding feature enabled or install a Hyper-V server. • Support for virtual performance analysis tools, which makes it possible to run applications like Intel VTune Performance Analyzer. • Significant improvements for remote connection to virtual machines via VNC clients. • New tools to quickly free up disk space by optimizing virtual machine files. • Redesigned tabs for quickly switching between virtual machines. • Buttons for quickly enabling/disabling virtual machines in tab headers. • Automatically save search results for quick return to them in the future.
How to run a virtual machine on your computer using VMWare Workstation Player!
This article will talk about working with virtual machines (virtual operating systems) through the free VWWare Workstation Player program.
Let me start briefly with what a virtual machine actually is. I already touched on this topic here once, but now I’ll repeat myself a little so that you are immediately aware of everything that this article will be about. A virtual machine is a kind of virtual computer with an installed operating system (hereinafter referred to as “OS”), which runs in your real system through a special program in a separate window. It turns out that you can work with any other OS through a special program without interrupting your work, without restarting the computer and without performing any other complex operations to switch work from one OS to another.
What is this all for? You can use a virtual system to test some programs and services. For example, I often use a virtual machine to record video lessons, since my virtual OS is clean, without any personal files and folders, and this will allow me not to expose anything important to the whole world in my video . I also use a virtual machine to test all sorts of Windows settings. so as not to experiment in a real system, as well as to test any new programs.
Also, working in a virtual OS is good for those who earn money in axleboxes. Why is it suitable? If you work in a bookstore, you've probably come across a ton of tasks where you need to install some small game or program on your computer, register in it, log in, and possibly perform some other actions. Can you imagine what will happen to your real OS in the near future if you often perform such tasks, installing just a shitload of programs and games? :) Nothing good will happen! And sooner or later you’ll catch some kind of virus. And when working in a virtual OS, all this installed rubbish will remain there, without touching your real system in any way, and all the viruses (if you catch them) will also remain there.
This is what a virtual OS looks like running in a separate window:
As you can see, the same OS, only in the window
Previously in articles I talked about a way to work with virtual machines through the free Oracle VirtualBox program. At first I used it myself, but then I tried an alternative - VMWare Workstation Player (previously called simply VMWare Player) and realized that this program would be simpler. There are not so many settings in it, they are not so cloudy and incomprehensible and everything, in my opinion, is much more convenient. For beginners, this option is, in my opinion, better suited than the VirtualBox analogue.
Let's begin to figure out in order how to install WMWare Workstation Player to work with virtual machines and then how to install and configure the virtual OS itself through this program!
I recorded the whole process on video, where I show what to download from where, what and how to configure. If it’s not very convenient for you to perceive the information from the video, then below the whole process is described in text and graphic form.
Attention! VMWare Workstation Player only works with 64-bit operating systems! Also note that to work with virtual machines, you must have a powerful computer with a modern processor (for example, Intel Core i3, i5, i7) and a recommended amount of RAM of at least 4 GB. Better yet, even more! If you don’t know what RAM, processor and other computer components are, then I recommend reading the article here. Otherwise, the virtual machine will be very slow, or your real system will slow down and not work stably.
You can see the bit depth of your OS and system information (processor, amount of RAM) as follows. Press the Win+R keys and in the “Run” line that appears, enter the command: msinfo32.exe. Click OK:
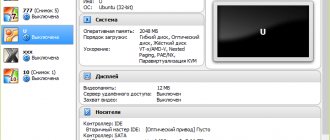
In the window that opens, on the “System Information” tab, you can find the necessary information:
The “Type” line indicates the bit depth of your system (x64 – 64-bit, x86 – 32-bit).
In the "Processor" line - information about the processor, and in the "Installed RAM" line - the amount of RAM on your computer.
Installing the WMWare Workstation Player program to work with virtual machines!
You can download the program from the link below:
my.vmware.com
The program can run on both the Windows and Linux operating systems, so you can download it for any OS. Click the “Download” button next to the desired operating system and the download will begin:
I will show using Windows as an example.
You can save the file to any folder where it is convenient for you. I usually select the desktop to save. The file is about 70 MB in size, so it will download within 2-3 minutes under normal connection speed.
Next, run the downloaded file:
The WMWare Workstation Player installation wizard will open. Wait until the first installation window appears. Click “Next” there.
Further, the installation process is the same as in most programs (I talked about how to install programs here), so I will only focus on those stages where it is necessary to perform some special actions.
At one of the installation stages, check the “Enhanced Keyboard Driver” checkbox and click “Next”:
Enabling this option means that an extended keyboard driver will be installed for virtual machines and it is better to install it just in case.
In one of the installation windows, uncheck the “Help Improve VMWare Workstation 12 Player” option, and leave the first option enabled:
The first option means that the program will automatically check for updates and if there is a new version, you can immediately update to it. The second option is to provide assistance to program developers by sending anonymous information about the operation of this program from your computer. This is the option I recommend turning off.
That's it, installation is complete! The next step is to install a virtual OS through this program.
Launch VMWare Workstation Player and install a virtual operating system!
After the VMWare program for working with virtual machines is installed, launch it using a shortcut on the desktop or from the Start menu.
When you launch the program for the first time, the following window will appear:
Here you need to select the first item, as in the image above and indicate your E-Mail address. This is only necessary so that you can use the program for free. I inserted my real email and then I didn’t receive any spam, i.e. there's nothing to be afraid of
After entering your email, click “Continue”.
In the next window, click “Finish”:
The program window will open. Immediately after the first launch, in a separate window, a proposal may appear on top of the main one to upgrade to the extended “Pro” version. We don't need it because it's paid. Click the "Skip this Version" button:
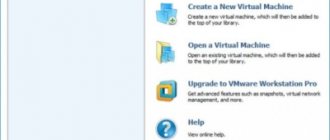
Now in the main program window, click “Create a New Virtual Machine” to create a new virtual machine (OS):
Now we have reached the stage where we need to choose where, from which file or disk the operating system will be installed as a virtual one. The window will have 2 options: install from a CD/DVD disc (Installer disc) or install from an image file stored on your computer (Installer disc image file). Choose the first option if you have your own CD/DVD with the OS that you want to install as a virtual one:
For example, you have a disk with Windows 7 and you want to install this system as a virtual one. Then insert the disk with this system into the computer and select the first option.
But operating systems for installation can also be stored in a special file on your computer called an “image”. Then you can install the operating system as a virtual machine directly from this file. Here is an example of an image file with the Windows XP operating system:
VMWare Workstation Player supports image files in the “.ISO” format, so if you have an ISO image file with the operating system, then the easiest way to install a virtual machine is from there. And then select the second option in the current window:
Using the “Browse” button, you can select just the desired image file with the operating system.
Having selected the desired option, click the “Next” button below.
Note! Any operating system can be installed as a virtual one, i.e. any Windows system, any Linux or any others! Those. not necessarily just Windows.
In the next window, we are asked to specify in advance the key for installing the operating system, specify the user name and password:
After all, installing an operating system in a virtual machine will be no different from installing a real OS on your computer. The only difference is that the system will be installed virtually in a window, and not on your real hard drive. But in that window, I recommend leaving only the username, which will most likely be set automatically (taken from your real OS). It is easier to specify the key and other parameters, if necessary, during OS installation. So in that window, just click “Next” to continue.
A window will probably appear warning you that you did not provide a key. Click Yes:
In the next window, in the first field you need to indicate the name of the virtual machine you are creating, and in the second field - the location of the virtual machine files on your computer.
You can call it whatever you want, it’s usually called the name of the OS that you will install. The main thing is that you yourself understand where your OS is, if you suddenly install and work with several virtual OSs in the future. Those. don’t call it like this: “1234”, because then you yourself won’t understand what kind of virtual machine you have with that name until you launch it
You can choose any location of the virtual machine on your computer – i.e. any folder or drive on your real system. It is in the selected folder that the files (there will be many of them) responsible for launching the virtual machine will be located. Please note that the virtual machine will take up a lot of space (a minimum of 10 GB is typical, but 20-30 GB is most common), so be sure to have enough space on your hard drive to store the virtual machine.
When you specify the name and location, click “Next”.
In the next window you need to indicate the volume of your hard drive that will be allocated for the operation of the created virtual machine. This is a very important step!
As I already said, a virtual machine is practically no different from your real OS. She will also have her own hard drive, only a virtual one. And the volume of the virtual OS hard disk will be equal to the volume of your real hard disk that you allocate for the virtual machine. Everything here will depend on what operating system you are installing as a virtual one. If, for example, Windows XP, then it does not require much space on the hard drive and somewhere around 10-15 GB will be enough. But modern Windows operating systems: 7, 8, 10 require a decent amount of free disk space for their operation, at least 20 GB, and preferably 30-40 GB.
And in the first field of the current window, you need to specify how much of your real hard drive you will allocate for the virtual machine being created. As I already said, for example, I will install a 30-day trial version of Windows XP. For this system, 15 GB will be enough. virtual disk volume. Please note that your real hard drive must have at least as much free space as you allocate for the virtual machine!
And then in the same window, click “Next”:
By checking that option, we indicated that there is no need to divide the virtual hard disk on which the virtual OS will run into several files; let it be in one file. If we selected the second option “Split virtual disk into multiple files”, then the virtual hard disk would be divided into several files. I personally don’t find any sense in this, so I always choose the mode – virtual hard disk in one file.
In the next window you will receive information about the settings of the virtual machine being created. We can “Finish” right now to start installing the virtual machine, but we won’t do that now. Let's move on to the advanced settings of the virtual machine to understand another extremely important setting!
Click the “Customize Hardware” button:
An additional window will open with a bunch of settings on several tabs. We are only interested in the “Memory” tab, where you configure the amount of RAM on your computer allocated to the virtual machine.
RAM is the most important component of every computer, without which it simply will not work. This is temporary memory where everything that is running on your computer is preloaded - programs, processes, etc. At the very beginning of the article, I provided a link where you can learn in more detail about all the main components of a computer.
So, in this window you need to indicate the amount of your real RAM that will be allocated for the operation of the virtual machine. Everything again depends on what operating system you will install. If this is Windows XP, then it will be able to work with only 128 MB of memory, although it will be very slow. It is better to allocate 1-2 GB for it. RAM. If you install Windows 7, 8 or 10 as a virtual machine, then I recommend allocating at least 2 GB. RAM (preferably 3-4 GB so that the virtual system works stably and does not slow down). But there is one more point. If your computer already has little RAM, then you cannot allocate much for the virtual system
If the computer has only 2 GB of memory (such a computer is very weak today), then you are unlikely to allocate more than 512 MB (megabytes) of memory for the virtual machine, because if you allocate more, your main system may begin to slow down severely. Take this into account!
In general, if your computer is weak, it’s easier not to bother with virtual machines, as I already mentioned at the very beginning of this article.
So, above I mentioned the recommended amount of RAM that should be allocated for different virtual OSs. Using the slider on the right side of the window, set the volume of your choice and click “Close” at the bottom of the window:
You will be returned to a window with information about setting up your virtual machine. Well, it’s time to proceed directly to installing the virtual machine! Make sure that the “Power on this virtual machine after creation” checkbox is checked so that the installation begins immediately and click “Finish”:
The installation of the virtual OS you configured will begin. First, windows will appear notifying you that some of your real computer hardware is connected to the virtual machine, as well as windows with various non-essential information. Just check the box “Do not show this hint again” in these windows and click “OK”:
Also, a window will then appear asking you to install additional tools for the virtual machine. We’ll post them a little later, so click “Remind Me Later.” Alerts on a light background at the bottom of the VMWare Workstation Player window can be closed by clicking on the cross:
Well, then the installation of the virtual OS will begin. I install Windows XP and the installation looks like this:
No different from the actual installation process on a computer. If you install a more modern Windows, the installation process will, of course, look different from the Windows XP installation process. Since the installation process for each OS is different, I will only briefly discuss it below. I talked about installing Windows 8 and 10 in a separate article:
How to install the Windows 8.1 or Windows 10 operating system!
As for the duration of installation, it depends on the OS being installed and is practically no different in time from the duration of installing a real system on a computer. Windows XP installs in about 20 minutes, Windows 7,8 and 10 - about the same. This largely depends on the power of the computer.
The installation process has reached the point of entering the license key:
No further action was required from me and after one reboot of the virtual machine, the virtual Windows XP I installed started up.
Now, to fully work with the virtual machine, we will install additional tools for it. This is necessary primarily so that you can easily drag and drop files from the real system into the virtual OS window or vice versa. This is just an awesomely convenient feature!! And this is a big advantage of VMWare Workstation Player over its analogue for working with VirtualBox virtual machines, because in the second I couldn’t directly drag and drop files, no matter how much I tinkered with the settings... Also, installing additional tools is necessary for the correct operation of some other functions of the virtual machine .
Open the “Player” menu on the top toolbar, select “Manage” and then “Install VMWare Tools”:
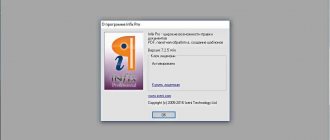
A window will appear in the virtual OS window where we click “Download and Install”:
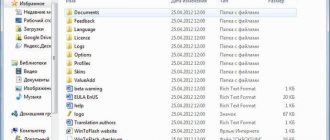
A window for downloading additional tools will appear for a few seconds. Then you need to open the “My Computer” section (also called “Computer” or “This Computer”) through the virtual Windows Explorer and start installing additional tools, which are displayed in the form of a connected CD/DVD disk to the computer:
Wait for the installation window to launch and click “Next”:
In the next window, leave everything as default and also click “Next”:
And in the last window click “Install”:
That's it, now we wait until additional tools are installed. This process may take several minutes.
In the last window, click “Finish”:
The system will ask you to reboot. This must be done so that the installed additional tools start working. Click the “Yes” button to reboot the virtual machine:
After the reboot, the additional virtual machine tools will take effect. Firstly, you will be able to drag and drop files and folders from a real system to a virtual one and vice versa. Simply drag and hold the left mouse button on one or more objects directly into the virtual machine window, then release the left mouse button. Files/folders will be moved:
Secondly, you will be able to quickly resize the virtual machine window by simply dragging the left mouse button outside the window borders. This way you can make the window with the virtual OS larger than it was originally, so that it is more convenient for you to work in it.
To switch to a virtual OS, just move the cursor to the window with it and that’s it, you will find yourself there and can perform any actions directly in the virtual machine. Getting back to the real system is also easy - just return the cursor from the virtual window to the real system window.
Another useful feature is to open the virtual machine in full screen mode. To do this, click the button as shown in the image below:
As a result, the virtual OS window will be stretched across the entire screen and outwardly it will no longer be distinguishable from the real system. You can return to windowed mode using the same button.
The virtual machine turns off just like a real one, i.e. go to the “Start” menu, click “Shutdown” and then the same button again. Or you can turn off the virtual machine by simply closing the VMWare Workstation Player window and clicking “Power Off” in the warning window:
In order to restart the desired virtual machine, open the VMWare Workstation Player program, select the virtual machine from the list and click “Play virtual machine” on the right:
And the last thing I would like to show you today is how to go to the settings of an already created and installed virtual machine. Please note that you can only configure a virtual machine if it is already turned off! To configure the desired virtual machine, select it in the main window of VMWare Workstation Player and click the “Edit virtual machine setting” button on the right:
A familiar window with virtual OS settings will appear:
That's all! Now, I think, you can independently create and configure a virtual machine with any operating system for your own tasks. I hope I made everything clear for beginners
Have a nice day and good mood everyone! Bye everyone