In the summer of 2020, a new version of the operating system from Microsoft, Windows 10, was released. In it, users found a number of pleasant innovations, for example, the developers again returned the convenient “Start” button in the lower left part of the monitor, after it was removed in Windows 8, replacing it uncomfortable and unusual tiles. Along with new features, unfortunately, old errors and failures have not gone away. Users continue to encounter the “Unable to sign in to your account” error in the new version of Windows 10. Read on to find out how to deal with it further in the article.
Error message when signing in to Windows 10
What is a Windows 10 profile?
After notifying us that you are unable to log into your account, you will be loaded into a temporary profile. A user profile in the system has its own directory in which all folders and files are located, this directory is C:\Users\Name. Name is the name you will give your local entry. By going to this address you can find Documents, Music, Downloads, AppData and other user folders.
User folders
We are especially interested in the AppData folder. It contains the user’s basic settings, his data about installed programs, etc. This folder contains 3 more folders, we will look at them in more detail.
Folders contained in AppData
- Local – this folder contains temporary user files that relate only to this computer, and also contains a program cache.
- LocalLow folder – contains user data with low integrity. Integrity levels are a mechanism that provides another level of data security. In general, we can say about this mechanism that high integrity refers to system processes, medium – user processes and low – dangerous for the system. If you open the contents of the folder, you can see browser files and so on. In the event of a non-standard situation in the system, processes that were launched from a folder with low integrity, user data will not be accessible.
- Roaming – the contents of this folder have a “light” profile part, which can later be moved to another computer. This contains settings for programs, the working shell, and saved browser profiles. Next, you will understand how this intersects with the “Cannot sign in to your account” problem in Windows 10.
Having access only to these folders and files, we will not be able to get to the problem with the user profile. The profile contains one more file that is necessary to configure the profile, this is the NTUSER.DAT file. This file can be found if you enable the display of hidden system files and folders.
Hidden folders and files
This file contains the HKEY_CURRENT_USER registry key for all users who have an account on this computer. It is because of a damaged registry branch that you cannot log into your Windows 10 account.
The ntuser.dat.LOG file contains the saved registry log from the last successful system boot. It makes it possible to return the system to its original state without any problems. “blf” files are a log of file movements and in the event of a registry failure, this file allows you to restore any partition to a working state.
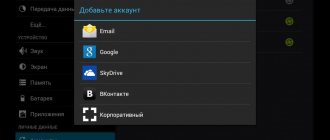
Microsoft forces users to use company accounts, but there's a way around it
Microsoft is slowly but surely trying to wean users off local accounts in Windows 10. In particular, this applies to the latest builds of the operating system from Redmond. The bottom line is that the fall update introduced changes to the Out-of-the-Box Experience (OOBE) procedure. They consist of hiding the ability to enable a local account if the PC is connected to the Internet during the installation of Windows 10.
pcworld.com
In this case, although the system asks to connect, it does not warn that in this case only the option to register a Microsoft account will be available. By the way, in the May update the company slightly let go of the reins, although not for everyone. Users report that about 6% of newly installed systems offered the ability to enable local accounts even if there was a network connection. What this is connected with is unclear.
Please note that the difference between a local account and its Microsoft counterpart is significant. The first allows you to minimize, albeit relatively, the transfer of data to the company. This also allows you to use different passwords for different PCs, without cluttering the system with applications from the Windows Store and other services. A Microsoft account, according to the company, has its own advantages. This includes single sign-on, access to universal applications, and work with subscriptions like Xbox Live. However, it is outrageous that the company simply decides for users what is best for them.
At the same time, during the installation of the OS, it is persistently prompted to connect to the network. If there is a wired connection, then everything will happen automatically. Otherwise, the system will require a Wi-Fi connection and authorization with a Microsoft account. And there simply won’t be a local account option.
pcworld.com
Even the old option of entering the “left” email address does not work. In fact, the only official option left is to log in using a Microsoft account, after which you can already register a local account. But there are also a couple of unofficial ones. They work, in particular, for version 1809, which is still used by about 30% of the “ten” audience.
pcworld.com
The first is to skip connecting to Wi-Fi. You need to ignore the helpful suggestion to “go back and think,” click “No” and still get access to the page where you can register a local account.
If you skipped this step and are stuck on the “Log in with a Microsoft account” page, simply unplug the network cable, turn off the router or Wi-Fi. The system will naturally try to connect to the Internet, but will not be able to and will be forced to redirect you to the local account page. You may need to press the Back button several times.
pcworld.com
In build 1903, the “Skip” option was replaced with “I don’t have Internet access.” When you select this option, the system will allow you to proceed to setting up a local account. And on the Microsoft account screen in the lower left corner there is the desired “local account” option. That's what was required.
Solving the profile problem in Windows 10
If you cannot log into your profile in Windows 10, you need to check the system disk for errors. To do this, boot into System Recovery Environment or Windows PE and enter the command: chkdsk c: /f. In most cases this will be sufficient, but there is a need to consider more complex cases. Therefore, after checking, let’s log back into the system and open the registry editor, namely the branch: “HKEY_LOCAL_MACHINE\SOFTWARE\Microsoft\Windows NT\CurrentVersion\ProfileList”.
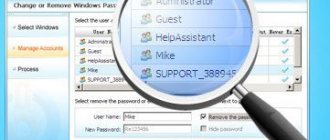
In the table you can see a description of sections with names like S-1-5 and others like that that will correspond to the profiles. To determine which user a record belongs to, look at the ProfileImagePath key on the right side.
List of accounts in the registry
When you find your profile by name, again pay attention to the tree on the left, you need to find two branches, one of them will have the ending .bak. Here our task is to rename the backup profile with the .bak extension to the main one. To do this, you need to assign any extension to the main one (you can use .ba), and remove the extension from the profile with .bak. Now find two keys “State” and “RefCount” in the new profile and you need to set their values to zero.
Account file value
Now we reboot and log in to the new account.
Additional methods to fix the problem
If the previous options did not help resolve the “Your account is disabled” issue, the following solutions are possible.
Using restore points
If you have system restore points, they can sometimes help solve problems logging into your accounts. You can try using restore points using the following methods:
- On the login screen, click on the power button at the bottom right and, while holding Shift, click "Restart".
- In the recovery environment, go to Troubleshooting - Advanced Options - System Restore. If in the next step you are asked to select a user and only “Administrator” is available, select it and do not enter any password, just click “Continue”. If you have restore points, use them.
- If the previous steps did not allow you to proceed to the beginning of system recovery (for example, a password is still required, but is unknown), you can use a boot disk or bootable USB flash drive of Windows 10 (you will need to create it somewhere on another computer) - boot from it.
- After booting from the flash drive and selecting the language, on the second screen, click “System Restore”, and then proceed to restore from recovery points in the same way (you will not need to enter a username and password).
If this method does not solve the problem or there are no restore points, there is another way to enable a disabled administrator account using a bootable Windows 10 USB flash drive ( note: theoretically, the described steps can lead to undesirable consequences):
- Boot your computer or laptop from the Windows 10 bootable USB flash drive and in the installation program, press Shift+F10 (or Shift+Fn+F10 on some laptops). A command prompt will open. In it, type regedit and press Enter.
- In the registry editor that opens, select HKEY_LOCAL_MACHINE , then select “File” - “Load hive” from the menu.
- Load the file C:\Windows\System32\config\SAM from your system and give the loaded hive a name (different from those already in the registry, for example, offline, which I will use later).
- Navigate to HKEY_LOCAL_MACHINE\offline\SAM\Domains\Account\Users\000001F4
- On the right side of the Registry Editor, double-click on the parameter named F.
- In the window that opens, in line 38, delete the first value 11 and replace it with 10 (double click on 11 in the specified line - press Delete or Backspace once, enter 10), click OK.
- Select the registry key with the name you specified (offline in my case), then select “File” - “Unload hive” from the menu and confirm the unload.
After these steps, all that remains is to restart the computer: now the built-in Administrator account should be enabled, and you can log in under it to work, or, better yet, to create a regular Windows 10 account instead of the existing built-in system account.
Other ways to solve the problem if you can’t log into your account in Windows 10
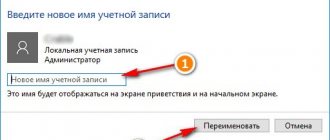
It often happens that users immediately begin to look for a problem deep in the system, although its solution may be completely on the surface. For example, you could set or change an existing account password and forget about it, which will cause the “Unable to sign in to your account” error.
The latest version of the OS has the ability to restore a non-working profile:
Restoring your work profile
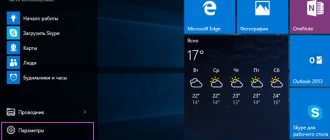
- Click Start.
- On the left side of the menu there is an item “Local Users”, select it.
- Select "User", then "Action", then "New User". In the window that appears, click “Create”.
- Then close all windows and programs and reboot the system.
- Please try to sign in to your account again.
If you don't remember your password, reset it
Follow these instructions to create a new password :
- Go to the Reset Password page.
- Select a reason for resetting your password, and then click Next.
- Enter the email address, phone number or Skype ID that was used to create your Microsoft account. This can be any email address or an address with a Microsoft domain, such as hotmail.com or outlook.com.
- Enter the characters that are shown on the screen (thanks to them, the system will know that you are not a robot), and click Next.
- If you have added account security information to your account, you will be sent a one-time code to an alternate phone number or email address. If you enter this code on the next screen, you can create a new password.
Sometimes changing your account settings can have an impact on how you sign in. In such a situation, resetting the password will do nothing.
How can I solve Do you need to fix Microsoft account message in Windows 10?
At some point, most of us have encountered the “You need to fix your Microsoft account” error while using our computers. We have prepared several solutions for you that will surely solve your problem.
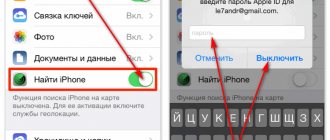
- Sign in with your Microsoft account
- Use your normal password instead of PIN
- Check your account settings
- Confirm your Microsoft account security information
- Check your email accounts
- Convert your Microsoft account to a local account
- Change privacy settings
- confirm your account
- Use the Microsoft Accounts Troubleshooter
- Use Group Policy Editor
Solution 1: Sign in with your Microsoft account.
If you receive the You need to fix your Microsoft account message, you can fix it by signing in to your Microsoft account. According to users, the problem occurs when using your local password to log in to Windows 10.
However, you can solve this problem by using your Microsoft ID and password to sign in to Windows 10. This will remove the message completely.
Having trouble signing in with your Microsoft account? Don't worry, we have the right solutions for you.
Solution 2: Use a regular password instead of a PIN
Many users prefer to use a PIN to log in because it is easier to remember than a long password. While using a PIN has its benefits, many users report that they can solve the problem by simply using their normal password instead.
There seems to be a problem with the PIN code that is causing this message to appear, but after using a regular password, the problem was completely resolved.
Solution 3 – Check your account settings
Windows 10 allows you to sync your email, calendar, and contacts using your email account. Additionally, you can also use your email account to access various applications.
If your account configuration is incorrect, you may encounter the message You need to fix your Microsoft account on your PC. To resolve this issue, you need to check your email and app accounts. To do this, follow these steps:
- Press Windows Key + I to open the Settings app.
- When the Settings app opens, go to Accounts and select Email & Apps Accounts .
- Check your email accounts to see if everything is ok.
According to users, you may sometimes accidentally change your configuration, so it is recommended to go to this section and check if everything is ok.
Several users suggest deleting the email account from the Accounts used by other applications section. Other users have reported that they fixed the problem by deleting their Live account, so you might want to try that.
If you are unable to sync email on Windows 10, check out this article to help you resolve the issue.
If you are having trouble opening the Settings app, please refer to this article to resolve the issue.
Solution 4: Confirm your Microsoft account security information
According to users, this issue occurs even for users using a local account. Additionally, the problem may also affect you even if you do not have any additional devices.
To resolve this issue, you need to sign in to your Microsoft account and confirm your security information. You will then receive a confirmation code by email.
Use the verification code to verify your identity and the issue should be resolved completely.
Solution 5 – Check your email accounts
According to users, the You need to fix your Microsoft account message may appear if you have multiple Microsoft accounts. If you are linking a new email account to your Microsoft account, you may encounter this issue.
This could be a problem, especially if you were using an old email account when installing Windows 10.
When you add a new Microsoft account, Windows 10 will not know which email account to use and you will receive this or a similar error message. To resolve this issue, you need to sign in to your Microsoft account and add the email address that you used when installing Windows 10.
Now set the old email account as the default account and check if the problem still persists.
Solution 6: Convert your Microsoft account to a local account.
If you receive the You need to fix your Microsoft account message, you can try converting your Microsoft account to a local account. To do this, follow these steps:
- Press Windows Key + I to open the Settings app.
- Go to the Accounts . Now go to the Your Information .
- Click Sign in with a local account .
- Enter your password and click Next .
- Now enter the username for your local account and click Next .
- After that, click the Sign Out and Finish .
- Now log into Windows 10 using your local account.
If the user account is currently disabled and cannot be used, follow the simple steps in this amazing guide to easily resolve the issue.
After that, you need to open the Microsoft Store and sign in with your Microsoft account. After logging into the Windows Store, you need to convert your local account back to a Microsoft account. To do this, do the following:
- Open the Settings app and go to Accounts > Your Information .
- Click Sign in with a Microsoft account instead .
- Enter your local account password if asked. Click Next .
- Now enter your Microsoft account login details and click Next . If necessary, you can also create a new Microsoft account.
- You may be asked to verify your account. Select a confirmation method and click Next . Enter the confirmation code you received and click Next .
- If everything is ok, click the Switch to complete the process.
As you can see, this is a fairly simple procedure, and after converting to a local account, the problem should be completely resolved.
Several users have suggested that you can fix this problem by simply creating a Microsoft account. Remember that this method only works for users who don't have a Microsoft account.
If you have a local account, you can easily create a new Microsoft account by following similar steps above.
Has your account expired? Solve the problem quickly with this guide.
Solution 7: Change your privacy settings
According to users, you can fix this problem simply by changing your privacy settings. It's quite simple and you can do it by following these steps:
- Open Application Settings .
- Go to Privacy > General .
- Find Allow apps on my other devices to open apps and continue to work on this device and Allow apps on my other devices to use Bluetooth to open an app and continue to work on this device and turn them off.
After disabling these two options, check if the problem is resolved.
Need more information on how to change your privacy settings in Windows 10? Check out this detailed guide.
Solution 8 – Verify your account
Sometimes the message You need to fix your Microsoft account because your identity is not verified on your PC appears. This mostly happens if you are using two-step verification, but you can fix it by following these steps:
- Open the Settings app and go to Accounts > Your Information .
- After that, click Confirm .
- Now select your desired verification method and click Next .
- After this you will receive a confirmation code. Enter the code to verify your account.
After you verify your account, check if the problem is still there. Remember that you must use the email address or phone number you provided when you created your Microsoft account.
Solution 9: Use the Microsoft Accounts Troubleshooter
According to users, you can fix the You need to fix your Microsoft account message using the Microsoft Accounts troubleshooter. To do this, follow these steps:
- Download the Microsoft Accounts Troubleshooter.
- Launch the application.
- Select the Apply repairs automatically and click Next .
- The troubleshooter will now scan your account and fix any potential problems.
After running the troubleshooter, any account issues should be resolved, including the You need to fix your Microsoft account message.
If the troubleshooter stops before the process completes, fix it with this complete guide.
Solution 10: Use Group Policy Editor
If you're having trouble with the You need to fix your Microsoft account message, you can easily disable it with this workaround.
Keep in mind that this solution will not solve the underlying problem, but it will prevent the message from appearing. To apply this solution, follow these steps:
- Press Windows Key + R and enter gpedit.msc . Press Enter or click OK .
- When the Group Policy Editor opens, go to User Configuration > Administrative Templates > Start Menu and Taskbar > Notifications in the left pane. In the right pane, double-click Turn off toast notifications .
- A new window will appear. Select Enabled and click Apply and OK to save the changes.
- After making changes, close the Group Policy Editor.
This solution will remove the problematic notification, but will also remove all other toast notifications. This is not a permanent solution, but if you are annoyed by this message, you can disable it using this solution.
Learn how to edit Group Policy like an expert with this helpful guide.
Don't have Group Policy Editor on your Windows PC? Get it now in just a couple of steps.
The computer is not signed into a Windows 8 account
I tried to change the password. Changed it. Logged into your account on another device successfully. I turned on the computer, entered my username and password - it’s not included in my Windows 8 account and that’s it. I received this message again:
Incorrect password. Make sure you use a password for your Microsoft account. You can always reset it at account.live.com/password/reset
In English, the same message might look something like this:
That password is incorrect. Make sure you're using the password for your Microsoft account. You can always reset it at account.live.com/password/reset
I started looking for a solution on the Internet, typing all sorts of search queries, such as “I can’t log into Windows 8” and “incorrect Windows 8 password.” It turned out that the problem is very common, and many people also cannot sign into their Microsoft account.
I was looking for solutions to the problem using my smartphone, and then, as luck would have it, I ran out of money on my SIM card. I already thought that I would have to tear this Windows 8 down, but fortunately, on the most recent site I opened, I found a method that helped solve the problem. The method is called “You’ll guess it”...
You need to fix your Microsoft account on Windows Phone
If you're experiencing an issue on your Windows Phone, you'll likely be able to fix it by using one of the solutions below.
Solution 1: Move problematic apps to your phone's memory.
According to users, you can fix the You need to fix your Microsoft account on Windows Phone message by simply moving the apps to the phone storage as some apps will not update due to this error message.
To solve this problem, you need to move these apps to your phone memory and try to update them again. After this, the problem should be completely resolved.
Solution 2: Confirm your email
The message You need to fix your Microsoft account may appear on Windows Phone after a software update. To fix this, try confirming your email address again:
- Go to Settings > Accounts > Email & App Accounts .
- Click Fix and follow the instructions to verify your account.
After you verify your account again, check if everything is working correctly.
Solution 3 – Setting up Cortana
Several users have reported that you can fix the You need to fix your Microsoft account message by simply setting up Cortana.
After setting up Cortana on your phone, the problem should be completely resolved.
That's about it. Hopefully one of the solutions in this guide helped you resolve the You need to fix your Microsoft account message.
If you have any other suggestions or questions, feel free to leave them in the comments section below and we'll be sure to look into them.