If the OS cannot start, then all the steps below should be performed from safe mode or using a LiveCD.
Driver rollback
If the problem starts to appear after the next update, then you should roll back to the previous version of the driver.
How to do it:
- Go to Device Manager and expand the “Video Adapters” tab.
- Right-click on the video device and open “Properties”.
- Move to the “Driver” section and click “Roll Back”.
- We confirm the action by selecting any of the proposed reasons.
- Reboot the computer.
The problem should be fixed.
Fixing nvlddmkm.sys error
From the file name it becomes clear that this is one of the drivers included in the software installation package from NVIDIA. If a blue screen with such information appears on your PC, it means that the operation of this file was stopped for some reason. After this, the video card stopped functioning normally, and the system went into reboot. Next, we will identify the factors influencing the occurrence of this error and provide ways to correct it.
Method 1: Rollback drivers
This method will work (with a high probability) if a new driver for the video card has been installed or updated. That is, we already had the “firewood” installed, and we installed new ones manually or through the “Device Manager”. In this case, you need to return old versions of files using the built-in Manager function.
Method 2: Install a previous driver version
This option is suitable if NVIDIA drivers have not yet been installed on your computer. Example: we purchased a card, connected it to a PC and installed the latest version of the “firewood”. “Fresh” does not always mean “good.” Updated packages sometimes simply do not fit previous generations of adapters. Especially if a new line has recently been released. You can solve the problem by downloading one of the previous versions from the archive on the official website.
- We go to the driver download page, in the “Additional software and drivers” section we find the “BETA drivers and archive” link and follow it.
In the drop-down lists, select the parameters of your card and system, and then click “Search”.
Hard drive problem
The first thing that is recommended to do is check the functionality of the hard drive and the integrity of the system files.
For this:
- Launch the command console, enter the command “DISM.exe /Online /Cleanup-image /Restorehealth”, removing the quotes and press “Enter”. The command is only available for Windows 10 and 8 users.
- Next, run “sfc /scannow” and then “chkdsk C: /f /r”. You can read more about these commands in a separate article.
Once the scan is complete, restart your computer and check for the problem.
Reinstalling software
Often, you can fix the nvlddmkm sys error by reinstalling the drivers. But it needs to be done correctly.
Detailed instructions:
- First, remove old drivers using special programs.
- Find out the year and month of release of your video card using the Google or Yandex search.
- Download one of the very first versions of drivers for your video card from the Internet and install them.
Sometimes you can fix the problem by installing a new version of the software.
Under no circumstances is it recommended to update the software using GeForce Experience.
RAM
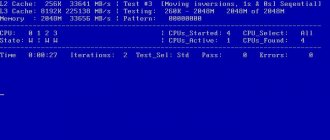
Broken or incompatible memory sticks with the motherboard can also cause nvlddmkm sys failure. You can check modules for errors using the Memtest86+ utility or the standard Windows 10 and 8 tool.
The second utility is launched as follows:
- Open the search bar, enter the phrase “memory” and click on the appropriate item.
- Select the first item marked "recommended".
- After this, the computer will restart and the scan will begin.
- Wait until the procedure is completed.
- Pay attention to the “Status” column. All found problems will be displayed here.
It should be noted that this diagnostic method does not detect compatibility problems. Therefore, you need to check module compatibility manually.
I’ll tell you how to do this using the example of “ASUS”:
- We go to the website of the motherboard manufacturer.
- We enter the model of the motherboard into the search bar.
- Move to the section “Support – processors/memory – memory/devices”.
- Download a document in PDF format to your PC, which describes in detail the compatibility of the components.
If necessary, we update the BIOS version, and, as a last resort, change modules or the entire board.
Solution #2. Rollback the graphics driver
If no problems were observed before, but they appeared after installing some update (new driver), try rolling back the PC to the previous driver.
- To do this, click on “Start”, enter devmgmt.msc in the search bar and press enter.
- In the “Device Manager” window that opens, expand the “Video Adapters” tab, click on your graphics card, right-click and select “Properties”.
- Now we need to go to the “Driver” tab, and select “Roll Back Driver” there.
- Then reboot our PC.
Overclocking components
Excessive overclocking of components can contribute to the appearance of a blue screen with the nvlddmkm sys error. So try returning all settings to default.
For this:
- Enter the BIOS and use the reset function. Depending on the BIOS version, it may have different names, most often it is “Optimal settings” or “Load Defaults”.
- Save the settings and restart your PC.
This will eliminate overclocking of the processor and RAM, but the MSI Afterburner or NVIDIA Inspector program will help remove overclocking of the video card.
Blue screen error 0x0000000A
The problem with this blue screen is due to the fact that some driver or Windows itself accessed memory at the DISPATCH_LEVEL level or higher. The main reason is that some driver is using the wrong memory address. There may also be problems with software incompatibility and even problems with the computer hardware.
If the error “0x0000000A” occurs during OS installation, then the problem is most likely with the hardware.
- The first thing you need to do is check the compatibility of your hardware and the OS you are installing. On the website of the manufacturer of each piece of hardware, look for which operating systems the hardware runs on.
- Next, you need to reset the BIOS settings to default and make sure that BIOS anti-virus protection is turned off and BIOS and L2 caching are disabled.
- The next step is to check your RAM. If there are several planks, then try installing Windows on one plank, using them alternately.
- Next, try to remove all devices unnecessary for installing the OS: network card, sound card, various PCI controllers. If you are installing the OS from a flash drive, then disconnect the drive, and if you have an integrated video card, then remove the external one while installing the OS.
If a blue screen with error “0x0000000A” occurs while Windows is running.
- Remember when this error started appearing. If you have recently installed any programs or games, remove them. If some programs load automatically with your computer, then at least remove them from startup.
- If you have recently added any new devices to your computer or simply updated old drivers, then there is a high probability that this is the problem. Check new devices for compatibility and remove newly installed drivers.
- You can also do .
Programs and games
Some apps and games may also cause crashes. You can exclude this option by removing recently installed programs or games. And it is advisable to do this using the “Revo Uninstaller” utility.
Once an unstable application is found, reinstall it or download another version. Another option is to contact the developers for help.
The most common BSoDs. Blue Screen of Death Error Codes
KMODE_EXCEPTION_NOT_HANDLED - Causes a blue screen as a result of an error by a kernel mode process that is attempting to execute an unknown instruction. May be due to incompatibility or hardware malfunction, as well as errors in drivers or system services.
NTFS_FILE_SYSTEM – this error appears as a result of a failure in the execution of the ntfs.sys file system driver code. The main reason may be a violation of the integrity of data on the disk or in memory, as well as corruption of the SCSI or IDE drivers.
DATA_BUS_ERROR – the blue screen of death appears as a result of a parity error in RAM. The root cause may be incompatible or faulty hardware. The problem may also be due to an incorrect driver, as well as a failure on the disk.
IRQL_NOT_LESS_OR_EQUAL - the blue screen of death in this case appears as a result of a kernel mode process accessing a memory area while using an IRQL level that is unacceptably high for it. This error may be caused by incorrect operation of drivers, system services, or incompatible software, such as a software emulator or antivirus application.
PAGE_FAULT_IN_NONPAGED_AREA - the error appears as a result of the system not finding the necessary data, for example, when Windows looks for the necessary information in the paging file, but cannot find it. Often, the appearance of a blue screen of death in this case is caused by hardware failures, file system malfunctions, or a service or software error, such as an antivirus.
KERNEL_STACK_INPAGE_ERROR - This error occurs as a result of errors in reading from the page file into physical memory. The main reason for the appearance of the blue screen of death is a damaged sector of the virtual memory file, incorrect operation or malfunction of the hard drive controller, insufficient free space on the disk, incorrect connection of the hard drive, conflict in interrupts, defect in RAM, viruses in the operating system.
Basically, the appearance of a blue screen of death is caused by: software (drivers), sometimes in hardware (its failure, conflicts or malfunction). In these cases, when a blue screen of death appears, you need to remove recently installed programs and drivers, as well as disable and remove recently installed hardware.
You need to uninstall software in Windows Safe Mode. To do this, when loading the operating system, you must press the F8 key and select Safe Mode.
Video card malfunction
Be sure to check the performance of the video card, including its temperature. It would not be superfluous to conduct stress testing; this will help identify defects in the form of artifacts.
But before testing, it is advisable to clean the video card from dust and replace the thermal paste.
In some cases, it is possible to eliminate the nvlddmkm sys blue screen by wiping the contact track and the PCI-Express connector with an eraser.
Additionally, you can clean the motherboard from dust, paying special attention to the south bridge. Usually there is a heatsink on the bridge; you need to carefully remove it and replace the thermal paste underneath.
Problems with NVIDIA video card drivers
As for drivers, there is a twofold situation here. Problems may arise directly when the installed driver crashes, or a crash like nvlddmkm.sys (blue screen) occurs after installing the driver. In both cases, you need to act very carefully when troubleshooting the problem.
Some “experts” recommend simply reinstalling the driver in the standard way from the “Device Manager” or simply replacing the desired nvlddmkm.sys object in the System32\Drivers folder. In general terms, the train of thought is correct, but the standard method of eliminating the problem, unfortunately, does not work. Here you need to act a little differently.
Lack of power supply power
Replace the power supply with a more powerful one, preferring a reliable manufacturer. For example, FSP, Hunkey, Seasonic or Thermaltake.
If the power supply has enough power, make sure it is working properly. Provided that the warranty period has expired, open the unit cover and inspect the capacitors. They should not be swollen.
Well, if you have a tester, you can check the voltage. As a last resort, contact a service center for further diagnostics.
Causes of dysfunction with Nvidia
The problem I am considering, nvlddmkm.sys, is a fairly common problem in systems running Windows 7, 8 and 10. At the same time, developers from Nvidia and Microsoft do their best to deny their guilt in the appearance of this error, sending users complaining about the problem to "Microsoft" (in the case of "Nvidia"), and in "Nvidia" (in the case of "Microsoft").
Upon careful examination, we can conclude that in the statistical majority of cases, the cause of the problem is the driver from Nvidia. During the installation of most graphics drivers in Windows OS, the old version of the “nvlddmkm.sys” driver is often copied to the directory:
Programs go there for the latest version of the driver, but find only an outdated version there.
In addition to the incorrect version of the graphics driver, the cause of the dysfunction may also be:
- System overheating (particularly due to overclocking);
- Incorrect operation of any of the memory sticks;
- Insufficient power of the PC power supply;
- Bad (“broken”) sectors on the hard drive;
- Device (software) conflict;
- Insufficient paging file size;
- Incorrect BIOS settings.
Let's consider several effective ways to fix the error that has arisen.
Virus cleaning
One should not exclude the presence of viruses that disrupt the system and cause various failures. Therefore, it is recommended to scan your PC with special scanners.
They can be used even if you already have a comprehensive antivirus.
Removing update packages
It is also worth removing the latest downloaded update packages for Windows 10 and 7. Some of them may not work correctly, causing the nvlddmkm sys error.
Detailed instructions:
- Press the combination “WIN+R”, enter “appwiz.cpl” and click “Enter”.
- Let's move to the appropriate section.
- Select the new software by installation date and click “Delete”. Additionally, we look for the package “KB4056892” and delete it.
Reboot the device and check the result.
other methods
If none of the above helped fix the situation, then do the following:
- Reinstall Windows using the original image.
- Install the latest updates.
- Clean the system partition and registry from unnecessary files and entries using the CCleaner program.
- Increase the paging file.
You should not exclude the possibility of a defect or complex technical breakdown. In this case, to eliminate the nvlddmkm sys blue screen, you will need professional repair or replacement of the motherboard and video card.
Video instruction
How to fix Blue Screen of Death in Windows 10
Boot into safe mode.
When you start your computer using Safe Mode, only essential Windows services and system drivers are loaded. If you have not encountered a blue screen of death, you can assume that the culprit of the error is a third-party driver.
How to use Safe Mode?
Previously, in the case of Windows XP and 7, you could use the msconfig utility to load this mode, or use the F8 key when starting the startup. Windows 10 has added one new convenient option for accessing Safe Mode.
- 1. Open Settings > Update & recovery > Recovery.
- 2. In the Advanced startup section, click Restart now. Wait until the window with additional launch options appears.
- 3. Click Troubleshoot.
- 4. On the next screen, select Startup Options, click on Reboot to enter Safe Mode.
Use System Restore.
By introducing a feature called System Restore into Windows, Microsoft made it possible to roll back errors that we might inadvertently make on our devices. This may help if the cause of the blue screen of death is software that you recently installed
You can try to find various settings related to the Windows 10 recovery system in Control Panel > Recovery. To roll back the system to a previous restore point, click Open System Restore. To create a new point, click Configure system recovery > New. The Blue Screen of Death will most likely be fixed if it is related to recent changes to your computer.
Fix Blue Screen of Death using Windows Troubleshooter.
Try using the system's built-in troubleshooting tool. To find it, go to Settings > Update & Security > Troubleshoot.
Under the Troubleshooting heading, you can see a tool to fix errors that cause Windows to stop or restart unexpectedly.
Uninstall the faulty Windows update.
During the installation of a Windows update, in rare cases, the process may be interrupted and such incidents can lead to the appearance of a blue screen of death. The easiest way to fix BSOD on Windows 10 is to uninstall the faulty update. The same should be done with applications that could damage important files on your PC.
You can uninstall the latest Windows update by visiting Settings > Update & Recovery > Windows Update > Uninstall updates.
Reinstall Windows to fix Blue Screen of Death.
Obviously, the latest way to eliminate the Blue Screen of Death is to completely reinstall the Windows operating system. For users working with Windows 10 or 8.1, there is a built-in reinstallation utility that does not require special installation media. For Windows 7, you will have to install the system using a bootable USB or CD.
If your hardware is not directly to blame for the BSOD, then the above tips and methods should help you. If the problem lies in the components, you will have to replace it.
Just in case you need to recover information from your hard drive, Starus Recovery tools will help you. and you can try programs for recovering deleted data completely free of charge!