Launching and configuring pgAdmin 4
We have installed PostgreSQL 12 and pgAdmin 4, now let's launch pgAdmin 4, connect to the server and set up the pgAdmin working environment.
To run pgAdmin 4, go to the start menu, find PostgreSQL 12, and in it pgAdmin 4.
Connecting to PostgreSQL 12 server
pgAdmin 4 has a web interface, so as a result your browser should start and the pgAdmin 4 application should open in it.
When you launch pgAdmin 4 for the first time, the “Set Master Password” window will appear, in which we must set the “master password”; this does not have to be done, however, if we save the user password (the “Save password” checkbox), for example, in order If you do not enter it each time you connect, it is strongly recommended that you come up with and specify an additional password here; this is done only once.
Enter and click “OK”.
To connect to the newly installed local PostgreSQL server in Server Explorer, click on the “PostgreSQL 12” item.
As a result, the “Connect to Server” window will open, in which you need to enter the password of the postgres system user, i.e. This is the password you created when you installed PostgreSQL. Enter the password, check the “Save Password” checkbox in order to save the password and not enter it each time (thanks to the “master password” functionality, all passwords saved in this way will be additionally encrypted).
Click “OK”.
As a result, you will connect to the local PostgreSQL 12 server and see all the objects that are located on this server.
Installing Russian language in pgAdmin 4
As you can see, by default the pgAdmin 4 interface is in English; if this does not suit you, you can very simply change the language to the one you need. pgAdmin 4 supports many languages, including Russian.
In order to change the language of pgAdmin 4, you need to go to the “File -> Preferences” menu.
Then find the “User Languages” item and select “Russian” in the corresponding field. To save the settings, click “Save”, then restart pgAdmin 4 or simply refresh the page in the browser.
As a result, pgAdmin 4 will be Russified.
Demo database for PostgreSQL
In this post, I will talk about our demo database for PostgreSQL: why it is important to us and how it can be useful to you, how the schema is structured and what data it contains.
I’ll immediately provide a link to the full description (it also says where to get the demo database and how to install it).
For what?
From our point of view, the need for a demonstration base is long overdue. To discuss almost any DBMS feature, you need some data, you need a table or several tables. Reinventing this wheel every time is a waste of both the listener’s attention and your own time. It’s not for nothing that every DBMS manufacturer has a database that they use every time they need to demonstrate something.
Why might such a database be needed?
Firstly, for self-study of SQL. Let's say you are a student, learning SQL and read, say, about recursive queries. Do you need to practice something?
On the other hand, in order for a student to read about recursive queries, someone needs to write about it. Our company is collaborating with several authors and is currently working on a university course on database technology and a tutorial on SQL, both of which will use the demo database. It will be possible not only to read the book, but to immediately reproduce the examples given in it, “play” with them, and complete practical tasks.
Another option is to practice in a database course at a university (or even read a commercial course on SQL: the PostgreSQL license under which the demo database is released allows this). There are already examples of such use.
It is also useful to use the demo database for writing blog posts or articles about PostgreSQL and its capabilities. Instead of starting every time with the words “let’s create a table and insert some data using generate_series,” you can get down to business right away.
We are also thinking about reworking the PostgreSQL documentation over time so that it relies as much as possible on the schema and data of the demo database.
What do you need?
We have put forward several requirements for the demo database:
- The data schema should be simple enough to be understood without much explanation.
- At the same time, the data schema must be complex enough to allow the construction of not the most trivial queries.
- The database should be filled with real-life data that will be interesting to work with.
Of course, the first thing we did was look at what bases already existed, but none of them suited us. In no way do I want to say that they are “bad”, but they were created for other tasks: in some the scheme is too simple, in others they are too specialized, in others the content is too primitive.
Data Schema
Therefore, we ended up making our own database. As you may have already guessed from the picture, air transportation was chosen as the subject area: we are talking about our subsidiary airline (which, alas, does not yet exist). The data diagram is shown in the figure:
The main entity here is bookings.
Several passengers can be included in one booking, each of whom is issued a separate ticket (tickets). As such, the passenger is not a separate entity: for simplicity, we can assume that all passengers are unique.
A ticket includes one or more flights (ticket_flights). Multiple flights may be included in a ticket in several cases:
- There is no direct flight connecting the points of origin and destination (flight with transfers);
- Take a round trip ticket.
There is no hard constraint in the data schema, but it is assumed that all tickets in the same booking have the same set of flights.
Each flight goes from one airport to another. Flights with the same number have the same origin and destination, but will differ in departure date.
When checking in for a flight, the passenger is issued a boarding pass (boarding_passes), which indicates his seat on the plane. A passenger can only check in for the flight that is on his ticket. The flight and seat combination must be unique to prevent two boarding passes being issued for one seat.
The number of seats on the plane and their distribution by class of service depends on the model of the aircraft operating the flight. Each model is assumed to have only one interior layout. The data schema does not ensure that the seats on the boarding passes match those available on the aircraft.
All schema objects are described in detail in the document to which I already referred at the beginning of the article. There is also a “guide” to tables in the form of simple queries.
What is inside?
To learn how to write queries, you need the database to already contain some data, and not a couple of lines, but a fairly large array. Our demo database is available in three versions, differing in data volume:
- The small database contains flight data for one month; it does not take up much disk space, but it allows you to write queries.
- The average base covers three months.
- A large database of flights over a year will already allow you to directly experience the nuances associated with performance.
In general, generating test data is an exciting activity in itself, and we will talk about it further. What’s interesting here, since there have been tools (for example, DataFiller) that solve this problem for a long time? Yes, they exist, but it all depends on what quality of information suits you.
For example, the ticket contains the passenger's first and last name. How can I generate data for this field? You can come up with several options.
The simplest one is to form strings of a given length from random characters. Ray Bradbury could afford Mr. Aaa, but are you ready to meet QDEMFI TGBSWAJVZH (this is not a fictional example, by the way)?
You can select values from a pre-prepared list of first and last names. This will be more like the truth, but there is also such a thing as data distribution. If you choose one of the names with equal probability, then there will be approximately the same number of Alexandrovs in the database as there are Poluekts. It would seem, what's the difference? But there is a difference, and a big one: if you need to get all the Alexanders, in a real database you will have to select about 10% of all rows, and the Poluekts may not be found at all. This means that query plans in one and in another case must be different - this is why DBMSs collect statistics on the distribution of data in columns.
A more honest way is to use frequency characteristics for each name and for each surname. That's exactly what we did. (One could also take into account national characteristics and changes in the popularity of names over time, but it is important to stop here in time.)
Here's another example. Our database contains about one hundred airports. Direct flights do not connect all airports, but from any one you can get to any other with several transfers. To put it another way: the connection graph must be incomplete, but connected. How to generate it? Again, it all depends on what quality of data suits us.
In a simple case, you can connect the first arbitrary airport with a second equally arbitrary airport, then connect the second with the next one, and so on several times. If each time we give preference to airports that are not yet connected, then formally we will obtain a suitable graph. Will it look like the real thing? Not in the slightest. Here's what we can get (the color of the lines depends on passenger traffic: the darker, the more congested the route):
If you look closely, you can see that all the cities are connected to each other by a fairly uniform web. And here’s what a real graph of flights in Russia looks like (according to OpenFlights.org):
A characteristic feature here is that the bulk of connections are concentrated in a small number of nodes. Such graphs are called scale-free; You can also find algorithms for their generation at the link.
In our case, we need to not only generate a graph, but also apply it to real cities (after all, it is clear that in any case, Moscow will be the largest hub in Russia). In fact, this simplifies the task if you go beyond the demo database itself and look a little wider: to describe each airport we use not only coordinates, but also several more characteristics. One of them is the volume of passenger traffic, and you saw the graph generated with its help at the very beginning of the article.
Why not just take the routes of some existing airline? You can, of course, do this, but you will lose flexibility: having an algorithm, you can generate a plausible graph for any number of cities, or for a fictional country, or even for intergalactic flights.
— By the way, what is the maximum number of transfers needed to get from any airport to any other? (Of course, the answer to this question should be a SQL query.)
Okay, so we have generated a route graph, but we still need to turn it into a schedule of regular flights. Moreover, there should be enough flights between points A and B to transport everyone, but not too many, otherwise the planes will fly empty. You also need to take into account the type of aircraft. You can take a smaller plane and make more flights.
— Are there any flights in the demo database that exceed the maximum range of the aircraft assigned to them?
Or it could be the other way around - fewer flights, but a larger plane. But not all airports can accommodate heavy wide-body aircraft; This can also be checked if desired, although we did not include information about airport classes in the demo database itself.
And so on. Here are a few more questions that hint that data generation is not as trivial as it might seem at first glance:
— How does the actual flight time differ from the planned one?
— Usually flights from west to east are long (we depart at night, arrive in the morning the next day), and from east to west they are short (we arrive on the same day at almost the same time). What happens in the demo database?
— How are the booking times and check-in times distributed in relation to the flight date and time?
— How many people are usually included in one booking?
— Are there passengers flying back and forth? Is the “there” route always the same as the “back” route?
— Do all passengers have seats on their boarding passes that correspond to the class of service selected when booking?
— Could it happen that a passenger was issued a ticket for a seat that is not in the cabin? Can two passengers claim one seat?
— Do tickets for seats of the same class of service on the same flight always cost the same (and why)?
Finally
We hope that you will find it as interesting to work with this data as it was interesting for us to work on it. Future (albeit not immediate) plans include developing the scheme to cover more “advanced” areas: full-text search, semi-structured information, temporal data, various indexing strategies.
If you find any discrepancies between the demo data and common sense (and this may well happen - after all, it is difficult to foresee everything in the world), do not hesitate to write to us at
We're also very interested to hear about real-world uses of data schema. Share your experience, and we, in turn, are open to communication and ready to share ours.
PostgreSQL command line management utilities
Let's look at the management and basic operations that can be performed with PostgreSQL through the command line using several utilities. The main PostgreSQL management tools are located in the bin folder, so we will execute all commands from this directory.
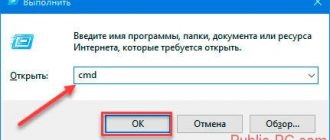
- Launch Command Prompt.
Advice . Before starting the DBMS, change the encoding for normal display in Russian Windows 10. On the command line, run: chcp 1251 - Go to the bin directory by running the command: CD C:\Program Files\PostgreSQL\11\bin
Basic PostgreSQL commands:
- Checking the installed version of the DBMS: psql –V
- To create a new database, use the createdb utility: createdb -U postgres testdb (where postgres is the superuser, testdb is the new database) Enter the superuser password.
- Check the list of active databases: Psql -U postgres –l (password)
- Using the createuser tool, we will create a new user: createuser –U postgres operator (where operator is the name of the new user)
- Let's grant the user superuser privileges (in practice this is not necessary). Start the interactive PostgreSQL management shell (shell): psql –U postgres. Using the SQL ALTER ROLE command, we will grant the necessary rights to our user: ALTER ROLE operator SUPERUSER CREATEROLE CREATEDB;. We have granted the user superuser rights, rights to create roles and databases.
- To display a list of users and roles in the DBMS, run the command: \du
Deleting a database or user
drop command is used for this operation : it can delete both the user and the database.
drop database drop user
This command must be used very carefully, otherwise the deleted data will be lost, and it can only be restored from a backup (if there was one).
If you specify psql postgres (without a username), then postgreSQL will log you in as the standard superuser ( postgres ). To log into the database as a specific user, you can use the following command:
psql [database_name] [user_name]
Let's log into the proglib_db as the author . Press \q to exit the current database, and then run the following command:
- Beginning PostgreSQL on the Cloud. Working with PostgreSQL starts with this book. It is better to start learning something new with practice. This publication includes a huge number of useful working examples taken from real projects.
- PostgreSQL 9 administration. Recipe book. An excellent reference book for developers of combat projects in PHP, Ruby, .NET, Java and Python. Covers common general questions about architecture, recovery, replication, and more.
- Seven databases in seven weeks. This book is suitable for the general development of specialists with any level of knowledge. The author talks about the organization of each DBMS, as well as in which case it is advantageous to choose one or another database.
We hope our little tutorial helped you understand the basics.
PostgreSQL Linux Commands
The basic commands for working with this DBMS for Ubuntu look like this:
- Starting work with the DBMS - sudo su postgres.
- Switch to the console – psql.
- Switch to working with the database on behalf of the created user - psql -h localhost mybase username.
- Creating a simple table about, for example, robots -.
CREATE TABLE Robots (
robots varchar(55),
engine_ver int, engine variation.
color_ver int, color variation.
usab real, level of control convenience.
date date
);
View tables - \d
Adding data is done in two commands:
INSERT INTO Robots (type, color,) VALUES ('slide', 'blue', 'south', '2018-01-15');
INSERT INTO Robots (type, color,) VALUES ('swing', 'yellow', 'northwest', '2018-01-15');
Delete – DELETE FROM playground WHERE type = 'blue'.
Restarting Postgresql – from a new Terminal window, run sudo service postgresql restart.
Commands for a last resort, reinstalling PostgreSQL:
apt-get purge postgresql
apt-get install postgresql