About Clonezilla
Clonezilla is a free and open source disk cloning application based on Debian. Like other disk cloning applications, the distribution copies the contents of a hard drive for transfer to another medium, such as another computer's hard drive, or to removable media such as a DVD or USB drive. The program is compatible with Windows, Macintosh and Linux operating systems.
There are two versions for cloning on one or more machines.
Clonezilla Live is designed for cloning without installation. It runs via LiveDistro on physical media such as a CD, DVD or USB drive, or can be routed from a server.
Clonezilla SE (Server Edition) uses multicast to clone multiple drives at once. The website says the software multicasts a 5.6-gigabyte disk image to more than 40 computers within 10 minutes.
The distribution was originally developed at the NCHC Free Software Laboratories by Steven Shaiu.
Official website of Clonezilla
Creating a backup copy of individual hard drive partitions to local media
It is not always necessary to backup your entire hard drive. A typical configuration of hard drive partitions on a computer with Windows vendor pre-installed might be, for example, this:
Usually, the outermost partition (drive D:\ in this example) contains data that is not really necessary to back up (at least for me). These can be copies of video files, disks of test virtual machines, software distributions. In a word, something very voluminous, but easily replenished.
In this case, you can make a backup not of the entire disk as a whole, but of its individual sections. In the presented example, it makes sense to backup the following sections (in order of priority):
- C:\ – bootable system disk – mandatory,
- System partition “Reserved by the system” - its loss is not critical, but it is very small and its backup will only take a few seconds,
- Factory recovery partition (it may not exist). Questionable. If the computer’s warranty has expired and a system backup is made independently, then its need becomes less obvious.
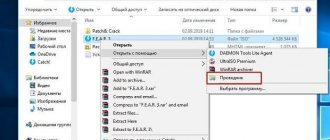
We boot the computer from the media with Clonezilla live .
Points 1 – 9 do not differ in any way from the previous option.
10. Clonezilla: Select a mode.
Select the second line of the menu: “ saveparts Save_local_partitions_as_image ”.
11. Set the name of the created directory with backup files.
12.
We identify the disk partitions selected for backup and mark them with the “Space” key.
13 – 14. - without changes.
Similar to backing up the entire disk, we check and confirm the choice made and wait for the process to complete.
Clonezilla Features
Backing up disks and partitions for later recovery
Designed as an alternative to expensive disk cloning applications, the software creates backup copies of your entire hard drive or individual partitions. When a crash occurs, you use a disk or partition image to recover your lost files.
The distribution offers two boot options: ISO and ZIP packages, each for different boot media: the first for CD, DVD or PXE servers, the second for USB flash or hard drives.
Boot disks and backups
Booting from media opens a menu where you can select the Clonezilla Live operating mode and run memory tests. Console data configuration options appear as you continue, allowing you to select your keyboard layout option.
After launching, you choose one of two options, namely to clone or restore a disk or partition using a previously created image, or make a backup copy. In addition, when you first start, you should take the time to create an image that is stored in different places.
Once the image is created, you either launch Clonezilla or shut down or restart your computer to access the host OS.
Backing up your hard drive to local media
Let's start with a full backup of the hard drive, as the simplest, and go the full way from its beginning to completion..
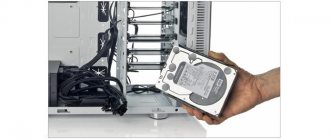
To do this, you will definitely need any drive of suitable capacity that can be connected to your computer - a second hard drive or an external drive with a USB interface. The drive must be formatted in one of Clonezilla's friendly file systems.
If you boot your computer not from Clonezilla live , but from Parted Magic , then you can create and format partition(s) of the target media using the GParted .
In addition, backup can be made over a local network to a file server or another computer acting in this role. This opportunity will be discussed in more detail below.
The connected target media must have enough free space to save backup files. You can roughly estimate the future backup size by dividing by two (average compression ratio in Clonezilla ) the volume of all data located on the source disk. It makes sense to connect the target media before loading Clonezilla live , although it can be done later.
1. Boot the computer from the created boot device with Clonezilla live .
The very first screen was already presented at the beginning of the article. As you might guess, this is just the Linux bootloader menu (Grub). Select the default first menu item.
In general, the interface for working with the program is organized in the form of a wizard according to the principle: list of questions - answer - next screen.
Press “Enter” and observe the short process of loading the Linux operating system.
2. Choose language - select the interface language:
The number of languages supported is impressive. There is also support for the Russian language, which greatly simplifies the process of working with the program (although on some screens some of the text will be in English).
With your permission, I will not cover this page with screenshots of all the windows that appear. Everything is quite obvious, so we will limit ourselves to choosing the necessary options. Most of them will be offered by default.
3. Configuring Console-data – keyboard layout. For a standard keyboard, select “ Do not touch layout ”.
4. Launch Clonezilla.
From this point on, the Linux boot and configuration can be considered complete. The selection of action options directly for the backup program begins.
5. Clonezilla . Since we need to make a backup, we select “ device-image work with disks or partitions using images .”
6. Mount the directory with the Clonezilla image . Select “ local_dev Use local device (for example: hard drive, USB drive) ”.
The next step will attempt to mount the target media into the Linux directory /home/partimag - the image repository. Therefore, after pressing “Enter” a warning will appear at the bottom of the screen that if you plan to work with a USB device and it is not yet connected to the computer, then you need to do this now and wait a few seconds for it to be identified.
7. Clonezilla (or rather Linux) will detect all hard drives connected to the computer and display a list of them for selection. Something like this (don't pay attention to the strange long disk names - the screenshot was taken in the VirtualBox virtual machine):
On the same screen there is an explanation for those who have never dealt with disks and their partitions in Linux. In Windows, we are used to referring to drives by their assigned letter - C:\, D:\, etc.
A question for the youngest. Why does Windows drive naming begin with the letter C:\ and not A:\?
The first hard drive in Linux is designated as sda - for SATA drives, or hda - for SCSI drives and drives with the now obsolete PATA interface.
Accordingly, the first partition of the sda disk is designated sda1, the second sda2, etc.
The second hard drive will be called sdb (hdb), its partitions, respectively, will be sdb1, sdb2, etc.
So don't be scared, everything is very simple.
We find and mark the device in the list (by number, label, if any, or size). " OK ".
8. Selecting a directory to save the backup on the target disk.
If there are directories on the disk intended for saving backups, then a list of them (root) will be presented on this screen. Depending on your preferences, you can first create, and here select, a directory with a “speaking” name, for example, Backup, or select as the location for placing the backup folder in the root of the target disk. The choice made here will not affect the backup process itself in any way.
9. Select the wizard launch mode.
Feel free to select: “ Beginner Entry level: accept default settings .” In the “Expert” mode, you can additionally select some options that are disabled by default, but they are definitely not needed for a regular backup.
10. Clonezilla: Select a mode.
On this screen you can choose whether to back up the entire disk or individual partitions. In accordance with the task, select the first item.
11. Set the name of the created directory with backup files.
It may make sense to leave the date the backup was created, but add some identifier for the computer being backed up or the operating system.
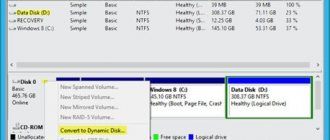
12. Selecting the source local disk - that is, the disk of which you are planning to make a backup copy. If there are several disks, then the desired one is selected with the spacebar, and the selected one is marked with an asterisk.
13. Clonezilla Advanced Advanced Options
This item is intended to check and correct the file system of the source disk before creating a backup copy. NTFS is not supported , therefore, to backup media with Windows, we precisely select the default item: “ Skip checking / repairing source file system ”.
14. “ After the image is saved, do you want to check if the image is restorable? ” – here we are talking about checking the created bepap. That is, whether it was created correctly and whether it will be possible to restore the disk from it.
If you have doubts, and backup is important, then it makes sense to choose the first option. Although the check will naturally take some time, it is much faster than the backup itself.
Everything is ready to start the backup process, but it makes sense to pay attention to the text that appears at the bottom of the screen suggesting that next time you should not go through the entire wizard from the beginning, but immediately execute the command it generated.
Press “Enter”, check your choice again and answer affirmatively (“y”) to the questions. The backup process begins and you can monitor its progress.
It's that simple. It turned out to be long, but in fact the entire wizard goes through very quickly.
All that remains is to wait for the process to finish and live peacefully for a while after that. The main thing is not to forget to make backups regularly.
Benefits of Clonezilla
The main advantages of the distribution are its free open source platform, ease of download and installation, and regular updates.
For example:
- Open source. The distribution offers its users free access to the latest developments
- Easy download and installation. Software is accessed from online repositories and websites. As a result, users download the source codes and install them on their computer along with instructions and documentation.
- Latest updates. Benefit from regular updates, the latest fixes and releases as developers continually improve the software.
- Community support. Clonezilla supports a community of users and developers to share opinions, experiences and knowledge on every aspect of the system. The community forum treats every user with care.
Installation
- We launch Clonezilla to RAM, because this mode speeds up the work of writing to disk
- Select the interface language. I chose English because Russian was not completely translated, and even the most useful things remained in English
- Select the keyboard layout. The default is English, which is good for naming files
- Choose a copying system according to your needs
- Selecting the degree of parameters
- Select disk_to_local_disk
- Select the disk whose copy we want to receive
- Select the disk to which the image will be copied
- Choosing what to do after cloning
- Clone the disk image.