System protection
The system protection feature creates shadow copies on a regular basis without user intervention. If your computer starts to slow down after installing updates or new versions of software, you can return to a stable state.
- Let’s use the keyboard shortcut Win+X to access the “Power User” menu. Select the specified item and open the control panel.
- The section we need for work is circled.
- Select the middle item and launch the recovery utility.
- At the initial stage, the system notifies that when performing the selected operation, the user's data will not be affected. Having familiarized ourselves with the information, we move on.
- Select the suggested restore point.
- We receive another information message. The OS displays general information about the upcoming operation.
- We confirm our decision.
- The computer will reboot during the operation. After logging in, we will see a success notification on the desktop.
As a result, we returned Windows to a stable state, which was automatically recorded by the protection service and recorded in history.
If your operating system suddenly began to function incorrectly or problems appeared in its operation, then you need to know how to roll back the Windows 8 system to its previous state. Restoring the OS to a previous operating state is a simple and automatic process that allows any average user to quickly troubleshoot problems. Restoring or rolling back the system means returning the basic settings and parameters to the previous working state, in which the OS and software worked in a stable mode. When the system returns to its previous state, user data is not lost, with the exception of settings and recent changes. In order to roll back the system, you can use several methods:
The first way to roll back a Windows 8 system is to use an automatic tool by calling it from the loaded OS (you will also need a bootable system image):
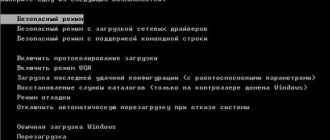
1. In the loaded OS, close all running applications; 2. Press and hold the Shift system button; 3. Select reboot in the computer shutdown menu;
4. The “Select Action” system menu will open in front of you, in which you should select “Diagnostics”;
5. In the “Diagnostics” menu, select “Restore” for the first time;
6. “Computer recovery” will open, click the “Next” button;
7. In the “Recover” menu that opens, select your account profile and password, if you have one;
8. Now you need an OS installation image to begin the recovery process. It can be loaded either via DVD-ROM or from an installation flash drive, having previously made it bootable;
9. In the “Computer Recovery” menu, click “Restore” - this will initiate the process of starting system recovery. Once you click the “Restore” button, you can no longer cancel the process!
10. Wait for the recovery process to complete without interrupting it, and also without disconnecting any system devices, as this may lead to recovery failure; 11. The system state will be restored after the final automatic reboot of the OS.
If it was not possible to roll back the system, or while restoring the system to its previous state, the computer crashes or freezes, then you should repeat the above sequence of actions, selecting “Restore the previous system state” in the fifth item. Be sure to save all your necessary personal data so as not to lose it, as in this case it will be deleted. This method of system rollback is suitable for those who experienced a crash as a result of installing third-party software or because of user data that interferes with the normal functioning of the OS.
The second way to roll back Windows 8 is to use the recovery tool from the Control Panel. This method is suitable if you need to roll back the system to a specific date or event:
1. In the loaded OS, close all active applications;
2. Open “Control Panel”;
3. Set the “Large icons” property in the “View” item;
4. Select the “Recovery” tab;
5. Initialize the start of the process by selecting “Start System Restore”;
6. In the dialog box that opens, click “Next”;
7. Select a recovery point from the list of available ones, click “Next”;
8. Confirm the restoration at the specified moment by clicking “Finish”;
9. Click “Yes” in the confirmation pop-up window;
10. Wait for the automatic Windows 8 system rollback process to complete;
11. Recovery is complete after loading the user profile.
This method of how to roll back a Windows 8 system is traditional in all operating systems of the Windows user family, safe and functional. Thus, you know how to roll back a Windows 8 system using two methods recommended by developers. By choosing one of them, you now fully understand what the result will be, as well as what you may have to sacrifice.
Recommended viewing:
- How to organize a meeting on Zoom?
- How to use Zoom on a computer?
- Internet speed check: what you need to know
- How to change your voice in Discord?
- How to change your profile cover in Odnoklassniki?
- How to delete Instagram posts from your computer?
- Troubleshooting errors when running Office 2010 on XP
- How to update Internet Explorer 8 to version 11 for Windows 7?
- How to archive a post on VK?
- How to maximize the screen on a computer?
- How to rotate a video 90 degrees?
PC Settings
Microsoft gives us another recovery tool with great capabilities. In Windows 8.1, you can get to it using the Miracle Bar or by going to the General list of applications in Modern UI.
- Using the “Start” button, we will open the “tiled” interface. To simplify the task, we enable sorting by name. We are looking for the letter “P” for the gear icon shown in the screenshot.
- Having opened PC settings, select the last item in the list.
- In the navigation area, go to the “Recovery” section. There are three options available to us here. The first two provide for the so-called return to factory settings. You can run it without losing data or to its original state. In both cases, the system will be reinstalled. At the same time, even in the “soft” version, all independently installed programs may disappear. To make it easier to reinstall them, a list will be displayed on your desktop with links where you can download them.
- It is believed that a factory reset can be performed without a disk or flash drive. Practice shows that the system is capable of requesting an installation DVD at any time if it detects a lack of any file.
The third option allows you to restart the laptop in safe mode and use the recovery tools there.
Uninstalling updates
Sometimes recently downloaded Windows updates can be the cause of crashes. Problems that arise include:
- Some application stopped working;
- problems with the functioning of drivers;
- changing the appearance of the system (and at the same time you don’t like it, because you are used to the way it was before) and much more.
Rolling back all updates is quite easy. To do this, you need to do the following.
1. Open the Start menu.
2. Click on the “Arrows” icon, which is pointing down.
3. After this, you will have a large list of applications. You need to scroll it to the right.
4. Scroll until you see “Control Panel.”
5. By clicking on this link, you will see a list of “All Control Panel Items”. You need to click on “Windows Update”.
6. Next, click on the “Installed updates” link.
7. Immediately after this you will have a large list of everything that was downloaded by the update center.
8. Select any item and you will see the “Delete” button.
9. Select any update and click on delete. As a result, you will be asked for additional confirmation.
10.After agreeing, you will need to wait a little. The waiting time depends on the size of the update.
Before you start, it’s worth thinking about: “What updates need to be removed?” After all, there are a lot of them there. Carefully! The “poke” method will not do anything good. On the contrary, the situation can be worsened.
Use sort by time.
It is logical to assume that the latest updates are to blame for the latest problems and system failures. Remove them all and see if the OS returns to full functionality.
Using the command line
You can also work with these add-ons through the console. This is done as follows.
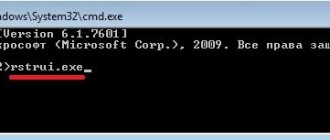
1. To get started, press the Win+R key combination. In the Run utility window that appears, enter the command “cmd”. To start, press Enter on the keyboard or the “OK” button.
2. Then enter the following command.
wusa
To enter, press the Enter key.
3. Immediately after entering you will see help about this utility.
Using this description, you can do almost the same thing as shown above.
Safe mode
Let's take a closer look at the actions performed with a special loading option. There are several recovery methods available to us here.
Diagnostics
After rebooting, the PC will show us the following menu. You must select the “Diagnostics” section highlighted in the screenshot.
- Let's consider the actions in the first two paragraphs. In fact, they duplicate similar functions available in the parameters graphical interface. In both cases, the sequence of actions is the same, only the consequences differ.
- For example, select the top item “Restore”. The system will ask us to define an account under which further operations will be performed. It is desirable that the selected user is registered in the OS as an administrator.
- Confirm your account by entering your password. Changing the layout does not work here, so first of all we change the language settings. If you set the initial access code in Russian, you don’t have to do anything.
- Using the hyperlink indicated by the arrow, we successively change the layout pages until we reach the indicated line.
- After entering the password, the bootloader will begin to require the distribution media. This could be a licensed DVD, which we will insert into the drive, or a self-made flash drive. The distribution itself must be downloaded from the Microsoft website. In this case, the license will be checked in advance and will not be able to “fly” when restoring the computer. Reactivation will occur automatically without user intervention.
- The system issues a warning informing us about what operations will be performed. Accordingly, when choosing to return to the factory configuration, we will be notified about the loss of unsaved data.
- If the operation is performed on a laptop, check the external power connection. The recovery process is quite long and the battery charge may expire faster than it runs out.
After several reboots we will get an updated Windows. The user's folder and personal data remained safe. Only the system registry will be completely rewritten and the recycle bin will be emptied.
Extra options
On the “Diagnostics” tab, in addition to the two items we have considered, there is a third one. "Advanced options" also contains several recovery options.
- Having opened this item, we will see the following set of tools.
- We have already looked at recovery from a checkpoint. The third point will help if the OS bootloader is damaged. Replacement of faulty startup configuration files is performed automatically from the installation media. At the initial stage, you will need to confirm the system for recovery.
- The second point assumes the presence of a previously prepared image. An additional local or external drive can be used to accommodate it. The system even supports network recovery if a remote network drive was used to store the copy.
The problem is that using this method requires preliminary configuration of archiving, which users usually do not do.
Windows 8 System Recovery Tools: Video
Recovery using bootable media
So, we need a bootable drive, which can be created using the UltraISO program.
Remember that for this you will need an image of Windows 8, which you can buy on the official Microsoft website or download a pirated version.
Finding and downloading such an OS will not be difficult. But remember that the purchased OS from the official supplier is much more stable and faster.
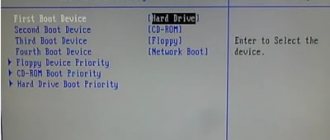
Let's imagine that we already have bootable media. To boot your computer from it, you will need to enter the BIOS, go to the BOOT section and install the initial boot from your drive (this can be a flash drive or DVD).
To avoid entering the BIOS, you can simply restart the computer and at the moment when the logo of the laptop (or motherboard) manufacturer lights up on the screen, press Esc.
Next, a sign will appear in which you need to indicate the boot option, or a window will appear with information about which button to press to select the required drive.
Then the system will boot from our media. At the first stage, you will need to select the interface language, keyboard layout and currency format. Here we leave everything unchanged. Click “Next”.
In the second stage we will have two options:
- Installation – complete installation of Windows OS
- System Restore.
We need exactly the second option. Click on it and follow the prompts on the screen. If you are extremely careful, you will succeed.
Installation media
For various reasons, it may not be possible to use the described methods. In such cases, you will have to restore the system through the BIOS, booting directly from the installation media.
- To use this method, you must first change the download priority. The media from which you are launching should be set first. This operation is performed in the BIOS Boot Priority section. The initial window, if the language parameters are correctly specified in it, can be skipped.
- Here we select the marked item in the lower left corner.
The recovery menu and the tools it offers are completely identical to those already discussed above in special boot cases. We select the appropriate one and perform the operations in the same sequence.
What to do if you can't log into Windows
Sometimes you can't log in. Of course, everything can be demolished and reinstalled again. But what if the information needs to be saved? This can be done in two ways:
- use save points (provided you created them);
- reinstall the OS without formatting.
Let's consider both options.
Restore point
Previously, we showed how to rollback using various system snapshots. But we were talking about working in functioning Windows. If you can't log in, here's what you need to do:
1. While turning on the PC, simultaneously press the Shift+F8 buttons. Let's move on to diagnostics.
2. Then – to additional parameters.
3. Next, click on “System Restore”.
4. Select an account.
5. If you do not use a password, immediately click on continue.
6. In the window that appears, click on the “Next” button.
7. Select any moment you need and click “Next”.
8. Complete the settings with the “Finish” button.
9. We agree that you understand that it is impossible to cancel the process.
10.Wait for a message about successful recovery and click on the “Reboot” button.
As a result of this, you will get a working operating system, although before you could not even log into it.
Reinstalling Windows from BIOS
If you are desperate and you have neither a system image nor checkpoints at hand, and Windows does not boot, you will have to do a system rollback using a radical method.
1. Insert the installation disc or USB drive. Go to BIOS. Go to the "Boot" section.
2. Using the F5 and F6 keys, move the USB-HDD to the first line. To save, press F10. After this, the computer will restart and the installation will begin. Click on the "Next" button.
3. Then click on the “Install” button.
4. We agree with the license and go to “Next”.
5. At this stage, you will need to select “Update”, and not the usual installation.
This way you can reinstall Eight and save all your files.
Pre-installed OS
Laptops from leading manufacturers such as ASUS, Acer or Lenovo come with a pre-installed operating system. As a rule, they have their own recovery partition. The command interface here may differ from that used in Microsoft distributions. It is called using the top row of hot function keys with the letters F.
There is no single, generally accepted option, so the Lenovo G50 or HP Pavilion may use different combinations. You can find out what you need in the technical documentation on the manufacturer’s website. You can return factory settings using this section with one caveat. Since the initial settings cannot be deleted, only the system pre-installed by the manufacturer can be restored. The PC you bought with Windows 7 and updated to 8.1 yourself will revert to Windows 7.