Badges are an excellent way to identify employees; they create a trusting atmosphere between partners at seminars, trainings, presentations and other events. The minimum amount of information guides the potential client and helps direct the conversation in the right direction. In addition to the owner’s personal data, the product usually displays a company logo. This article will help you prepare a complete template for a badge of any size and print it on a printer. At the bottom of the article is a link to a standard size badge template.
Deciding on a standard size
The basic principle for choosing the size of a badge is the amount of information that needs to be placed on it and the pocket available for the badge for that size. For standard badges containing the name, position and company logo, a 90x60mm format is sufficient. Badges for private security company employees are usually made in sizes 100x70mm, and for public events large badges in A6 format (105x148mm) are usually made. According to our statistics, the main size of pockets for badges is ordered for a horizontal liner of 90x60 mm. In this example, we will proceed from these dimensions.
Credly
To get all the features of this service, you need to pay. There aren't many free options. After selecting a template, click on the Customize This button.
Of the tools, only the set of icons is impressive. In the free version, you can’t edit almost anything, but, in principle, you can select something (Russian language is supported)
Especially for you: Sptn!k in Kyiv: online platform for searching excursions
To download, click the Save button (you need to create an account or log in via Facebook)
Printing the badge on a printer
To print the page with badges, press “CTRL + P” and in the window that opens, click the Print button. At this stage, all you have to do is carefully cut out rectangles along the lines of the table and insert them into a special pocket for the badge.
We hope that you easily completed our training lesson on creating a badge template in Word, and now you can create badges yourself to the required size. Also, in our store you can buy badge pockets with various holders: ribbons, laces, clips, retractors. Standard solutions for employees can be viewed at the link in this section.
Buy our pockets and badge holders at retail:
For badges on paper, holders are needed:
- Economy badge pocket 20 RUR/piece
- Badge pocket with ribbon 30 RUR/piece
- Badge pocket with clip RUB 21/piece
- Badge pocket with drawstring 28 RUR/piece
- Badge pocket with tape measure 69 RUR/piece
- Badge pocket on a chain RUB 36/piece
How to make a badge online
A badge is a convenient “sticker” on clothing, a label on which your name, surname, and occupation are indicated. The badge helps you address consultants, salespeople, doctors, teachers and other professionals, mainly in the service sector, by name. Badges are often worn at conferences. Badges can be different in design, as well as in form - a sticker, a card with a clothespin on clothes or on a ribbon (on the neck) and badges. Standard badges measure 85 x 55 mm.
You can create a badge on the Internet using the same services as creating a business card online. However, there is also a specialized badge generator. This is badge-online
You can make a badge in this generator in just three steps:
- The first step is Design. Select a template from those offered (the “ready-made templates” tab) or select the “inscription and avatar” tab (here you can select an original avatar picture and add your own inscription) or the “Upload your own” tab (here you can upload your own picture - be it a badge background , clipart or your photo). WITH choosing your own template It’s not difficult to figure out a badge - just click on the design you like and move on to the next step. If you decide to select " Inscription and avatar“, then it should be noted that here you can format the inscription (inscription settings), and you can also reflect the badge horizontally using a special button under the preview:
The third tab - “upload your own” - allows you to upload your own backgrounds, photographs, clipart and pictures into the generator. You can upload an image to the service, the size of which does not exceed 2 Mb. After loading, under the preview you will see two buttons: the left one is responsible for resizing the photo, and the second is for moving the image. Click on the desired button and drag the preview photo.
- The second step is “Information”. There are two tabs here - “personal” and “for a group of people”, which means that you can make many of the same type of badges for the employees of your company. Creating a personal badge. Add your first name, last name, specialty, website or other information in the appropriate fields. You can change the text settings for each field:
Creating a badge for a team (group of people) . Go to the appropriate tab. Here, each line in a separate badge is separated by a * sign, and a ; Separates information from one badge from another.
- The third step is “Result”. View the result and download using the special button. If you are not satisfied with your work, then return to the previous steps.
Using Templates
If you want to use ready-made badge samples, then create a new document in Word.
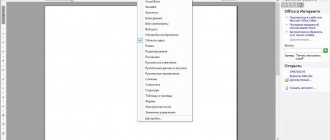
Then, in the search bar for available templates, type either “Cards” or “Business Cards” and click on the arrow to search. You need to look for cards, since there are simply no badges on this list, and they are most similar to them.
In the list of available options, select the one that suits you best and click “Download”.
When the template is downloaded, it will open in a new window.
If you don’t like anything from the displayed list, then you can find an option on the official website: https://templates.office.com/ru-ru/Business Cards
Follow the link, select the item we need on the left, and then look for what you like. Make sure that Word is written under the image. Then click on the name of the template and download it by clicking on the corresponding button.
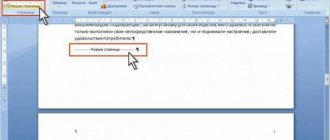
The next thing to do is to move on to editing and formatting the blank. Almost all the necessary buttons will be located on the “Working with Tables” tab - “Layout” or “Designer”.
Click on any word and look at the top to see what size the table cell is. In the example, the blocks are 8.82x5.08 cm. This may not always be suitable. The size of a standard badge in centimeters is 8.5x5.5. If you do not have a standard one, it is better to measure the width and height of the leaflet that you will insert there.
I will stick to the standards, so select the table and enter 8.5 in the “Width” field (your value may be different). Then change the height value, where 5.08 is, and press “Enter”. After this, each cell will become the size you specified.
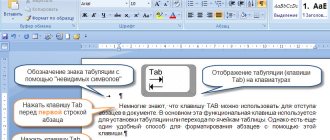
To make it clear where the table boundaries are, you can “Display grid” by clicking on the corresponding button. As a result, all transparent lines will become a blue dotted line, but they will not be printed.
Let's change the sample - enter your organization name.
Then we delete the text below - select it and click “Delete”.
By pressing “Enter” I made an additional indent from the top line and typed the person’s first and last name. Select them, go to the “Home” tab and here select the appropriate size and font, you can use italics or bold.
The bottom lines remain. We delete them, print the appropriate text, this is my position. Then change the font and letter size. To place words, for example, in the center, left or right, click on one of the stripe buttons.
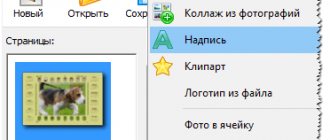
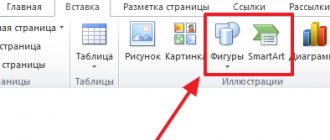
The next step is to add an image. This is not necessary, so in principle, the badge can be considered ready. If you want your badge to have a picture, then click on the cell that you edited and on the “Insert” tab select “Picture”.
In the window that opens, select either a logo or a photo and click “Insert”.
Then you need to reduce the image using the markers on the frame.
To ensure that it is displayed correctly on the sheet and the words do not move, select it and select “Text wrapping” - “before” in the drop-down list.
Again using the markers and arrows in different directions on the frame, move the drawing to the desired location. I have it in the top left.
Once one badge is ready, copy it and replace the pattern in the other cells. Then change names and positions. This way, you can make several copies for different workers or schoolchildren.
To print your badge, go to the File tab.
Specify the number of copies, select a printer and click on the desired button.
Using Templates
If you want to use ready-made badge samples, then create a new document in Word.
Then, in the search bar for available templates, type either “Cards” or “Business Cards” and click on the arrow to search. You need to look for cards, since there are simply no badges on this list, and they are most similar to them.
In the list of available options, select the one that suits you best and click “Download”.
When the template is downloaded, it will open in a new window.
If you don’t like anything from the displayed list, then you can find an option on the official website: https://templates.office.com/ru-ru/Business Cards
Follow the link, select the item we need on the left, and then look for what you like. Make sure that Word is written under the image. Then click on the name of the template and download it by clicking on the corresponding button.
The next thing to do is to move on to editing and formatting the blank. Almost all the necessary buttons will be located on the “Working with Tables” tab - “Layout” or “Designer”.
Click on any word and look at the top to see what size the table cell is. In the example, the blocks are 8.82x5.08 cm. This may not always be suitable. The size of a standard badge in centimeters is 8.5x5.5. If you do not have a standard one, it is better to measure the width and height of the leaflet that you will insert there.
I will stick to the standards, so select the table and enter 8.5 in the “Width” field (your value may be different). Then change the height value, where 5.08 is, and press “Enter”. After this, each cell will become the size you specified.
To make it clear where the table boundaries are, you can “Display grid” by clicking on the corresponding button. As a result, all transparent lines will become a blue dotted line, but they will not be printed.
Let's change the sample - enter your organization name.
Then we delete the text below - select it and click “Delete”.
By pressing “Enter” I made an additional indent from the top line and typed the person’s first and last name. Select them, go to the “Home” tab and here select the appropriate size and font, you can use italics or bold.
The bottom lines remain. We delete them, print the appropriate text, this is my position. Then change the font and letter size. To place words, for example, in the center, left or right, click on one of the stripe buttons.
The next step is to add an image. This is not necessary, so in principle, the badge can be considered ready. If you want your badge to have a picture, then click on the cell that you edited and on the “Insert” tab select “Picture”.
In the window that opens, select either a logo or a photo and click “Insert”.
Then you need to reduce the image using the markers on the frame.
To ensure that it is displayed correctly on the sheet and the words do not move, select it and select “Text wrapping” - “before” in the drop-down list.
Again using the markers and arrows in different directions on the frame, move the drawing to the desired location. I have it in the top left.
Once one badge is ready, copy it and replace the pattern in the other cells. Then change names and positions. This way, you can make several copies for different workers or schoolchildren.
To print your badge, go to the File tab.
Specify the number of copies, select a printer and click on the desired button.