If you need to supplement the text with graphic elements. For example, tables, graphs, diagrams or diagrams. That is, this can be done directly in the Word text editor. Without resorting to using third-party programs.
We have already talked about how to make a diagram in Word. This time we will talk about schemes. The Word text editor has many tools for creating diagrams. With their help you can draw various geometric shapes, as well as lines and arrows. In this case, the drawn diagram can be decorated with the help of shadows or other graphic effects.
How to make a diagram in Word 2007, 2010, 2013 or 2020
So, if you want to make an outline in Word 2007, 2010, 2013 or 2016, then you need to go to the Insert tab. This tab has two buttons that can be used to create diagrams in Word. These are the Shapes and SmartArt buttons.
When you click the Shapes button, a huge list of shapes appears that you can insert into your document.
By selecting one of these shapes from the list, you can immediately draw it in any place convenient for you. Using several of these figures, you can easily make a diagram in Word. An example of a simple circuit in the screenshot below.
If necessary, the appearance of the drawn figures can be changed. To do this, simply select one of the shapes and go to the “Format” tab. On this tab you can change the shape color, frame color, fill color, add shadows and other graphic effects. Using all these features you can create a quite beautiful diagram (example below).
To add text to the diagram, simply right-click on the desired shape and select the “Add text” menu item. Then you can enter text directly inside the shape.
As a result, you can get something like this.
In addition, you can make a diagram in Word using the “SmartArt” button. After clicking on this button, a catalog of ready-made schemes opens. In which you can choose one of the options that suit you.
After selecting the appropriate scheme option, a ready-made scheme will appear on the page.
You will only need to add your text. To do this, just click on one of the blocks and enter the desired text.
You can also change the appearance of the diagram you made. To do this, select the diagram with the mouse and go to the “Design” or “Format” tab. Using the tools available on these tabs, you can get a multi-colored and voluminous diagram like the one in the screenshot below.
Create a flowchart with pictures
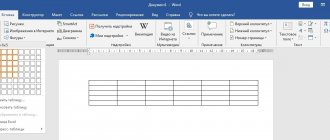
On the Insert
In the
Illustrations
, click the
SmartArt
.
In the collection Choose a SmartArt Graphic
Select
Process
, and then double-click
Process with Offset Pictures
.
In the shape you want to add a picture to, click the picture icon
, select a picture, and click the
Insert
.
To enter text, do one of the following:
In the text area, click [Text]
and enter the content.
Note:
If the text area is not visible, on the
Design
click the
Text Area
.
Copy text from another location or program, in the text area, click [Text]
, and then paste the copied content.
Click the box in the SmartArt graphic and enter your text.
Note:
For best results, use this action after adding all required fields.
How to make a diagram in Word 2003
If you are using Word 2003, you can also make an outline and add it to your document. To do this, you must first open the View menu and enable the Drawing toolbar.
,
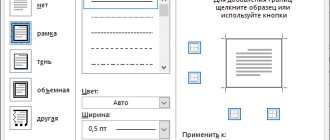
After this, a toolbar for drawing various shapes will appear in Word 2003. Shapes such as rectangle, circle, line and arrow will be available here.
In order to draw more complex shapes, you can use the “AutoShapes” menu.
Apply a SmartArt style to a flowchart
A SmartArt style is a combination of different effects, such as line styles, borders, or 3D effects, that you can apply to the margins of a SmartArt graphic to give them a professional, unique look.
Click the SmartArt graphic whose SmartArt style you want to change.
On the Design
In the
SmartArt Styles
, select the style you want.
To view other SmartArt styles, click the More Options
.
If you don't see the Design tab, make sure you select a SmartArt graphic.
When you hover your mouse over a thumbnail, you can see the style of the SmartArt graphic change.
You can also move or resize shapes, and add fills, effects, and designs.
Creating a regular diagram
Microsoft's multifunctional editor is an excellent solution for creating and editing text files. It includes various tools to display text easily, such as different fonts, lists, tables or diagrams.
The user's arsenal includes a square, rectangle, circle and its derivatives, as well as others. To use them you need:
To create identical figures, there is no need to constantly use the paste and repeat the above steps again - just copy them in the standard way using the Clrl + C and Ctrl + V keys.
To align elements, they are selected one by one while holding down the Shift . After this, you need to go to the “ Format ” section of the top menu and select “ Align ” in the “ Arrange ” subsection.
A list will open where you can align the shapes, for example, along the bottom edge.
Changing flowchart colors
To quickly give your SmartArt graphic a professional look, you can change the colors of your flowchart or apply a SmartArt style to it. You can also add effects such as glow, anti-aliasing or 3D effects. You can also animate your flowchart in PowerPoint presentations.
Applying theme colors
Click the SmartArt graphic whose color you want to change.
On the Design
In the
SmartArt Styles
, click the
Change Colors
.
If you don't see the Design
, make sure you select the SmartArt graphic.
Select the color combination you want.
Advice:
(NOTE) When you hover your mouse over a thumbnail, you can see how the colors change in the SmartArt graphic.
Change the background color or style of a flowchart field
In a SmartArt graphic, right-click the shape you want to change and select Format Shape
.
To change the fill style, in the Format Shape
Click the arrow next to the
Fill
to expand the list and choose one of the following options:
Pattern or texture
Click the Color
and choose a color from the collection.
To specify how transparent the background color is, move the Transparency
or enter the number in the field next to it. The transparency value can be changed from 0 (fully opaque, the default) to 100% (fully transparent).
Change the border type or color
In a SmartArt graphic, right-click the shape you want to change and select Format Shape
.
To change the border color, in the Format Shape
Click the arrow next to the
Line
to expand the list and choose one of the following options:
No Line, Solid Line, or Gradient Line
Transparency (use the slider or enter a percentage)
Width (pixels)
How to create a flowchart in Word
To be able to easily connect objects, for example using arrows, you will need to create a flowchart . To do this, in the “ Insert ” section you need to go to “ Shapes ”, then at the very bottom of the pop-up list click on “ New Canvas ”. Having moved previously created shapes within its limits, you can connect them using arrows :
The point is that when you further move any of the newly created objects, attached to them will move along with them.
Such tools make it possible not only to create new diagrams, but also to adjust their display if necessary. With each new edition, Microsoft Word expands its arsenal of tools and technologies, and also improves the convenience and ease of use.
When working with text in a Word document, you may come across pictures, diagrams, and drawings. By inserting various objects into the text, it becomes more visual, and those who read it perceive the information better.
In this article we will look at two ways in which you can create a diagram in the MS Word text editor - a SmartArt drawing and inserting regular Shapes. I will show it in Word 2010, but these screenshots are also suitable if you have Word 2007, 2013 or 2020 installed.
The site already has articles: how to add a drawing to Word, and how to make a graph in Word. By following the links, you can read them and make your document interesting and more informative.
Add or remove flowchart fields
Click the SmartArt graphic to which you want to add a field.
Click the existing field closest to where you want to insert the new field.
On the Design
In the
Create a Picture
, click the arrow next to the
Add Shape
.
If you don't see the Design
, make sure you select the SmartArt graphic.
Do one of the following:
To insert a box at the same level as the selected box but after it, choose Add Shape After
.
To insert a box at the same level as the selected box but before it, choose Add Shape Before
.
If you need to add a field to your flowchart, try adding it before or after the selected shape to determine the appropriate location.
Add a field from the text area
Place your cursor at the beginning of the text where you want to add the shape.
How to Draw Diagrams Using SmartArt
A diagram is added to a text editor by inserting a SmartArt drawing into the document. To do this, go to the “Insert” tab and in the “Illustrations” group, click on the “SmartArt” button.
A window like this will appear. In it you need to select a suitable drawing. On the left, click on the section, in the example “Hierarchy”, and select one of the proposed pictures. There's a preview area on the right, see what it looks like and what it's best suited for.
Now let's start placing blocks. You can delete unnecessary ones by selecting it with the mouse and clicking the “Delete” button. Thus, remove all unnecessary rectangles.
Next you need to add blocks. Select the one under which you want to insert additional ones, and on the “Working with SmartArt Drawings” - “Design” tab, click on the “Add Shape” button, in the list click on the “Add Shape Below” item.
After that, select the top rectangle again and add another one below. Here you can choose to add the desired object above, in front of, or behind the selected block.
After you complete the previous step, you need to print the text. Select the diagram area and on the “Working with SmartArt Drawings” - “Design” tab, click on the “Text Area” button. Or, on the left border, click on the button with two small arrows.
A small window will open on the side. In it you need to enter text for each of the blocks. Here markers indicate the levels, and by clicking in front of the marker you can see where the text will be entered.
Write next to each marker which text should be in which object.
How to Draw an Arrow Diagram Using Shapes
You can make diagrams in Word in another way, without using ready-made templates, but create it by inserting suitable shapes into the document.
To do this, open the “Insert” tab, click on the “Shapes” button and click on the one you need from the list, it can be an oval, rectangle, rhombus, etc.
After this, the cursor will change from a stick to a plus sign. Use it to draw a shape at the desired location in the document. Then you will see the “Drawing Tools” – “Format” tab. On it, click on the “Shapes” button again and click on the one you need in the list. Add them all this way.
If you have drawn an object on a sheet and need to move it a little, then you can do this with the mouse, grabbing it by its border. Or select it, hold down the Ctrl key and move it using the arrows on your keyboard.
Next, let's connect the blocks with straight lines or arrows. Select one of them to open the “Drawing Tools” – “Format” tab. Then click “Shapes” and from the drop-down list click, for example, on the arrow. Draw an arrow so that it points directly to the block itself. You can connect several arrows using a straight line.
You can read more about how to make arrows in Word in the article by following the link.
To draw a straight horizontal or vertical line while drawing an arrow, press and hold the Shift key.
Using a straight line and an arrow, I was able to draw this diagram.
Now let's change the appearance of the arrows. Select them one by one, and for each you can choose one of the ready-made styles, or click “Shape Outline” and choose the color, arrow thickness, etc. yourself.
By clicking “Shape Effects” you can add one of the proposed effects. I chose the shadow.
Having drawn and changed the appearance of all the arrows, we move on to the text. Select one rectangle and on the “Drawing Tools” – “Format” tab, click on the “Draw Label” button. A plus sign will appear instead of a cursor. Draw a rectangle with it for the inscription in the desired block.
Next, type the text. Thus, add text to the entire diagram.
As you can see, the rectangle for the inscription is filled with white and has an outline. Let's get this out of the way. Click on it and on the “Drawing Tools” – “Format” tab, select “Shape Fill” – “No Fill”.
We repeat the same for the outline: “Figure outline” – “No outline”. Do this for all text blocks.
The next step is formatting the written text. Select the text and on the “Home” tab, select the font, size, color and center it.
So, we have changed the appearance of the arrows and the text in the diagram, all that remains is to work with the blocks. Select any of them with the mouse by clicking on it - the “Drawing Tools” – “Format” tab will open. In the “Shape Styles” group, click on the one you like. Or use the Fill, Outline, and Effects buttons to create any look that suits you best.
Drawing with Shapes
It is almost impossible to create a drawing of any shape, with roundings, variegated colors with smooth transitions, shades and other details using this method. True, often such a serious approach is not required. Simply put, don’t make high demands on Word—it’s not a graphics editor.
Adding a Drawing Area
1. Open the document in which you want to make a drawing and go to the “Insert” .
2. In the illustration group, click on the “Shapes” .
3. In the drop-down menu with available shapes, select the last item: “New Canvas” .
4. A rectangular area will appear on the page in which you can start drawing.
If necessary, change the size of the drawing box. To do this, pull one of the markers located on its border in the desired direction.
How to open the drawing menu in MS Office Word?
Before you draw a picture in Word, you should open the “Insert” tab on the ribbon. It’s easy to find, since the bookmark is located to the right of the “Home” button. Under the tab, the “Illustrations” menu opens, which you can use when inserting pictures into a document from files, libraries, the Microsoft website, etc. However, to draw in Word, you need to open the “Shapes” tab. Underneath it lies a whole set of tools for drawing in Word, and at the end of the list is the “New Canvas” command. After executing the command, we get a field in the document to work in, where we draw a variety of shapes offered in the context menu. There are lines and patterns of various configurations. How to create a canvas for work can be seen from the diagram (Fig. 1). You can adjust the dimensions of the canvas for images at your discretion.
Drawing Basics in Microsoft Word
MS Word is, first of all, a text editor, however, you can also draw in this program. Of course, you shouldn’t expect such opportunities and ease of use as in specialized programs originally designed for drawing and working with graphics. However, to solve basic problems, a standard set of tools will be enough.
Before we look at how to make a drawing in Word, it should be noted that you can draw in this program using two different methods. The first is manually, similar to what happens in Paint, although a little simpler. The second method is drawing using templates, that is, using template shapes. You won’t find an abundance of pencils and brushes, color palettes, markers and other tools in Microsoft’s brainchild, but it’s still quite possible to create a simple drawing here.
How to make your own arrows
The art of making your own arrows is a survival skill worthy of our attention.
Why? Because this is the main form of self-sufficiency.
As survivors, we love autonomy.
Imagine combining the power of learning - How to make your own arrows - with skill - How to make a longbow.
You will never again be an unarmed and helpless fool.
No matter how bad our world has become.
You will have a powerful ability to take natural resources and transform them into a very useful survival tool.
And the tool is not only useful, but also deadly.
Whether your motivation for making your own arrows is for DIY purposes, as a fun hobby, or just to impress your friends, the following instructions will show you step-by-step how to do it right.
But before we can make an arrow, we need to fully understand the basic parts that make up an arrow.
Main parts of the arrow
Before you can create your own arrows, you must understand the basic parts of an arrow.
The good news is that arrows are fairly simple devices and only include a few components.
So let's go through them from end to end.
Arrow
At the front end of the arrow is the "arrowhead".
It's a deadly sharp tip that does real damage.
It can be thin, wide, and usually made of stone or metal.
But the good ones are razor-sharp and can penetrate deeply into their intended target.
Shaft
The next part of the arrow is the “shaft”. As the name suggests, it is the long, thin part of the arrow that attaches the arrowhead and fletching.
The arrow can be thought of as the chassis of a car. It's not sexy, but it holds everything together.
Which brings us to part 3.
Plumage
Flights are thin blades made of feather or plastic that are needed to control the flight path of arrows.
Without fletching on the back of the shaft, your arrow will fly erratically and uncontrollably.
Hitting a target without feathers is a much more difficult task.
Nok
Finally knocked. The nose is the small "notch" at the base of the arrow where the string and arrow meet. The correct notch is important for the string to shoot.
Without a notch on the rear end of the arrow, the full release force of the bowstring will not be fully transferred to the arrow.
The bottom line is that the notch is critical to the performance of the bow and arrow.
As a way to introduce you to survival skills, we are giving away our #78 Item Complete Prepper Checklist. Click here to get your FREE copy.
How to make your own arrows
The process of making hands can be broken down into making the component parts and then assembling those parts.
So I'll start with the arrows, end with the ridge, and then end with how to put the whole thing together.
How to make your own arrowheads
Proper tip placement is very important to building a good arrow.
You can make your own arrowheads from a range of raw ingredients. Stone, rebar, porcelain or even glass can become an arrowhead.
As long as the arrow point is balanced and damn sharp.
Here are the basic steps for making your own arrowheads:
- Using a hammer or stone, break pieces of flint, slate, obsidian or devil into roughly triangular pieces—no longer than 2 inches and no wider than 1 inch.
- Trimming and shaping the arrowheads is done using a process called "Flint Knapping". To do this, lightly hit the edges with a nail or screwdriver to make the edges sharper and more uneven. This gives strong edges.
- The next part is appropriately called "sanding" because you use a stone or sandpaper to sand down the edge until it's razor sharp. This weakens the edges, which wear away over time, but the edges are not as important as the point. So I wouldn't worry too much.
- Finally, remove a couple of recesses at the bottom of the arrow to attach to the shaft. This can be achieved by using a bolt or screw to grind down the stone to create perfect semi-circular indentations.
If a picture is worth 1000 words, video is even better. So let's take a look at some great instructional videos on how to make arrows.
How to make a primitive arrowhead
How to make an arrowhead from rebar
How to make an arrowhead from Toliet porcelain
So now you may be wondering, “Homemade arrowheads may not be as good as expensive store-bought arrowheads.
Well, you should watch this test video.
Glass Arrowhead vs Modern Broadhead – Gell Penetration Test
I think the handmade glass arrowhead performed well in this test.
But you have to be patient and practice making arrowheads to get similar results.
If you don't want to invest that time and energy, then just buy some good broadheads online and attach them to your arrow shafts.
As a way to introduce you to survival skills, we are giving away our #78 Item Complete Prepper Checklist. Click here to get your FREE copy.
How to make your own arrow shafts
Arrow shafts are usually made of wood or lightweight plastics.
Because these are materials that can be processed and shaped, but are strong enough for our purposes.
The key to making good arrow shafts is balance and symmetry. When you're done, you want it to be perfectly round.
The good news is that regardless of the material you choose, the process for making your own arrow shaft is the same.
Choosing an arrow shaft material
When using wood, you want to find a slab with very few defects. So limited number of knots or warping.
Now take a rough piece of wood and cut it into as many square pieces as possible.
Cut them to your desired overall length.
Here's a video about choosing arrow shaft wood and making initial cuts.
Templates for making boom shafts
When you have square cut shafts, you need to round them into dowels (boom shafts). You can do this a few different ways (see after the videos), however the basic process is the same.
You pull the square shafts through a router bit, saw blade, chisel or sharpener while rotating the square shaft. You create a rotating motion using a drill.
It is this process of spinning and feeding that creates perfectly round arrow shafts.
Here are 4 videos detailing several unique arrow making tools.
1- Simple table saw dowel maker
2 - Making arrow rods using Veritas Dowel Maker
3 - Old school dowel maker
How to Make Your Own Arrow Shafts Using a Shooting Board
Fine tuning of arrow shafts
Now use a drill bit to quickly spin the shaft in a piece of sandpaper. This helps smooth the arrow shaft and adjust its symmetry.
Finally, test your rod with a pinwheel.
An arrow spinner will give you a visual indication of how straight and balanced your arrow is.
Continue sanding and testing until it turns smoothly on the turntable.
You can buy a good arrow spinner or make your own (see video below).
How to make your own arrow spinner
How to make your own feathers
It is very important to get the correct fletching on your arrow. They are necessary to ensure that your arrow flies straight.
Before adding fletching, you must select the material for the fletching.
Traditionally, bird feathers were used as feathers. But feathers are not the only material available. You can also use electrical tape .
Make Fletchings from Duct Tape
No matter what material you choose. The best way to apply fletching in the right location and orientation is to use a fletching jig.
This is a device that will help you perform a critical fletching application correctly. Here's how to use fletching bait.
What about those of us who are avid DIYers? Then make your own fletching jig.
How to Make Homemade Feather Bait
Adding a lip
The nose is just a slot on the end of the arrow shaft, right? Well, technically yes, but that's not all.
For example, watch the following video to learn how to properly add a nock to the end of an arrow shaft using only hand tools.
Self-tapping nozzles in wooden arrows
You can also add some horn inserts for your self-rifling arrows. They will strengthen your nose and prevent split ends after heavy use.
Remember, this is where your string and arrow make contact, so this is the spot on the arrow shaft that will take the most force during energy transfer.
As a way to introduce you to survival skills, we are giving away our #78 Item Complete Prepper Checklist. Click here to get your FREE copy.
Horn inserts for self-propelled booms
Finally, you can simply buy attachments online and then attach them to your wooden arrow shafts.
It's quicker and easier, you'll just need to taper the end of the shaft to allow the serrations to fit into the shaft.
P Putting it all together
So now you have all the basic steps to create your own arrows, but now you need to put everything together.
Here's a series of videos showing you how to make your own arrows from start to finish.
Part 1 - How to make your own arrows
Part 2 - How to make your own arrows
Part 3 - How to make your own arrows
Conclusion
You now have all the knowledge you need to create your own arrows. However, if all of this is new to you, then you don't have all the skills yet.
And the only way to get them is to take meaningful action .
To find raw wood, cut it into square sections, run it through a shaft jig, make an arrowhead, add fletching and barbs, and give it a try.
Here's how to make your own arrows today.
Will Brenza
Ps Do you know where the nearest nuclear bunker is located from your home?
There are many natural nuclear shelters in the USA that are absolutely free, and one of them is located near your home.
Click here to see the closest natural nuclear bunker to your home?
Click on the image above to see where you need to take cover.
Top image source
Related
.
Drawing and editing lines
How to make a line in Word is of interest to everyone who wants to accompany a document not with a template, but with an original illustration. MS Office Word will help you draw straight segments and vector lines, which will definitely come in handy when drawing up diagrams.
There are commands in the editor similar to “Pencil Drawing” or “Lasso” in Photoshop . How to draw with them? Everything is very simple! Select the “Polyline” and “Drawn curve” commands from the menu, click on the selected one with the left mouse button and click again on the canvas. Without releasing the button, make the desired drawing. And with one more click on the mouse, the picture is fixed on the field. It, like templates, can be edited by filling it with different colors, creating effects, etc. And using “Change Shape” you can correct the image around the perimeter.
Now it is clearer to you how to draw in MS Office Word. It must be said that a text editor cannot be considered a full-fledged drawing program, but with the help of the image creation function you can significantly reduce the time when illustrating documents.
Thank me by sharing the link with your friends on social networks:
How to Create a Venn Diagram in Word
Venn diagrams use circles and text to help you compare, contrast, and recognize relationships between ideas, products, and even sets of data. In theory, creating two overlapping circles should be easy. But when you add three or even four circles to the mix you want to include in a Venn diagram in a Word document, things get a little more complicated. Follow this step-by-step guide to learn two approaches to creating a Venn diagram in Word.
Option #1: Use Lucidchart to quickly add a Venn diagram in Word Option #2: Use Word to manually create a Venn diagram
Option #1: Use Lucidchart to Add a Venn Diagram Directly in MS Word
Word is an appropriate name for Microsoft's flagship word processor because that's what the program does best. But once you move beyond words to collect, share, and compare ideas, Word reaches its limit and lacks the functionality needed to create an easy-to-understand Venn diagram. Luckily, Lucidchart integrates seamlessly with Microsoft Office, making adding a diagram easy Venn into your document.
Sign up for a free Lucidchart account to start creating your Venn diagram today.
Register now
How to Install the Lucidchart Add-in for Word
To get started, you'll need to download the Lucidchart add-in for Word. Follow these simple steps:
- Open Microsoft Word.
- Go to Insert > My Add-ons > Store.
- Find and select "Lucidchart Charts for Word."
- Click Add.
- Accept the terms of use.
- Sign in to your Lucidchart account to access the diagrams.
How to Insert a Venn Diagram in Word Using an Add-in
To insert a Venn diagram as a high-resolution image in Word, follow these steps:
- In Word, look for the Lucidchart add-ins button in the top right corner.
- Click “Insert Chart.”
- Select a Venn diagram.
- Click "Insert".
To edit the Venn diagram, select Edit. Make your changes in the Lucidchart editor, and then repeat steps 2–4 to insert the updated chart.
How to Create a Venn Diagram in Word Using the Lucidchart Add-in
Access the Lucidchart editor with an add-in to create and edit a Venn diagram without leaving Word.
- In Word, click the Lucidchart Insert Chart button.
- Click Create New Chart to open the Lucidchart editor.
- Start with a blank document or template.
- Drag shapes and add text to create a Venn diagram.
- When finished, save the diagram and close the editor.
- Select your new Venn diagram from the Lucidchart panel.
- Click "Insert".
If you need more help installing and using the Lucidchart add-on, visit our Help Center or watch the quick video tutorial below.
Option #2: Create a Venn Diagram in Word Using a Shape Library or SmartArt
To manually create a Venn diagram, you will need to use either the Shape Library or SmartArt in MS Word. But keep in mind that each option requires attention to detail and patience to line up multiple shapes and text. You also won't be able to use any pre-made templates.
How to Make a Venn Diagram Using Shapes Library in MS Word
- In Word, choose Insert > Illustrations > Shapes. A drop-down menu will appear.
- Add shapes and lines from the shape library to create a Venn diagram.
- Add text with a text field. Go to Insert > Text > Text Box.
- Move shapes and text boxes to create a Venn diagram.
- Save the document.
How to Create a Venn Diagram Using SmartArt Graphics in MS Word
- In Word, choose Insert > Pictures > SmartArt. A pop-up window will open.
- Go to Communications > General Venn. Click OK.
- Double-click "Text" to change the text or use the text panel.
- Select a picture and click Add Shape to enlarge the Venn diagram.
- When finished, save the document.
Examples of Venn diagrams
Uncover hidden connections between themes, ideas, and more by trying one of our templates. Simply click on the template to open it in your Lucidchart account and start editing.
Venn diagram with two sets (Click on image to edit online)
Example of UX interaction with a three-part Venn diagram (click image to edit online)
Example of a Venn diagram with four sets (Click image to edit online)
Select Lucidchart to Create a Venn Diagram in Word
Save the time and hassle of trying to connect and align all the shapes and text you need and use Lucidchart instead. With numerous Venn diagram templates, easy-to-use tools, and an intuitive interface, Lucidchart helps you create professional-level diagrams.
Create your own Venn diagram when you try Lucidchart now.
Organize, compare and visualize topics and ideas with our Venn diagram maker.
Find out how
,