Installing iTunes on your computer and updating to the latest version is very simple and comes down to just a few steps. Today we will tell you how to install iTunes on PC (based on Windows) and Mac (based on OS X), how to set up automatic check for updates and how to update iTunes manually.
As you already know, the iTunes media combiner is necessary to download content (music, video) to iPhone, iPod Touch and iPad and synchronize them (contacts, settings, calendar) with the computer. In addition to basic functions, iTunes allows you to restore an iPhone or any other iOS device (iPod Touch and iPad), update the device’s firmware and create a backup copy. From all of the above, we can conclude that iTunes is necessary for all owners of iPhone, iPod Touch and iPad. And therefore, every owner of an iOS device should be able to install and update iTunes to the latest version.
What beginners need to know about iTunes:
- iTunes is intended exclusively for the personal computer (desktop or laptop). It is not possible to install iTunes on an iPad or iPhone .
- iTunes is free and not intended for commercial use. If you are offered to buy iTunes for money, do not be fooled, it is a scam. you can quickly and without any registration from the official Apple website.
- To download content to an iPhone, iPod Touch or iPad, you can do without iTunes (you can download contacts to an iPhone from iCloud, download content using third-party file managers), but you won’t be able to restore the device or update the firmware without iTunes.
For help...
To be fair, I also got the same message... True, I registered three Apple ID accounts within half an hour.
When registering the fourth, I received a message known to all of you with the content “For help, contact iTunes support: www.apple.com/support/itunes/ww/“. I am sure that Apple somehow filters out “untrusted” (let's call them that) IP addresses and blocks attempts to register an Apple ID.
How to overcome this scourge? You need to try to register again from a different IP address. In my case, I returned home from work and successfully signed up for a couple more Apple ID accounts. The computer was the same - my MacBook Air.
Does not work? Read on...
How to install iTunes
Video on how to install iTunes on Windows 10:
iTunes, like any other application, is installed in Windows and Mac OS X in a standard way, the process is no different.
Depending on the operating system and its bitness (32- or 64-bit), iTunes is installed separately on:
- Mac OS X;
- Windows (32-bit version);
- Windows (64-bit version).
iTunes is compatible with Windows XP, Vista, Windows 7 and 8.
- Download iTunes for your operating system from the official Apple website (direct links here).
- Go to the folder where you downloaded the iTunes installer. File named iTunesxx (where xx is the iTunes version) with the extension .exe (for Windows) and .dmg (for Mac OS X), run the installer and follow the installation program instructions.
- After installation , you will need to restart your computer .
There is no need to download and install iTunes separately on iMac, Mac Pro, MacBook Air and Pro, at least on OS X Mavericks. The program is installed on the system by default.
iTools is a great alternative to iTunes for PC from Chinese developers
All owners of jailbroken devices are well aware that there are third-party file managers for iDevices that significantly expand the functionality of the gadget and help in solving many problems. Of course, the best file manager directly on a hacked device is iFile from Cydia,
But with the winner among PC programs, not everything is so simple. Until recently, I considered iFunBox the best program, used it regularly and recommended it to friends and acquaintances.
Recently, on one of the forums, I came across a creation by Chinese programmers called iTools. A visit to the not particularly expressive website of the developers and the blue program icon with a bunny prevented us from taking this software seriously for a long time. However, I overcame myself, took a break from iFunBox for a while and tried to solve all the problems through iTools for a while. Imagine my surprise when I not only quickly mastered the new program, but also completely abandoned the old software that I had been using for more than two years. But first things first…
Don’t let the word beta in the name of the program versions scare you, iTools is a full-fledged, full-featured file manager, distributed free of charge, supports PC and Mac OS X and has a Russian-language interface (so far only in the PC version). If this is not enough for you to switch to this program, read on.
The program menu is divided into two parts: library and device. In the first section, I found the following functionality useful - the “Applications” tab. It contains all the games and programs that were downloaded from iTunes. In other words, the program simply refers to the folder with *.ipa files where iTunes saves them. In the table you can see the Application name, size, version, date and the “install” button.
The “media” tab allows you to collect a collection of music, photos and ringtones in advance and, when connecting the iDevice to a PC, “upload” all or part of it to the device. Unlike iTunes, the program simply remembers the location of the files on your computer and does not copy them to its library, thereby saving space on the HDD. This is especially true for music lovers with 32 and 64 Gb devices.
The “Device” section is available when the device is connected and contains much more interesting things. The main section contains all the information about the device. Name, presence of jailbreak, serial number, iOS version, etc., and when you click on “show details” you will receive data about your gadget that you didn’t even know about. Assigning many rows in a table won't mean much to most of us. The Media section allows you to fully manage your music, videos, ringtones, and other content, just like in iTunes.
The “Photos” tab will allow you to add pictures and snapshots to the gallery or wallpaper directly into the folder from which the iDevice takes pictures in the settings. This way the wallpaper will not be displayed in the general gallery.
You can move files in both directions. When you try to copy a photo to your device, the program scares you with a scary warning window. For correct operation, you must close the Photo and Camera applications before copying. We obey, check the box and continue.
The “iBooks” tab allows you to download or upload files for use in the application of the same name. The next item “Applications” is much more interesting. It allows you to perform various manipulations with installed games and programs. The Install button allows you to quickly and easily add a new application from your PC to your device. You can find out all the necessary information about the applications themselves, including licensing. Software that is free or purchased from iTunes will be marked with a red label with the letter “C”.
Of particular note are the three buttons to the right of each application. If everything is clear about the deletion, then I’ll tell you more about the other two. Backup allows you to save the original *.ipa file if you want to reinstall the application without synchronization after updating the firmware or resetting the device, or simply install it on another device. Viewing files will allow you to add media content to third-party video or audio players (AVPlayer or RushPlayer), office applications and readers.
On the “Desktop” tab, you can manage icons by moving them around the screens and, Attention, see the “live desktop of the device.” Of course, this is not a full-fledged video broadcast, but simply a set of frequently taken screenshots that display in real time what is happening on the device.
The “File System” menu will give access to all folders on the device (with jailbreak, of course). You can carry out all possible manipulations with them.
I was especially pleased with the presence of a folder for Cydia. This is the well-known “Autoinstall” folder. You can copy tweak files from Cydia in *.deb format into it. After rebooting the device, they will be installed automatically. Any folder can be added to the “Favorites” menu, thereby creating a shortcut for it in the corresponding section.
The “Information” section allows you to manage contacts, calendar and emails on your device. You can view, delete, and save copies of any data.
Finally, it remains to say about the most pleasant feature of the program - the ability to work via Wi-Fi. After connecting the device for the first time and enabling the corresponding option in the main menu of the device, you can then work without a cable. The data transfer speed, of course, will decrease, but installing a couple of programs and games or copying photos is always more convenient without a “cord”.
The program is really worthwhile. It remains to add that it works, like all similar applications, only if iTunes is installed on the PC. If you still use iTunes, don’t hesitate to download iTools and work with it. This will save a lot of time and allow you to carry out many operations in a few clicks without the long process of synchronization and backup. I will say this: for a jailbroken device, the usefulness of backup via iTunes and the ability to return everything to its original form tends to zero.
You will have to take care of the backup yourself. Read about how to do this here.
Download the latest version of iTools from the official website for PC and Mac OS X for free.
August 15, 2012 Tags: Programs for Mac, Programs for computer.
Comments for the site
Cackl e
How to Update iTunes on Windows
By default, after installation, every time you start iTunes, it will automatically check for updates and if a newer version appears on the Apple server, the program will offer to download and install the update. All you need to do is agree to download and install iTunes updates in a separate Apple Software Update window.
You can check for iTunes updates without launching the program ; the Apple Software Update downloader is a separate program and runs outside of the iTunes environment.
Example of automatic iTunes update via Apple Software Update
It can check for updates for all Apple software products for Windows OS on a schedule:
- Daily
- Weekly
- Monthly
- Never
You can set the frequency of checks in the Apple Software Update in the Edit -> Preferences -> Schedule .
In the Apple Software update settings you can specify the frequency of updates
If for some reason, when you launch iTunes, the automatic check for updates does not occur, you can check the availability of a new version of Apple software manually.
- Launch iTunes and from the main Help , select Updates .
- iTunes will automatically check for updates and if there is a more recent version on the server, it will notify you accordingly.
- Follow the instructions of the program , the steps are intuitive.
How to Update iTunes on Mac in OS X
Owners of Mac computers are much more fortunate; the system automatically checks for software updates and not just iTunes. No additional “dancing with a tambourine” is needed.
- In OS X, from the main menu , click the Apple logo and select Software Update . Mac App Store app will launch, Updates tab .
- The system will automatically check for updates on the Apple server and if a software update is available, a corresponding notification will appear in the application window.
- Click on “ Update ” in the line with the available update. If updates are available for 2 or more applications, you can initiate an update for all applications at the same time by clicking on the “ Update All ” button. Wait for updates to download and install; you may need to restart OS X.
Of course, in OS X, as in Windows, you can check for updates in iTunes itself manually.
- Launch iTunes , in the main iTunes menu (in the upper left corner) select Updates .
- If updates are available, the system will notify you accordingly. To install updates, follow the instructions of the program; you do not need special knowledge for this.
How to turn off automatic checking for updates in iTunes
If for some reason you don't want iTunes to automatically check for available updates, you can disable the feature.
On Mac in OS X:
- Launch iTunes , in the main menu go to iTunes -> Preferences (called by the keyboard shortcut “ Command+, ”) -> “ Add-ons ” tab.
- In the program window, uncheck the box next to “ Check for software updates automatically ” and click “ OK ”. Now iTunes will not automatically check for updates, but this change does not affect the Mac App Store and information about iTunes updates will appear automatically in the application on the Updates tab (when you launch the Mac App Store).
On PC in Windows:
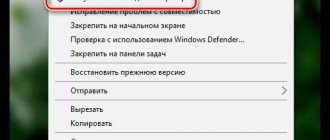
- Launch iTunes , in the upper left window, click on the image of the door and select “ Settings ” (press “Ctrl+,”).
- On the " Add-ons " tab, uncheck the box next to " Check for software updates automatically " and click on " OK ". Ready.
How to move music to iPad?
Many users ask the question about the word “iTunes” - what is it? The iTunes translation can be interpreted as follows: literally, without the prefix “i”, tunes means “melodies”. That is, the program was originally created to carry out various operations with media files. One of the main ones is moving music from a computer to a tablet. For this purpose, in the toolbar located on the right side, create one or more playlists. Click on the small plus sign on the toolbar and enter a name. After that, go to the created list and open the folder on your computer where the songs are located. Move them to the playlist window. But this is all preparation, and now you need to download it all directly to the device. For this purpose, go to the iPad section, then select the “Music” tab and click on the created playlist.
Of course, music can also be placed in a general media library, but if there are a lot of songs, then confusion will arise.
How to return the App Store to iTunes 12
In the iTunes 12.7 update, Apple completely removed the App Store. To get it back, you need to install iTunes 12.6.4. There is a separate article about this: Returning the App Store to iTunes. There is also an animated video about what happened and how it affected the Apple ecosystem.