Uninstalling service components
Finally, you can uninstall this component. The file is usually presented as an executable EXE object and is named OneDriveSetup. It needs to be uninstalled.
However, most experts recommend uninstalling through the command line, for which the standard /uninstall command is used (before it, separated by a space, you need to enter the full path to the above file, using the %SystemRoot% attribute).
Note: on 32-bit systems, the desired object is located in the System32 directory, and on 64-bit modifications - in the SysWOW64 directory. After the uninstallation is complete, even if the storage icon remains in the file manager, you can delete the OneDrive Windows 10 folder directly in Explorer.
How to disable OneDrive in Windows 10 (method 2)
In order to disable Microsoft OneDrive in Windows 10 Home editions (Home, Home for one language), you need to make changes to the operating system registry.
Follow these steps:
- In the Windows Search box, enter the expression: "regedit" (without the quotes), and then run the command.
- In the “Registry Editor” window that opens, follow the path:
HKEY_LOCAL_MACHINE\SOFTWARE\Policies\Microsoft\Windows
- Enter the “OneDrive” subsection (if this subsection does not exist, create it)
- Right-click on the free space, select “New” in the context menu, then “DWORD Value (32 bits)”.
- Give the new setting a name: "DisableFileSync" (without quotes).
- Right-click on the “DisableFileSync” parameter and select “Change...” from the context menu.
- In the “Change DWORD Value (32-bit)” window, in the “Value” field, set the parameter to “1” (without quotes), and then click on the “OK” button.
For changes to the registry to take effect, restart your computer.
Please note: if you need to return the previous values, enter the Registry Editor, go to the specified path, and then delete the “DisableFileSync” parameter, or change the value of the parameter to “0”.
How to completely remove OneDrive on Windows 10
To remove OneDrive, we use the command line by running it as an administrator.
- Launch the command prompt by right-clicking on Start and selecting Command Prompt (Administrator) and run the command: taskkill /f /im OneDrive.exe
which will unload OneDrive from memory.
- Run the following command to remove OneDrive from your computer
%SystemRoot%\System32\OneDriveSetup.exe /uninstall (for 32-bit systems)
%SystemRoot%\SysWOW64\OneDriveSetup.exe /uninstall (for 64-bit systems)
To return OneDrive to its place, open Explorer, enter %SystemRoot%\SysWOW64\ in the address bar and run the OneDriveSetup.exe file in the target directory.
Also in the article you can see a program that can be used to automatically remove OneDrive from your computer.
In this article, I showed you how to remove OneDrive in Windows 10. And several ways you can do it without uninstalling the program, but simply by disabling it completely. These methods are also suitable for users of previous operating systems. As for me, OneDrive is a convenient cloud storage, but I still use others, so I just turned it off. I hope the article was interesting for you, do not forget to share it on social networks.
Disable OneDrive in Windows 10 Home (home)
On the Home version of Windows 10, you'll need to follow a few simple steps to disable OneDrive. To begin, right-click on the icon of this program in the notification area and select “Options”.
In OneDrive settings, uncheck o. You can also click the “Unlink from OneDrive” button to stop syncing your folders and files with cloud storage (this button may not be active if you haven’t synced anything yet). Apply the settings.
Done, now OneDrive won't start automatically. If you need to completely remove OneDrive from your computer, see the appropriate section below.
Uninstalling OneDrive for Windows 10 Home Edition
Starting with Windows 10's Creators Update (https://support.microsoft.com/ru-ru/help/4028685/windows-get-the-windows-10-creators-update), you can now easily remove OneDrive like this the same way as any other application. Please note that this method is only suitable for Windows 10 Home edition systems; if you are using the Professional or Enterprise edition, you can immediately proceed to the following removal options.
- Right-click on the Start menu icon and find Control Panel there, or find it through the search in the Start menu itself.
- Go to the Control Panel item Programs -> Uninstall a program, if the display mode is set to “Icons”, then you should go to the Programs and Features menu.
- Select Microsoft OneDrive from the list, click the Remove button in the top panel and confirm deleting the program.
How to remove onedrive from windows 10 explorer
In order to completely get rid of the OneDrive folder icon, we will need to make some changes using the registry. Follow the instructions below:
- To open the registry editor, press the Win+R keys, in the window that opens, write regedit and click OK;
- Find the HKEY_CLASSES_ROOT\CLSID\{018D5C66-4533-4307-9B53-224DE2ED1FE6} directory or the HKEY_CLASSES_ROOT\Wow6432Node\CLSID\{018D5C66-4533-4307-9B53-224DE2ED1FE6} directory for 64-bit systems;
- Select the System.IsPinnedToNameSpaceTree parameter in the right part of the window and change its value from 1 to 0.
That's all, with the help of simple tweaks, we completely got rid of the signs of cloud storage on our computer.
Disabling OneDrive for Windows 10 Pro and Enterprise editions through the Group Policy Editor
If you are using the Professional or Enterprise edition of the system, the most convenient way to disable cloud storage is to use the group policy editor gpedit.msc
- To launch the utility, use the Win+R and enter the command gpedit.msc The Group Policy Editor is extremely similar to the Registry Editor, you should not have problems using it.
- On the left side of the window, find the directory Computer Configuration -> Administrative Templates -> Windows Components -> OneDrive
- Select the Don't use OneDrive for file storage , right-click -> Change and select Enabled .
This method will completely disable the OneDrive process and remove all traces of it from File Explorer. You don't need to uninstall OneDrive through Control Panel like you do with the Home Edition. In order to roll back the changes made at any time, simply change the Enabled to Not configured .
What is OneDrive
At its core, the OneDrive service is a direct successor to SkyDrive, which was provided when using early systems and was a regular “cloud” storage with which information stored on the hard drive of the user’s computer was synchronized.
But then the connection between the user and the service was established only upon request, and only with constant access to the Internet. In Windows 10, everything has changed. The system itself assumes that the connection has been established, and therefore tries to synchronize all data stored on the user's computer with the storage in the default settings.
In addition, the service itself places a significant load on the central processor and RAM in terms of tracking changes. This is similar to changing user files or links to installed programs in a backup. But why does an ordinary user need such synchronization if he does not use the cloud or does not intend to copy files there even in the long term? This is where the question arises of how to disable OneDrive in Windows 10 (in the eighth version, as mentioned above, this is the SkyDrive service).
And here you need to clearly understand that the storage itself is not intended to store backup copies of the system, from which it could be restored if necessary. It only affects synchronization of user files (not programs). Therefore, as it turns out, by and large, the average user does not need it, especially since it reserves a certain space on the hard drive (although in the “cloud” today about 30 GB on the server is available for free use, on the hard drive the reserve sometimes reaches 7 GB). The constantly performed synchronization itself, with the slightest change in one or another component, uses system resources, which increases the load on them.
What is OneDrive in Windows 10
The history of the project began in 2007 and initially the Microsoft cloud was called SkyDrive - “heavenly disk”. Subsequently, one of the British companies filed claims against Microsoft Corporation regarding the illegal use of the brand name and the cloud had to be renamed.
How to create a OneDrive account and how to sign in?
- First, you need to have a cloud storage application on your computer. In previous versions of Windows, you had to download and install OneDrive separately. In Ten, the program is installed by default in the basic package of the operating system.
- To create an account in the cloud, you simply need to register a Hotmail email address or use an existing one.
- Your email and password are your passcard for logging in and using OneDrive.
Today we are talking from the perspective of the current OS Windows 10. So, the application for working with the cloud is already installed in it. And you can register your mailbox right on the spot, without visiting the Microsoft services website.
- All documents you work with in applications included in the Microsoft service package are automatically synchronized and saved in the cloud.
- Any file can be instantly sent to any person participating in the use of these services.
- With team access, you can instantly see the work of all participants on your device, share comments, make additions and objections.
And this is where the problems begin. Owners of mobile devices may have noticed that MS Office applications consume enormous amounts of Internet traffic even in the background. And besides, all MS programs take up a lot of space on the local disk and greatly slow down the system.
Also, MS applications are constantly updated and often these updates come with bugs. As a result, after the next update, the computer starts to fail.
All this together creates a number of inconveniences that interfere with work and irritate users.
The question arises - how to disable Microsoft OneDrive in Windows 10? This is what we will look into further.
Deleting a service permanently
However, that's not all. When deciding how to disable OneDrive and remove storage from the system, you need to uninstall the OneDriveSetup.exe component on a 64-bit system in the SysWOW64 directory, and for a 32-bit architecture in the System32 folder.
What is most interesting: it is advisable to carry out this process from the command line, where you should initially enter the command in the form /uninstall, and before the space and slash with the command, indicate the full path to the file or use a conditional access tool like % SystemRoot%, after which the further location is indicated executable component.
By the way, it is through such intervention that the OneDrive service is deleted forever and irrevocably. After this, even if the storage icon is still present in Explorer, the service itself will not work. In addition, there is nothing easier than simply getting rid of the link to an inactive object in the file manager itself.
Check for incompatible files
First, make sure that no single file you want to sync is larger than 20GB or larger than your remaining OneDrive space. If so, try compressing the file first. Check out our list of free compression tools if you need help.
Second: the full path to the file (including the file name) cannot exceed 400 characters . This can happen if you have a lot of subfolders or really long folder or file names. To fix this, rename the files or move them to a top-level folder.
Third: file and folder names cannot contain the following characters:
«*: ? / |
For more information about file name restrictions, see the Microsoft Support article.
Disabling the cloud service in home Windows 10
The Home edition of the “ten” is free of the administration tool known as the group policy editor, so deactivation of the cloud service is carried out through a graphical interface.
1. Move the cursor to the notification area, where we call the context menu of the OneDrive icon. Select “Options” from the drop-down list.
2. In the advanced settings window of the Microsoft OneDrive application, uncheck the box next to “Automatically launch OneDrive...”.
3. To stop synchronizing data with data stored in the cloud, click on the “Unlink from OneDrive” icon in the accounts window; if you do not use the cloud, the button may be inactive.
4. Click “OK” to apply the new settings.
Next, remove the OneDrive directory from Explorer by editing the corresponding system registry key.
5. Execute the regedit command by entering it into the search bar or text form of the command interpreter (Win + R).
6. Expand the section (analogous to a directory in Explorer) HKCR.
7. Go to the subsection “CLSID\{018D5C66-4533-4307-9B53-224DE2ED1FE6}\”.
8. In the right frame, look for the “System.IsPinnedToNameSpaceTree” key, call its parameters by double-clicking and change the value to “0” (zero).
When using 64-bit Windows 10, also change the value of the parameter of the same name, located in the subsection HKСR\Wow6432Node\CLSID\ {018D5C66-4533-4307-9B53-224DE2ED1FE6\.
9. Close all applications and restart the computer.
After this, the cloud storage will stop starting, and files synchronized in the past can be deleted from the Users\User\OneDrive directory, which is located in the root of the system partition.
Method 1: Disable OneDrive from the Windows interface
- In the notification area (lower right corner - system tray), right-click on the OneDrive icon and select from the context menu (How to add “Copy to folder” and “Move to folder” items to the context menu) Settings
- On the Settings tab, uncheck the Automatically start OneDrive when you sign in to Windows option (see Startup Windows 10 programs for more details).
- If you're signed in to a Microsoft account and it was linked to OneDrive, you can stop syncing files by clicking the Unlink OneDrive button
After this, you can remove the OneDrive icon from the File Explorer navigation area
How to disable OneDrive and delete it in Windows 10
03/16/2016 Sergey Windows
If you installed the latest Windows 10 operating system, then I think you noticed that it has the Microsoft OneDrive application (formerly SkyDrive). By default, it is launched and hangs in the system tray. What kind of program is this? This is a cloud service client from Microsoft, which provides users of this operating system with up to 25 GB of cloud space to store their data. The only problem is that few people use the capabilities of OnDrive, because there are more convenient options - Google Drive, Yandex.Disk or DropBox. Accordingly, the cloud service client integrated into the system works in vain and wastes system resources. In this case, it is better to disable it or completely remove OneDrive from Windows 10. Now I will tell you in detail how this can be done.
Disabling OnDrive disk synchronization
The easiest and fastest option is to simply disable OneDrive so that it does not sync data. This is easy to do - in the system tray (tray) we find the service icon in the form of a cloud and right-click on it:
Select “Options” from the menu. The following window will appear:
On the “Settings” tab, uncheck “Automatically start OneDrive when you log into Windows” and click “OK”. After this, you need to right-click on the tray icon again and select the “Exit” menu item. The client will complain with this message:
Click on “Close”. That's all.
By the way, almost the same thing can be done through the Group Policy Editor of Windows 10. To launch it, you need to press the Win+R key combination, enter the command “gpedit.msc” and click “OK”. An editor window will open in which you need to open the section:
Computer Configuration >>> Administrative Templates >>> Windows Components >>> OneDrive
We look at the right side of the window:
Local Group Policy Editor
By default, the Group Policy Editor is available on the Professional and Enterprise editions of the Windows 10 operating system. It allows you to configure different settings from one convenient interface. In this way, you can completely prohibit the use of OneDrive for storing files or, as an alternative, prohibit synchronizing OneDrive files through metered connections and use a metered connection.
Setting up OneDrive sync
- Open the Local Group Policy Editor by running the gpedit.msc in a Win+R .
- Go to the following location: Computer Configuration > Administrative Templates > Windows Components > OneDrive .
- Change the value of the policy Prevent syncing OneDrive files through metered connections to Enabled .
Enabling metered connection
- Go along the path: Start > Settings > Network and Internet > Ethernet .
- Next, select the current connection and drag the Set as metered connection slider to the Enabled .
After completing the above mentioned steps, you can enable and disable OneDrive synchronization in Windows 10 with literally one metered connection switch. By enabling a metered connection, which helps avoid traffic overruns, the user disables OneDrive cloud synchronization on the device.
In the latest versions of the Windows 10 operating system, the user simply needs to enable metered connections. OneDrive syncing will be automatically paused to save data.
Uninstallation
How to remove OneDrive Windows 10 completely?
You can uninstall the service as a regular application if the system is updated to the latest version.
Removing OneDrive is as follows:
- Open Control Panel.
- Go to Programs and Features.
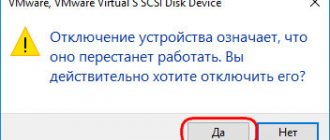
- Select VanDrive and use the “Delete” button.
To uninstall a service from an unupdated Windows, you will need to use a special command:
- Open a command prompt as administrator (Win+R).
- Enter cmd into it and click “OK”.
- Paste the text: taskkill /f /im OneDrive.exe
- Press "Enter". This will stop the application from running.
- Paste another text: C:\Windows\System32\OneDriveSetup.exe /uninstall (for computers with a 32-bit processor) or: C:\Windows\SysWOW64\OneDriveSetup.exe /uninstall (for computers with a 64-bit processor).
The service will be completely uninstalled.
How to remove OneDrive via command line
To remove OneDrive you will need:
- Open a command prompt with Administrator rights (press “Win+R” and select the appropriate item in the menu).
- In the console, first enter the command to stop OneDrive: taskkill /f /im OneDrive.exe
- And then enter the command to remove it, depending on the bitness of your Windows:
32 %SystemRoot%\System32\OneDriveSetup.exe /uninstall 64 %SystemRoot%\SysWOW64\OneDriveSetup.exe /uninstall
The deletion will be performed in silent mode, without progress status and any dialog boxes. It is worth saying that after these operations you will still be able to restore OneDrive.
OneDrive how to remove Windows 10. Group policies
One of the most effective methods for deactivating OneDrive is to use the settings you set for services in the Group Policy Editor. By the way, this method allows you to solve the problem of how to remove OneDrive from Windows 10 Explorer (so that the service icon is not visible at all).
To call the corresponding editor, use the Run console, in which the gpedit.msc command is entered with administrator rights. Through the configuration, the administrative templates section is selected, which contains a catalog of components. In the right field of the editor, you should find the directory corresponding to the name of the service, open it by double-clicking and start editing the existing parameters.
There are four options here that need to be set to new values (usually the status bar is set to Not Configured). For each menu line, editing is called by double clicking.
The recommended values are as follows:
- automatic saving – “disabled”;
- prohibition of synchronization through metered connections – “enabled”;
- prohibition of use for storing files – “enabled”;
- a similar prohibition for Windows 8.1 is “enabled”.
After setting the required values, it is advisable to completely reboot the system, first deactivating the storage in startup. But all this will only take effect for the current user record. To exclude OneDrive activity for all users, you will have to do things a little differently.
For Windows 10 Pro
In Windows 10 Professional, you can use another, somewhat simpler method to disable the use of OneDrive in the system. To do this, you use the Local Group Policy Editor, which you can launch by pressing the Windows + R keys on your keyboard and typing gpedit.msc into the Run window.
In the Local Group Policy Editor, go to Computer Configuration - Administrative Templates - Windows Components - OneDrive.
On the left side, double-click on “Prohibit the use of OneDrive for storing files”, set it to “Enabled”, and then apply the settings you made.
On Windows 10 1703, repeat the same for the “Prevent OneDrive from being used to store Windows 8.1 files” option, which is located there in the Local Group Policy Editor.
This will completely disable OneDrive on your computer; it will no longer launch or appear in Windows 10 Explorer.
The simplest method to disable a service
Now directly about how to exit OneDrive in Windows 10 and deactivate the service. First you need to enter the standard “Task Manager” and end the process associated with the storage.
Usually it has a system attribute and may not be completed without administrator rights. In this case, you need to use the command line, which can be called from the Run console (Win + R) with the abbreviation cmd. Next, the line taskkill /f /im OneDrive.exe is written, after which the process is “killed” (by the way, the specialists from Microsoft did not think of this before, although this is a possibility).
Now, to completely solve the problem of how to disable OneDrive in Windows 10, you just need to click on the service icon in the system tray and select in the settings to disable startup at system autostart. If there is no such parameter, you can use the msconfig menu or directly go to autorun in the Task Manager (taskmgr), where you simply uncheck the synchronization process with the storage that starts automatically.
How to turn off OneDrive syncing in Windows 10
The main problem is that the default programs cannot be simply removed and removed. Due to the many internal connections, this will disrupt the entire operating system.
To stop the constant exchange of data between the storage and the computer, you should stop regular synchronizations. This way you will get rid of unwanted overuse of Internet traffic.
To understand how to disable OneDrive synchronization in Windows 10, follow these steps:
- Click on the bubble-shaped icon in the taskbar.
- In Action Center, go to Advanced or Other, then Settings.
- In the “Account” section, click on “Unlink this computer.”
- Next, click on “Remove account association.”
But that's not all, synchronization will stop, but all MS services applications are automatically configured to back up all data to the cloud. So go to the settings of the applications you use and change the settings so that the data is saved not in the cloud, but on the local drive of your computer.
However, even though synchronization has stopped, the OneDrive app will continue to run somewhere in the background and will consume precious software and hardware resources, slowing down your computer. Therefore, we move on to the next stage.
What to do if the suggested options did not help
In general, the Ten developers took care of maximum comfort by creating various programs and applications directly under the auspices of Microsoft. Thus, in most cases, users do not need to download and install anything - the system and its further updates will take care of this. OneDrive is also trying not to fall face down in the mud - just to mention the cost of increasing the limit on the size of downloaded files, expanding the standard storage capacity and increasing the number of files that are downloaded simultaneously. This is quite enough to not only lure even a capricious user, but also make him think about changing his main cloud storage. So should OneDrive be disabled or deleted altogether?
How to remove OneDrive Windows 10 completely
How to disable UAC in Windows 10: User Account Control options
Even though this storage is a built-in Windows 10 application, it is still possible to delete it. And it is recommended for those who no longer plan to use it. There are several ways to uninstall the One Drive app. Below are detailed instructions for each method.
Note! After completely uninstalling the built-in OnDrive cloud, installing it again may be problematic.
Removing OneDrive from Windows 10 File Explorer
It is not possible to remove the built-in program using the standard “Remove Programs and Features”. But you can use the “Registry Editor”, which significantly expands the user’s capabilities:
- After launching the “Registry Editor”, go to the path: HKEY_CLASSES_ROOT\ CLSID\ {018D5C66-4533-4307-9B53-224DE2ED1FE6}.
- Open the context menu of the “System. Is_Tree”, then “Change” and correct the value to “0”.
- Confirm actions.
Changing options in the context menu
After this, the built-in cloud will be removed from Explorer.
OneDrive: how to delete in Windows 10 via command line
There is another systemic way to completely remove OnDrive - using the command line:
- In the Start menu or Command Prompt, look for Search.
- Next, enter the search phrase “command line” or “cmd”.
- In the new best matches window, right-click on “Command Prompt”.
- Select the “Run as administrator” option.
- In the line that appears, enter the command “im onedrive.exe” and press “Enter”.
- Next, type “Uninstall” and press “Enter”.
How to remove OneDrive Windows 10 via command line
After this, the program will be completely removed from the computer system.
Note! To remove built-in storage from Windows 10, you can also use a free specialized PowerShell application. Uninstalling a program using it will be similar to a simplified version of uninstalling via the command line.
How to remove Microsoft OneDrive Windows 10 via disconnect
The simplest solution is to end the processes associated with the service and deactivate it at the system boot stage. Of course, we are not talking about how to remove OneDrive (Windows 10) completely. The component itself can only be deactivated, nothing more.
The simplest solution is to use the usual “Task Manager”, in which you need to find the corresponding service in the active processes section and use the button to force the process to end. But this option is only suitable for the current session. When you download it again, this component is activated again.
To disable the start of the service when the system boots, in the same “Task Manager” you should go to the startup tab and disable the storage there. After such manipulations, the service will not automatically load, nor will user information be constantly synchronized with the cloud.
How to disable OneDrive startup in Windows 10 (1 method)
This method is suitable for use on computers running lower editions of Windows 10: Home, Home Single Language.
We will turn off auto-download of the OneDrive application on the computer:
- Enter the notification area, right-click on the Microsoft OneDrive icon.
- In the context menu that opens, select “Options”.
- In the Microsoft OneDrive window, open the Settings tab.
- In the “General” section, uncheck the “Automatically start OneDrive when you log into Windows” checkbox.
- Click on the "OK" button.
The OneDrive app won't automatically launch on your computer.
Complete removal of OneDrive from the top ten
Previously (before version 1703), to remove the OneDrive application, you had to perform dubious manipulations with the command line. For example, there was such a way. To remove the application, enter the command taskkill /f /im OneDrive.exe on the command line.
Next is direct removal using the following commands:
- for 32-bit systems: C:\Windows\System32\OneDriveSetup.exe /uninstall;
- for 64-bit systems: C:\Windows\SysWOW64\OneDriveSetup.exe /uninstall.
The method is questionable, since after such actions it is very problematic to install the application again.
Starting with version 1703, developers have made it possible to delete cloud storage in a standard way. Go to Windows 10 settings (Win+I key combination), select the “Applications” section.
In the first tab, find the Microsoft OneDrive application and click delete.
Read more about deleting applications and games on Windows 10. It describes in detail all the methods available to the user to remove programs.
How to disable OneDrive using local group policy (3rd method)
Using the Local Group Policy Editor, you can disable Microsoft OneDrive in editions of the Windows 10 Pro and Windows 10 Enterprise operating systems. These versions of Windows 10 include the Local Group Policy Editor, which you can use to disable OneDrive on your computer.
To access Group Policy settings, follow these steps:
- In the “Search in Windows” field, enter the expression: “gpedit.msc” (without quotes), click on the application.
- In the “Local Group Policy Editor” window, follow the following path: “Local Computer Policy” => “Computer Configuration” => “Administrative Templates” => “Windows Components” => “OneDrive”.
- Look for the "Stop using OneDrive for file storage" and "Stop using OneDrive for file storage in Windows 8.1" options.
- Right-click on the “Prohibit using OneDrive for storing files” option and select “Edit” from the context menu.
- In the “Prohibit the use of OneDrive for storing files” window that opens, set the option to “Enabled”, click on the “OK” button.
- Follow the same steps for the "Prevent OneDrive from being used to store files in Windows 8.1" option.
- After this, restart your computer.
Microsoft OneDrive is disabled on the PC, the application icon has been removed from the Explorer window.
How to exclude OneDrive from the system
In general, if you don't have plans for OneDrive, you have the option of completely removing the app from your device. In the process of eliminating a program, certain difficulties may arise, because do not forget that the storage is an integral part of the OS. In some cases, the removal process can proceed without complications, but there is always the possibility of some negative consequences. Therefore, think carefully again about whether you are really categorical on this issue. Our site is not responsible for the consequences of following subsequent instructions. Before you begin following the instructions, you should remember that recovery can be quite a hassle.
Moreover, deleting OneDrive may damage other parts of your system.
So, first, activate the main system menu and select “Command Prompt (Administrator)” from the list of options.
Then enter the command taskkill /f /im OneDrive.exe. After this, you should type a command that will extract the program from the system. If you have a 32-bit version, enter the following line: %SystemRoot%\System32\OneDriveSe. For a 64-bit system, type %SystemRoot%\SysWOW64\OneDriveSe.
No warnings, prompts, messages or windows will appear after you enter these commands. The removal process is quick, quiet and unnoticeable. All that will remain from the Windows cloud storage is the corresponding folder with certain files. But launching the application will turn out to be a failure.
However, if you change your mind, then returning the program to its “original position” will not be at all difficult. To do this, activate “Explorer” and type the command that you used during uninstallation. In the dialog box, find OneDriveSetup.exe among all the files and run it.
How to disable OneDrive autostart in Windows 10
If you close the application every time, this does not guarantee that every time you start Windows, the program will not be activated again and continue to work in the background.
Therefore, you need to go to the autorun settings and deactivate the application.
- If you have installed a utility for comprehensive system optimization such as Advanced System Care or similar, you can deactivate the autorun of any program in the Autorun Manager. Just go to the tools section and uncheck optional programs in startup.
- Alternatively, go to the Windows 10 taskbar and select the “Settings” section.
- Uncheck the box next to “Automatically start OneDrive when Windows starts.”
- Confirm the action - click “OK”.
Additionally, you can stop any applications and disable startup in the appropriate sections of the Windows Task Manager. The dispatcher is launched using hotkeys:
- Ctrl+Shift+Esc
Microsoft applications are so cleverly designed that this does not guarantee that if you use one of the programs from the general package of cloud services, OneDrive will not be launched from within, without your knowledge. Therefore, it is useful to disable OneDrive completely.
Uninstalling an application
If you try to remove OneDrive in the standard way - through the system tool " Uninstall a Program " - you will not succeed. This object is simply not in the list of installed applications. However, in Windows 10, there is an alternative method that allows you to completely remove the application from your computer. To do this you will have to use the command line :
- Bring up the Search using the magnifying glass icon found on the Quick Access Toolbar.
- Type “ cmd ” or “ command prompt ” into the search bar. You should not press Enter .
- Right-click on the icon of the presented program and in the drop-down list, click “ Run as administrator ”.
- The Windows 10 console will open. Here you need to paste the command taskkill /f /im OneDrive.exe and press Enter. Using it you will completely stop the program . Now the utility can be removed.
- Now enter or copy another line: C:\System32\OneDriveSetup.exe /uninstall for 32-bit operating systems or C:\SysWOW64\OneDriveSetup.exe /uninstall for 64-bit.
- To find out the bitness of your OS, you need to simultaneously press the Win and Pause keys. in the “ System Type ” column.
- Press Enter to immediately remove OneDrive from your PC.
The disadvantage of this method is that it is not always possible to install the client back. You may need to reinstall Windows 10 if you want to start using Microsoft's cloud service again.
How to connect OneDrive as a network drive in Windows 10
The redesign of the mechanism for accessing data from the OneDrive cloud service has become one of the most significant changes in Windows 10, however, very few users will be able to perceive the external difference between the operation of the OneDrive service in Windows 10 and 8.1. What is the difference between the operating principles of the cloud storage service in the new and previous versions of the operating system?
The most important difference is that the standard OneDrive folder in Windows 8.1 contained not so much the files themselves as shortcuts to them, and files were directly downloaded to the local computer only when the user launched them.
Unlike its predecessor, in Windows 10 file synchronization is performed for real, that is, files uploaded to the cloud are simultaneously stored on the hard drive. True, the user can limit himself to synchronizing only the directories he has chosen, but in this case they will be deleted from the disk and viewing them through Explorer will become impossible. It turns out that only the web interface remains? Not certainly in that way. You will still be able to view files hosted in the cloud storage without physically downloading them if you connect the OneDrive folder using the WebDAV .
In simpler terms, you can connect OneDrive like a regular network drive. What benefits will this provide? Firstly , you will be able to view the contents of the remote storage through Explorer or any other file manager in full, and secondly , there is a saving of disk space on the local computer, because the files will physically remain on the Microsoft server. Of course, all files and folders will be available for downloading, renaming and other operations. As with any network resources, data performance will depend entirely on the speed of your Internet connection.
Connecting OneDrive as a network drive
To map the OneDrive directory as a network drive, go to the “This PC” , click on the horizontal “Computer” and select the “Map network drive” .
In the window that appears, select the drive letter, check whether the checkbox “Restore connection at logon” , and in the folder location field enter the following path:
// [email protected] /user_id
Finding out your user ID is very easy. To do this, you need to log into OneDrive via the web interface, open any directory and copy the value in the address bar located between “?id=” and “%” .
This is your unique user ID . Copy and add it to the above network path, paste the whole thing into the folder location field and click “Finish” , after which the system will ask you to enter your Microsoft username and password, which you use to log in to Windows.
After connecting your OneDrive directory as a network drive, it will become available in the Explorer navigation bar, and you can work with it like any other resource.
True, its name will be unreadable, but what’s stopping you from renaming it? That's all, actually. You can disconnect such a network drive either from the tape menu or through the Explorer context menu.
How to remove OneDrive
The main question is “Is it worth deleting?” Even if you use this cloud service, disabling it will prevent the loss of resources, but deleting it may create unnecessary issues when the need for OneDrive arises.
But, if you finally decide to delete, then take the following steps (create a restore point first):
- Open a command prompt with administrator rights by pressing “WIN+S” using the “cmd.exe” prompt;
- If you have not disabled “OneDrive” using the methods described above, then first run the command “taskkill /f /im OneDrive.exe”;
- Next, depending on the bitness of the operating system, run the command
For 32-bit – “C:\Windows\System32\OneDriveSetup.exe /uninstall”
For 64-bit – “C:\Windows\SysWOW64\OneDriveSetup.exe /uninstall”
This will remove OneDrive, but its icon will remain in Explorer, despite the actual absence of software.
To remove the icon, you will need to make some changes to the registry:
- Press "WIN+R" and execute "regedit";
- In the Registry Editor, open "HKEY_CLASSES_ROOT\CLSID\{018D5C66-4533-4307-9B53-224DE2ED1FE6}
- Change the value of the "System.IsPinnedToNameSpaceTree" parameter from "1" to "0"; (10)
- Carry out the same action with a similar parameter in the folder HKEY_CLASSES_ROOT\ Wow6432Node\ CLSID\ {018D5C66-4533-4307-9B53-224DE2ED1FE6}.
Close the Registry Editor window and restart your computer.
Onedrive in Windows 10 - how to hide or completely disable?
If you prefer to work with cloud services, such as Dropbox or Google Drive, and do not use the Microsoft cloud, you can remove the OneDrive shortcut from File Explorer or disable the cloud completely.
Onedrive is fully integrated with Windows 10, which has its benefits, but not everyone is interested in using this feature. As mentioned above, if you are logged into WIndows using a Microsoft account, then by default the system will offer to save files to Onedrive.
We have two options: you can simply remove the link to Onedrive from Explorer, but this cloud will still be active (the OneDrive directory is located in the user’s folder, where Documents, Images and Photos are). And if you suddenly want to use this service, the folder will still be available, but will not appear in the Explorer sidebar.
The second option is to completely disable the OneDrive service - the folder will disappear completely, and cloud synchronization will not occur in the background.
Method 1: Hide OneDrive link in Windows 10
If you just want to hide the link from the Windows 10 sidebar, all you need to do is make a simple edit in the system registry. Press the Windows + R key combination and launch Registry Editor with the following command:
regedit
In the Registry Editor, navigate to the appropriate entry by expanding the folders in the left pane:
HKEY_CLASSES_ROOT\CLSID\{018D5C66-4533-4307-9B53-224DE2ED1FE6}
When you click on a specified folder, its details will be displayed on the right. Here you need to find the entry “System.IsPinnedToNameSpaceTree”
Double click on it to enter the settings. The default value is set to "1", which means that the OneDrive link will appear in File Explorer.
Change the value to 0 and click OK, then exit the Registry Editor and restart your computer. Afterwards, the link to the cloud will disappear from Windows Explorer. To return it, change the value to “1”.
Method 2: Uninstall OneDrive on Windows 10 Pro
If you have Windows 10 Pro or higher, you can use the Local Group Policy Editor. To do this, press the Windows + R key combination and enter the following command in the Run module window:
gpedit.msc
Then, in the Local Group Policy Editor, navigate to the following path:
Computer Configuration > Administrative Templates > Windows Components > OneDrive
Click on OneDrive and on the right side of the window, find the option “Don’t allow OneDrive to be used to store files.” Double click on it to enter the settings.
In the new window, activate the function to turn off the virtual disk. Select the “Enable” value and click on OK. After restarting the computer, the cloud will be inaccessible.