How to turn off review mode in Word
In this short tutorial we will continue the topic of tracking revisions in Excel workbooks. And today we'll talk about how to review edits made by other users, as well as how to completely remove them from a Microsoft Excel document.
What you need to review revisions
- Click the Corrections on the Review and select Accept/Reject Corrections .
- If prompted, click OK to save the workbook.
- Preview Revisions dialog box that appears, make sure timed checkbox is selected and Not Viewed Yet is . Then click OK .
- In the next dialog box, click the buttons Accept or Refuse for each specific correction in the workbook. The program will automatically move from one fix to another until all of them have been reviewed to the end.
To accept or reject all changes at once, click Accept All or Reject All in the appropriate dialog box.
Whether revisions are accepted or rejected, they can still be tracked in the Excel workbook. To completely remove them, you must turn off patch tracking. For this:
- On the Review , click the Corrections and select Highlight Corrections .
- In the dialog box that appears, uncheck Track fixes and press OK.
- In the next dialog box, click Yes to confirm that you want to turn off revision tracking and stop sharing your Excel workbook.
Once you disable patch tracking, all changes will be removed from the workbook. You will not be able to view, accept or reject changes, except that all changes will be automatically accepted. Be sure to review all revisions in your Excel workbook before turning off revision tracking.
officeassist.ru
Making an amendment
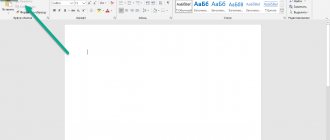
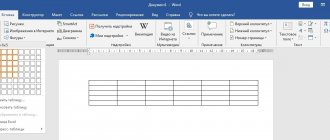
To enable the corrections area in Word, you need to go to the “Review” tab. If you don’t see one, press Alt then Shift+F10 and in the settings return the tab we need to the panel. After we have configured the panel and went to “Review”, select “Review Area”. A drop-down menu will appear in which you can select the display that is convenient for you. You can then make changes and comments. Anyone working with this text will see your notes. And the author will be able to agree with them, or not. This greatly simplifies working on the document.
How to remove the correction area in Word
When working collaboratively on text documents, today users actively use the feature of making registered changes. It is located in the “Review” block of the settings menu. Using it allows you to make edits and comments that will be seen by another user who opens this file. The document author can accept or reject these notes and instructions from other people working on the file, hide them, or show them. In any case, you should check the text for corrections that are not displayed, so as not to accidentally send it, for example, by email to another person.
At the same time, in addition to the actual edits, Word also supports such a function as comments. They are located directly in the editing window and are visible only when the display of the text file review area is enabled. They cannot be accepted or rejected, and the person working on the file has really only one option: when they are not needed, the notes are simply deleted. Their function is simple: if an edit made by another person requires clarification, then the user also creates a note in this place. Then the author of the document will not rack his brains over the motivation of the ruler, and the work will clearly be more productive.
Change mode in Word
To enable or disable the display of the corrections area in Word, you should find the “Review” tab in the top line of the Settings Ribbon and click on the button with the corresponding inscription. There is an arrow at the bottom of this icon, which means that clicking on it will open a drop-down list in which you can choose to display the review area. After that, you can make corrections and also insert comments into the text, and anyone who opens this file will see them, and the document creator can accept or reject them. If you are the author of this text, then you will just need to do this.
Sometimes such recorded changes are hidden when the text file is opened in a word processor. Then you will have to enable them from the same menu. Next to the button of the same name there will be a “Tracking” item. By clicking on it, you will receive a drop-down list in which you will need to mark all the proposed items. After this, the required elements will be displayed in full in the editing window. Actually, if you want to display not all the edits made and recorded, then select only the items that interest you in this menu.
How to remove the review area
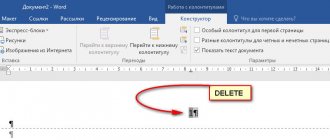
You can remove all changes in a document in Word, as stated in the official Microsoft documentation, by turning on their display, accepting or rejecting each of them. If you have done everything we described above, then the first part has already been completed. Now in the review menu, click on the “Next” button. The corresponding area will be highlighted in the editing window, and you will see the “Correct” and “Reject” options next to the button you just clicked. If the selected fragment was a note, then there will be one button, “Delete”. Actually, this is exactly how, by accepting or rejecting each correction one by one, in Word you will remove them all.
However, sometimes there are voluminous texts in which there are too many such areas. Or, let’s say, for you in the process of work, each of the changes made and comments made earlier ceased to matter. In this case, clicking through each of them can be tedious, so the Microsoft Word developers have provided the ability to automate this process. Each step will be identical to those described above, only at the end of the process, when you are already beginning to accept each element you are looking for, you need to select the drop-down menu to the right of the corresponding button. In it, the user can click on the “Apply all corrections in the document” item, and then the displayed and hidden marks in the text will be marked as accepted. Actually, in order to remove each of them, you need to act in exactly the same way, that is, find the arrow to the right of the “Reject” button, click on it and select the “Reject all corrections” item.
Please note that in order to remove comments as well, you will need to carry out the corresponding procedure with any comment in the same menu item. Please note that in this mode you will mark each of the changes and comments made, not just those that are displayed in the selected mode. This will move the selection across the screen and “highlight” the area you are currently editing.
Afterword
When working with text fragments in Word, you need to take into account that for ease of reading, the author or other users could make the notes and comments made hidden from other authors. Since your word processor won't display these things by default when you open a file you've received from another user, you may not know they're there until you turn them on. Accordingly, before working with it or transmitting it anywhere, you should check for the presence of reviewed areas, and if available, accept or remove them from the text. In Word, this is done in just a couple of mouse clicks.
At the same time, you must remember that there is only one way to protect your edits from prying eyes: make copies. The fact is that any user can remove corrections and comments from a Word document, since there is no distributed editing model in this word processor; this would be too much of a complication of the model. Therefore, if you want to make notes and edits just for yourself, then create a separate copy for yourself. But this approach also has a disadvantage, because then you will have to track changes in the copy that you left for public use.
nastroyvse.ru
Editing the text
Notes
Notes are used to leave a comment on the text. It can be very important not only to make corrections, but also to convince the author of the document to agree with them. Or, for example, you see an error repeated many times. Then you can leave a note with a request to correct it throughout the text, and offer alternative phrases. You can ask to cover some aspect in more detail, give arguments, structure it differently, supplement or, conversely, shorten the text.
Microsoft Word uses a revision tracking mechanism so that the author can see their version of an edited piece of text along with another person's edit. Let's see how these features work in practice when the document falls into the capable hands of a reviewer.
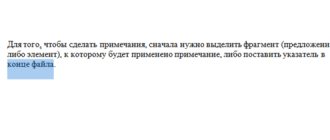
With notes everything is very simple. You need to select the text, click the “Create Note” button and add your comment to the selected fragment.
Notes are located in callouts, which by default are placed in the right margin of the document. If notes have been changed by several users, they are marked in different colors. The authorship of a particular note is always visible on the screen (see Figures 4 and 6).
Corrections
Correction tracking is activated by clicking on the “Corrections” button, which immediately becomes highlighted, thereby signaling that the mode is enabled. In it, Word shows all insertions and deletions, as well as changes in document formatting. If you right-click on it, an additional menu will open, the first item of which enables or disables tracking.
By clicking the "Edit Options" button, you can customize the appearance of your edits - colors, line types, document layout. However, by default, corrected text is highlighted in red. You can also see the location of the notes here, and you can set the width of the callouts. See Figure 3.
When a document has a lot of corrections, it becomes more difficult to read because by default, both the original text and the corrected text are displayed. To avoid getting lost in the edits, you can turn on the “Source Document” mode (see Figure 10). This will stop displaying all text correction indicators and callouts. So if you, tired of numerous corrections, get confused, you can always leave on the screen only what was originally written.
You can flexibly customize the display of corrections in callouts, for example, select only formatting or only adding and deleting fragments. The Show Corrections button opens a list of all possible corrections that Word shows by default. Here you choose what you need, incl. You can easily select edits and comments from only a specific reviewer.
Reviewing in Word - BY EXAMPLES
When you work in review mode in Word , every change you make to the document will be highlighted in color. If you delete text, it will not disappear; instead, the text will be crossed out. And if you add text, it will be underlined. Thus, reviewing in Word allows you to view the changes made before the changes are applied.
How to enable reviewing in Word
- On the Review , click the Corrections button.
Review in Word – Enable Review Mode
- After this, the review mode in Word is enabled. From now on, any changes you make to the document will appear in red.
Review in Word - Making edits to a document
If there are multiple reviewers, each person will be assigned a different color.
View your changes in review mode
The edits made in the review mode in Word are in reality only suggested changes. They can be either accepted or rejected. Since the original author may not agree with some of the corrections and reject them.
How to accept or reject changes
- Select the change you want to accept or reject.
Review in Word - Selected Edit
- On the Review , click Accept or Reject.
Review in Word - Accept or reject a revision
- The highlight will disappear and Word will automatically move on to the next change. You can continue to accept or reject each change until you have reviewed them all. Use the Previous and Next buttons to navigate through the changes.
Review in Word - Revision Navigation
- When you're done, click the Corrections command to turn off review mode .
Review in Word - Disable Review Mode
To accept all changes at once, click the arrow at the bottom of the Accept command, then select Accept All Changes. If you no longer want to track changes and want to remove reviews in Word , you can select “Accept all changes and stop tracking.”
Review in Word - Accept all corrections
Review modes in Word
If your document has a lot of edits, they can distract from the text while reading the document. Fortunately, there are several ways to set up the review mode in Word :
- Corrections: Shows the final version without any changes made. Red markers in the left margin indicate where changes have been made.
- All Corrections: Shows the final version with the changes made.
- No Revisions: This shows the final version and hides all edits.
- Original Document: Shows the original version and hides all edits.
How to hide tracked changes
- On the Review , click the Show for Review button. The Display for Review command is to the right of the Corrections command.
Review in Word - Selecting Review Mode
- Select the desired option from the drop-down menu. In our example, we'll select "No revisions" to preview the final version of the document before committing the changes.
Review in Word - Review Modes
Please note that hiding changes does not remove review corrections. In order to remove a review in Word , you need to either reject or accept the changes made in the manner described above.
Now you know how to work with the review mode in Word .
naprimerax.org
Editing the text
Notes
Notes are used to leave a comment on the text. It can be very important not only to make corrections, but also to convince the author of the document to agree with them. Or, for example, you see an error repeated many times. Then you can leave a note with a request to correct it throughout the text, and offer alternative phrases. You can ask to cover some aspect in more detail, give arguments, structure it differently, supplement or, conversely, shorten the text.
Microsoft Word uses a revision tracking mechanism so that the author can see their version of an edited piece of text along with another person's edit. Let's see how these features work in practice when the document falls into the capable hands of a reviewer.
With notes everything is very simple. You need to select the text, click the “Create Note” button and add your comment to the selected fragment.
Notes are located in callouts, which by default are placed in the right margin of the document. If notes have been changed by several users, they are marked in different colors. The authorship of a particular note is always visible on the screen (see Figures 4 and 6).
Corrections
Correction tracking is activated by clicking on the “Corrections” button, which immediately becomes highlighted, thereby signaling that the mode is enabled. In it, Word shows all insertions and deletions, as well as changes in document formatting. If you right-click on it, an additional menu will open, the first item of which enables or disables tracking.
By clicking the "Edit Options" button, you can customize the appearance of your edits - colors, line types, document layout. However, by default, corrected text is highlighted in red. You can also see the location of the notes here, and you can set the width of the callouts. See Figure 3.
When a document has a lot of corrections, it becomes more difficult to read because by default, both the original text and the corrected text are displayed. To avoid getting lost in the edits, you can turn on the “Source Document” mode (see Figure 10). This will stop displaying all text correction indicators and callouts. So if you, tired of numerous corrections, get confused, you can always leave on the screen only what was originally written.
You can flexibly customize the display of corrections in callouts, for example, select only formatting or only adding and deleting fragments. The Show Corrections button opens a list of all possible corrections that Word shows by default. Here you choose what you need, incl. You can easily select edits and comments from only a specific reviewer.
Accept corrections - Word
Note:
We strive to provide you with up-to-date reference materials in your language as quickly as possible. This page has been automatically translated and may contain inaccuracies and grammatical errors. It is important to us that this article is useful to you. Please take a few seconds and let us know if it helped you using the buttons at the bottom of the page. For convenience, we also provide a link to the original (in English).
Advice.
Video not in your language?
Try selecting Closed Captions
.
Even if logging changes is currently disabled, your document may have colored underlines and strikethroughs to indicate insertions and deletions that were made while this feature was active.
These marks will be visible to all users who select All corrections
or
Revisions
in the
Record Revisions
of
the Review
.
To remove marks, accept or reject the changes. To do this, use the buttons in the Changes
on the
Review
.
- To move between fixes, click the buttons Previous
and
Next
. - If you press the button Accept
, the fix will become permanent,
- and if you press Reject
, it will be deleted.
Exercises on corrections and other collaboration features in Word by downloading collaboration to the Word Learning Guide app.
Advice:
To accept or reject all changes at once, click the arrow on the
Accept
or
Reject
, and then select
Accept all changes
or
Reject all changes
.
support.office.com
Set up AutoCorrect in Office applications
The autocorrect function works by using two parallel lists of words. The first word is the one the user enters, and the second is the word or phrase that the program inserts to replace that word.
The AutoCorrect list is common to all Microsoft Office applications that support this feature. This means that adding or deleting a word in the list of one Office application affects all other applications in the suite.
You can add multiple entries that will result in the same text being replaced in the "to" section. For example, you can configure the replacement of “big”, “big” and “large” with “big”. Just add a separate entry for each of these changes.
Important:
If you feel like AutoCorrect isn't working, check that the Replace as you
type checkbox is selected
.
Adding an entry to the AutoCorrect list, changing it, or deleting it
To add an entry, follow these steps:
- Open the AutoCorrect tab.
- In field Replace
Enter a word or phrase that you often misspell, such as
custom
. - In field On
Enter the correct spelling of the word, for example
usually
. - Click the button Add
.
To change the replacement text for an entry, select it from the list and enter the new text in the field on
.
To delete an entry, select it in the list and click Delete
.
Note:
The Exceptions
list contains words that the spell checker identifies as misspelled but should not be automatically replaced. If a word is automatically replaced and you have verified that it is not in the AutoCorrect list, add the word to the exceptions list to prevent this from happening again in the future.
Adding an entry using the Corrector
If you have an Office 365 subscription and have the latest updates installed, you should see the Editor feature in the desktop Office apps. If Office detects a misspelled word, it will be underlined with a red wavy line. Right-click the misspelled word to open a context menu with correction options. If you want to add a pair of misspelled words and a correction to the AutoCorrect list, simply click the arrow next to the desired correction and select Add to AutoCorrect
.
support.office.com
Add, change, or disable automatic fixes
Using AutoCorrect, you can correct typos and misspelled words, as well as insert symbols and other text fragments. By default, it uses a list of common errors and symbols, which can be changed.
Enabling AutoCorrect
AutoCorrect is turned on by default in Word, Excel, and PowerPoint.
- On the menu Tools
select
AutoCorrect
. - Check the box Replace as you type
.
Adding frequently misspelled words to the autocorrect list
- On the menu Tools
select
AutoCorrect
. - Check the box Replace as you type
.
- In field Replace
Enter a commonly misspelled word, such as
abbreviation
. - In field On
Enter the correct spelling of the word, such as
abbreviation
. - Click the button Add
.
Advice:
To speed up your typing, you can save a section of text as AutoCorrect, and then paste the text by typing only a few characters.
For example, you can create an AutoText entry to insert the phrase "big blue whale" into your document when you type bsk
.
Disabling AutoCorrect
- On the menu Tools
select
AutoCorrect
. - Uncheck Replace as you type
.
support.office.com