To install the operating system, store programs and other data, virtual hard disks are used - Virtual Hard Disc. The .vhd format almost completely imitates a real hard drive with key structure, partitions and other characteristics.
Virtual disks are used to backup information and quickly restore it, to protect data from viruses, as an installation image of a new operating system, etc. Although, like real hard drives, they can be damaged and infected with Trojans.
In our review, we will look at several programs that can be used to open VHD virtual disks.
Microsoft Virtual PC
The first utility is a direct Microsoft development for creating and working with virtual hard disks. Often the program was used to create another operating system in an installed Windows environment. In this way, damage to the “native” OS was avoided.
Unfortunately, the program is not supported on newer versions of Windows. At least on our “tens” we could not install Virtual PC. Windows XP owners actively worked with the program. According to the site, the latest supported OS version is Windows 7.
How to connect/open vhd file (Virtual Hard Disk) in Windows XP and Vista
If you often work with Virtual PC, then from time to time you need to open a virtual hard disk file not in the virtual one, but in the main system. In Windows 7, this is not a problem (the vhd file can be easily connected via Disk Management). But in XP and Vista everything is more complicated: you need to install the vhdmount utility. Content:
- Installing vhdmount
- Creating a context menu
- Installing the vhdmount driver
Installing vhdmount
The vhdmount utility is included in Microsoft Virtual Server 2005 R2 SP1 (this is not a separate service pack, but a full-fledged server with SP1).
Download Microsoft Virtual Server 2005 R2 SP1.
We launch the installer (if UAC is enabled, then run it as Administrator). Select Install:
Installing vhdmount (1)
Next Custom:
Installing vhdmount (2)
There is no need to install all server components. Select only VHD Mount:
Installing vhdmount (3)
We complete the installation. This completes the first stage.
Creating a context menu
Now let's start creating a context menu (so as not to suffer with the command line).
You need to create a file with the reg extension and the following content:
Windows Registry Editor Version 5.00 [HKEY_LOCAL_MACHINE\SOFTWARE\Classes\Virtual.Machine.HD] [HKEY_LOCAL_MACHINE\SOFTWARE\Classes\Virtual.Machine.HD\shell] [HKEY_LOCAL_MACHINE\SOFTWARE\Classes\Virtual.Machine.HD\shell\Dismount] @="Dismount" [HKEY_LOCAL_MACHINE\SOFTWARE\Classes\Virtual.Machine.HD\shell\Dismount\command] @="\"C:\\Program Files\\Microsoft Virtual Server\\Vhdmount\\vhdmount.exe\" /u \»%1\»» [HKEY_LOCAL_MACHINE\SOFTWARE\Classes\Virtual.Machine.HD\shell\Mount] @=»Mount» [HKEY_LOCAL_MACHINE\SOFTWARE\Classes\Virtual.Machine.HD\shell\Mount\command] @=»\»C:\\Program Files\\Microsoft Virtual Server\\Vhdmount\\vhdmount.exe\» /m /f \»%1\»» [HKEY_CLASSES_ROOT\.vhd] @=»Virtual.Machine. HD"
If the installation folder differs from the standard one, then naturally you need to change the path to vhdmount.exe. Vhdmount can be launched with various parameters (for example, enable undo disk support to roll back changes). To see additional options, run vhdmount with the /? on the command line.
After the file is created, run it. We confirm that changes have been made to the registry.
Let's check the result. When you right click on the vhd file, you should see new menu items:
vhdmount context menu
Installing the vhdmount driver
To install the driver, open the control panel, switch to “classic view” and launch the “Add Hardware” wizard:
Installing the vhdmount driver (1)
Select “Install equipment selected from the list manually”:
Installing the vhdmount driver (2)
Select “Show all devices” and click on Next:
Installing the vhdmount driver (3)
Click on “Have from disk”:
Installing the vhdmount driver (4)
Go to the vhdmount installation folder and open the vhdbus.inf file:
Installing the vhdmount driver (5)
Select “Microsoft Virtual Server Storage Bus” and Next:
Installing the vhdmount driver (6)
After the installation is complete, you need to connect any vhd file. During the connection attempt, driver installation will begin and fail. This is fine.
Open Device Manager. Here you will see the Microsoft Server Storage Bus Device01 marked with an exclamation mark:
Installing the vhdmount driver (7)
Right-click on it and select “Update drivers...”. Select manual installation:
Installing the vhdmount driver (8)
In the “Look for drivers in the following location” field, select the vhdmount installation folder and click Next:
Installing the vhdmount driver (9)
Installing the vhdmount driver (10)
That's all. Now we connect the virtual disk, open “Computer” and work with the connected disk.
About the shutdown. Under Vista, I was never able to shutdown without rebooting. A standard message appears that the resource is being used by another program, etc. No big deal, just be aware.
VirtualBox
One of the simplest programs is VirtualBox from Oracle. It is designed for creating and working with virtual machines (disks) with the ability to install additional operating systems.
The installation file is downloaded from the official website (click on the active title link). Follow the installer's instructions. During installation of the utility, the network connection will be disconnected, about which we will see a warning.
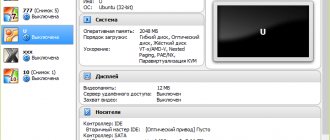
The advantage of the program is its simple, clear and very convenient interface. Here is the main VirtualBox window.
In the utility settings, you can set the folder for saving virtual machines, configure hot keys (Input tab), change the language, etc.
Despite the minimalistic interface, the program's capabilities are quite consistent with professional tools for working with VHD:
- work with multiple VHD disks;
- import and export of settings, configurations of ready-made virtual machines;
- the ability to work remotely from a virtual machine (from another computer), combining several machines into one network;
- creating screenshots and videos;
- support not only for Windows, but also for other operating systems;
- the program is absolutely free.
In our opinion, this is the most accessible program for working with VHD disks in all respects. It is free, with a simple interface, extensive settings and extensive capabilities.
VHD file extension
Updated:
12/15/2019
How to open a VHD file?
Problems accessing VHDs can be caused by various reasons. Fortunately, the most common problems with VHD files can be resolved without extensive IT knowledge, and most importantly, in a matter of minutes. We have prepared a list that will help you resolve your problems with VHD files.
Step 1: Download and install Microsoft Virtual Server
The main and most common reason that prevents users from opening VHD files is that the user's system does not have a program installed that can handle VHD files. This one is lightweight. Select Microsoft Virtual Server or one of the recommended programs (such as 7-Zip, VMware Workstation, Microsoft Virtual PC) and download it from the appropriate source and install it on your system. A complete list of programs grouped by operating system can be found above. If you want to download the Microsoft Virtual Server installer in the most secure way, we recommend that you visit the Microsoft Corporation website and download it from the official repositories.
Step 2: Make sure you have the latest version of Microsoft Virtual Server installed
Are you still unable to access VHD files even though Microsoft Virtual Server is installed on your system? Make sure your software is up to date. It may also happen that software creators update their applications to add compatibility with other, newer file formats. If you have an older version of Microsoft Virtual Server, it may not support the VHD format. The latest version of Microsoft Virtual Server should support all file formats that are compatible with older versions of the software.
Step 3: Assign Microsoft Virtual Server to VHD Files
If you have the latest version of Microsoft Virtual Server installed and the problem persists, select it as the default program to use to manage VHDs on your device. The method is quite simple and varies little across different operating systems.
Procedure for changing the default program in Windows
- Right-clicking on the VHD will bring up a menu from which you should select the Open with option
- Select Choose another app → More apps
- To end the process, select Find another application on this... and use File Explorer to select the Microsoft Virtual Server folder. Confirm by checking Always use this app to open VHD files
and clicking OK button.
Procedure for changing the default program in Mac OS
- From the drop-down menu when you click on the file with the VHD extension, select Information
- Find the Open with option - click the title if it's hidden
- Select Microsoft Virtual Server and click Change for all...
- If you followed the previous steps, you should see a message: This change will be applied to all files with VHD extension
. Then click the Forward button to complete the process.
Step 4: Make sure the VHD file is complete and free of errors
Have you carefully followed the steps listed in points 1-3, but the problem is still present? You should check if the file is a valid VHD file. Lack of access to a file can be due to various problems.
The VHD may be infected with malware - be sure to scan it with an antivirus.
If the file is infected, the malware residing in the VHD file interferes with attempts to open it. It is recommended that you scan your system for viruses and malware as soon as possible, or use an online virus scanner. If the VHD file is indeed infected, follow the instructions below.
Make sure the VHD file structure is intact
Have you received a VHD file from another person? Ask him/her to send again. It is possible that the file was not properly copied to the data store and is incomplete and therefore cannot be opened. When downloading the file with VHD extension from the internet, an error may occurred resulting in incomplete file. Try downloading the file again.
Check if the user logged in has administrator rights.
Some files require elevated permissions to open them. Switch to an account with the necessary privileges and try opening the Virtual PC Virtual Hard Disk file again.
Make sure your system has enough resources to run Microsoft Virtual Server
The operating systems may note enough free resources to run the application that support VHD files. Close all running programs and try opening the VHD file.
Make sure you have the latest drivers, system updates, and patches installed
The latest software and drivers can help you solve problems with Virtual PC Virtual Hard Disk files and keep your device and operating system secure. Outdated drivers or software may have caused you to be unable to use a peripheral device needed to handle VHD files.
Daemon Tools Ultra
Click on the active link to download Daemon Tools Ultra. The developers offer a free two-week version. This is quite enough to get acquainted with the program.
Compared to the Lite version, the Ultra utility offers advanced capabilities for working with virtual disks. Including VHD virtual machines. It also allows you to work with multiple virtual machines, create backup copies of files, etc.
This is what the main program window looks like.
In general, there should be no problems with setting up and managing virtual disks. The interface is simple, and the settings do not cause difficulties even for novice users.
VDI, VHD, VMDK files - what are they?
VDI, VHD, VMDK files are different types of virtual disks used in programs for creating and running virtual computers, such as VirtualBox.
See also: The Complete Guide to VirtualBox
A virtual disk is a file, which is a disk in a virtual machine, and in which all the data of the virtual computer is stored.
You can, of course, view the contents of the file system by starting the virtual machine and opening the file manager. This article will tell you about another method - how to view the contents of a virtual disk from the host machine without starting the guest system.
Using the described method, you can view the contents of the following types of virtual disks:
- VDI - VirtualBox Disk Image (VirtualBox disk image, used by default in VirtualBox when creating new virtual machines)
- VHD - Virtual Hard Disk (virtual hard disk)
- VMDK - Virtual Machine Disk (virtual machine disk)
7zip
The 7zip archiver known to us (the download link is in the title) does not work with virtual machines. But you can use it to open and view the contents of a VHD file. Right-click on the file and select “Open with”.
In the list of programs, click on 7zip. It is also possible to open using other archivers, for example, WinRAR. By the way, we talked in detail about how to set a default program.
Automatically mount VHD/VHDX disk when Windows boots
In Windows 7 and Windows Server 2008 R2, it became possible to create and mount virtual disk files ( VHD /VHDX ) directly from the Disk Management console. Such virtual disks appear in the system as separate physical disks and can be used to store arbitrary data. A significant drawback of such disks is that every time you restart Windows, you have to manually mount all VHD/VHDX files each time. In addition, only computer administrators have the right to mount vhd virtual disk files; ordinary users cannot mount a vhdx file on their own (the administrator has to intervene every time).
In this article we will show how to automatically mount a vhd/vhdx file when the system boots, so that virtual disks are available to ordinary users (who do not have administrator rights)
Windows does not have a built-in ability to automount vhd files when the system is rebooted, so we will have to develop our own mounting mechanism. Windows task scheduler and the diskpart will help us with this .
So, let's create a text file (C:\Scripts\attach_vhd.txt) with the following code:
select vdisk file="C:\vhd2\w10vhd.vhdx" attach vdisk select part 1 assign letter=K exit
where: C :\ vhd 2\ w 10 vhd . vhdx – full path to the VHD or VHDX disk image K – drive letter to assign to the VHD image
This script connects the specified vhd file, selects the first partition on it and assigns the given drive letter to it.
If there are multiple partitions on the disk, change the code accordingly, indicating the number of the partition that needs to be mounted. Note :
For security reasons, it is advisable to change the NTFS permissions on the file “C:\Scripts\attach_vhdx.txt” so that ordinary users cannot change it. Launch Windows Task Scheduler ( Taskschd.msc ) and create a new scheduler task ( Actions -> Create Task ). Set it up like this:
- General tab : Specify the job name ( Name ):automountvhdx;
- Note that it should run regardless of whether the user is logged in or not ( Run whether user is logged on or not );
- Specify that the task should be run with maximum privileges ( Run with highest privileges );
- Add a new startup trigger ( At Startup ) with default settings.
- Let's create a new action New : Action start a program ( Start a program );
To run the task on behalf of the system, open its properties again and on the General , click the Change User or Group . In the user selection window, select system and save the changes.
You can create a scheduler job using PowerShell or using schtasks: schtasks /create /tn "automountvhdx" /tr "diskpart.exe /s 'c:\Scripts\attach_vhdx.txt'" /sc ONLOGON /ru SYSTEM
Now, the next time you restart the computer, the specified virtual VHDx disk will be mounted automatically.
Note : As a rule, the disk does not appear in the list of available disks immediately, but 30-60 seconds after Windows boots.
If you want the virtual vhdx disk to be mounted not in a separate drive letter, but in a folder, change the code in the c:\Scripts\attach_vhd.txt file to:
select vdisk file="C:\vhd2\w10vhd.vhdx" attach vdisk select part 1 assign mount="c:\mount" exit
As a result of executing this command, the virtual disk will be mounted in a separate directory on your physical disk (the contents of the vhdx file will be displayed in this directory).
You can mount not only a local VHD disk, but also a disk from a network directory via a UNC path.
select vdisk fils=”\\192.168.1.100\share\shared.vhdx”
To test the operation of the code of your script for automatically connecting virtual disks, it is not necessary to restart the computer every time; just run the command on the command line with administrator rights:
diskpart /sc:\Scripts\attach_vhdx.txt
If your code does not contain errors, the command will connect the vhdx file and a new disk will appear in the system.
These methods for automatically connecting virtual disks work both in Windows 10 and in Windows 8.1 and Win 7.
If you prefer PowerShell, you can automatically mount a VHDX disk using the following PoSh script in startup (cmdlets from the Storage module are used to manage disks):
mount-vhd -path C:\vhd2\w10vhd.vhdx –PassThru | Get-Disk | Get-Partition | Set-Partition -NewDriveLetter G
How to use virtual hard disks?
Having created such a virtual disk, you can connect it to several operating systems at once, for example, guest and home, so that it is convenient to “send” files between them.
The virtual disk can also be used for backup. Periodically upload the necessary data to it, and then copy the VHD file to external media.
Another use case is storing the same type of data on such disks, for example, photos, videos, music. This will make backup easier and also allow you to separate the system from user data. The only thing worth paying attention to is the backup of VHD files.
That's all for now! I hope that you found something useful and interesting for yourself in this post.
