Personalization in Windows - customizing the design of the operating system to suit your individual (personal) tastes and needs. According to his preferences, the user changes the theme, color, desktop background, sounds, screensaver, font size, avatar, etc. on his computer.
The combination of images, colors, sounds, and screensavers is called a theme. There are already themes ready for use on your computer, you can create and customize a theme as you wish.
In this article we will get acquainted with the personalization settings in Windows 10, you will learn where you can download official Microsoft themes and wallpapers (backgrounds) for your Desktop, how to install or remove a theme from your computer, where themes are stored on your computer, and how to extract the desired image from a theme.
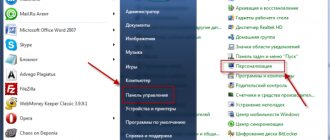
Personalization settings can be accessed from the Start menu. Select "Options" and then "Personalization." It’s even easier to enter the settings as follows: right-click on a free area of the monitor screen, and select “Personalization” in the context menu.
Personalization in Windows 10
In the “Personalization” window, in the “Background” tab, select an image for the Desktop background. The following options are available for displaying the background:
- Photo - a separate image serves as the background.
- Solid Color - The selected color will be used as the background.
- Slideshow - background images will change at regular intervals.
When choosing one of the options, you will need to make settings: select a photo, select a background color, select albums for the slide show. In each specific case, select the desired settings. Here you can select the background position: “fill”, “fit to size”, “stretch”, “tile”, “to .
In the “Colors” tab, select the main color for the Windows design. In the settings, you can enable automatic selection of the main background color, change color display options in the Start menu, on the Taskbar and in the Action Center.
In the “Lock Screen” tab, you can configure the background that will be displayed on the monitor screen when the computer is locked. There are three options for displaying the lock screen background: Windows Explore, Photos, Slideshow.
From the “Themes” tab, you go to the theme options and related options: “Advanced sound options”, “Desktop icon options”, “Mouse pointer options”.
We will look at the theme parameters in detail later. If necessary, adjust the sound settings and mouse pointer settings. Enter Desktop Icon Settings.
In the Desktop Icon Options window, select the icons you want to display on the Desktop, and then click OK. In order to remove an icon from the Desktop, uncheck the box next to the corresponding icon, and then click on the “OK” button.
In the “Start” tab, you can configure the settings of the “Start” menu. The user himself selects the settings according to his preferences: the number of displayed tiles, display of recommendations, order of applications, etc.
How to remove installed themes
If you have accumulated a lot of themes, some of which you do not use, you can delete them in two ways:
- Right-click on a theme in the list of themes in the “Settings” - “Personalization” - “Themes” section and select the only context menu item “Delete”.
- Go to “Settings” - “Applications” - “Applications and Features”, select the installed theme (it will be displayed in the list of applications if it was installed from the Store), and select “Delete”.
Saving a theme in Windows
Open the Themes tab and click on Theme Options. After this, the “Personalization” window will open. Here you will see the default themes and the themes you have added. Windows 10 comes with three default themes: Windows, Windows 10, Flowers. To activate a theme on your computer, click on the appropriate theme.
If the topic is named "Unsaved Topic", click the "Save Topic" link to save and name the topic.
How to change the theme of Windows 10
You can find all installed themes in Windows 10 by going to Settings -> Personalization -> Themes. The Themes page lists all themes, including built-in themes.
As you may have noticed, when you right-click on a theme on the Themes page, it only prompts you to delete the selected theme. There is no option to save the theme.
Users who download themes from the Microsoft Personalization Gallery or third-party sites will not encounter this situation because they first download the theme before enabling it.
RECOMMENDED: How to reset Windows 10 appearance settings
If you want to save the theme or want to save the wallpaper from the theme file, you can follow the instructions below.
How to download Microsoft themes
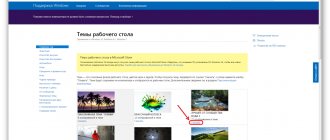
Users find desktop themes and wallpapers on the Internet; many do not even suspect that they can download Microsoft themes and wallpapers from the corporation’s official website. Official themes and wallpapers can be found on the Personalization Gallery page. In the personalization gallery you will find themes, desktop backgrounds, language packs.
In the Personalization window, click the More Online Themes link. Next, the “Personalization Gallery” will open in the “Themes” tab.
The site has a large selection of topics. Topics are collected in collections: “Animals”, “Art (drawings)”, “Art (photos)”, “Cars”, “Games”, “Holidays and Seasons”, “Movies”, “Wonders of Nature”, “Locations and landscapes”, “Plants and flowers”, “Panoramic (for two monitors)”, “With custom sounds”, “Compatible with Windows 7”, “Compatible with the new Windows”.
You can download and install any theme from this collection on your computer. Windows 7 users can download and install many themes from the Microsoft Gallery that support this operating system.
Enter the appropriate collection, select a topic, click on the “More details” link. Here you will see detailed information about the topic: the number of images in this topic, the color of the window, an example of an image on the computer screen. View all the images included in the theme, if the theme suits you, download the theme to your computer.
Next, run the theme file, after which the theme will be installed on your computer. You will see the theme in the Personalization window, under My Themes.
How to create your own theme for Windows 10
Want to customize your Windows 10 desktop and windows the way you want and share the design with your friends? Windows 10 lets you create your own themes with custom desktop backgrounds, window borders, and Start menu colors. You can save these settings in a new theme file and use them whenever you want or send them to other users.
1. Open the Start menu and select Settings.
2. Select Personalization on the Settings screen.
3. Change one or more of the following:
Desktop Background: Choose from an image, solid color, or slideshow. In addition to the default images, you can click the Browse button to choose your own background image. If you choose a slideshow, the default album will be Photos, but you can change to a different folder and also set how often you want the desktop images to change.
Colors: You can choose your background's accent color automatically, or set a subtle color border around windows and the Start menu. This will also change the color of the Windows taskbar icon when you hover your mouse over it. If you wish, you can also specify the color of the taskbar by checking the desired boxes.
You can also change your lock screen background image and Start menu settings, but these are not saved with your theme.
4. Click Themes in the Personalization window, then Theme Settings.
This will open Personalization Settings in Control Panel.
5. Right-click on the unsaved topic and select Save Topic. Unsaved topics appear in the My Themes section. They contain the settings you have chosen.
6. Name your topic and click OK.
Your new theme will be saved and you can easily switch between it and other themes by going to the Personalization Options in your Control Panel. Once you save your theme, you can right-click on it and save it for sharing as a .deskthemepack file.
Microsoft doesn't offer a built-in way to create more complex themes, such as changing app icons or sounds. However, there is an app in the Windows App Store called Theme Creator that has advanced theme creation capabilities. The application did not start for me, but perhaps you will have better luck.
In addition, Microsoft offers many theme packs for Windows, which you can download for free here. Here are some of the best themes for Windows 10.
How to download Microsoft wallpaper
In the Personalization Gallery window, go to the Desktop Backgrounds tab. Wallpapers (backgrounds) are combined into collections of images: “Animals”, “Art (drawings)”, “Art (photos)”, “Cars”, “Games”, “Holidays and seasons”, “Wonders of nature”, “Locations and landscapes”, “Plants and flowers”, “Panoramas”, “All wallpapers”.
After clicking on the picture, the image will be expanded. You can save the image you like to your computer to use as a desktop background.
Any image can be used on your computer as desktop wallpaper. To do this, right-click on the image, and in the context menu select “Set as desktop background image.”
For those who are not resigned: we are changing the look of Windows 10 to Windows 7
Reward accrued
This material was written by a site visitor and was compensated for.
Greetings. Many Windows 7 users do not want to switch to Windows 10, rightly considering the new interface inconvenient. The problem also lies in the fact that in the new system it is impossible to return the Windows 7 interface using standard methods, as, for example, in Windows 7 it was possible to return to the old Windows 9x interface.
The problem has puzzled many people. It's clear that there's no turning back in the UI, so concerned users have taken matters into their own hands.
announcements and advertising
2080 Super Gigabyte Gaming OC for 60 rubles.
Compeo.ru - the right comp store without any tricks
RTX 2060 becomes cheaper before the arrival of 3xxx
Ryzen 4000
series included in computers already in Citylink
The price of MSI RTX 2070 has collapsed after the announcement of RTX 3xxx
Core i9 10 series is half the price of the same 9 series
The price of memory has been halved in Regard - it’s more expensive everywhere
At this stage, no program can return the Aero interface to Windows 10 with 100% identity. Of all the options as of today, March 2020, the closest one was chosen. This method does not claim to be the best option for changing the interface. Perhaps someone knows a better replacement for the interface - do not hesitate to write in the comments.
So, we will need:
— Installed and working version of Windows 10 Pro build 1809 with standard default settings.
- some standard wallpaper from Windows 7, for example these - c:\Windows\Web\Wallpaper\Nature\img2.jpg, or you can take your favorite wallpaper.
— a package of standard Windows 7 icons, for the IconPackager program. The package can be downloaded on the Internet, look for the phrase windows_7_icon_package_by_kylematic.
- a paid program for replacing Stardock IconPackager icons, version 5.10.032 is suitable.
— a paid program for restoring the Start menu StartIsBack++, version 2.8.2 is suitable.
- DWMGlass AIO 0.21R2 utility - for transparency of window titles and button themes from Windows 7.
First, let's bring back your favorite wallpaper. We copy them somewhere to the system disk. After copying the wallpaper, right-click on it and select from the context menu – Set as desktop background image. Wallpaper set.
Install the Stardock IconPackager program. Find the pre-downloaded icon pack for this program and launch the pack by double-clicking. The package will open in the program. Click the “Apply package” button. As a result, system icons will be replaced.
Next you need to set transparency for all windows. Install the DWMGlass AIO 0.21R2 package. The utility returns the translucency of windows with a blur effect. The program is optimized for modern processors with SSE support, so it consumes virtually no computing resources. Once the installation is complete, the Aero Glass settings window will pop up. There you need to select the Atlas win7rp theme and set the Glass geometry radius to Win7 style. The transparency sliders can be moved to the far left position.
Next, install the old-new Start menu. Install the StartIsBack++ program. After the installation is complete, you will be asked to go to settings - we agree. In the “Appearance” menu, select the Windows 7 style second from the left, select the start icon third from the left. Check two transparency checkboxes and move the corresponding transparency sliders to the far left position. In the “Start Menu” settings section, you can increase the number of recently used programs to 20. And in the “Switching” menu section, set the number of recently used items to 20. That’s it, the Start menu is configured.
You can see what happened in the end on the screen. That's all, write what you think about this transformation in the comments.
Where are Windows 10 themes stored?
The default themes are stored on your computer in the “Web” folder. In order to get to this folder, follow the following path (standard desktop wallpapers for Windows 10, Windows 8.1, Windows 8, Windows 7 are stored in this location):
C:WindowsWeb
In the “Web” folder you will find three folders: “4K”, “Screen”, “Wallpaper”. The “4K” folder contains the official Windows 10 screensaver in various resolutions. The Screen folder stores images used for the lock screen. The “Wallpaper” folder contains folders with three official themes, which store the images included in these themes.
If you like a particular image from a theme and want to use that image as your Desktop background, you can copy the image to another location and then set that image as your Desktop background.
You may also be interested in:
- How to remove or disable Windows 10 Live Tiles
- How to remove unnecessary Windows 10 applications - 5 ways
Themes downloaded to your computer yourself are stored in a different location. There are two ways to extract a single image from such a topic.
First way. Unpack the downloaded but not yet installed theme on your computer using an archiver, for example, WinRAR or 7-Zip. In the folder you will find all the images included in the theme.
Second way. You will find images that are part of a theme already installed on your computer in a folder named after the theme, which is located in the following path:
C:UsersusernameAppDataLocalMicrosoftWindowsThemes
Themes for Windows 10 with automatic installation and their advantages
- The Internet has a huge catalog consisting of a wide variety of themes that you can choose depending on your preferences.
- When you choose the design option that suits you, you download an archive onto your PC that contains many additional components - you will have access to a small collection of cursors, icons, images, skins for third-party applications, various variations of the Start button, and much more. You only need to download themes for Windows 10 once to gain access to this collection.
- Themes for Windows 10 have their own unique features and style - they will suit any user, regardless of their preferences.
- The installation process does not take much time.
- You can download free themes for Windows 10 in unlimited quantities - just make sure that your device has enough memory to install wallpaper.
- Additional desktop themes for Windows 10 are offered by Microsoft - you can follow this link https://support.microsoft.com/ru-ru/help/13768/desktop-themes-featured to download the option you like for free or visit the built-in store Microsoft Store, which also has a wide catalog of different variations for high-quality design of virtual space.
Where are the lock screen wallpapers stored?
You will find standard lock screen background images in the “Screen” folder. If the “Windows: interesting” option is selected in the lock screen background settings, then the Windows 10 operating system downloads images from the Internet to the computer. These images can not only be used as a lock screen saver, they can be used as a desktop background.
The downloaded images that are used as the lock screen background are located in this path:
C:UsersusernameAppDataLocalPackagesMicrosoft.Windows.ContentDeliveryManager_cw5n1h2txyewyLocalStateAssets
The Assets folder contains files downloaded to your computer. Copy the file from this folder to a convenient location on your computer. Next, rename the file, give the file some name with the extension “.jpg”, for example, “picture.jpg”.
After this, you can use this image as your desktop background.
Instructions for enabling the light theme in the Windows 10 operating system
- The first thing we need to do is call the context menu on the desktop.
This is done quite simply, you just need to place the mouse cursor on the desktop and press the right key. A small menu will be displayed, in it we are interested in the Personalization , and select it. - A system window will appear in which you can configure certain parameters, as well as go to other sections with settings using the items located on the side.
This is exactly what we need, namely, we need to go to the section with setting up themes by selecting the appropriate item. - Once in this section, we will have the opportunity to change the topic. By selecting the topic located there under the name Windows (light), we will accomplish the task by switching the operating system interface to a light shade.
The changes will take effect instantly, you will immediately see the updated color scheme, which is dominated by bright and light colors.
Live wallpapers in Windows 10
If you want to slightly update your beautiful Desktop, then you have come to the right place.
The theme of live wallpaper or video wallpaper is quite old and popular, oddly enough. At one time, animated wallpapers were very popular on phones, so-called gifs, and users wanted to see something similar on their computer. If earlier, in order to make video wallpaper on the Desktop, it was necessary to do a lot of manipulations, but now one program called DeskScapes is responsible for all this. In principle, there are other programs for implementing video wallpapers, but this is the most popular, very multifunctional and quite easy to learn. In order to download this program, you need to go to stardock.com and go to the Software section. Here we see programs from this company, even the famous classic Start menu called Start10 is present here. But we are interested in DeskScapes, so we select it and click on the Get it now button, i.e. Get it now. Next, select the trial version, i.e. you will be able to use the program for 1 month, after which, if you like it, you can buy it. It costs only 5 dollars. But we’ll come back to this at the end, and I’ll tell you my opinion about this program and why 30 days is enough for you. Download and install the program.
So, after installing the program, I hope you know how to do this, you will be asked to enter your email to activate the trial mode, enter your email and confirm it in the email itself, after which you will be able to use the program for free for 30 days without any restrictions. The program already has some default live wallpapers, and also adds your standard wallpapers from themes, sort of like a bonus.
To apply video wallpaper, you need to select what you like and click on the Apply to my Desktop button, that is, Apply on my Desktop. After which you will be immersed in the world of animated wallpapers.
Some wallpapers have additional settings. For example, in the wallpaper where the planet is spinning, you can adjust its rotation speed. In wallpaper where insects run, they can be removed, and so on. There are also wallpapers with music, like this wallpaper with a cat. Also, in addition to its own settings, there are also general effect settings. You can make the wallpaper black and white, apply a blur effect, a rainbow and much more. Personally, I prefer not to touch these effects; I like the naturalness of the picture better.
There are also settings for the application itself, where you can set Good picture quality or High performance, the folders in which your video files are stored. In this case, you can use any video files, from the most standard one with the Dream extension, to video in MP4 format, for example, a recorded video from a game. You just need to be careful with the bitrate, otherwise everything will slow down if you have a slow PC. I also advise you to uncheck the Pause dream when windows are maximized setting in the Advanced tab. It stops your screensaver from stopping. Those. when you go full screen windowed mode. It even sounds somehow strange, or even in just full-screen mode, the playback of the video wallpaper pauses and when you return to the Desktop again, this will slightly disorient you. I'm not kidding, it's so annoying that I just want to delete this program. In another case, when you are working with documents and at the same time you do not have a pause on the screensaver in full-screen mode and when the Taskbar is visible, then you are also infuriated by the constantly changing effects on the Taskbar.
And oddly enough, we come to some conclusion and why I advised using the 30-day version. Everything is very simple, during this time you will definitely understand whether you really need live wallpapers or not. Personally, after using it for quite a long time, I realized that this was not suitable for me personally. When using screensavers, there are a lot of irritating factors that distract from work. Where you are used to seeing a static picture, something is constantly happening and it is clear that because of this, video wallpapers have not become so widespread, since too many distracting things appear, and besides, they load the system quite well. Whether you install them or not is up to you, but after a certain period of time, most likely you will realize that you are simply tired of them and perhaps even after the next installation of the system you will not even think about installing DeskScapes. If you show off and give an unusual expensive look to your system, then you can install it, but it is desirable that there is little animation and distractions, but I don’t think this will suit you for work. This was my opinion, if you have your own, then express it in the comments.
