Is it possible to run Windows 10 from a USB flash drive or external hard drive without installing it on the computer?
You can: for example, in the Enterprise version in the control panel you can find an item for creating a Windows To Go drive, which makes just such a flash drive. But you can get by with the regular Home or Professional version of Windows 10, which will be discussed in this manual. If you were interested in a simple installation drive, then about it here: Creating a bootable USB flash drive for Windows 10. In order to install Windows 10 on a flash drive and run from it, you will need the drive itself (at least 16 GB, in some of the described methods this turned out to be is not enough and a 32 GB flash drive was required) and it is very desirable that it be a drive with USB 3.0 support connected to the appropriate port (I experimented with USB 2 and, frankly, got tired of waiting for it to first record and then start). An image downloaded from the official website is suitable for creation: (however, there should be no problems with most others either). Update: in the new version of Windows 10 1607 dated August 2, 2020, the control panel item for creating a Windows To Go flash drive has also appeared in the professional version. So if you have a supported USB drive, check this method out. Install the Windows 7 start menu in Windows 10
Our assistant - WinBuilder
To replace PeBuilder, another, absolutely wonderful tool was found - WinBuilder. This is not even a program, but a real framework for creating Windows PE (this is the name of a lightweight version of Windows OS that allows you to boot from a removable CD/DVD/USB media). To do this, it extracts the necessary components from the distribution of the system itself, as well as the Windows Automated Installation Kit (WAIK) as the basis for the system and allows you to create additional scripts with which any third-party utilities are built into the system.
Several projects have been built on the basis of WinBuilder, here are just a few of them:
- LiveXP - uses Windows XP as a file source and creates a system for administrators.
- Win7PE - takes the Windows 7 distribution as the basis for the system.
- VistaPE-CAPI - Creates a Vista-based build.
- NaughtyPE is based on Windows XP and supports media playback out of the box.
- MultiPE - assembles a bootable system from the Vista or Windows 7 distribution.
We will use Win7PE as the most proven and most suitable project for our tasks.
What do we need?
In order to build a bootable system based on Windows 7, we need the following:
- Windows 7 x86 or x64 distribution, preferably with SP1 already integrated.
- Latest version of WinBuilder. It is distributed in the form of a small exe file, and additionally downloads the necessary components and auxiliary utilities from the Internet.
- Windows Automated Installation Kit for Windows 7 (WAIK). The package for automatic installation of Windows weighs a lot - it is a 1.7 GB image, which you can either download from the Microsoft website or take from our disk.
- Driverpacks are cool sets of drivers that support a huge amount of hardware. Assemblies for various types of devices are available on the site; we will not need many, namely, assemblies for the categories Chipset, LAN, WLAN Mass Storage driver.
Preliminary preparations
When all the files are at our disposal, we can begin preparations.
- First, we need to install the Windows Automated Installation Kit for Windows 7. Of course, it is not necessary to burn the ISO to a disc: you can simply unpack the files from KB3AIK_EN.iso and run StartCD.exe. In the autorun menu that appears, select Windows AIK Setup and perform the most standard installation. This equipment weighs a lot, but after the WinBuilder scripts extract the necessary files from there, WAIK can be deleted (keep this in mind).
Installing WAIK
- Next, copy the Windows 7 files from the disk or from the ISO image to some directory.
- We place the downloaded WinBuilder.exe in some folder (for example, C:WinBuilder) - just not in the directory with the user profile. And we launch the binary under an administrator account: otherwise the program will honestly warn you about possible problems.
- WinBuilder in its pure form is of little use - it requires scripts and auxiliary files to create a bootable distribution. Therefore, the first thing you will see after launching is “Download Center”. The program will prompt you to select the projects that need to be downloaded.
Check the boxes:
- updates.boot-land.net (these are updates);
- win7pe.WinBuilder.net/SE (Win7PE project files).
In the upper left corner you can select the download mode (by default it is set to “Recommended”). Select “Complete” through the menu and start downloading files by clicking on the “Download” button.
- For some reason, WinBuilder cannot correctly extract absolutely all the files needed to create the assembly, so you will have to do a little manual work. You need to find the bcdedit.exe file on your system (Windows 7) and copy it to C:WinBuilder ProjectsToolsWin7PE_SEx86 (or C:WinBuilder ProjectsToolsWin7PE_SEx64 for a 64-bit system). You also need to copy the following files there:
imagex.exe wimgapi.dll wimmount.inf wimmount.sys wimserv.exe
Initially they are located in the WAIK folder. You can try skipping this step. My automatic WinBuilder scripts were unable to grab these files, but perhaps you will have better luck.
Using the command line to burn Live USB with Windows 10
There is also a way to make a flash drive from which you can run the OS without programs, using only command line tools and built-in Windows 10 utilities.
I note that in my experiments, USB made in this way did not work, freezing upon startup. From what I found, the reason could be that I have a “removable drive”, while for it to work it is required that the flash drive be defined as a fixed drive.
This method consists of preparation: download an image from Windows 10 and extract the install.wim or install.esd file from it (Install.wim files are present in images downloaded from Microsoft Techbench) and the following steps (the method with a wim file will be used):
- diskpart
- list disk (find out the disk number corresponding to the flash drive)
- select disk N (where N is the disk number from the previous step)
- clean (disk cleaning, all data from the flash drive will be deleted)
- create partition primary
- format fs=ntfs quick
- active
- exit
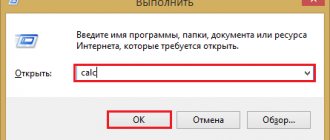
- dism /Apply-Image /imagefile:path_to_file_install.wim /index:1 /ApplyDir:E:\ (in this command, the last E is the letter of the flash drive. While executing the command, it may seem that it is frozen, this is not so).
- bcdboot.exe E:\Windows /s E: /f all (here E is also the letter of the flash drive. The command installs the bootloader on it).
No activation of Windows 10 / are there any restrictions
After this, you can close the command line and try to boot from the created drive with Windows 10. Instead of the DISM command, you can use the command imagex.exe /apply install.wim 1 E:\(where E is the letter of the flash drive, and Imagex.exe must initially be downloaded as part of Microsoft AIK). At the same time, according to observations, the option with Imagex takes more time than using Dism.exe.
Collecting the distribution
Now that we have everything necessary for assembly and are ready for use, there is no point in delaying the creation of the distribution kit. Again, I’ll break it down point by point.
- So, in the left panel we see the Win7PE SE project tree. Click the “Source” button: here you need to specify the location of the Windows 7 distribution files. Everything else can be left as default.
- Next, you need to connect the drivers that the system will use to create the assembly. This is done in the "Drivers" section. The default path here is %GlobalTemplates%Drivers_x86. The easiest way is to click on the “Explore” button and copy all the necessary drivers into the folder that appears. We simply unpack here the Driverpack archives that we previously downloaded. Since scanning of subdirectories is supported, there is no need to shove everything into one crazy pile: feel free to post the contents of the archives “as is”.
- If you go through the “Tweaks” section, you can additionally make various cosmetic settings for the future system. For example, change the wallpaper, customize the Start menu, change shortcuts. Everything is very clearly configured through the appropriate options.
- Next, go to the “WriteMedia” section and activate the “Copy to USB-Device” mode to immediately place our assembly on a USB flash drive by selecting the desired media from the menu.
- Now you can press the “Play” button and trust that everything will go without a hitch. Creating an assembly obviously takes some time: in the process, you can see how one system script after another is executed (it is difficult to imagine how much time it would take to do such work manually). Accordingly, the more scripts you select for execution, the longer WinBuilder will fiddle around. In case of an error, the program will tell you what the problem is and, most likely, will provide help in the browser with a possible solution to the problem.
I am compiling this instruction taking into account all the difficulties I have encountered, so you should not step on my rake. Everything should be fine, and as a result you will receive a Win7PE_x86.ISO file in the WinBuilderISO folder.
- Before uploading files to a flash drive, you can first check the functionality of the assembly in a virtual machine, and here again everything is automated. In the VirtualTest section you can select a virtualization system (the test can be arranged using qEmu, VirtualBox, Virtual PC, VMware). I left the default mode (Best Emulation), and WinBuilder launched the resulting image in the installed VMWare Workstation, which suited me quite well. You can choose a more suitable scenario. You can leave everything as is and install a free and lightweight one into the system.
Checking the build for VMware
- Now let’s talk about what transferring the system to a flash drive looks like. First, WinBuilder launches HP USB Disk Storage Format Tool - the most correct utility for formatting USB drives. Here we select FAT32 (if you want to add the ability to boot from a flash drive of another system in the future) or NTFS. Let's format it. After this, the Grub4Dos utility comes into play, which has an important purpose - to install a bootloader on the flash drive. Here you need to: firstly, select the disk correctly (since the letters are not displayed, look carefully at the size), secondly, select “Part List - Whole disk (MBR)” as the parameter value and check the Don't search option floppy. After this, all that remains is to click on the “Install” button, instantly receive a message about installing the bootloader and, mentally thanking Gbur4Dos, close its window. That's it: after this, WinBuilder will quickly transfer all files to the USB drive.
Our bootable USB flash drive with Windows 7 is ready.
It’s a sin here not to boot from a USB drive to make sure that the system works not only in a virtual environment, but also in a real, most ordinary environment. But I want to warn you right away: this is a greatly stripped-down variation of Windows 7, in which a minimum of components are left. No Aero or beautiful effects for you: all this is disabled. And from the software, by default you get some standard Windows utilities (like regedit), as well as several bonus programs like PENetwork for setting up a network (including a wireless adapter) and Opera USB for browsing. All this is not bad, but clearly not enough - the system needs to be equipped.
Network configuration
Installing Windows 10 on a USB flash drive in WinToUSB Free
Of all the methods I tried to make a flash drive from which you can run Windows 10 without installation, the fastest was the method using the free version of the WinToUSB program. The resulting drive was functional and tested on two different computers (though only in Legacy mode, but judging by the folder structure it should also work with UEFI boot).
After launching the program, in the main window (on the left) you can select from which source the drive will be created: it can be an ISO, WIM or ESD image, a CD with the system, or an already installed system on the hard drive.
In my case, I used an ISO image downloaded from the Microsoft website. To select an image, click the “Browse” button and indicate its location. In the next window, WinToUSB will show what is contained on the image (check if everything is okay with it). Click “Next”.
The next step is to select a drive. If it is a flash drive, it will be automatically formatted (an external hard drive will not).
The last step is to specify the system partition and the partition with the bootloader on the USB drive. For a flash drive, this will be the same partition (and on an external hard drive you can prepare separate ones). In addition, here you select the installation type: to a vhd or vhdx virtual hard disk (which is placed on a drive) or Legacy (not available for a flash drive). I used VHDX. Click Next. If you see an "Out of Space" error message, increase the virtual hard disk size in the "Virtual hard disk drive" field.
The last step is to wait until Windows 10 is installed on the USB flash drive (this can take quite a long time). When finished, you can boot from it by setting it to boot from a flash drive or using the Boot Menu of your computer or laptop.
At the first start, the system is configured, the same parameters are selected as during a clean installation of the system, and a local user is created. In the future, if you connect a USB flash drive to run Windows 10 on another computer, only the devices are initialized.
In general, the system worked tolerably as a result: the Internet via Wi-Fi worked, activation also worked (I used the Enterprise trial for 90 days), the speed via USB 2.0 left much to be desired (especially in the “My Computer” window when initializing connected drives).
Open Shell - installing the start menu from Windows 7 in Windows 10 and instead of Classic Shell
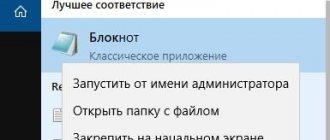
Important note: by default, when you start Windows 10 from a USB flash drive, local hard drives and SSDs are not visible; they must be connected using Disk Management. Press Win+R, enter diskmgmt.msc in disk management, right-click on the disconnected drives and connect them if there is a need to use them.
You can download the WinToUSB Free program from the official page: https://www.easyuefi.com/wintousb/
Scripts (plugins)
Additional programs that you can include as part of your system build are distributed in the form of scripts (or plugins, as they are also called). Connecting them is easy. It is enough to copy them to WinBuilderProjectsWin7PE_SEApps and then activate them through the WinBuider GUI interface. True, in order for them to appear in the script tree, the program has to be restarted, although it is possible that updating the list of plugins could be somehow easier. In some cases, the plugin is distributed as a single file - a script. There are two options here. The developer could include the necessary files directly in this file by encoding them in base64. Or, no files are included in the script, and you need to copy them to the folder with the script yourself (this should be described in detail in the plugin manual). The latter especially applies to commercial software (the same Total Commander), the files of which plugin developers simply do not have the right to distribute.
Now I’m answering the question you probably have: “Where can I get these plugins?” There are many sources - for example, here:
- Reboot.pro's App Scripts forum;
- Al Jo's script collection.
For example, you can download the Wireshark plugin and Winpcap necessary for its operation (available from here). We move it to the Apps/Network directory, activate it through the tree - and we get an assembly with a full-fledged sniffer. I have provided links to some useful plugins below:
- Avira AntiVir
- Malwarebytes' Anti-Malware
- Sala's Password Renew
Despite the fact that there are quite a lot of ready-made plugins, it is useful to be able to write a script yourself to add the necessary programs to the system. When you add a new script via “Tools .. Create script...”, WinBuilder offers a simple script template. As an example, I will give a simple script that installs Softperfect Netscan, and explain the logic using comments:
//Section with information about the application being added [main] Title=NetScan Description=Netscan from Softperfect Selected=True Level=5 Version=1 NoWarning=False Download_Level=0 //Important variables, including the path to the executable file [variables] %ProgramTitle% =Netscan %ProgramEXE%=netscan.exe %ProgramFolder%=netscan // Commands for installing the application [process] // Copy the necessary files from the netscan subdirectory in the folder where the script is located (you must first transfer here what is necessary for the program to work) CopyProgram,% ScriptDir%%ProgramFolder% //Add shortcuts Add_Shortcut,StartMenu,Netscan Add_Shortcut,Desktop,Netscan //Specify the DLLs that are necessary for the program to work. WinBuilder will include them in the assembly Require_FileQ,mgmtapi.dll Require_FileQ,msvcrt.dll Require_FileQ,KERNEL32.dll Require_FileQ,snmpapi.dll Require_FileQ,USER32.dll Require_FileQ,WS2_32.dll Require_FileQ,wsnmp32.dll
A huge number of scripts are available on the reboot.pro forum; they can be viewed as examples and used as a basis. In any case, there is nothing difficult in creating your own scripts. If there is a need to simply add some files to the assembly, then it is not necessary to create a plugin for this. In this situation, the “Components .. Additional Files” section will help, which is necessary just for such a situation. If you click on the “Directory Example” button, you will see the structure of the folders used in the assembly so that you can understand where exactly the files will be added.
What did we get?
How well does such a system work? Very good! When loading on my laptop, the necessary drivers are immediately attached, including for the wireless module. Thus, I immediately have access to the Internet. All programs, if integrated correctly (that is, by fulfilling all their dependencies), launch and work with a bang. And this includes software for system recovery, working with partition tables, backup, editing the registry, as well as hack tools. After all, what could be more convenient as an auxiliary system that you can always take with you and, if necessary, boot from it?
Some tips
- As I already mentioned, it is better to take a Windows 7 image with Service Pack (SP1) already included as the initial distribution. Using a distribution that does not yet have a service pack, I had problems finding some libraries. Although, I must say, this is not critical, because WinBuilder gives specific ways to solve the problem.
- If there are any problems, the scripts usually produce errors. If something went wrong, but what exactly the problem is is not clear, logs will help. The option is activated in the "Finalize .. Save log file" script and is enabled by default. WinBuilder writes logs in great detail: you can fully study the process of creating an assembly, trace the logic of script execution and, in case of any problem, try to fix errors.
- An optional, but very useful project is www.paraglidernc.com/WinBuilder (I recommend that you immediately select it for download during the first launch of WinBuilder). It includes detailed instructions for creating scenarios. After installation, look for it in the ProjectsParagliderWinBuilder.chm folder.
- The easiest way to include an application in the assembly is to find its Portable version (for example, on the website portableapps.com), which already includes all the necessary files for working on a “foreign” system.
Windows To Go Flash Drive in Rufus
Another simple and free program that allows you to easily make a bootable USB flash drive to run Windows 10 from (you can also make an installation drive in the program) is Rufus, which I have written about more than once.
Making such a USB drive in Rufus is even easier:
- Select a drive.
- Select the partition scheme and interface type (MBR or GPT, UEFI or BIOS).
- The file system of the flash drive (NTFS in this case).
- Set o, select ISO image from Windows
- O instead of "Standard Windows Installation".
- Click “Start” and wait. In my test, a message appeared that the drive was unsupported, but in the end everything worked fine.
How to Install Windows 10 on Mac
As a result, we get the same drive as in the previous case, except that Windows 10 is installed simply on a flash drive, and not in a virtual disk file on it.
It works in the same way: in my test, the launch on two laptops was successful, although I had to wait during the device installation and configuration stages. Read more about Creating a bootable USB flash drive in Rufus.