Windows
Author Mila Kozak
Date
Aug 23, 2016
2,335
Share
The Windows XP computer system is already 15 years old, but it has not lost its relevance to this day. Most often it is used by owners of netbooks and weak computers. This simple OS is completely undemanding in terms of hardware power and allows you to use basic computer functions without any hitches. Since the system is old, and most netbooks and laptops do not come with a CD/DVD drive, the question arises: is it possible to install Windows XP from a flash drive? Of course you can, but read on to find out exactly how to do it.
- LiveJournal
- Blogger
Windows xp Professional
- Preparing to install windows xp from a flash drive
- Creating a bootable USB drive for installing windows xp on a computer, laptop, netbook
- Step-by-step installation of Windows XP on a computer from a flash drive
- Error installing windows xp
- Blue screen when installing windows xp
Initial data
To install Windows XP on a netbook, you must first prepare. You will need:
- Flash drive with a capacity of 1 to 2 GB.
- CD or image with the Windows XP operating system.
- Desktop or laptop.
- Distribution for creating a bootable flash drive.
If you are using an OS image, you must unpack it and save all the files in a separate folder.
Creating a boot volume using UltraISO
Read also: Bootable USB flash drive Linux: 5 instructions for creating
We will use a flash drive with a memory capacity of over 1 GB.
Before downloading an image with an operating system, you must first find out its bit depth.
This is done very simply: if you have less than 4 GB of RAM, you need to choose the 32-bit version; computers with more RAM than this require twice the bit capacity.
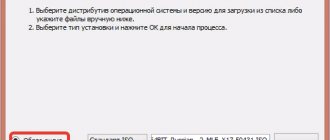
Important: To write to a flash drive, we need an image in .ISO format and an installer program; the easiest way is to use the UltraISO utility. We first clear the drive of all data and format it in the NTFS file system.
Then we launch the software in question, its initial menu looks like this.
UltraISO interface
Next we perform the following sequence:
1Go to the “Boot” and select the “Burn hard disk image” ;
2Now select the recording method. In our case it is USB-HDD;
3Press the Record button.
Recording process setup menu
Now you only have to wait 5-7 minutes depending on the performance of your computer.
At the end of this stage, if the outcome is favorable, you will receive a report on the screen about the successful completion of the operation.
back to menu ↑
Format the flash drive
For different tasks and devices, flash drives with a specific file system are used. The same drive will be readable on a computer, but, for example, a DVD player may no longer see it. In a word, for our tasks we need a certain file layout of a USB flash drive. And you can make the necessary drive layout in different ways. Let's consider one of them.
Windows tools
Everything is simple here. To do this, you should perform a certain sequence of actions:
- The flash drive is mounted into the USB input.
- After it has been identified by the system, go to “ My Computer ”.
- Right-click the desired device, that is, it will be a flash drive, and from the drop-down menu click on the line “ Format… ”.
- In the “ Format ” window there is an item “ File system ”. You must select NTFS. All. All you have to do is click on the Start button.
The program will work and reformat the USB device to the desired layout.
Now, to install Windows XP on a netbook from a flash drive, you need to make it bootable. There are several ways to do this.
Create a bootable USB flash drive with WinToFlash
Novicorp WinToFlash - makes it possible to create a bootable USB drive with OS versions such as XP, 2003, Vista, 2008, 7. With its help, you can install Windows from a flash drive to a netbook, laptop or desktop computer. The program's capabilities have been expanded with:
- WinPE transfer;
- destruction of drive data full or quick;
- creating a boot disk from DOS;
- creating a Live CD/DVD flash drive.
Besides:
- it is possible to select a Russian-language interface;
- two modes: wizard mode, which is used to create Windows XP flash drives, and advanced;
- support of the program on the Russian-language website;
- The ortable version allows you to work on different machines;
- The program weight is only 10 MB;
- completely free.
So, let's start creating a bootable flash drive:
- We launch the program and respond affirmatively to all pop-up messages until the working window appears. In wizard mode it will look like below.
Or in advanced mode it will look like this, shown in the figure.
- We connect a flash drive with a capacity of 1 GB or more.
- The selected XP OS image is unpacked by WinRaR into a separate folder.
- Now, if you click on the large button with a green checkmark in the main window in operating mode, we will go to the preparation wizard. Click Next ›.
- The next window indicates the path to the folder with the unpacked OS image and the path to the installation drive.
- After clicking the Next › button, we accept the Microsoft license and agree to the formatting. Although the official website of the program states that WinToFlash will not display a message about the format if the flash drive is empty. In our case, we confirm.
- The technician himself will prepare the drive for the next stage.
- Now comes the final stage of creating a bootable flash drive with Windows XP SP3.
WinToFlash wizard is finished, you can exit the program. The bootable Flash drive is ready and the next step is installing Windows XP on the netbook.
Preparing a flash drive or memory card with the Windows XP distribution
Unlike installing Windows 7 and Windows Vista from a USB flash drive, preparing a flash drive or memory card for installing Windows XP is somewhat more complicated. This is due to the difference in the Windows XP and the bootloader of Windows 7 and Windows Vista .
To prepare the flash drive we will need:
- A set of necessary utilities for modifying the Windows XP for installation from a USB flash drive or memory card. You can download it using these links: / ;
- Disc or .iso image with Windows XP ;
- A flash drive or memory card with a capacity of more than 1 gigabyte.
Important note: to avoid many problems with the installation and operation of Windows XP , I strongly recommend using clean and untouched builds of Windows XP . You can easily find these on the Internet by searching Windows XP SP3 MSDN . I will not give direct links to the images as this slightly violates the law. With assemblies like Loner , Zver , Black , Game and others, problems with installation, drivers and operation are almost guaranteed. With this recommendation I just want to save you time and nerves.
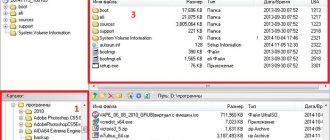
Copy the downloaded utility package to drive D:\ , run it and click Extract to extract all files to the specified folder. As a result, the D:\Flash\ with the subfolders 7-zip , bootsect , hp_format_tool , nlite , sata , usb_prep8 and windows98 .
Now copy the files from the Windows XP to the D:\WinXP\ .
If you have an .iso image with Windows XP , then you can extract it to the folder indicated above using the 7-Zip . It is located in the D:\Flash\7-zip\ . We launch this utility, open your image with Windows XP, select all the files and select Copy to... :
Specify the folder D:\WinXP\ and click OK :
As a result, the D:\WinXP\ should have something like this:
If you have a netbook or laptop with Intel chipsets, then you need to integrate SATA drivers or switch the hard drive operating mode to IDE Mode (the name may change depending on the BIOS). If this is not done, then when installing Windows XP the installer simply will not find the hard drives. You can read more about this in these articles: Installing Windows XP with SATA driver integration and NCQ Technology. Should I enable AHCI?
Let's now consider how to integrate SATA into the Windows XP . To do this, we need the nLite (it is located in the D:\Flash\nlite\ ). Microsoft .NET Framework 2 package is required for it to work .
Install and launch nLite :
Click Next , and then click on the Review :
Specify the folder D:\WinXP . If everything is done correctly, nLite will display information about the Windows XP :
Click Next :
Let's move on to the next window. Since we only need to integrate the drivers into the distribution, we only check the Drivers :
Click Next , and then click on the Add :
In the menu select Driver folder :
Specify the folder D:\Flash\sata . SATA drivers for Intel chipsets are located there:
If you have a 64-bit version of XP, then select the appropriate item. Click OK :
Now comes the fun part. Select the necessary drivers for your south bridge. For netbooks based on Atom processors, this is usually ICH7-M. If you don't know what to choose, then select all:
Click OK and Next :
Important note: you can similarly integrate other drivers onto a laptop or netbook.
To start the integration process, click Yes :
After some time, the integration will be completed:
That's all. Click Finish to exit nLite:
Now you can proceed directly to creating a flash drive or memory card with Windows XP.
We insert a flash drive or memory card into the laptop and copy all the information from it. The fact is that it will be formatted in the future and all information on it will be deleted .
Go to the D:\Flash\usb_prep8\ usb_prep8.cmd file as Administrator :
The following window should open:
Important note: Do not close this window under any circumstances until the process of creating a flash drive or memory card with Windows XP .
Then the PeToUSB :
For flash drives or memory cards with a capacity of 4 GB or less
In the top window, select your flash drive. To start formatting, click Start . A warning window will open:
Click Yes . Another warning will appear, saying that the flash drive will be formatted and all data from it will be deleted:
Since all data from the flash drive has been copied, click Yes . The formatting process should begin:
When formatting is complete, the utility will display the following message:
Close the PeToUSB :
For flash drives or memory cards larger than 4 GB
First, close the PeToUSB :
Then install and run the utility HP USB Disk Storage Format Tool . It is located in the folder D:\Flash\hp_format_tool\
In the upper window, select your flash drive, and in the lower window, specify the path D:\Flash\windows98\ :
Click Start to start formatting. Confirm formatting:
That's all. Flash drive formatted:
We continue preparing the flash drive or memory card
Now launch Command Prompt :
Enter the command D:\Flash\bootsect\BootSect.exe /nt52 g: . Instead of the letter g, you should put the letter of your flash drive or memory card in the system :
Press Enter . If everything is done correctly, the following message will be displayed:
You can close this window.
Let's go to the window that we launched at the beginning of the flash drive preparation process. Enter the number there 1:
Press Enter and specify the path to the Windows XP . In our case this is D:\WinXP :
Click OK and go back to the window. Enter the number 3 :
Press Enter and indicate the drive letter where your flash drive or memory card is located. Press Enter and enter the number 4 :
Press Enter to start the process. Next, enter Y and press Enter :
Press any key:
To start the copying process, click Yes :
We wait a little:
Click Yes :
Disable the virtual disk:
Press Yes , and then press any key several times:
That's all. The USB flash drive with Windows XP is ready. You can move on to the next stage. If something doesn’t work out for you, you can try to create a flash drive using the WinToFlash according to this guide: Installing Windows XP from a flash drive using WinToFlash.
UltraISO program
UltraISO program is popular .
From what this program can do, we can note:
- The ability to correct a CD/DVD image, for example, extract an entire file or folder from it.
- Add or remove a folder or file.
- Create an ISO image of any document.
- Optimizes files to save disk space.
- Supports a large number of image types.
- Creates your own virtual drive and much more.
In addition, the program supports the Russian language and is compatible with such popular emulators as Daemon-Tools and Alcohol 120 .
So, for work we need a Windows XP image in ISO format and a flash drive.
Check the contents of the flash drive or all data from it will be erased.
Let's start creating a bootable flash drive, to do this we will perform the following sequence of actions:
- Launch UltraISO .
- From the top panel, click on “File" From the drop-down list select " Open…».
And we show the path to the folder where the image file of the desired operating system is saved.
- Now you need the “ Bootboot ” item from the top menu. Click on the line “ Burn hard disk image... ”.
- the Write Disk Image program opens . In the “ Disk Drive ” line, select the drive that will be used in the future. There is no need to select the image file, since it is already marked in the second “ Image File ” window. By default, the program creates a flash drive from the “ USB-HDD+ ” menu. It’s better not to change anything, but leave it as is. This makes it more likely that the boot drive will be recognized by the BIOS of most computers and netbooks as well. In addition, there are very specific BIOSes. Therefore, USB-HDD mode is most likely not suitable for them. There is also no need to format it to the desired file system. Ultraiso will do everything automatically. All that remains is to click the Record button.
- If you forgot, the UltraISO will warn you that the flash drive will be formatted. Therefore, you need to make sure that important information from it is saved in advance. And in this case, you should agree with the hint.
The process of creating a boot disk for any computer, laptop and netbook will begin.
Setting the first boot in BIOS from USB
Installing Windows XP from a flash drive is the same as from an installation CD/DVD, but you must first set the OS boot priority in the BIOS. To do this, you definitely need a signal from the USB drive. If it is not connected in advance, then it will not be visible in the OS boot options.
Now let's set the boot priority:
- Different netbook models have different login processes. But, as soon as the device turns on, in the first seconds a hint is visible on the display about which keys are responsible for entering the BIOS.
- Before installing Windows XP from a flash drive, you need to select “ Advanced BIOS Features ” in the BIOS.
- Find the line in the menu where there is an inscription with “ Boot... ” and press the ENTER key.
- All operating systems start booting from the installation CD. If the system did not detect it, the second in the line of the executable task will be loading from the HDD disk. It is necessary, using the arrow keys and the ENTER key, to place the USB device first in the line.
- Now all that remains is to exit the BIOS by pressing the Esc key and save the settings.
After the reboot, the netbook will begin loading the OS from the created Windows XP flash drive.
Installation process
Having dealt with the previous point, you can proceed directly to the download itself.
To do this, insert the drive into one of the free USB ports and start the computer.
After POST testing, the following message will appear on the screen:
Boot confirmation menu from a flash drive
When you see this message, press any button on the keyboard and wait for further requests from the installer.
If the image is working and the settings are made correctly, the following image will be displayed on the display:
Initial installation stage
After a couple of minutes, you will need to select the system directory and boot type: restoring the previous version or introducing a new OS and deleting the previous instance.
Here's how the internal storage information appears during Windows XP installation:
Hard Drive Setup Menu
After splitting the partition into parts, usually two of them, the hard drive is formatted. The storage is then cleared.
After this, you can select it as a system device.
Having selected the main directory, you begin the main download stage, which takes place in several steps:
- Collection of information
- Dynamic update
- Preparing for installation
- Loading
- Completion
Let's look at the installer window:
Unpacking Windows XP components
back to menu ↑
Errors when installing Windows XP from a flash drive
But the first launch of the installation flash drive is not always successful, and the OS is not installed. We can list the main reasons for resetting the Windows XP installation:
- Hardware conflict when laptop devices are incompatible.
- The storage medium itself is damaged.
- There are no suitable drivers for this hardware.
- Problems with the activator.
- Incorrectly selected program for creating a bootable drive.
- Often the Windows XP installation program from a flash drive fails because it is formatted incorrectly.
- Hardware conflict when trying to use a USB 3.0 input, while the installer does not support such port extensions simply because there are no such drivers. And it’s not a fact that if the USB port supports both modes, then the installer will be able to understand it.
Now let's look at whether it is possible to install Windows XP without additional BIOS settings, what errors may occur during installation, as well as ways to solve them.
After creating a bootable drive, it is not always possible to install the OS from it. For example, a situation is possible when the boot device authorization was successful and the drivers are being loaded, but text appears on a blue screen.
A little BIOS reconfiguration can help here.
In it you need to find the item “ Sata Mode ” (“ Sata Operation ”) and change the priority. Instead of “ ATA ” we set the priority to “ AHCI ”. Save the changes and reboot.
If it does not install again, then you need to return to the BIOS again and in the “ IDE configuration ” section switch to IDE mode. This problem can arise when installing a system from outdated flash drives for which the system cannot select the appropriate drivers. If this item is not visible, then most likely a different BIOS version is installed. In this case, find the “ Advanced ” tab. Go to the line “ OnChip SATA Type ”, where we change the priority from “ IDE AHCI ” to “ Native IDE ”.
There is another option. On the “ Advanced ” tab we find the line “ IDE Configuration ” and in the “ SATA Operation Mode ” section we change from “ Enhanced ” to “ Compatible ”.
It may also happen that already at the installation stage from the hard drive, the computer suddenly reboots. Resetting the BIOS to “ IDE mode ” will help. Reboot.
Another situation. During installation, the netbook may report: I can’t install, I need the asms file. To solve this problem and install Windows, select the second line in the first message when loading from the window.
And in the selection window - “
First part... ”. After the files are copied to the hard drive and the netbook reboots, everything is the same, but select “ Second part... ”.
It may be that a warning appears when booting from a flash drive. In order for the system to install, creating a bootable Flash disk with another program will help solve the problem. For example, you can download and install WinSetupFromUsb .
If the system does not install, the reason may be a hardware conflict. The laptop system itself will display the error code on the screen.
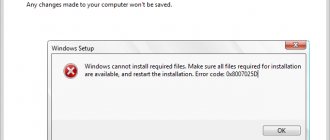
It may also happen that the installation program displays the message: error code 0x80070017. Reason for failure:
- USB input is damaged;
- unreadable flash drive (error code 0x80070570);
- incorrectly compiled distribution.