Purpose and features of connection
Before you begin the connection procedure, you need to determine what result you want to get. Most users want to use an external hard drive to store data on a closed home network. What does it give? Thanks to the router, all the data that is on the disk will be available on every device connected to the router.
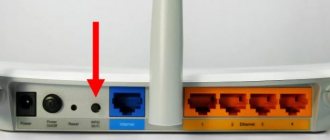
In most modern routers, you can find a standard USB 2.0 or 3.0 port on the back of the connection panel. This digital indicator determines the speed of data transfer between connected gadgets. In some models, manufacturers immediately create two ports.
Devices that can be connected to the router:
- External hard drive;
- Any media player with data and USB cable;
- Modem. Thanks to the use of 3G, you can connect the router to the Internet without a special cable;
- A printer. By connecting your printer to your router, you can create a remote server and send documents from different devices wirelessly. This type of organization technology can often be found in offices;
- Flash drive;
- FTP server. For storing large data on the network. The FTP protocol allows you to transfer large files without losing quality. When working with standard flash servers, errors may occur when trying to play the file.
Figure 1 - Router Port Panel
The option of connecting a hard drive allows you not only to create a publicly accessible file storage. You can also set up a DLNA media server. This technology allows you to play not only the files of the drive itself, but also all other devices in the house. For example, the TV will be able to open photos stored on the computer, and the phone will start a track from the smartphone of another network user. You can set up iTunes Server in a similar way.
If you need to access files from the Internet, you can use the AiDisk feature to fix this process.
Let's move on to specific instructions for setting up interaction between your router and external hard drive.
Setting up network access to a flash drive via a router
What are the differences between 3G and 4G networks: features, advantages and disadvantages
When the router's factory settings are used, no configuration is performed. The main problem occurs with older models that use a control panel. In this case, a transfer to a network environment occurs.
The network is not displayed, so setup is being done. In Windows 7, 8, 10, the procedure is similar. Through the explorer, a network is selected, it is necessary to find network discovery. Next, open file sharing and click OK. It is important to find your home router and agree to the terms of use of the drive.
Create a connection to your Asus router
Asus has created a very simple setup system for a home data server. Its essence lies in the initial connection of gadgets. The user must then configure them in the menu on the PC or smartphone. You can access the router software settings through any browser on the computer connected to the router.
First, unplug your router. Now connect your external drive to it using a USB to micro USB adapter. The following construction should be obtained:
Figure 2 - example of connecting the drive to the router
If your router has two available ports, select the one with the higher transfer speed (version 3.0). A simple connection between two devices is not enough, since the transfer of information on the home network is still unavailable. Accordingly, other devices cannot yet recognize the files.
To configure the display of files from the network on your computer, go to the “This PC” window. On the left side of the “Item Display” panel, find the “Network” tab and go to this window. This shows all the available network storage and transmission protocols that you can use.
Right-click on an empty area of the window and click Refresh from the pop-up menu. This way, the icon of the drive connected to the router will be displayed in the window.
Connecting to Huawei
Most Huawei routers are equipped with a GPON optical terminal, which has a built-in USB connector. Connect your hard drive to the router through this port and go to the router's web interface using a browser on your PC. Follow the instructions:
- To access the program interface, use the address 192.168.100.1. Login and password are root and admin respectively;
- After successfully logging into the interface, pay attention to the tabs located at the top of the window. Click "Network Application";
- Now a list of available windows appears on the left side of the page. We need to open the “USB Application”;
- In the tab content field, check the box shown in the figure. It activates the server. On the same page, fill out the “username” and “password” fields. Next to the “USB device” line, open the drop-down list and select the name of the hard drive to which other network users will connect;
- Confirm the changes by clicking the "Apply" button.
Figure 11 — Setting up a Huawei router
Now the hard drive data is available to all devices connected to the Huawei router.
Connecting a Sagemcom router from Rostelecom
Sagemcom routers from Rostelecom are connected to an external hard drive as follows:
- Connect the drive and router;
- Go to the router interface through a browser. The address is 192.168.1.1, the username is admin, and the password is admin;
- In the "Multimedia" section, open the storage server tab. After this, a table is displayed on the right side of the window showing the data of the connected disk. Remember the meaning of the Volume Name column;
- Go to the “Storage Server” window and specify the name of the disk and its manufacturer;
- Activate the “Enable server” field;
- Save your settings.
After registering the drive, we recommend logging out of the web interface and turning it back on to check if the account you created is saved. In routers from Sagemcom, users often encounter the problem of saving settings. If necessary, create the drive profile again.
Figure 12 - Configuration of the Sagemcom router from Rostelecom
MikroTik Router Guide
MikroTik routers have one feature: they cannot be connected to a drive that is already full of data. The device must be formatted and then connected to the router.
Setting up file sharing is done using the Samba program. You don't need to use the web interface. Typically, the utility can be installed on a PC via a disk that is included in the router configuration. You can also download the program from the manufacturer's official website.
After connecting the drive to the router, go to Samba and format the device again. Open the main menu of the program and go to the Systems-Stores window. Select your hard drive from the list and click Format Disk.
Figure 13 — Preparing an external hard drive for connection to MikroTik
Once the Status column shows Ready, you can begin further configuration:
- In the Samba application, open the "IP-SMB" tab and check the Enabled field;
- In the same window, specify any network workgroup name and router name;
- Oh, you allow access to files on unauthorized devices. There is no need to validate this line;
- On the interface graphic, set the value to "All". Thus, you can view the contents of your hard drive from any device, regardless of its OS and interface type.
Alternatively, click the Apply and Shares button to apply the settings and activate the online data sharing feature.
Figure 14 — Configuring the MikroTik router
Featured videos:
Setting up an FTP server on a Tp-Link router. Configuring a router on the inrouter channel
How to properly connect a TP-Link router and configure it Nowadays, unlimited high-speed Internet is no longer a novelty.
And even more so if we are talking about a wireless connection, which is applicable even for a personal computer, not to mention laptops, tablets or smartphones. Now most mobile devices have... Many users ask us how to connect a hard drive to a router.
This procedure will not take you much time, however, connection features for each router model may differ.
Let's look at detailed guides for connecting an HDD to your home router.
Play media files on your smartphone and tablet
When you managed to connect the network router, it’s time to think about displaying media files through smartphones and tablets. There are many players to choose from; they must support the UPnP Standard. As an alternative, you can consider DLNA technology, which is used on Android devices.
Popular apps:
- PlugPlayer.
- UPnPlay.
For the iOS platform, PlugPlayer is an excellent player. Since 2010, version 3.5.3 has been available. The program is considered suitable for displaying music and video. Full control is provided, you are allowed to flip through tracks and pause them. The volume level is shown at the bottom of the screen, and the current time at the top.
Important ! The display shows playlists and the current artist. You can go to the list or select settings.
For Android, the UPnPlay player remains in demand, which has a simple interface. With its help, you can even watch movies or flip through photos. Devices with Android 2.2 or newer models are accepted. Since January 2020, version 0.97 is available.
Purpose and features of connection
Before you begin the connection procedure, you should decide what result you want to get.
Most users want to use an external hard drive to store data on a closed home network.
What does this give? Thanks to the router, all the data that is on the drive will be available in every device connected to the router.
In most modern routers, on the rear connection panel you can find a standard USB port of 2.0 or 3.0 technologies.
The speed of data transfer between connected gadgets depends on this digital indicator. In some models, manufacturers build in two ports at once.
Devices that can be connected to the router:
- External hard drive;
- Any media player with data and USB cable;
- Modem. Thanks to the use of 3G, you can connect the router to the Internet without a special cable;
- A printer. By connecting a printer to your router, you can create a remote server and print documents from different devices over a wireless connection. This type of organization technology can often be found in offices;
- Flash drive;
- FTP server. For storing large data on the network. The FTP protocol allows you to transfer large files without losing quality. When working with standard flash drive servers, errors may occur when trying to play a file.
Rice. 1 - router ports panel
The option of connecting a hard drive allows you not only to create a publicly accessible file storage. You can also set up a DLNA media server.
This technology allows you to play not only files from the drive itself, but also from all other devices in the house.
For example, the TV will be able to open photos saved on the computer, and the phone will launch a track from the smartphone of another network user.
You can configure iTunes Server in a similar way.
If you need to access files from the Internet, you can use the AiDisk function to set up this process.
Let's move on to specific instructions for setting up the interaction between your router and external hard drive.
Create a connection with the Asus router
Asus has created a very simple setup system for a home data server. Its essence lies in the initial connection of gadgets.
Then the user must configure them in the menu on a PC or from a smartphone.
You can access the router's software options through any browser on a computer connected to the router.
First, disconnect your router from the network. Now connect an external drive to it using a USB-micro USB adapter. You should get the following design:
Rice. 2 – example of connecting the drive to the router
If your router has two available ports, choose the one with the higher transfer speed (version 3.0).
Simply connecting two devices is not enough, since transmission of information on the home network is still not possible. Accordingly, other devices cannot yet recognize any files.
To configure the display of files from the network on your computer, go to the “This PC” window. On the left side of the element display panel, find the “Network” tab and go to this window.
This displays all available network storage and transfer protocols that you can use.
Right-click on an empty area of the window and click on “Refresh” in the pop-up menu.
Thus, the window will display the icon of the drive connected to the router.
Rice. 3 – “Network” window on the computer
Now just click on the icon that appears to go to the folder with the files of the external drive.
If sharing is disabled on your computer, you will need to enter your login and password for the router settings to view the content. As a rule, the values of these fields are the same.
This is the word admin.
Once you have access to the contents of the folder, you can create new files in it, edit or view existing content.
To control the router from the TV, just go to the Internet connection settings. The USB tab will appear in the window.
By clicking on it, you can find out about the amount of free space on the disk or view its contents.
Rice. 4 – view external drive data on TV
To access files from your phone or tablet, you need to download the ES Explorer application.
It will accurately display the desired folder and allow you to quickly open files or create new documents on the HDD:
- Connect your smartphone to the router and launch the Explorer program;
- Now, at the top of the screen, select the LAN window as shown in the image below;
- Wait for the content to load. Sometimes this may take several minutes. After the external hard drive folder appears, click on its icon;
- If necessary, enter data to gain access (login – admin, password – admin);
- After confirming the entry, all network files will be displayed on the phone.
Rice. 5 – connecting to external HDD files from a smartphone
For Apple mobile devices, the connection procedure is the same, only you need to use a standard file explorer.
How to Connect an External Hard Drive to a Router
Content
How to connect a hard drive to a router? detailed instructions
Users probably ask us how to connect a hard drive to a router.
This procedure will not take much time, but the connection functions for each router model differ.
Let's look at detailed guides on connecting a hard drive to a home router.
Purpose and features of connection
Before you begin the connection procedure, you need to determine what result you want to get. Most users want to use an external hard drive to store data on a closed home network. What does it give? Thanks to the router, all the data that is on the disk will be available on every device connected to the router.
In most modern routers, you can find a standard USB 2.0 or 3.0 port on the back of the connection panel. This digital indicator determines the speed of data transfer between connected gadgets. In some models, manufacturers immediately create two ports.
Devices that can be connected to the router:
- External hard drive;
- Any media player with data and USB cable;
- Modem. Thanks to the use of 3G, you can connect the router to the Internet without a special cable;
- A printer. By connecting your printer to your router, you can create a remote server and send documents from different devices wirelessly. This type of organization technology can often be found in offices;
- Flash drive;
- FTP server. For storing large data on the network. The FTP protocol allows you to transfer large files without losing quality. When working with standard flash servers, errors may occur when trying to play the file.
Figure 1. Router port panel
The option of connecting a hard drive allows you not only to create a publicly accessible file storage. You can also set up a DLNA media server. This technology allows you to play not only the files of the drive itself, but also all other devices in the house. For example, the TV will be able to open photos stored on the computer, and the phone will start a track from the smartphone of another network user. You can set up iTunes Server in a similar way.
If you need to access files from the Internet, you can use the AiDisk feature to fix this process.
Let's move on to specific instructions for setting up interaction between your router and external hard drive.
Create a connection to your Asus router
Asus has created a very simple setup system for a home data server. Its essence lies in the initial connection of gadgets. The user must then configure them in the menu on the PC or smartphone. You can access the router software settings through any browser on the computer connected to the router.
First, unplug your router. Now connect your external drive to it using a USB to micro USB adapter. The following construction should be obtained:
READ How to Connect a Router to the Internet
Figure 2. Example of connecting the drive to the router
If your router has two available ports, select the one with the higher transfer speed (version 3.0). A simple connection between two devices is not enough, since the transfer of information on the home network is still unavailable. Accordingly, other devices cannot yet recognize the files.
To configure the display of files from the network on your computer, go to the “This PC” window. On the left side of the “Item Display” panel, find the “Network” tab and go to this window. This shows all the available network storage and transmission protocols that you can use.
Right-click on an empty area of the window and click Refresh from the pop-up menu. This way, the icon of the drive connected to the router will be displayed in the window.
Figure 3. Network window on a computer
Now just click the icon to go to the external drives file folder. If you have disabled sharing on your computer, you will need to enter your username and password from the router settings to view the content. Typically, the values of these fields are the same. This word. admin.
Once you have access to the contents of a folder, you can create new files in it, edit or view existing content.
To control your router from your TV, simply enter your Internet connection settings. The USB tab will appear in the window. By clicking on it, you can find out about the amount of free space on the disk or see its contents.
Figure 4. Viewing external drive data on TV
To access files from your phone or tablet, you need to download the "ES Explorer" app. It will accurately display the desired folder and allow you to quickly open files or create new documents on your hard drive:
- Connect your smartphone to the router and launch Explorer;
- Now, at the top of the screen, select the LAN window as shown in the image below;
- Wait for the content to load. Sometimes this may take several minutes. When the external hard drive folder appears, click on its icon;
- If necessary, enter data to gain access (login. admin, password. admin);
- After confirming the input, all network files will be displayed on the phone.
How to create a home media network. Router Archer C59 HDD Seagate amplifier-receiver WIFI signal
Solving the problem of sharing files, videos and photos. Review and speed check enabled.
How to connect a drive to a router
how to connect external hard drives
USB
disk
into
the router
, in the form of
connecting
to the disk through
the router
,
connecting
a flash drive.
Figure 5. Connecting external hard drive files from a smartphone
For Apple mobile devices, the connection procedure is the same, only you need to use a standard file explorer.
Manual for TP-Link
File sharing across the TP-Link router network is created as follows:
- Connect the hard drive or flash drive to the router and reboot both devices to ensure there is no software error in their interaction;
- Open any browser on your computer and enter the network ID 192.168.1.1 or 192.168.0.1 into the address bar. Only one of the above addresses will work;
- Enter your login and password to access in the pop-up window (admin, admin). Press "Enter";
- Select the "Network Sharing" tab;
- Click "Sharing Service";
READ How to Set Up a Universal Remote for Lg TV
Figure 6. TP-Link router setup window
- On the right side of the window, click the “Edit” field, which is shown in the figure below. This will allow you to change your network sharing settings;
Figure 7. Editing network access
- In the window that opens, specify the new name of the hard drive connected to the network. Be sure to check the “Share this volume” box so that other devices can see the disk folder;
Figure 8. Creating a new repository
You can access storage information from your smartphone, tablet, computer, laptop or TV exactly as described in the Asus router instructions.
Now return to the “Network Sharing” tab and open the “User Accounts” sub-item. Think about your username and password. You will enter this data on all devices to access the disk folder. If the fields are left blank, anyone who connects to the network will be able to view and edit files, which is not secure.
Figure 9: Restricting access to view drive data
All that remains is to activate the sharing function. To do this, return to the Sharing window and click the Start button.
Figure 10. Launching the Network Sharing function
Connecting to Huawei
Most Huawei routers are equipped with a GPON optical terminal, which has a built-in USB connector. Connect your hard drive to the router through this port and go to the router's web interface using a browser on your PC. Follow the instructions:
- To access the program interface, use the address 192.168.100.1. Login and password. root and admin respectively;
- After successfully logging into the interface, pay attention to the tabs located at the top of the window. Click "Network Application";
- Now a list of available windows appears on the left side of the page. We need to open the “USB Application”;
- In the tab content field, check the box shown in the figure. It activates the server. On the same page, fill out the “username” and “password” fields. Next to the “USB device” line, open the drop-down list and select the name of the hard drive to which other network users will connect;
- Confirm the changes by clicking the "Apply" button.
Figure 11. Setting up a Huawei router
Now the hard drive data is available to all devices connected to the Huawei router.
Connecting a Sagemcom router from Rostelecom
Sagemcom routers from Rostelecom are connected to an external hard drive as follows:
- Connect the drive and router;
- Go to the router interface through a browser. Address 192.168.1.1, username. admin, and the password. admin;
- In the "Multimedia" section, open the storage server tab. After this, a table is displayed on the right side of the window showing the data of the connected disk. Remember the meaning of the Volume Name column;
- Go to the “Storage Server” window and specify the name of the disk and its manufacturer;
- Activate the “Enable server” field;
- Save your settings.
READ How to Set up Zyxel Keenetic Omni 2 Router
After registering the drive, we recommend logging out of the web interface and turning it back on to check if the account you created is saved. In routers from Sagemcom, users often encounter the problem of saving settings. If necessary, create the drive profile again.
Figure 12. Configuration of the Sagemcom router from Rostelecom
MikroTik Router Guide
MikroTik routers have one feature: they cannot be connected to a drive that is already full of data. The device must be formatted and then connected to the router.
Setting up file sharing is done using the Samba program. You don't need to use the web interface. Typically, the utility can be installed on a PC via a disk that is included in the router configuration. You can also download the program from the manufacturer's official website.
After connecting the drive to the router, go to Samba and format the device again. Open the main menu of the program and go to the Systems-Stores window. Select your hard drive from the list and click Format Disk.
Figure 13. Preparing an external hard drive for connection to MikroTik
Once the Status column shows Ready, you can begin further configuration:
- In the Samba application, open the "IP-SMB" tab and check the Enabled field;
- In the same window, specify any network workgroup name and router name;
- Oh, you allow access to files on unauthorized devices. There is no need to validate this line;
- On the interface graphic, set the value to "All". Thus, you can view the contents of your hard drive from any device, regardless of its OS and interface type.
Alternatively, click the Apply and Shares button to apply the settings and activate the online data sharing feature.
Figure 14. Configuring the MikroTik router
Featured videos:
Setting up an FTP server on a Tp-Link router. Configuring a router on the inrouter channel
Are you wondering what to do with the usb port on your TL Tp-Link router? Connect it to your hard drive or regular USB drives. And then this form will help you connect and set up an FTP server on your TL-Link TL router. What is this for? To access one file from different computers.
How to make network storage (ftp) from an external hard drive and router?
What to do with the usb port on the TL Tp-Link router? Connect it to your hard drive or regular USB drives. This video will help you connect and configure an FTP server on your router.
Instructions for TP-Link
File sharing over the TP-Link router network is created as follows:
- Connect the hard drive or flash drive to the router and reboot both devices so that there is no software error in their interaction;
- Open any browser on your computer and enter the network ID 192.168.1.1 or 192.168.0.1 into the address bar. Only one of the specified addresses will do;
- Enter your login and access password in the pop-up window (admin, admin). Press Enter;
- Select the “Network Sharing” tab;
- Click on “Sharing Service”;
Rice. 6 – TP-Link router settings window
- On the right side of the window, click on the Edit field, which is shown in the figure below. This will allow you to make changes to your network sharing settings;
Rice. 7 – editing network access
- In the window that opens, set a new name for the hard drive that is connected to the network. Be sure to check the “share this volume” box so that other devices can see the drive folder;
Rice. 8 – creating a new storage
You can access storage information from a smartphone, tablet, computer, laptop or TV in the same way as was described in the instructions for the Asus router.
Now go to the “Network Sharing” tab again and open the “User Accounts” sub-item. Create a username and password.
You will enter this data on all devices to gain access to the drive folder.
If the fields are left blank, anyone connected to the network will be able to view and edit the files, which is not secure.
Rice. 9 – restriction of access to view drive data
All that remains is to activate the sharing function. To do this, return to the “Sharing Device” window and press the Start button.
Rice. 10 – launching the “Network Sharing” function
Setting up NAS on routers from other manufacturers
D-Link: connection to mobile phone
Our review D-Link DIR-868L router's confusing web interface makes configuring the network-attached storage (NAS) features difficult, even if there aren't many subtleties. The router allows you to create a network drive without any problems, but without the ability to add users and change permissions.
The main focus of the D-Link DIR-868L is to make user data accessible over the Internet. To do this, the router web interface provides the “Shareport Web Access” option. It does not require installation of additional utilities on your computer and allows you to immediately access information stored on a network storage device from a web browser.
It is very convenient to save photos, music and other media data on a network drive using special SharePort applications for smartphones and tablets based on iOS, Android and Windows Phone operating systems. And for remote access via the Internet, D-Link offers users the free mydlink service.
Netgear: Easy Access
The Netgear R7000 Nighthawk dual-band router we tested with Netgear Genie firmware immediately provides passwordless access to all external devices connected via the USB port. To do this, you just need to enter the IP address in Windows Explorer, for example 192.168.1.1. You will find additional options in the ReadyShar web interface menu.”
Through advanced settings in the router's web interface, you can also activate the media server and FTP connection functions. To access data on a network drive while away from home, you will need to use the services of a free DNS server (see step 7 of our guide). And for managing the router and accessing NAS files from a smartphone and tablet, Netgear has Genie and ReadyShare applications.
How to connect a SATA HDD/SSD drive to the USB port of a computer/laptop.
From time to time it happens that a laptop or computer does not turn on, but the information from its disk is needed for work. Well, either you have an old hard drive lying “idle” and which would be absolutely nice to turn into a portable external drive.
Connecting to Huawei
Most routers from Huawei are equipped with an optical GPON terminal, which has a built-in USB connector.
Connect the hard drive to the router through this port and access the router's web interface using a browser on your PC. Follow the instructions:
- To access the software interface, the address 192.168.100.1 is used. Login and password are root and admin respectively;
- After successfully logging into the interface, pay attention to the tabs that are located at the top of the window. Click on “Network Application”;
- A list of available windows will now appear on the left side of the page. We need to open "USB Application";
- In the tab contents field, check the box next to the field shown in the figure. It activates the server. On the same page, fill in the fields “username” (user name), “password” (password). Near the “USB Device” line, open the drop-down list and select the name of the hard drive to which other network users will connect;
- Confirm the changes by clicking the Apply button.
Rice. 11 – setting up a Huawei router
Now the hard drive data is available to all devices that are connected to the Huawei router.
Connecting a Sagemcom router from Rostelecom
Sagemcom routers from Rostelecom connect to an external hard drive as follows:
- Connect the drive and router;
- Log into the router interface through a browser. Address - 192.168.1.1, username - admin and password - admin;
- In the "Multimedia" section, open the information storage server tab. After this, a table will appear in the right part of the window displaying the data of the connected drive. Remember the meaning of the “Volume Name” column;
- Go to the “Information Storage Server” window and specify the name of the drive and its manufacturer;
- Activate the “Enable server” field;
- Save your settings.
In routers from Sagemcom, users often encounter the problem of saving settings. If necessary, create the drive profile again.
Rice. 12 – configuration of the Sagemcom router from Rostelecom
MikroTik Router Guide
Routers from MikroTik have one feature: you cannot connect a drive that is already filled with data to them.
The device must be formatted and only then connected to the router.
Setting up file sharing is done using the Samba program. There is no need to use the web interface.
As a rule, the utility can be installed on a PC via the disk that is included with the router. You can also download the program from the manufacturer's official website.
After connecting the drive to the router, you should go to Samba and format the device again. Open the main menu of the program and go to the Systems-Stores window.
Select your hard drive from the list and click on "Format Drive".
Rice. 13 – preparing an external hard drive for connection to MikroTik
After the “Ready” value appears in the Status column, you can begin further settings:
- In the Samba application, open the “IP – SMB” tab and check the Enabled box;
- In the same window, set any name for the network workgroup and the name of the router;
- By checking the “Allow Guest” checkbox, you allow unauthorized devices to access your files. It is not necessary to confirm this line;
- In the interface column, set the value to All. Thus, you can view the contents of your hard drive from any device, regardless of its OS and interface type.
Click the Apply and Shares buttons one by one to apply the settings and activate the online data sharing feature.
Rice. 14 – setting up a MikroTik router
Thematic videos:
Setting up an FTP server on a Tp-Link router. Setting up a router on the inrouter channel
Are you wondering what to do with the USB port on the Tp-Link TL router? Connect a hard drive or a regular USB flash drive to it. And then this video will help you connect and configure FTP servers on your TP-Link TL router. What is it for? In order to have access to the same files from different computers.
You can organize your home file storage in different ways. The simplest and most expensive is to keep files on your computer, but there is nothing difficult about distributing data via Wi-Fi directly from your hard drive. In some cases, such storage may even be portable. How to do it?
Disk selection
When the router is purchased and configured, all that remains is to find the hard drive. You can go several ways:
- Take the HDD from your old laptop and insert it into the docking station.
- Buy a new laptop or desktop hard drive also for the docking station.
- Buy a HDD with a USB connection, like WD MyPassport.
The first method is bad because it takes a used spare part with an unknown remaining service life and, most likely, a low operating speed. But this is the most budget option if you have an unnecessary laptop. The latter, therefore, can even be upgraded by purchasing an SSD as a replacement. In the second case, the speeds of the new disks will be higher, and the desktop version also means terabyte volumes. But when pairing a router with a docking station, various incompatibility problems can arise: the firmware does not always “recognize” the dock and the device inserted into it. Therefore, it is optimal to resort to the last option and connect a USB drive to the router. They have no compatibility nuances.
Winchesters with Wi-Fi
Some companies, such as Seagate, produce Wi-Fi-enabled portable hard drives. They cost a little more than regular ones and support simultaneous distribution of files to several devices at once. Let's say you can work on a computer with documents stored on this disk, watch videos on a tablet, and listen to music on a smartphone. Typically, such hard drives have a battery installed, thanks to which files can be distributed even on the go without being connected to an outlet. Data is accessed via FTP or through a special application. Disks connected to Wi-Fi are visible to devices on all modern operating systems, both desktop and mobile.
Playing media files on TV
Connecting an SSD to a WiFi router doesn't look that complicated. However, next you need to deal with the video files on the television device. In order for the drive to display music, movies, and photos, you should use the network playback function. There is a corresponding icon on the start screen.
Support for the UPnP standard is an advantage for the hard drive. If you're having problems, it's likely that one of your devices doesn't support the media file format. For example, some photos and videos may not be displayed.
External boxes
If you already have a hard drive and want to make it wireless, you can get by by purchasing a special case with a SATA adapter and a Wi-Fi module.
Such cases are available for 2.5″ and 3.5″ drives, and some of them are equipped with built-in batteries. Little-known manufacturers, as a rule, do not bother with developing special software for accessing files, but provide support for several generally accepted network technologies, for example, NAS and FTP. In China, such boxes are relatively cheap - from $30 and up, depending on the characteristics. The disk capacity can be any, and if you do not want to use Wi-Fi (for example, due to speed limits), the disk can be connected directly to the computer with a USB cable. As is the case with branded wireless hard drives, you can distribute files from drives installed in boxes with Wi-Fi modules to computers with Windows, macOS and Linux, as well as to mobile devices with Android, iOS and Windows 10 Mobile.
In the previous article, I described the basic settings of the Asus RT-N14U rotuter, namely: Firmware update, Internet and Wi-Fi settings
.
In this article I will describe how to use the Asus RT-N14U router as a file server, FTP server, download server and media server. As you understand, in order to use all these functions, you need to connect an external USB hard drive or USB flash drive to the Asus RT-N14U. The wireless router works with most USB hard drives/flash drives (up to 2TB in size) and supports reading and writing for FAT16, FAT32, EXT2, EXT3 and NTFS. But in practice, it is better not to use NTFS, since some functions become unavailable, for example, on a flash drive with NTFS, I was never able to set up a media server, after I formatted the flash drive in FAT32 format, everything worked successfully. So I recommend formatting the USB device in FAT32, as described in the article How to format a USB flash drive, external hard drive
. But you should remember that when formatting in FAT32, the maximum size of one file cannot be more than 4 GB.
We connect the USB drive/flash drive to the router and go to the web interface. Of all the tabs, we are interested in the USB application
“, select it.
Setting up File/Media Server on Asus RT-N14U.
In the USB Application
" select "
File / media server
".
In the first tab “ Network Neighborhood”
"You can configure viewing the contents of a flash drive/hard drive connected to the router on the local network.
As you can see, there are not many settings here, it is possible to specify a password requirement when connecting on a local network (I recommend selecting Allow sharing without an account, for more convenient use of a network resource), you can also specify the rights to folders, to do this, check the flash drive in the menu, go to the required directory and specify the rights to it (change (R/W), read (R) or none (N)). To access the file server, on your computer/laptop, click “Start” - “Run”,
enter
\\192.168.1.1
or connect the file server
with a network drive
. In order to view files from an Android tablet/phone or iPhone/Ipad, you need to install the ASUS Aicloud program.
FTP share
— this tab is dedicated to FTP settings, i.e. you can use the router as an FTP server. FTP (File Transfer Protocol) is a standard protocol designed for transferring files over TCP networks (for example, the Internet). In other words, your data on a USB flash drive/hard drive will be accessible from the Internet. To use FTP, you must have a white IP address (a unique IP address on the Internet, leased by your provider) or a dynamic IP (in this case, you must use the DDNS service or something similar).
You can disable/enable FTP, set the requirement to enter a password (I recommend not Allow sharing without an account, otherwise any user on the Internet will be able to see and change your files), you can specify the rights to the folder.
In the " Other Settings"
"you can change the number of simultaneous connections, device name (under this name the flash drive/hard drive connected to the router is available on the local network), work group (you must specify the work group you are using on the local network, WORKGROUP is used by default) and character set to FTP (I recommend leaving it as default).
Downloud Master settings on Asus RT-N14U.
This model supports automatic downloading of files via FTP/HTTP/Torrent using the Download Master utility. It is installed directly from the router’s web interface onto the selected partition of a connected external hard drive or flash drive, occupying approximately 50 MB on it. In order to install it, go to the router’s web interface and select “ USB application
“- Downloud Master
Install
.
The installation process takes a few minutes, after which you click “ Launch Downloud Master now”
«.
A new window will open in the browser with the router’s IP address and port 8081 (192.168.1.1:8081).
Go to General Settings
" and look at where (full path) the files will be saved; if desired, this path can be changed.
Next, go to the “ Task”
" and clicking on the "
Add
" button, specify the file or URL path to download.
In this example, I'm downloading from a torrent, so I click " Browse
" and specify the path to the torrent file.
This way you can download files from the Internet without using a computer/laptop.
Preparing the drive
Most "dummies" work on Windows, and therefore for them the choice of file system is obvious - NTFS. It is better to connect such a hard drive to Asus and Zyxel Keenetic routers, which use special NTFS drivers, which guarantees high speed. Other routers cannot boast of normal read and write speeds. Apple requires the HFS+ file system.
Since most routers run Linux, there will be no compatibility problems when formatting the hard drive to Ext4. However, connecting it to a Windows PC will be impossible without creating a new file system on the disk with data loss.
There's bad news for people planning to use their old drive. They will have to delete all partitions and format the drive, because routers, as a rule, do not recognize more than one partition.