To a foreign monastery with your flash drive
Obtaining the necessary rights on a work computer in the general case begins with loading another OS with a set of “hacker” utilities. We have already written about how to create a multiboot flash drive, and now let’s go over the important details.
It happens that booting from a trusted flash drive or Live CD is very difficult, even if you have physical access to the computer. Booting from arbitrary media was not a problem until the advent of EFI. Just go into the BIOS settings and change the boot order in the Boot section. On some computers you had to press Delete to do this, on others F2 - in any case, the required key was indicated on the screen or in the manual. Now UEFI uses a list of trusted boot loaders and two different startup sequence modes, and Windows 8, 8.1 and 10 can be loaded directly from EFI for acceleration without any prompts to enter the settings.
If you immediately see Windows loading and don’t have time to do anything, then wait until it starts and do one of the following:
- Click "restart" on the Windows Welcome screen while holding down the left Shift key.
- After downloading, go to “Settings → Update and Security → Recovery → Special boot options.” Click "Restart now → Troubleshooting → Advanced options → Boot options."
- Alternatively, you can enter shutdown.exe /R /O at the command line.
Regardless of the chosen method, a reboot will occur with a choice of parameters, and you will be able to find yourself in the BIOS/UEFI settings.
If rights are strictly limited and it is impossible to enter Windows 10 settings using the software method, you can try physically disconnecting the HDD/SSD. Then the next time you boot, an error message will appear and an option to enter UEFI will be displayed.
It may seem difficult to turn off power to the HDD on a work computer, especially if the case is sealed. Just press the plastic plug for the 5.25″ slot, which is usually located on the front panel. A little stronger. I said: “a little”! Do you feel it sagging? After pushing it about three millimeters, try to grab the edge and pull out the plug. A hand can easily fit into the resulting hole up to the middle of the forearm, even if you regularly go to the rocking chair. Through this embrasure, with proper dexterity, you can not only disconnect the cable, but also sort through almost the entire computer. The method is reminiscent of repairing an engine through an exhaust pipe, but it works in real life. The exception is non-standard cases - for example, all-aluminum ones.
Built-in Administrator account in Windows 10
Like previous versions of the OS, Windows 10 has a hidden built-in Administrator account, hidden and inactive by default. However, in some situations it may be useful, for example, if it is impossible to do anything with the computer and create a new user, to reset a password, and more. Sometimes, on the contrary, you need to disable this account.
This instruction details how to activate the hidden Windows 10 Administrator account in various situations. We will also look at how to disable the built-in administrator account.
I note that if you just need a user with administrator rights, then the correct ways to create such a user are described in the materials How to create a Windows 10 user, How to make a user an administrator in Windows 10.
Fast boot from flash drive
The option to quickly select a boot device, implemented in some firmware, can make life easier. If it is present and active, then when you turn on the computer, in addition to the “Press [key] to enter setup” message, another message will appear: “... or [key] for boot menu.” Typically these are the Enter, F1 - F12 keys, their combinations with the Alt, Ctrl, Ins and Esc keys. A full list of options would take more than one page, so it’s better to look for the answer in the manual for a specific motherboard.
One way or another, you end up in the BIOS settings. Most likely, to boot from a flash drive you will also have to change the Boot List Option. By default, it is usually in the new UEFI mode, and the flash drive uses GRUB running through the MBR. Therefore, we need either the old Legacy/CSM mode, or both, but with the priority of the classic one: Legacy/CSM + UEFI. Sometimes this item is not on the list. Then Legacy support will have to be activated in another tab first. This item is usually called Load Legacy Option Rom. The protected boot method Secure Boot is also disabled there. If you wish, you can not disable it, but add your own trusted bootloader keys, but a description of this method is beyond the scope of the article.
Another obstacle may be BIOS/UEFI password protection. Let me remind you that the password is usually written on the back of the battery on the motherboard. Just pull it out and turn it over. Why don't you see the password? Strange... Okay, put it back. While you were twisting the battery, it evaporated along with other CMOS data. If veterinary methods of computer operations are alien to you or opening the case is problematic (for example, it is in plain sight), then try entering the engineering password. It can be googled by BIOS manufacturer and is common to all motherboards of the same series.
Another way to soft reset the BIOS password is to cause an error in the checksum of data blocks. There is Christophe Grenier's CmosPwd utility for this. It writes to CMOS directly from Windows. The method will not work if the utility is blocked by an antivirus or if CMOS rewriting was previously disabled at a low level.
INFO
On some laptops, ultrabooks and nettops, a temporary loss of CMOS power does not reset the BIOS/UEFI login password, since it is stored in a separate non-volatile memory chip. In such cases, you can recover the password using the error code. This code is displayed after entering an incorrect password three times and is a hash of the saved password. Since hash functions are irreversible, it is impossible to calculate the password directly. However, there are programs that guess a password with the same convolution value. This can be either a given password or another combination of characters that gives the same hash when checked. You can go into the settings using any of them, since it is the hash that is checked. Please note that on some Dell laptops you must press Ctrl + Enter when entering your password. If all else fails, then all that remains is to use a soldering iron and a programmer, but this is already hardcore for service center engineers.
Instructions
If you have multiple accounts on your computer, log in using the account that was created with the “Administrator” status. After the system has fully started, open the Control Panel. This can be done through the Start menu.
In the window that appears, in the “View” column, the “Small or large icons” view should be selected. This will speed up the search for the desired element. If you choose from the categories, the item you require will be located in the “System and Security” section. This window will display subsections that are necessary to manage all system functions. Select Administration.
In this Control Panel item, find the line “Computer Management”. Launch it by double clicking. In the newly opened window, on the left side, expand the “Local users and groups” section. Two folders will appear in front of you. Select Users. It stores information about all accounts that were previously created on the computer.
Select the account that has the “Administrator” status. Open it also by double clicking. When a new tab appears, all properties of this account will be visible. To disable the “Administration” function, check the box next to “Disable account”. After this, click OK.
You can also disable administration using the command line. To do this, open the Start menu, then the Accessories section and the Command Prompt function. Write the following text in it: “Net user Administrator /Active:no”. Then press the Enter key. The system will inform you that this feature is disabled. As a result of these actions, the Administrator account will be disabled. Exactly the same manipulations can be performed to disable any other account.
Attention, TODAY only!
Everything interesting
The Windows operating system is initially designed for multiple users. In order to save the parameters of a specific user, it is necessary to create individual accounts for each of them. And if necessary, they can be...
Several users can work on a computer running the Windows operating system under different accounts. If an account is disabled, that member will not be able to log in. Instructions 1To enable your account...
One of the features of the Windows Vista operating system is that the Administrator account is disabled by default, i.e. The access of the owner who is a member of the administrator group remains limited. Changing this...
For a user to obtain administrative rights in the Windows operating system version 7, it means enabling the built-in, but disabled by default, Computer Administrator account. Instructions 1 Log in with your...
The procedure for disabling the built-in administrator account requires that you have a user who is a member of the computer's local Administrators group. Instructions 1Call the context menu of the desktop item “My Computer”...
Activating the computer Administrator account, disabled by default in Windows Vista and Windows 7, may be necessary when executing system commands that require running as Administrator. Instructions 1Press the button...
In some cases, a PC user may need to disable a particular user account. Please note that disabling an account is just a deactivation, not an account. Today I will show you how to do it correctly.
Opening access to the disk
So, let's assume that we have successfully booted from the flash drive and are ready for exploits. Where do we start? The first limitation that the average user faces is the lack of read and write permissions in certain directories. He can only freely use his home folder, which is not very convenient.
Such restrictions are set at the level of access control lists in the NTFS file system, but only Windows itself must check them. Other operating systems and individual utilities can ignore these restrictions. For example, Linux and data recovery programs do not use WinAPI, but access the disk either through their drivers or directly. Therefore, they simply do not see the security attributes set in NTFS and read everything.
You can make a copy of any data at this stage. The only possible obstacle is partition encryption. ElcomSoft utilities will help you overcome the built-in BitLocker protection (by the way, like many other virtual fences), but TrueCrypt, VeraCrypt and other serious cryptographic containers will have to be opened differently. The easiest way to do this is by using social engineering methods, since the technical protection of these tools is an order of magnitude higher than the psychological protection of the owner - see real life examples.
Changing access rights is also easy. By booting from a flash drive, you become an administrator in the same Windows PE and do whatever you want with the disk. However, it is more interesting to retain rights in the main system, for which you need to become an administrator in it. To do this, it is most convenient to use one of the password reset utilities. For example, the simplest NT Password Edit program by Vadim Druzhin was written more than ten years ago, but is still relevant. With its help, you can delete or set a new password for any Windows account.
NT Password Edit
Other articles in the issue:
Xakep #212. Secrets of the darknet
- Contents of the issue
- Subscription to "Hacker"
In most cases, this utility is sufficient. Then all that remains are routine operations such as changing ownership and resetting permissions for selected directories. Another similar utility provides a little more options - [email protected] Password Changer. Together with other [email protected] , it is added to the flash drive as a tiny .ima image, so running the free old (but still useful) version is possible even without downloading WinPE.
Activating disabled accounts
Password Changer also allows you to reset the password of any account and can unlock it if it was previously disabled.
The Reset Windows Password program has even more functions. With its help, you can not only reset passwords, but also cover up traces of hacking.
Resetting, dumping and covering tracks
Like SAMInside, it allows you to copy passwords and hashes for analysis on another machine - this makes it easier to open them in a quiet environment (see the article “Large Password Collider” in issue 194). Finding an admin password is much more interesting than simply resetting it: with the original password you will appear less in the logs, while a blatant hack can be quickly noticed.
Another subtle option is to add a new user to the system, give him the desired rights and hide this account. If there are dozens of users, then they will not see the unnecessary ones soon. Having done this, you will be able to log in under a regular account without arousing suspicion, and, if necessary, run any program on behalf of an account known to you with full access. Of course, you won’t be able to hide it completely, but at least it won’t be visible on the welcome screen. To do this, just change the UserList subkey in the registry.
HKEY_LOCAL_MACHINE\SOFTWARE\Microsoft\Windows NT\CurrentVersion\Winlogon
We look for the SpecialAccounts section or create it if it is not found. In this section, we look for or create a UserList subsection, and in it - a new DWORD type parameter with the name of the account to be hidden. If you set it to zero, the corresponding account will not be displayed either on the welcome screen or in the general list from the control panel.
You can go further and strengthen the conspiracy. To do this, look for the keys with the descriptive name dontdisplaylastusername and DontDisplayLockedUserId in this thread:
HKEY_LOCAL_MACHINE\SOFTWARE\Microsoft\Windows\CurrentVersion\Policies\System
We assign the value 0x00000001 to the first one, and 0x00000002 to the second one. The current and last used account will also disappear from the lock screen.
How to activate administrator rights?
If you use the classic Start menu on your workstation, go to the “Control Panel” and click on the “Administration” icon. Otherwise, the “Administration” icon will be located when you select a category with small icons in the “Control Panel”.
Double-click the “Computer Management” icon and go to the “Local Users and Groups” snap-in. Next, in the list of names (right side of the management console), go to the “Users” folder. By right-clicking on the “Administrator” account, you will need to select “Properties” in the context menu. O opposite the “Account deactivation” item.
Next, in the “Full name” field, come up with a signature that does not match the name of the computer owner (it was set when installing the Windows 7 operating system). Click the “Apply” button and OK. After this, restart your computer and you can log into the system under an unlocked administrator account with the corresponding rights.
The management console can be opened in another way. Right-clicking on the “My Computer” icon brings up a drop-down menu. In it you need to select the “Manage” command. In the console window (on the left side), click on the “Local Users and Groups” snap-in.
You can always disable the User Account Control (UAC) feature. To do this, open the “User Accounts” item in the “Control Panel”. Select the item “Changes control parameters” and move the slider to the bottom state. The system will independently recognize each user as a computer administrator.
There is another simple way. In the window for launching programs, or using the key combination win+r, enter secpol.msc and run the command. A. Then open the Local Policies and Security Settings nodes.
In the list of policies, select "Accounts" and look at the status of the "Administrator" entry. If it is disabled, select “Properties” and toggle its status.
If you installed Windows 7 Home Premium or Windows 7 Home Basic on your computer, then in the Start menu, click Run, then type cmd. Right-click and select “Run as administrator.”
Enter the following command:
net user Administrator /active:yes
Confirm your entry with the Enter button and restart your computer. Log in as an administrator.
An additional way to give a user administrator rights in Windows 7
In addition to all of the above, you can also use local application of administrator rights. What could this mean? Let's assume you have a program installed and administrator rights are required for it to work correctly. Here you can use the first method by enabling the appropriate “account”, or you can change the setting, according to which the necessary software will be launched and operated under the administrator’s “account” (his rights will be extended and applied only to the program selected by the user). This method is the most secure, because you do not need to constantly enable and disable admin rights. To run the software in this mode, you need to hover the mouse over the shortcut and, by right-clicking, select “Run as administrator account.”
NTFS streams will help you access files
As noted above, most access rights on work Windows computers are set at the NTFS file system level. Now is the time to remember about file streams and syntax features. According to the Universal Naming Convention (UNC), a colon separates the drive letter from the further path. In NTFS, this character is also used as a separator between the actual file name and the file stream associated with it.
If the permissions settings for each file and directory in Windows are correct, then it makes no difference how exactly file system objects are accessed. Access will always be blocked if you do not have the required permissions. However, setting up rights is a long, routine operation, which in recent years, admins have often begun to simplify using third-party programs. Not all of them (even certified ones) work correctly with file streams. Therefore, if you cannot read filename.ext, try accessing the data stream of this file using the filename.ext:stream:$DATA or filename.ext::$DATA construct.
For example, if you do not have access to the passwords.txt file, then the following command will still display its contents on the screen:
more < passwords.txt::$DATA
In much the same way, you can copy the contents of a file by redirecting the output of the more command to another file rather than to the screen.
more < passwords.txt::$DATA > pass.txt
This shouldn't work if read/write restrictions are set correctly, but admins often don't bother auditing access rights for each file system object. On a real computer, you often end up with an explosive mixture of explicitly defined and inherited rights, the contradictions in which you can take advantage of.
Reading a file from a data stream directly into the console
By the way, about inheritance mechanisms. There are situations when the administrator denies access to a subdirectory for certain users, but leaves for them full access to top-level directories. In this case, an obvious contradiction arises, and the restrictions cease to apply. For example, not having read permissions on a file doesn't work if you have permission to read the listing of the directory containing it. Same with deletion.
Create a secret section without access rights support
Sometimes admins only prohibit the execution of files. For example, so that the user cannot run some program. You can get around this limitation by simply copying it to a FAT32 partition (or, alternatively, to the same flash drive), where access rights can no longer be set. The file system itself simply does not support them. If constantly using a flash drive is too risky, then you can do something smarter. Run any disk partition editor from it once, reduce the size of the system one, and in the free space create a new FAT32 volume and (optionally) hide it.
Create a hidden FAT32 partition
Hidden partitions are not assigned a drive letter, so they are not displayed in Explorer and file managers. You can mount it in Windows via Disk Management - diskmgmt.msc. You have already assigned yourself the necessary rights to run this tool at the previous stage, when you found out the admin password or created a new one.
If documents, databases or media files were copied to the FAT32 partition, they will open without problems. Nothing can stop you from launching simple software, which is installed by unpacking: in the new place everything will work as before. With installed programs, not everything is so simple. They will have to change the paths in the settings. These are either .cfg and .ini files in the same directory, or registry keys. You can change the keys using a remote registry editor launched from a flash drive in the same WinPE.
Editing the registry of another OS
With such a tool, you can bypass other restrictions specified in the registry.
Bypassing Kaspersky Anti-Virus
Most of the restrictions on user actions in Windows are implemented through the registry and access rights in NTFS. However, there is another option: installing specialized control programs.
For example, Kaspersky Lab software loads its own drivers from \windows\system32\drivers\ and sysnative\drivers. With their help, it intercepts system calls and access to the file system, monitoring both the operation of programs and user actions. Typically, the administrator closes changes to antivirus software settings with a password. The good news is that there are simple procedures for resetting such a password.
Kaspersky Anti-Virus SOS and versions for Windows Workstation check the name of the main file. Therefore, it is enough to do the following:
- rename avp.exe (booting into WinPE or safe mode);
- run the renamed file after normal login;
- go to the “Settings → Options” menu, disable self-defense and password protection;
- save the settings, unload the antivirus and rename it back.
If you wish, you can set your own password so that the admin understands how you suffered without knowing it.
This method will not work if the antivirus on your computer is configured centrally. However, you can always temporarily neutralize the guard using the method described above.
With new Kaspersky products everything is even easier. Italian Kaspersky Lab consultant Matteo Rivoira wrote a script that automatically detects the installed version of the antivirus and resets the specified password. From the batch file you can see that in 32-bit and 64-bit versions of Windows it is stored in different registry branches:
HKEY_LOCAL_MACHINE\SOFTWARE\KasperskyLab\[product_name]\settings HKEY_LOCAL_MACHINE\SOFTWARE\KasperskyLab\protected\[product_name]\settings HKEY_LOCAL_MACHINE\SOFTWARE\Wow6432Node\KasperskyLab\[product_name]\settings
Therefore, either just run this bat, or edit the registry manually from WinPE. Just check out these branches and set the EnablePasswordProtect parameter to a null DWORD value.
How to get administrator rights in windows 7
I made a new account, but not a single program starts up - there are no administrator rights. A utility will appear at the top, run it as described above (with administrator rights). I have Windows 7 Home Basic, I tried to get administrator rights through the console, but it says “access denied.” In addition, you should know how to install a program without administrator rights on Windows 7 Ultimate. Before you get administrator rights in Windows 7, you need to be aware of certain risks.
This is largely due to the fact that the rights of the “Administrator” in these systems are truncated to the extreme. The only problem is that, due to such security measures, experienced users quite rightly believe that they cannot rightfully call themselves the owners of their own computer. The safest way to fulfill your desire is to activate a special account, under which all actions will be performed with administrator rights.
Command line with administrator rights
If it does not work, you must use the “net user Administrator /active:yes” option. Since it is quite rare to obtain administrator rights in Windows 7 to constantly run one application, let’s consider the simplest case.
How to set administrator rights
Click on the “My Computer” shortcut RMB (right mouse button), and then activate the “Manage” item. Right-click on the “Administrator” item, and select “Properties” in the context menu that appears.
Administrator rights and account management in Windows 7
If it were not for the fact that approximately 60% of all computer infections with malware occur precisely because of working under an administrator account. If you listened to our advice, you probably might have thought about how to remove the Windows 7 administrator. This is not difficult to do. The fact is that the Windows 7 administrator account has some restrictions that are designed to prevent viruses and Trojans from being introduced onto the computer.
to the entry “How to get administrator rights in Windows 7”
How to do it? Working without an antivirus from an account with elevated rights, you are at great risk. Windows 7 significantly reduces the number of risks by limiting access to such privileges. This fact is worth paying attention to if you are going to set super admin rights for yourself. Viruses will receive them along with you. Please note that logging in with administrator rights does not mean that you have them completely.
More advanced users can remove these restrictions if the system requires administrator rights. To do this, get them via the command line. After this, a window with a black background will open. Copy this line: net user Administrator /active:yes, paste it there, press enter and restart your computer.
In any case, you already know how to make local administrator rights. System error 5 indicates insufficient rights. What do you do when you receive an error: “access denied”?
Administrator /active:yes Does not give your account administrator rights, but only enables the system administrator account. XP has a flaw: in safe mode you can operate with administrator rights. I have this problem. When you remove Sims 3 from your computer, it says that you need to contact your system administrator. Should I use the method described above or will it not work?
This happens because you are trying to disable indexing of drive “C”, and there are system files there, the administrator does not have access to them, only the system, and this is correct. I can tell you how to access system files, but I don’t advise you to do this, problems will appear in the future that cannot be solved without reinstalling Windows.
Before performing any important action that could affect the performance of the system as a whole or its important components, it is usually necessary to obtain administrator rights. However, the system cannot fail to have an administrator account.
How to get ADMINISTRATOR rights in windows 7? I can't delete a folder without this.
If you are reading this article, then you have probably already come across a window with the message: “The operation cannot be completed because you do not have access rights to some objects.” At first, this window may seem somewhat strange, because how can it be that we, the owners of the computer, do not have enough access rights to some folders or files. Therefore, in order for you to have full access when working with any software on your computer, you need to enable administrator rights.
This will close your administrator rights and switch to regular user mode. In addition to the fact that you can obtain general administrator rights, you can also use them locally. Let's say you have a program and for it to work you need to enable administrator rights. Among the millions of PC users, not everyone knows how to enable administrator rights in Windows 7, and without this it is simply impossible to use all the capabilities of the operating system.
Fortunately, making administrator rights is quite simple. Once you obtain the rights, all responsibility for deleting useful files and other errors will lie with you, so you should be careful. This simple operation will help you get permission to delete a file or take another action that was previously unavailable. To do this, you don't have to create a new account using the command line.
And windows is rightfully the leader, even if it contains some shortcomings and glitches, although it depends on which way you look at it. Administrator rights in Windows OS mean access and the ability to edit any system files.
How to delete an account?
For example, if you have Windows 7 installed, then most likely you will not be able to edit or delete some system files if you are logged in as a regular user. This is a feature of this version of Windows, even if the system is installed with one user, who in fact should be an administrator.
The owner of the computer can only be assigned administrator rights or deleted. For some this is a flaw, but for others it is “protection from fools”. In particular, in Windows 7, there is a problem with administrator rights.
osemta.ru
Adding a Trojan bookmark
A multiboot flash drive is a real Swiss army knife. After downloading from it, you can unlock hidden accounts, reset passwords, edit the registry, and generally do anything else. There is only one problem: she can be noticed. Therefore, we will make ourselves an additional hole that does not require external tools. You can also create it through the recovery console. Anyway, you can make a copy of utilman.exe and then replace it with cmd.exe. First, let's make a copy of the original file.
copy %windir%\system32\utilman.exe %windir%\system32\utilman-new.exe
Then we overwrite the original utilman.exe file with the cmd.exe file:
copy %windir%\system32\cmd.exe %windir%\system32\utilman.exe
The drive letter (system partition) in the %windir% variable will not necessarily be C:\. You can find it using the diskpart utility - the list volume command.
After replacing utilman.exe with cmd.exe, the next time you boot Windows you will see the usual welcome screen. Only when you click on “Accessibility” will the command line now open.
You can do everything in it as usual. For example, you can find out the current list of accounts using the net user command and change their settings. You can do whatever you want with any account - activate and deactivate it, change passwords, change their expiration dates, and so on. For more information about the syntax, read .aspx) in the help on the Microsoft website.
Administrator Mode
To be able to log in to this account, users will need to activate it. You can enable it using the Windows command line:
- Press the R and Win keys simultaneously (works with any active keyboard layout and if Caps Lock is enabled).
- Type "cmd" in the empty text field.
- In the console that opens, write or copy the line “net user administrator /active:yes” and press Enter. You can replace "yes" with "no" to turn it back off.
- Now write “net user administrator *pass*”, where *pass* is the new password you chose. If you don't need it, skip this step.
- Restart your PC.
After restarting, you will be able to log in using this account.
Bypassing local group policies
We’ll talk more about policies a little later (I don’t like them, politicians), but for now let’s look at the simplest example - a restriction on running programs through administrative templates.
Admins really love the gpedit.msc editor. One of the most popular settings in it is called “Run only specified Windows applications.” Typically, this tool allows office plankton to run only whitelisted applications. It includes Word, Excel, a calculator and other harmless things. All other executable file names are automatically banned. Please note: these are names. Therefore, we take the same cmd.exe or totalcmd.exe, rename it to winword.exe and use it calmly. You can view (and change) restrictions through the same remote registry editor in WinPE. They are written in this thread:
HKEY_CURRENT_USER\SOFTWARE\Microsoft\Windows\CurrentVersion\Policies\Explorer\RestrictRun
Shaking off domain policies
In a domain, computers are managed centrally through group policies, but this barrier can also be overcome. The easiest way is to prevent the policies from loading. To do this, start Windows in safe mode or simply disconnect the machine from the local network when turning it on. In the second case, you will be able to log into the domain even without physically connecting to it, since Windows caches the previous login data and, if communication with the domain controller is lost, performs a check locally.
After logging in, you can connect to the local network again and work as usual, only without active policies. The disadvantage of this method is its indiscriminate approach. Policies contain not only restrictions, but also additional resources, such as a dedicated network folder. However, by this time you should already have sufficient rights to restore the loss yourself.
Bypass advanced bans on running programs
The domain uses a more advanced program launch restriction tool - SRP. It can check, in addition to the names of executable files, their paths, hashes and certificates. Simply renaming the executable will not fool it. How to be? Similarly: just don’t let the system see these restrictions.
By default, only the launch of programs is controlled, but not dynamic libraries, since a total scan takes up too many resources.
Default SRP settings
Back in 2005, Mark Russinovich wrote the Gpdisable utility. It injects the library into any process, and it stops seeing group policy restrictions from the corresponding registry branch.
HKEY_LOCAL_MACHINE\SOFTWARE\Policies\Microsoft\Windows\Safer\CodeIdentifiers
Eric Rachner then implemented a similar tactic in his Group Policy Bypassing Tool while he was still the head of the Application Consulting Engineering (ACE team) at Microsoft.
Both programs have the same disadvantage: in order to run them and inject the .dll, the user must already have some administrative privileges. But if he has them, then the meaning of these utilities is lost. Nothing prevents a local administrator from removing domain policy restrictions manually.
The ACROS Security blog five years ago described another way to bypass domain restrictions, applicable in a real situation with the rights of a simple user.
- Rename the implemented library gpdisable.dll to deskpan.dll.
- Create a new folder named files.{42071714-76d4-11d1-8b24-00a0c9068ff3}.
- Place the file deskpan.dll in it and open the folder.
- Create a new .rtf document in it and open it.
This loads WordPad, which loads gpdisable.dll into memory under the guise of deskpan.dll. Let's look at the method in more detail.
Deskpan.dll is a display panning CPL extension, a standard library in Windows that is not subject to SRP restrictions. It is registered in the system as a COM server with a global class identifier {42071714-76d4-11d1-8b24-00a0c9068ff3}. If we launch a trusted application from a folder whose name has the ID of this class after a dot, then it creates an instance of the COM server and loads deskpan.dll from the current working directory.
In the stated version, this method only works in Windows XP, but for more recent versions of Windows it is easy to modify. The principle remains the same.
For example, on Windows 7, you can use the AnalogCable Class COM server (\System32\PsisDecd.dll) registered with the CLSID {2E095DD0-AF56-47E4-A099-EAC038DECC24}. When accessing PsisDecd.dll, the ehTrace.dll library is loaded, searches for which begin in the current directory. Therefore, a similar scenario for introducing gpdisable.dll can be implemented even using Notepad.
- Rename gpdisable.dll to ehTrace.dll.
- Create a new text document.
- Create a directory named files.{2E095DD0-AF56-47E4-A099-EAC038DECC24} and place both files (library and text document) in it.
- Double-click on the text file and open the “Save As” option in Notepad.
At this point, gpdisable.dll is loaded into memory.
Enabling the administrator account
If the user still prefers, despite the risk, to give himself administrator rights, then this action can be performed in two ways:
- Using the command line.
- Through the control panel.
Administrator rights using the command line
To gain administrator rights in Windows 7, you need to follow these steps:
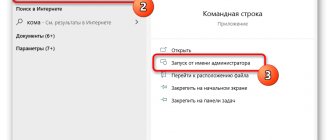
- Click “Start” and enter cmd into the search bar.
- In the window that appears, right-click the cmd line and select “Run as administrator” from the drop-down list.
- In the command line window that opens, enter net user administrator /active:yes (in the English version of Windows) or net user administrator /active:yes (in the Russian version of Windows), then press Enter.
- In the command line, enter net user administrator (in the English version of Windows) or net user administrator (in the Russian version of Windows), then press Enter. Instead, you need to specify a password that should be set for the administrator account.
- Type exit and press Enter.
- Reboot and log in under UZA.
Administrator rights via Control Panel
To have administrator rights, you can do this in another way. It is like this:
- Open the control panel and select “Administration”.
- In the right part of the window that opens, double-click “Computer Management.”
- In the window that opens, expand the “Local Users” item and click on the “Users” element. The following window will open with a list of all users on this computer.
Next, double-click on the “Administrator” item and get a window with its properties.
As you can see from it, the UZA is disabled. To enable it, you need to uncheck the “Disable account” item and click “OK”. After this, you should reboot and log in to UZA.
Creating clever shortcuts
The tricks from the previous section are possible because Windows, along with regular folders, uses shortcut folders with predefined functions. For example, "My Computer", "Control Panel" or "Printers". They are all implemented as COM servers with known class identifiers (CLSIDs). There are more than a hundred of them in total, so I will list only the new ones in Windows 10:
- {3936E9E4-D92C-4EEE-A85A-BC16D5EA0819} - frequently used folders;
- {018D5C66-4533-4307-9B53-224DE2ED1FE6} - OneDrive;
- {679f85cb-0220-4080-b29b-5540cc05aab6} — quick access panel;
- {BB64F8A7-BEE7-4E1A-AB8D-7D8273F7FDB6} - Security and Maintenance.
Any of them can be used to run your programs covertly.
In the example below, I create a subfolder in the user directory called LPT3.{BB64F8A7-BEE7-4E1A-AB8D-7D8273F7FDB6}. The name before the dot is prohibited in Windows because it is the same as the port name. To create it, you need to confuse the command interpreter with the sequence \\.\ and pass the full path to the directory to be created as an argument in quotes.
Create a hidden, undeletable folder
After this command, we get a directory that cannot be deleted by standard means, which is displayed in Explorer as LPT3. When you double-click on it, the contents of the folder do not open. Instead, the "Security and Service Center" is launched. In this case, the executables located inside the folder will be accessible from batch files (.bat and .cmd) and from the registry (for example, in the startup section).
Enable the hidden administrator account in Windows 10
As you know, when installing Windows 10, the system asks you to create a user account and grants local administrator rights to this account. However, during the installation process another hidden administrator account , which is disabled for security reasons. In this article we will talk about the built-in administrator account in Windows 10, what it is for, how to enable it and block it.
Even in Windows XP, the administrator account was hidden from the login screen, and from Windows Vista to Windows 10 inclusive, it is also blocked. The built-in administrator account has full, unlimited rights on the computer; this account is not subject to UAC (User Account Control), and all programs are executed without a UAC prompt (this is its main difference from user accounts with administrator rights).
We'll look at several ways to enable the built-in administrator account in Windows 10.
Turn on USB (7 different ways)
One of the obstacles to using a flash drive may be the administrator disabling the USB ports on your computer. This can be done in different ways, so different methods of counteraction are required.
Ports are physically disabled
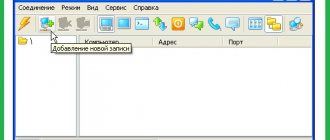
This is only possible with additional ports that are connected by cable to the motherboard. The rear ports are soldered on the motherboard itself, and there are at least two of them. Therefore, bring a cheap hub from home, plug it in instead of a mouse or keyboard, and connect all standard peripherals through it. Leave the second one for the bootable flash drive.
Ports disabled in BIOS/UEFI
The administrator can disable both ports in general (a rare case) and a separate USB Boot option. It is she who is responsible for the ability to boot from USB drives. We have already discussed how to enter the BIOS settings, and finding the required option is not difficult.
Removed USB controller drivers
Cunning admins simply uninstall USB drivers through the device manager, but that won’t stop you. The lack of drivers won't hurt to boot from a flash drive. By becoming a local administrator, you can easily install missing drivers - Windows itself will offer to do this.
Individual USB devices are blocked
A more subtle method is to ban the use of USB drives. However, other types of USB devices continue to work. The restriction is set through a registry branch
HKEY_LOCAL_MACHINE\SYSTEM\CurrentControlSet\Services\USBSTOR
When the Start parameter is set to 0x00000004, the use of flash drives and external drives is prohibited, and when set to 0x00000003, the use is allowed. You can deal with this using the same method as in the previous paragraph: boot from a flash drive and change the USBSTOR section through an offline registry editor.
USB drives are prohibited via Group Policy
The Group Policy Editor allows you to define an administrative template that denies access to removable storage devices. We boot again from the flash drive, find out the local admin password (or reset it if we couldn’t find it out), and at the same time activate the account if it was disabled. After that, run gpedit.msc and disable the ban.
Disabling the ban on using USB drives
Restricted rights to read the files usbstor.inf and usbstor.pnf in the \Windows\Inf directory
Another trick with NTFS rights. If it is impossible to access these files in a limited account, then the flash drives will not be connected. We use local administrator rights or simply move these files via WinPE to a FAT32 volume. After moving back to \inf\, the access rights will be lost.
Connecting devices via USB is controlled by a separate program
To help administrators, many utilities have been written to limit the use of flash drives and external drives. Most of these programs simply change the value of the registry branch mentioned above, but there are also advanced options. These are able to remember authorized flash drives by volume number (VSN - Volume Serial Number) and block the rest. You can simply unload the processes of these programs from memory or replace the VSN. This is a 32-bit value that is assigned to a volume when it is formatted using the current date and time value.
Find out the volume serial number
You can find out the VSN of a trusted flash drive using the vol or dir command. Using the Volume Serial Number Changer program, you assign the same number to your flash drive and use it freely. To be safe, also replace the volume label (simply through the disk properties).
Another countermeasure option is to disrupt the operation of control programs by occasionally booting from a flash drive and changing the names of its working files (or deleting it from startup). If you do everything carefully, the admin will consider the program to be buggy and will delete it himself.
An unexpected obstacle to the use of flash drives arises on computers with a mediocre power supply (read: on most cheap work machines) without any efforts from the administrator. The fact is that the 5 V bus drains so much that the flash drive does not have enough power. In this case, disconnect the other device from the adjacent (paired) USB port or use an active hub with its own power supply. You can even power an external hard drive through it.
Connecting to the Internet
A lot of restrictions at work relate to the use of the Internet. In general, they can be circumvented by redirecting all traffic to a server not controlled by the company. For example, use an anonymous proxy server through the FoxyProxy browser add-on or similar. If you change the proxy address more often, it will be more difficult to calculate its use. By setting up a proxy server at home, you will increase the speed and security of your connection, and at the same time gain access to your local area.
Add your own or public proxy
Sometimes the problem is not so much a ban on visiting certain sites, but a traffic quota. The easiest way to create an unlimited connection today is using a smartphone. By connecting to a favorable mobile Internet tariff, you can distribute traffic via Wi-Fi or use USB tethering. A smartphone connected by cable does not appear on air and causes less suspicion. You charge it from your work computer, what are the problems?
All described methods have limited application due to the variety of configuration options. Step-by-step instructions become outdated quickly, but the general principles remain unchanged for years.