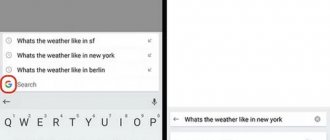
Why are photos not deleted from my phone?
If such a problem arises, then most likely the problem is not at all due to viruses that may be on the phone. The problem is that the device is automatically synchronized with some cloud storage, which immediately transfers deleted photos from the recycle bin back to the gallery. The user may not be aware that the phone has such external storage installed, but its presence can complicate life.
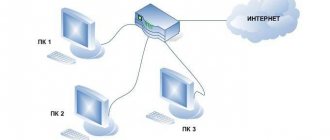
Saving files in cloud storage is most often done by programs such as:
There are also a huge number of clouds that automatically synchronize files. This function can be very useful when the user accidentally deletes the desired object. Storing it in the cloud will help you find it at the right moment. You can disable this function in the settings of the phone itself or in the program.
Disabling automatic synchronization can lead to the loss of many files, so you need to disable this feature carefully.
The correct way to disable synchronization can be seen in this video
How to delete photos from gallery on Android
The gallery saves all the photos that the user has taken while using the phone. This is a built-in application; developers automatically install it so that a person can view all the photos taken.
There may be a need to delete a photo. This can be done in different ways, starting with standard deletion in the gallery, ending with deletion using specialized applications.
Removing from the gallery on Android takes place in the program itself. Most often it is located on the main screen, called “Gallery”. The icon represents either an individual photo or an album. By clicking on it, you can view all the photos taken.
To remove a photo from it, you must:
- Open the program and the desired folder in it where the photo to be deleted is located;
- Having found a photo, you need to pinch it and hold it until it becomes highlighted, that is, a blue field appears around it. A curtain opens for actions that can be performed with this photo;
- In this curtain you need to find the basket icon and click on it;
- The phone will ask you to confirm the action. Click on “OK”.
The photo was automatically deleted. If you need to delete a large number of objects at once, then you just need to press first one photo in the same way, and then the others that the user wants to delete. By clicking on the trash can, files are deleted from the device memory forever.
Delete Google Disk files on your computer and phone
You can carry out the cleaning process selectively, sorting the information according to specified parameters, and then get rid of unnecessary folders that take up space or completely format the space so that there is nothing left on the disk. There are two ways to delete data. This places them in a recycle bin, which must then be emptied for final disposal. Until the files are completely deleted, users who have access to them continue to own this information.
Google Drive for Mac OS
Method 1
- Having logged in to the service, go to the disk;
- Select the elements to be deleted (you can select several at once);
- Call the context menu;
- Click “ Delete ”.
Method 2
- Select files or folders;
- Hold down the mouse button and drag them to the trash can located on the navigation panel;
- Letting go of the held elements.
If you accidentally delete using any of the methods, you can quickly correct the situation by clicking the “ Undo ” button, which appears immediately after moving.
The final cleanup does not provide the opportunity for subsequent recovery, the data will be destroyed irrevocably, and the users who had access to it will now lose these rights, so if you are not happy with this state of affairs, it is better to transfer ownership of the information to another person.
Emptying the Trash
- Go to “ Trash ” from the navigation menu;
- Select a file (several are possible);
- Call the context menu, click “ Delete ”;
- Confirm the action in a new window.
You can quickly delete all items from this folder by clicking the “ Empty Trash ” button, or by checking the Header checkbox, after which all items are highlighted, you should click “ Delete Permanently ”.
To carry out the procedure on a phone or other device running Android or iOS, a number of similar actions are carried out:
- Open the application;
- We mark everything that we are going to delete;
- Click on the icon in the form of three vertical dots;
- Select “ Delete ” from the drop-down list of commands.
Emptying the cart
- Click on the menu icon in the form of three horizontal stripes:
- Go to the “Basket” item;
- Mark the file, click on the “More” icon and select “Delete permanently” or click on the “More” sign in the upper right corner of the screen, then “Empty Trash” to completely delete all items.
Cleaning up Gmail
Messages do not take up much disk space, but if they contain attachments, and the mail has been functioning for more than a year, the volume of letters reaches a certain scale, so it is better to empty folders, including Spam and Trash . Options allow you to get rid of individual elements or all of them at once. To do this, select the letters and then move them to the trash bin, then go to this folder and click the “ Empty Trash ” button.
To filter emails that have attached files, you need to click on the arrow in the search bar on the top panel and check the box next to “Have attached files”, then set the attachment size.
How to delete photos from Google cloud
The process of deleting photos follows a similar principle as with Google Drive files. To do this you need to do the following:
- Let's go to the Google+ Photos service;
- Open the “All Photos” tab;
- Here you can see all available photographs;
- Mark one file or several, click “ Delete ” so that the selected photos are moved to the trash.
Data sent to this folder is automatically deleted after 60 days. In order to immediately get rid of unnecessary photos, go to the menu located in the upper left corner. Here we select the “Trash” item and click the “Empty Trash” button, after which the permanently deleted photos will not be available for recovery.
How to clear the gallery on Android in the file manager
You can clear the gallery not only using a standard application, but also using a file manager. This system stores all the files on the device, from downloaded applications to photos and videos. Using it, you can also successfully remove unnecessary photographic objects.
For this method, you need to download the most popular program, since they most often do not contain viruses and other harmful files for the phone. The most popular program in the path of file managers is ES Explorer.
To clean your gallery of unnecessary photos using this method, you need to:
- Launch the downloaded file manager and select the section in which you want to delete photos: either the device memory or memory cards. The choice depends on where the user has his photos;
- Next, you need to select the required folder where the photo objects are located. It is usually called DCIM;
- By clicking on it, select the Camera folder, and then click on those photos that are to be deleted;
- Having selected the necessary files, you need to click on the trash can, which is located in the top curtain.
The file manager will help you delete pictures on your phone without much difficulty. This method is not the easiest, as it will require additional manipulations and downloading of the program.
How to delete files from your phone using special applications
A file manager is one of the applications that you need to download. Despite this, there are a huge number of programs that help you delete photos quickly and intelligently.
The difference between specialized applications and a file manager is that the application will help the user select those objects that are best deleted. That is, the program automatically filters objects, selecting successful and unsuccessful images, determining the size and frequency of shooting.
The most popular is Gallery Doctor. Its advantage, unlike other downloaded programs, is that:
- It finds duplicate photos and recommends deleting them;
- Detects blurry frames;
- Scans photo cards in the background;
- Analyzes the state of the gallery.
You can download it from this link
Using his example, we will analyze standard deletion. First, go to the application and allow it to use information from the camera. Then it will automatically begin the analysis.
Note! The speed of the process depends on how many information files are stored on your device.
The most important advantage of the application is that it analyzes the received data in the background, that is, the user can go about their business and not pay attention to its work.
At the end of scanning and analyzing the information, the application will show recommending photos that should be deleted. It will also split the photo into several categories. For example, blurry photos will be in one folder, and repeated ones will be in another.
Gallery Doctor will ask you to rate the photos it has screened out. When presenting an object, you will be offered a choice - like or dislike. A like means saving a photo, and a dislike means deleting it. This way you can quickly delete unnecessary files.
A more detailed overview of the application can be seen in this video
Disabling through settings
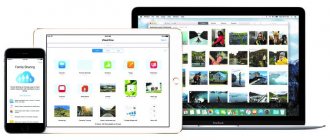
The cloud sharing feature is very useful, especially when working with multiple smartphones or changing mobile phones. Depending on the selected settings, the following will be loaded:
- Contacts;
- Messages;
- Calendar;
- Mail;
- Documentation;
- Many other company services.
Synchronization with other installed services and applications from third-party developers is available. It just depends on the number of products and the type of products. The action algorithm is no different from how to remove synchronization from account on Android .
Go to the system settings of the phone. This can be done using the gear icon in the notification shade or using the All Apps menu.
Click on the line “Accounts”. Shows apps that use the cloud pairing feature and Gmail addresses that are linked to the phone. In our case, there are 4 profiles attached to the smartphone at once, select the one you need. To completely disable the function, you will have to repeat the steps with each mail.
We recommend: What to do if the phone does not turn on after resetting the settings
In the panel that opens, you can delete your account. Select “Account Synchronization”.
Set all sliders to inactive. For the changes to take effect, click on the icon with three dots and tap “Synchronize” in the context menu.
Important: for all data to be updated, the smartphone must be connected to the Internet. Don’t know how to distribute Wi-Fi from a smartphone to a laptop? Read the article: “How to distribute Wi-Fi from a phone to a laptop.”
Deleting photos using a computer
A computer is also a great assistant in deleting photos from your phone. Unfortunately, this method is quite labor-intensive, but it is needed in cases where the user does not have access to the gallery for various reasons. For example, he forgot the password for it, thereby completely losing access, but there is no memory - he needs to delete the objects.
Then the PC comes to the rescue. The algorithm of actions is almost the same as with the file manager:
- We connect the phone to the computer using a USB cable and launch the internal memory of the device;
- We are looking for the folder where we need to delete the photo. If you need to clean up a regular gallery, then this folder is called DCIM. Let's go into it;
- Then you need to select the desired section. In the case of standard cleaning, the section is called “Camera”;
- A complete layout of all photos available on the device opens. Everything is quite simple - click and select those that are no longer needed;
- After selecting, right-click and find the “Delete” tab.
Distant objects will no longer appear in galleries. A computer is a good option for deleting files from your phone.
How to return a photo to the gallery
If all your images were stored on your phone, everything is fine with the SD card, and you did not overwrite the information, then there are quite a lot of chances for painless data return, and there are several options. We advise you to start with the first and move on to the last.
Clearing the cache in the gallery
This problem can arise for various reasons, but, in fact, all the photos you still have in the gallery, they are just not displayed due to a failure in the cache, so you need to clear it. This is done like this:
- Go to the “Settings” of your smartphone and go to the “Applications” section;
- Find “Gallery” there and click on this application;
- In the list, find the “Clear cache” item and confirm the operation.
We also recommend that you clear the cache of “Multimedia Storage” to fix the problem for sure. Now you need to restart your smartphone and check the functionality of the gallery. In 99% of cases, this method solves the problem on almost all versions of Android.
Removing .nomedia files
Since the Android operating system is built on the Linux kernel, various service files may accumulate in the system, which do not entirely correctly affect the operation of your smartphone. And in this case we are talking about the .nomedia file. They mainly appear due to viral activity on your phone or damage to the system by other applications or user actions (if he does not understand Android).
So, .nomedia prohibits indexing of multimedia files, and if it is located in the DCIM folder, accordingly, all images will be automatically hidden from the gallery, since they cannot be indexed by the system. To fix the problem, you will need to delete this file from the system. This is done like this:
- Open any file manager on your smartphone (Total Commander, Explorer and other options);
- Be sure to activate the “View hidden files and folders” item in the settings so that they are displayed in the shared directory, otherwise you will not be able to see nomedia;
- Find the DCIM section (all photos from the smartphone are stored here) and open it;
- Next, find the .nomedia file and delete it from your smartphone. We recommend that you view all subdirectories through the file manager, and if there are still files with the same name there, delete it too;
- Reboot your device and go to Gallery again. All your photos should appear in the system.
Checking where the photos were saved
We recommend that you check in the settings of your smartphone where your photos were saved by default and use the file manager to see if they are there. Sometimes a problem arises when images actually exist on the phone and are visible through file managers, but are not displayed in the “Gallery”. Also, when you connect your smartphone to your computer, such photos are visible in Explorer, and they can be transferred to your local drive. Be sure to try it. Maybe it will work for you.
But, as soon as you copy the files to your computer, we recommend making a backup of the data and resetting the phone to factory settings or deleting “Gallery” and downloading it again for your smartphone via Google Play (this option will not work on all phone models and versions of Android).
Photo recovery
If none of the methods above helped you, most likely, using standard methods to quickly return images will not work, and you will have to restore them. A large number of applications are designed for this, both on Android and on a computer, including those for working with the Google Photos service, so we advise you to read our separate article “ How to recover deleted photos on Android ”, where we described all possible ways to quickly recovery using various tools.
In general, as you can see, if images have disappeared from the Gallery on Android and you don’t know what to do, the main thing is not to panic. Try to follow our instructions, and if none of the methods help, then proceed to recovery. My only advice is that if you need to recover photos or other data, try to perform fewer actions on the phone so as not to overwrite sectors with information. Then the chances of returning information will increase significantly. If you have other methods for solving this problem, you can describe them in the comments, and we will definitely add them to our article.
Share link:
How to delete synced photos from Android
Synchronized photos are those objects that are automatically restored after any deletion. Many cloud storage services automatically restore and synchronize photo cards immediately after installation. To fix this, you need to disable automatic synchronization in the settings.
Deleting synced items is fairly easy. Let's look at this process using Google Drive as an example:
- First you need to go to the disk website or specialized application;
- Next, you need to enter it, that is, log in. After authorization, you need to select the “My Disk” folder. All those files that have been synchronized are stored on it;
- After seeing the photos, you need to press and hold the exact object that the user wants to delete. You can also select multiple photos;
- After making your selection, click on “Trash” and say goodbye to unnecessary synchronized photos forever.
Part 3: How to Delete Photos from Google Drive Permanently
Think twice if you want to permanently delete photos from Android. During this time, you can use Google Drive, which allows users to easily delete photos and albums. Additionally, there is a 60-day period that you can get before Android photos are permanently deleted.
Backup Android Photos to Google Drive
To prevent unnecessary data loss, you can first back up to Google Drive for free, and then use Android Data Backup Extracor to recover photos after deletion.
Step 1. Launch the Google Drive app
Download Google Drive. Open this app and set up your Google Drive account.
Step 2. Add photos from Android
Click the Add icon in the lower right corner. Later, select "Download" from the pop-up menu.
Step 3. Backup Android Photos using Google Drive
Select the photos you want to backup from Android to Google Drive. Select "Done" to save the changes. Then, even if you delete something important, you can still recover photos from Android safely.
Delete photos from Google Drive permanently
In fact, you can also organize files in Google Drive to make up more space. Therefore, deleting photos from Google Drive permanently is a good choice.
Step 1. Find Google Drive site
Open the Google Drive website in your browser. Select My Drive to check how much space is left.
Step 2. Delete Photos from Google Drive Permanently
You may see FileRocks in the Folders category that are causing your drive to fill up. You can also select photos and other files later. Right-click and select Delete to permanently delete photos from your Android backup.
Radical removal methods
Radical deletion can be considered the action when the photo is not saved in the gallery at all. This is only possible in cases where:
- Backup and saving of the file in the cloud is not installed;
- No problem with the memory card;
- There is no recycle bin, where the photo can be stored for about 30 days.
If we analyze each situation, then for radical removal you need:
- Check to disable automatic synchronization in your phone settings;
- Check that the memory card is working correctly. It often happens that the memory card is simply broken. Then she can't save photos she just took, but she stores photos she took a long time ago. The only way out is to completely replace the card;
- It is worth emptying the basket more often so that there are no unnecessary photos left in it.
Vyacheslav
For several years he worked in mobile phone stores of two large operators. I understand tariffs well and see all the pitfalls. I love gadgets, especially Android ones.
Ask a Question
Question to the expert
Are photos deleted from the gallery permanently deleted?
It all depends on the phone system. As a rule, no, since the phone has a special section called “Recently Deleted Objects”. It stores all files that have been deleted. They do not take up space and are erased automatically after 30 days of storage.
How to recover a photo?
The first step is to make sure that there is a recycle bin on your device where recently deleted files are stored. If there is no such folder, then you will not be able to restore the photo card. If there is, then you need to click on the desired object and click on the “restore” button.
Are there programs for deleting photo cards on a PC?
Yes. There is a good and official CCleaner application that you need to download from your PC and then delete objects on your phone.
Can a photo delete itself?
No. If the photos are deleted on their own, then most likely there is a virus on the device that deletes objects. To fix this, you need to contact a specialist.
Clearing your phone of useless photos is not as difficult as it might seem to a beginner. By choosing a convenient method, you can free up your memory and increase the performance of your device several times.
4.3 / 5 ( 22 voices)
FAQ
Is it possible to recover photos that were lost a COUPLE OF YEARS ago due to a malfunctioning phone?
2 years is too long for Google Photos. Even if you don’t take into account the fact that deleted photos are stored in the cloud for up to 60 days. Theoretically, you can repair a faulty phone, disable synchronization with Google Photos and check the contents of the phone's memory.
If the photos were stored on the SD card of the broken one, see if they are still there.
Samsung Note 9 phone, some photos were deleted from the phone and ended up in the Google Photos Trash. Miraculously found and restored. How can I avoid this in the future?
Store your most valuable photos in multiple places. This could be the Dropbox cloud, Google Drive, a memory card and a PC hard drive. For backup instructions, see here.
Is it possible to recover photos from an old mobile phone using the Google cloud service.
It doesn't matter what phone the photos were stored on. You can only recover photos deleted to the Google Photos Recycle Bin (after 60 days, the files are deleted permanently). There is no point in contacting technical support directly: you will still be redirected to official help on using the Google Photos application and service.
Photos disappeared from Google Photos. Before deleting them from the Gallery on my phone, I checked that they were synced in Google Photos.
If less than 60 days have passed - the Recycle Bin will help, if more - look for photos in the phone memory using the DiskDigger for Android application.
I cleared the device memory, after which the video quality on the cloud deteriorated significantly. Is it possible to return quality?
Most likely, the data was not completely synchronized; only preview files were saved. Check the Trash folder in Google Photos, if there is no video there, try to recover the data using the methods given in the article.
Photos from the old phone were uploaded to Google Photos. After purchasing a new phone, I tried to log into my account, but there were no photos there.
- The photos may not have been uploaded to Google Photos from your old phone. You may have disabled synchronization or configured partial synchronization.
- Check to see if there are any photos on your old memory card or previous phone.
I created a cloud 6 months ago and saved very important photos there. I don’t remember the login and password under which account I created it.
The account is linked to your Google account, so you can log into the cloud using your Gmail username and password, for example.
If you use Android, most likely this data will match the linked account. Google account entry.