Enable Google synchronization with Android
To understand the synchronization settings, you first need to know where to enable this feature.
- Go to "Settings".
- Open the “Accounts” section (“Personal data”, “Accounts”).
- If you don't have a Google account inside, you need to add one. You can create a new account or add data from an existing Google profile - login and password.
- Click on the added account to open its settings.
- To enable synchronization, move the switches next to the necessary services - contacts, Google Play Music, Google Fit, Google Photos, etc.
- To start synchronization right now, call up the additional menu and select “Synchronize” in it.
By default, app data, calendar, and contacts are synced. If you want to automatically synchronize photos with the Google server, you will have to install the Google Photos application. In its settings there is an item “Startup and synchronization”, after activation of which the photos will be sent to cloud storage.
Automatic photo syncing will continue to work even after you delete Google Photos. To disable it, you need to go to the application settings and move the “Startup and synchronization” switch to the inactive position.
Additional manipulations will also be needed to synchronize mail from the Gmail application. In order for data to be sent to the server, you need to set o in the client settings. If mail synchronization does not work, clearing the phone's internal memory of unnecessary files (if the storage is full) or deleting Gmail data will help.
Synchronizing your Google account on your Android smartphone is a very convenient feature.
Thanks to it, some of the important information from the smartphone is stored on Google servers, and if you switch to a new smartphone, this information can be quickly restored
For example, a list of contacts. If you use account synchronization, then after switching to a new smartphone, your contact list will appear on it in just a minute and you will not have to manually re-enter all phone numbers.
In this material you will learn how to enable and configure Google account synchronization on your Android smartphone or tablet.
After you have selected a Google account, you will see synchronization settings for this account. Here you can enable or disable synchronization for many services, including the Chrome web browser, Gmail, Google Keep notes and much more. To enable synchronization, move the switches opposite the desired services to the “Enabled” position.
If you want account synchronization to begin immediately, you can click on the button in the upper right corner of the screen and select the “Synchronize” option in the menu that opens.
This will start synchronizing all selected services with your Google account. If synchronization still does not work, then you need to check your Internet access.
Oh, the great and mighty Google Chrome can turn into your favorite home browser at work or with friends. All you have to do is “Login to Chrome...”
And the question is, how to disable synchronization and delete data after use? After all, you don’t want your colleagues or friends to see your information. Let’s not cause panic and let’s start learning a good method.
Disable synchronization with your Google account
Remember that it can be returned at any time. Once you turn it back on, it will move into storage all the information you added while it was not working.
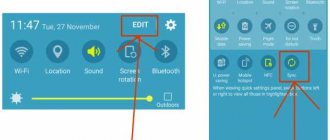
- Open Settings.
- Go to the "Accounts" section.
- You will see a list of applications in which you are authorized.
- To disable auto-syncing with all accounts, click on the three dots icon located in the upper right corner.
- Uncheck the box. This will allow you to independently control the data flow and trigger synchronization of Google contacts, as well as other elements, when needed.
- If you only want your Google profile not to sync with cloud storage, then click on its icon.
- There it is possible to prohibit the exchange of a certain type of data (contacts, Gmail); just move the slider to the inactive position.
- By clicking on the three dots, you can force synchronization of the current profile.
After you do everything, the phone will stop transferring information to other devices automatically.
Attention! Due to the nature of the shells, the path to the “Accounts” menu may differ slightly, depending on the manufacturer and model of the phone.
Enable the backup function
Some users by synchronization mean data backup, that is, copying information from Google branded applications to cloud storage. If your task is to create a backup copy of application data, address book, messages, photos, videos and settings, then follow these steps:
- Open the “Settings” of your gadget and go to the “System” section. On mobile devices running Android 7 and below, you will first need to select “About phone” or “About tablet”, depending on what you are using.
Find the item “Backup” (may also be called “Restore and reset”) and go to it.
Set the “Upload to Google Drive” switch to the active position or check the boxes next to the “Data backup” and “Auto recovery” items. The first is typical for smartphones and tablets on the latest OS version, the second - for earlier ones.
After completing these simple steps, your data will not only be synchronized with your Google account, but also saved to cloud storage, from where it can always be restored.
Common problems and solutions
In some cases, syncing data with your Google account stops working. There are several reasons for this problem, fortunately, they are quite easy to identify and eliminate.
Network connection problems
Check the quality and stability of your Internet connection. Obviously, if the mobile device does not have access to the network, the function we are considering will not work. Check your connection and, if necessary, connect to stable Wi-Fi or find an area with better cellular coverage.
Auto-sync disabled
Make sure that the automatic synchronization function is turned on on your smartphone (5th point from the part “Turn on data synchronization ...”).
Failed to login to Google account
Make sure you are signed in to your Google account. Perhaps it was disabled after some kind of failure or error. In this case, you just need to log in to your account again.
Read more: How to log into a Google account on a smartphone
The latest OS updates are not installed
Your mobile device may need to be updated. If a new version of the operating system is available to you, you must download and install it.
To check for the availability of the update, open “Settings” and alternately go to “System” - “System update”. If you have a version of Android lower than 8, you will first need to open the “About Phone” section.
How to recover data on a new device
To import contacts and other information from your old device to your new one, you need to log into your Google account and then click on the synchronization button. After completing these simple steps, contacts and other information will be downloaded from the Internet. You can log in using one account on several devices, including those running other operating systems (for example, bookmarks in the browser can be synchronized between a laptop, PC, tablet and phone).
It is recommended to leave the auto-sync feature turned on so that up-to-date information about contacts or other personal data is always available across multiple devices.
How to fix sync problems
If you notice that Chrome data isn't being saved on other devices, try turning the sync feature off and on again.
- Open the Chrome app on your Android phone or tablet.
- To the right of the address bar, click the More Settings icon.
- Tap your name at the top of the screen.
- Click Sync.
- Disable the Sync feature.
- Open the Settings app.
- Go to Chrome's Apps & Notifications section.
- Click Stop OK.
- Open the Chrome app.
- To the right of the address bar, click the More Settings icon.
- Tap your name at the top of the screen.
- Click Sync.
- Turn on the Sync feature.
Make sure device syncing is enabled
If this doesn't fix the problem, check your Android sync settings:
- Open the Settings app on your Android phone or tablet.
- Select Users and Accounts.
- Turn on the Auto-sync data option.
How to disable synchronization on Android
A smartphone is such a multifunctional device that some users replace it with a full-fledged computer or laptop. Every year, more and more applications are created for the Android operating system that can turn a phone into a TV remote control, navigator, player and camera. However, all stored data may be lost if the smartphone is broken or stolen. They can be restored only if the account synchronization function has been activated in the device settings. In this article, we will figure out what synchronization is on Android, and also tell you how to disable it.
How to disable Google synchronization completely or just contacts on Android
Since now I have a Samsung Galaxy A3 with Android 7 in front of me, I’ll show it on it, or rather, the picture will be different from it, but the procedures are not very different.
Go to Settings -> Cloud & Accounts -> Accounts and select Google.
Now disable all channels or selected ones, for example, Google contacts, Gmail synchronization, calendar, games, chrome browser.
From this moment on, the phone will no longer connect to the Internet. At the same time, some options will be active in the background, such as weather apps.
You can also set up checking for new mail, for example, every hour. There are even options to choose from, every 5, 10, 15 and 30 minutes.
A more significant battery jump (+30%) can be obtained after turning off 3G. Also turn off Bluetooth, Wi-Fi and location data - then even you will be surprised.
Android is a system of unlimited possibilities, but when it comes to work, start taking the stairs to get the "robot" to cooperate with you on your terms.
How to disable photo synchronization?
The Google Photos app (pre-installed on most Android devices) offers a great feature - automatically saving photos and videos to a cloud service that helps you access photos from any device. But some users, despite the usefulness of this functionality, prefer to abandon it.
You won’t be able to do this through the “Accounts” menu, so you’ll have to work directly with the program.
- Launch Google Photos.
- Tap on the three stripes icon located in the upper left corner.
- A window will pop up with a list, select “Settings” there.
- After that, click on “Backup and Synchronization”.
- At the top there is an option responsible for auto-uploading photos to the cloud and forcing it to turn off.
- Turn it off by moving the slider.
Start synchronization
How to synchronize contacts on Android with Google and what is needed for this? First you need to register an account with Google
. This is done in two ways - on the Google website or during the initial setup of the Android device. There is nothing complicated about this, you just need to provide a free login and come up with a normal password. Be sure to save your registered account information in a safe place.
So we now have a Google account. What to do next?
Let's consider two options:
- Your contacts were saved on your SIM card and you created an account on your new smartphone. In this case, you need to go to the “Contacts” application, visit the “Settings” item and copy contacts from the SIM card to your Google account. After this, all contacts will be sent for synchronization;
- Your contacts were saved in the smartphone, the account was created on the computer, and the smartphone itself worked without the Internet and a Google account. In this case, go to “Settings – Accounts” and add a new Google account there, specifying your login and password. After that, go to “Contacts” and copy all the entries into your account - they will automatically be sent for synchronization.
Some users disable syncing in the drop-down menu of their Android devices. This allows you to save Internet traffic and battery power. If you often add, delete and edit contacts, be sure to turn on synchronization so that the changes are saved not only on your smartphone, but also on Google servers.
After synchronizing contacts from your Android device to Google, you can go to the Gmail service website (section “Contacts”) and admire its results. Here you will also have the opportunity to conveniently edit contacts - through the Gmail web interface you can conveniently edit first and last names, add additional phone numbers, fill in addresses and add photos to contacts. In order for all these changes to appear on your smartphone, do not forget to enable synchronization.
Synchronization with Google is also convenient because it allows you to synchronize many other data - calendar entries, photos, videos, application data, data from contacts on Google+ and other data stored on your smartphone. The main disadvantage is the lack of synchronization of SMS messages.
Google – the entire basis of the “green robot” is built on it. When buying a new mobile friend, you first need to create your account. After creating it, make a few more manipulations for correct operation, the last stage of which is synchronization.
How to complete all these processes and how to enable Google account synchronization on Android at the last stage is described in detail below.
Account creation
Creating one is quite simple, following these tips:
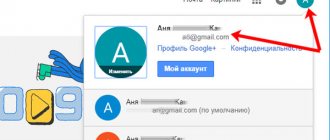
- In the field provided, enter any “name” of your choice. It will be registered as an email address. Moreover, you only need to come up with the beginning of the address, since the ending @gmail.com is set by default.
- Create a strong password.
- After clicking "OK", a user box is created.
It is imperative that you remember your address and password, since they will be required many times in the future.
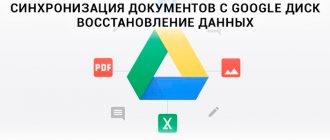
Copy and restore
After creating an account, the system will prompt you to install backup and restore. What does it mean?
- backup is the preservation of all information located on the medium, which is transferred to the account of its owner;
- recovery - since the gadget is a computer brainchild, a failure can occur at any time. In addition, the owner can, on his own initiative, reinstall and reset to factory settings. Any reinstallation will delete all information. To avoid losing it, “Recovery” will help, which after reinstallation will restore everything without loss. The entire database will be stored in the so-called “cloud”.
What does synchronization do?
Duplicating data in a Google account provides several undoubted advantages when working with the system:
- Synchronization allows you to save passwords for logging into social networks through your favorite browser. The need to enter your login and password every time will no longer be necessary.
- The ability to save all contact information recorded in the phone book of your smartphone. When purchasing a new device on the Android OS, all you need to do is log into your Google account and start syncing. Soon your phone book will be automatically filled with the names and phone numbers of all your friends, acquaintances, and work colleagues.
- Unconditional access to applications. Now all the necessary programs and utilities can be downloaded from a safe source on the Play Store. All games, programs, extensions and books are guaranteed to be free of viruses and malware. In addition, all of them can be found using one link. Very comfortably.
Sync your Android device with your Google account
Synchronization is a rather useful feature that every smartphone based on Android OS is equipped with. First of all, data exchange works in Google services – applications directly connected to the user’s account in the system. These include email messages, address book content, notes, calendar entries, games and much more. The active synchronization function allows you to access the same information simultaneously from different devices, be it a smartphone, tablet, computer or laptop. True, this consumes traffic and battery power, which does not suit everyone.
Despite the many advantages and obvious benefits of data synchronization, sometimes users may need to disable it. For example, when there is a need to save battery power, because this function is very power-hungry. Deactivation of data sharing may apply to both your Google account and accounts in any other applications that support authorization. In all services and applications, this function works almost identically, and it can be turned on and off in the settings section.
Option 1: Disable sync for apps
Below we will look at how to disable the synchronization function using a Google account as an example. These instructions will also apply to any other account used on the smartphone.
- Open “Settings”
by tapping on the corresponding icon (gear) on the home screen, in the application menu or in the expanded notification panel (curtain). - Depending on the version of the operating system and/or the shell preinstalled by the device manufacturer, find the item containing the word "Accounts"
.It may be called "Accounts"
,
“Other accounts”
,
“Users and accounts”
. Open it. - Select an item "Google"
.As mentioned above, on older versions of Android it is present directly in the general list of settings.
- The email address associated with it will be indicated next to the account name. If you use more than one Google account on your smartphone, select the one for which you want to disable synchronization.
- Next, based on the OS version, you must do one of the following:
- Having completely or selectively deactivated the data synchronization function, exit the settings.
Note: On older versions of Android, there is a general “Accounts”
, which lists the connected accounts. In this case, there is no need to go anywhere.
Note: On some versions of Android, you can disable synchronization for all items at once. To do this, tap on the icon in the form of two circular arrows. Other possible options are a toggle switch in the upper right corner, an ellipsis there, a tear-off menu with the item “Synchronize”
“More”
button located below , clicking which opens a similar menu section. All these switches can also be switched to the inactive position.
You can do the same with the account of any other application used on your mobile device. Just find its name in the “Accounts”
, open and deactivate all or some items.
Note: On some smartphones, you can disable data synchronization (only completely) from the curtain. To do this, you just need to lower it and tap on the “Synchronization”
, turning it into an inactive state.
Option 2: Disable data backup to Google Drive
Sometimes users, in addition to the synchronization function, also need to disable data backup (backup). Once activated, this feature allows you to save the following information in cloud storage ():
- Application data;
- Call log;
- Device settings;
- Photo and video;
- SMS messages.
This data saving is necessary so that after a factory reset or when purchasing a new mobile device, you can restore basic information and digital content sufficient for comfortable use of the Android OS. If you do not need to create such a useful backup, do the following:
Prohibiting synchronization with other services
Xiaomi, Meizu, Samsung offer their cloud storage services, and I force you to register with them. This is useful because it stores settings for your calendar, music, photos, and contacts. But, as in the previous situation, this can get in the way if, for example, you reject the Xiaomi ecosystem in favor of the one proposed by Google.
To prevent your phone from exchanging data with developer services, just take a couple of steps. Let's demonstrate this using the example of Xiaomi.
Using this scheme, you can disable synchronization with any services of the smartphone manufacturer.
Greetings! When you have several iPhones in your family, then you are a very rich person, many people prefer to use one Apple ID account for all these devices. So what? At first glance, everything is really very convenient! For example, you downloaded a game (program) on one gadget, and it instantly became available on another device. Plus, you don’t need to remember the details of several accounts at once. It would seem that happiness has arrived. Live and be happy!
However, it’s not for nothing that Apple recommends creating your own unique Apple ID account for each iPhone. After all, there are also plenty of problems when using accounts at the same time (by different people on different iPhones). For example, iCloud backups. And in the event of theft of an Apple ID, all gadgets on which this identifier is activated are immediately at risk.
There is another problem that is associated with using one Apple ID on several iPhones - synchronizing call logs and calls. We'll talk about this today.
Comfortable? Certainly. But such call log synchronization is only good if all these iPhones belong to you. Otherwise, questions are possible - we are all curious and suspicious people :) But oh well, now it’s not about that, but about how to get rid of it.
How to disable synchronization and delete data in Google Chrome Instructions InDevices.ru
One of the most useful and accessible features of the Google Chrome browser today is synchronization. It allows you to use your tabs and settings anywhere, and restore them if you delete the browser. But one day, everything can go sideways - evil colleagues are not asleep.
Instructions
What to do if the computer at work is not yours, many people have access to it, and you absolutely do not want to store your personal information there, especially your browsing history and the like. It is possible and necessary to disable synchronization and delete synchronized data in this case, just remember that this operation should be performed before starting work in an unsafe place.
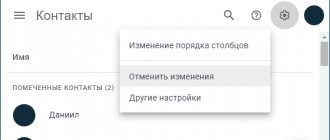
1. If you want to turn off syncing, you'll need to sign in to your Google Account first. You probably have it, since without it synchronization is impossible. To do this, click on your avatar in the upper right corner, then find the “Account” button and click on it.
2. You will enter your account settings menu. It is logical that you will be interested in the “Security” tab. Confidently click on it and go down to the very bottom of the list. Here you are interested in a certain line called “Set up access for apps and websites to your Google account.”
3. Now you need to find a line called “Linked sites, applications and services”, just below which you will inevitably see a “Disable access” button. Press it firmly. Synchronization is now disabled for all devices. But remember: the information that has already been saved will not go anywhere - you just cut off the connection.
4. It's time to delete the data. To do this, go to the standard settings of your browser, and then go to your personal account. The picture below shows where to click.
5. After that, at the bottom you will inevitably find the “Stop and Delete” button. Now all your data that was stored on the server has been deleted. Synchronization is disabled.
6. Deleting local data (if required) is carried out only in a physical way - by deleting the user from Chrome. To do this, you need "Settings" and a "Delete user" button.
Worth paying attention
You can find out more about synchronization here.
If the need arises, find out how to restore google chrome settings.
445
com_content.article
6
How to disable synchronization and delete data in Google?3.83 out of 50 based on 6 voters.
Enable Sync
Synchronization works when the following conditions are met:
- Yandex Browser is installed on all devices (computer, smartphone, tablet);
- all devices use the same
Any device running on the iOS platform immediately after connecting to the iTunes service begins synchronizing data. Some people may find this convenient, but most users find this arbitrariness annoying. Fortunately, there are ways to turn off iTunes automatic syncing, and you don’t need to be an advanced user to use them. The first method allows you to disable self-syncing with iTunes for a single device, such as an iPhone, while any other device will be able to work with the program as usual, in automatic mode.
Disable automatic sync for one device
To do this, you need to connect your smartphone or tablet to your computer via USB. Of course, automatic synchronization will begin immediately after this. In the iTunes program window, click on the image of your device under the player buttons, closer to the left side of the screen.
Immediately after this, you will find yourself in the “Overview” tab, where you can see a variety of information about your iPhone or iPad, from memory capacity and serial number to software version. Here you need to uncheck the box next to “Sync automatically”, in the section called “Options”. After this, you just need to select “Confirm” for the changes to take effect.
You can now disconnect the device and reconnect again to make sure that you have succeeded in disabling automatic syncing with iTunes. You need to remember that the setting is valid only for one smartphone or tablet, the one that was connected to the computer at the time the settings were changed. To disable automatic synchronization on another device, you will have to do the described manipulations with it as well.
Disable automatic synchronization of all devices
Another method, more radical, involves imposing a ban on any synchronization unauthorized by the user. To activate this mode, you need to launch iTunes and select “iTunes” from the menu bar, and then the submenu headed “Settings.”
In “Settings” we find “Devices” and activate the menu item “Prevent automatic synchronization of iPod, iPhone and iPad devices”.
The most important thing in your phone is your address book, or otherwise a list of contacts, SMS, photos and notes. Most of us store them in the phone's memory, not thinking about the fact that one day everything may disappear without the possibility of recovery. For example, the settings were reset or the device simply broke down.
In this case, Google has provided Android synchronization with its services. How to do synchronization on Android or how to set up synchronization on Android?
Of course, you must have a Gmail mailbox created - otherwise you will not be able to download applications from the Play market and use many Google services.
Create a Gmail mailbox
Just in case, we will describe the process of creating a mailbox.
- Type google.com in your browser and press enter.
- When the page loads, you will see “Mail” in the top right corner:
Click on the inscription “Mail” and you get the following:
Click “Create an account”. A window will appear with a form that you need to fill out:
Come up with a name for your mailbox (it will be written before @gmail.com) and a password (the more complex it is, the more difficult it will be for attackers to hack it).
You may not provide real personal information if you want to maintain anonymity. But be sure to indicate the phone number from which you want to synchronize contacts with Gmail.
You also need to go through an additional check - enter the text that will appear in the picture shown to you. And you need to check the box next to the item “I accept the Terms of Use and agree to the Google Privacy Policy.” Otherwise, registration will be impossible.
When all the required fields are filled in, click “Next”. And receive your inbox.
Causes of synchronization errors between Android and Google
When Android does not synchronize information with the Google server, the reasons must be sought primarily in the operation of your gadget. Errors can also occur on Google's side, but quite rarely. Such failures are quickly detected and corrected.
Increase
Users most often encounter a notification that indicates a failure, the exact cause of which is not clear. It may be due to user actions or incorrect login settings. Devices with unofficial firmware can harm the system, so you will have to remove them and return the gadget to its original state.
The most unpleasant situation when a Google account synchronization error is displayed on Android may be “stuck synchronization.” In this case, the entire system freezes, and the error can be corrected after rebooting the tablet or smartphone.
A synchronization error may occur due to incorrect entry of personal data (login and password). You must enter the correct information that you received during registration. In extreme situations, you can recover your password.
Sometimes synchronization errors are due to incorrect system settings. You can reset to factory settings, but in most cases this is not necessary. Just go to settings and examine the included services.
Synchronization must be enabled for all accounts. First, you can deselect services that require authentication, and then reboot the gadget. Then, on the newly turned on device, you need to go to the accounts section and check the boxes next to the corresponding services.
In some situations, you will need to disable two-level authentication in your account security settings. You can also use information transfer in the background and auto-synchronization.
If Android refuses to synchronize photos, mail, contacts and other information, perform the following steps:
- Reboot the device.
- Checking the stability of the Internet connection. We connect to Wi-Fi, if possible.
- We check that synchronization is enabled and the settings are configured correctly.
- Delete your Google account and add it again.
To delete an account, go to “Settings”, “Accounts”, then to “Google” and call up the additional menu (on the top right is a button in the form of 3 buttons). Now click “Delete”.
Increase
When deleting accounts, no data will be lost, as the account remains intact. We reboot the gadget, and the next time we turn it on, we add the Google profile again, specify the login and password.
Increase
If errors continue to occur during synchronization, you should add another Google account. If other accounts do not work normally, you need to reflash the gadget. It is recommended to use only official firmware, since custom builds have their drawbacks, which can lead to various system failures.
Solving some problems
Many owners of Android devices can use them, but do not know their Google account information, email, or password. This is most typical for representatives of the older generation and inexperienced users who ordered service and first setup at the store where the device was purchased. The obvious disadvantage of this situation is the inability to use the same Google account on any other device. True, users who want to disable data synchronization are unlikely to be against it.
Due to the instability of the Android operating system, especially on smartphones in the budget and mid-budget segments, failures in its operation can sometimes result in a complete shutdown or even a reset to factory settings. Sometimes, after turning on, such devices require entering the credentials of a synchronized Google account, but for one of the reasons described above, the user does not know either the login or password. In this case, you also need to disable synchronization, albeit at a deeper level. Let's briefly look at possible solutions to this problem:
- Create and link a new Google account.
Since the smartphone does not allow you to log in, you will have to create an account on a computer or any other properly working device. Once a new account is created, its data (email and password) will need to be entered when setting up the system for the first time. The old (synchronized) account can and should be deleted in the account settings. - Reflashing the device. This is a radical method, which, moreover, cannot always be implemented (depending on the smartphone model and manufacturer). Its significant drawback lies in the loss of warranty, so if your mobile device is still covered by it, it is better to use the following recommendation.
- Contact the service center. Sometimes the cause of the problem described above lies in the device itself and is of a hardware nature. In this case, you won’t be able to disable synchronization and linking of a specific Google account yourself. The only possible solution is to contact an official service center. If your smartphone is still under warranty, it will be repaired or replaced free of charge. If the warranty period has already expired, you will have to pay to remove the so-called lock. In any case, this is more profitable than buying a new smartphone, and much safer than tormenting it yourself, trying to install unofficial firmware.