When installing any hardware device and its corresponding drivers into the system, the user may encounter a problem with the operation of the latter, which is displayed in the “Device Manager” with error code 52. This error is due to the lack of an appropriate digital signature for this driver, which is why the Windows OS refuses to support him. Below I will analyze the essence of this dysfunction, and also explain how to fix the “Unable to verify digital signature” error on your PC.
Cannot verify digital signature of drivers (code 52) - Solution
When installing any hardware device and its corresponding drivers into the system, the user may encounter a problem with the operation of the latter, which is displayed in the “Device Manager” with error code 52. This error is due to the lack of an appropriate digital signature for this driver, which is why the Windows OS refuses to support him.
Below I will analyze the essence of this dysfunction, and also explain how to fix the “Unable to verify digital signature” error on your PC. Message about dysfunction in device information
- 1 Reasons for error code 52
- 2 How to fix “Unable to verify the digital signature of drivers (code 52)” 2.1 Method No. 1. Remove the top and bottom USB filters
- 2.2 Method No. 2. Disable integrity check
- 2.3 Method No. 3. Disable digital signature verification (for Windows 8 and 10)
- 2.4 Method No. 5. Temporarily disable driver digital signature verification (palliative method)
- 2.5 Method No. 6. Enable Administrative Templates
- 2.6 Method No. 7. Use System Restore
How to disable Windows 7 driver signature verification via command line
How to disable driver signature verification in Windows 10
If you download a driver and then install it, when the process is interrupted, an error appears; the problem lies in the driver signature. Many drivers do not have the correct digital signature, which is required when installing software on a 64-bit version of the OS. In such a situation, you can temporarily disable electronic signature verification of Windows 7 drivers via the command line.
Deactivating scanning via the command line
Note! All changes are made only through the administrator account.
To do this, you need:
- Through the “Start” button, open the full list of programs, then go to the “Standard” section.
- Here you need to run the command line as administrator.
- In the window that opens, enter “bcdedit.exe /set nointegritychecks ON”.
- Activate execution.
- When checking drivers again, you need to replace the “On” parameter with “Off”.
How to disable driver digital signature verification in Windows 7:
- Call the command line and enter “bcdedit.exe -set loadoptions DDISABLE_INTEGRITY_CHECKS bcdedit.exe -set TESTSIGNING ON” in the same sequence. After each entry you need to press “Enter”.
- Before moving on to the next input, you need to see if the task was completed successfully. The corresponding message should appear. After all commands have been completed, the digital signature verification process will be deactivated.
- To roll back the changes you have made, you will need to repeat the entered commands in the opposite order, only replace “On” with “Off”, and “Ddisable” with “Enable”.
Reasons for error code 52
The error “Unable to verify the digital signature of drivers (code 52)” on any device in Device Manager (or in “DxDiag”) usually tells the user that Windows was unable to verify the digital signature of the driver for this PC component. For this reason, Windows refuses (or stops) working with this device, and may even block the ability to install new drivers for the problematic device.
Many users encounter this error, especially often on Windows 7. This error can be caused by many reasons, starting from the installation of any specific update, installation of any incorrect or modified driver and other relevant factors.
Problematic component in remote control
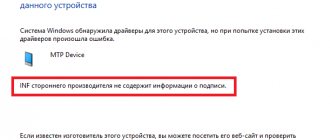
The presence of error 52 is usually indicated by an exclamation mark on the background of a yellow triangle next to any device in the “Device Manager”. Going to the “General” tab of information about this device informs the user about the presence of error 52, associated with the lack of a digital signature on its driver.
error with drivers (Code 52)
The virtual clonedrive program worked fine, didn’t even notice and then stopped working, but in the device manager it says Unable to verify the digital signature of the drivers required for this device. The most recent hardware or software change may have installed an incorrectly signed or corrupted file or malware of unknown origin. (Code 52)
I uninstalled the program and reinstalled it, it didn’t help, everything is the same, Kaspersky is installed and doesn’t seem to block it
what could it be? alcohol doesn't want to work either
How to fix “Unable to verify the digital signature of drivers (code 52)”
The specifics of how to get rid of error 52 vary depending on the device with which you are having this problem. Let's look at the most popular and effective solutions.
Method number 1. Remove the top and bottom USB filters
The first of these methods concerns solving problem 52 associated with USB devices. There are two registry entries that need to be removed, also known as “UpperFilters” and “LowerFilters,” to restore full functionality to your system. Do the following:
- Press Win+R, enter regedit there and press “Enter” (if UAC asks you for permission, confirm);
- Follow the path:
- Find the “UpperFilters” and “LowerFilters” parameters on the right, select each of them in sequence, right-click, and click on “Delete”. After removing both settings, close Registry Editor and restart your PC.
Method number 2. Disable integrity check
Launch a command prompt with administrator rights and type the following commands in sequence:
If these commands did not help, and error 52 continues to occur, then run the command line again and type:
Restart your PC.
Carry out the indicated operations
Method number 3. Disable digital signature verification (for Windows 8 and 10)
This method will allow you to install drivers for problematic devices without checking their signature with the digital functionality of Windows 8 and 10. Do the following:
- On the main screen, click on the “Start” button (or its equivalent), click on the “Power” button, hold down the “Shift” key, and then click on “Restart” (do not press the “Shift” key);
Do not press the indicated key until the PC reboots and you see the Advanced Recovery Options. In it, select “Diagnostics”, then “Advanced options”, then “Boot options”, and here we click on “Restart”. In the list of options that opens, you must select option No. 7 by simply pressing the corresponding number on the keyboard.
Disable this check
Windows OS will reboot in this mode, and you can easily install the previously problematic driver.
Method number 4. Remove drivers for problematic devices
Go to Device Manager by pressing Win+R and typing devmgmt.msc there. Find the problematic driver, hover over it, right-click, and select “Uninstall device” (or simply “Uninstall”). Then restart your PC.
Select "Delete"
Method No. 5. Temporarily disable driver digital signature verification (palliative method)
An effective (but short-lived) way to get rid of error 52 is to select the option to disable driver signature verification when loading Windows. To do this, at the beginning of the PC boot, quickly press F8, and after the menu of additional boot options appears, select the option to disable driver verification at the very bottom. Boot the system in this mode, and the problem with error 52 will temporarily disappear.
Solving the problem with checking the digital signature of the driver
Sometimes problems can arise when installing absolutely any driver. One of them is the problem with checking the digital signature of the driver. The fact is that by default you can install only software that has a signature. Moreover, this signature must be verified by Microsoft and have an appropriate certificate. If such a signature is missing, the system simply will not allow such software to be installed. In this article we will tell you how to bypass this limitation.
How to install a driver without a digital signature
In some cases, even the most trusted driver may not be properly signed. But this does not mean that the software is malicious or bad. Most often, Windows 7 owners suffer from problems with digital signatures. In subsequent versions of the OS, this issue arises much less frequently. You can identify a problem with a signature by the following symptoms:
- While installing the drivers, you may see a message box shown in the screenshot below. It states that the driver being installed does not have an appropriate and verified signature. In fact, you can click on the second inscription in the window with the error “Install this driver software anyway.” This way you will try to install the software, ignoring the warning. But in most cases, the driver will not be installed correctly and the device will not function properly.
- In Device Manager, you can also find equipment whose drivers could not be installed due to a lack of signature. Such equipment is identified correctly, but is marked with a yellow triangle with an exclamation point. In addition, error code 52 will be mentioned in the description of such a device.
- One of the symptoms of the problem described above may be the appearance of an error in the tray. It also indicates that the hardware software could not be installed correctly.
All the problems and errors described above can be corrected only by disabling the mandatory check for a digital signature on the driver. We offer you several ways to help you cope with this task.
Method 1: Temporarily disable scanning
For your convenience, we will divide this method into two parts. In the first case, we will tell you how to apply this method if you have Windows 7 or lower installed. The second option is suitable only for owners of Windows 8, 8.1 and 10.
If you have windows 7 or lower
- We reboot the system in absolutely any way.
- During the reboot, press the F8 button to display a window with a choice of boot mode.
- In the window that appears, select the line “Disable mandatory driver signature verification” or “Disable Driver Signature Enforcement” and press the “Enter” button.
- This will allow the system to boot with driver signature checking temporarily disabled. Now all that remains is to install the necessary software.
If you have windows 8, 8.1 or 10
- We reboot the system by first holding down the “Shift” key on the keyboard.
- We wait until a window with a choice of action appears before turning off the computer or laptop. In this window, select the “Diagnostics” item.
- In the next diagnostic window, select the “Advanced settings” line.
- The next step is to select “Download Options”.
- There is no need to select anything in the next window. You just need to click the “Restart” button.
- The system will begin to reboot. As a result, you will see a window in which you need to select the download options we need. In it, you need to press the F7 key to select the line “Disable mandatory driver signature verification.”
- As in the case of Windows 7, the system will boot with the signature verification service of the installed software temporarily disabled. You can install the driver you need.
No matter what operating system you have, this method has disadvantages. After the next system reboot, signature verification will start again. In some cases, this can lead to blocking the operation of drivers that were installed without the appropriate signatures. If this happens, you should disable the scan permanently. The following methods will help you with this.
Method 2: Group Policy Editor
This method will allow you to disable signature verification forever (or until you activate it yourself). After this, you can safely install and use software that does not have the appropriate certificate. In any case, this process can be reversed and signature verification can be turned back on. So you have nothing to fear. In addition, this method is suitable for owners of any OS.
- Press the “Windows” and “R” keys on the keyboard at the same time. The Run program will launch. In a single line, enter the code gpedit.msc. Don’t forget to press the “OK” or “Enter” button afterwards.
- This will open the Group Policy Editor. On the left side of the window there will be a tree with configurations. You need to select the “User Configuration” line. In the list that opens, double-click on the “Administrative Templates” folder.
- In the tree that opens, open the “System” section. Next, open the contents of the “Driver Installation” folder.
- There are three files in this folder by default. We are interested in a file called “Digital signature of device drivers.” Double-click on this file.
- On the left side of the window that opens, you must check the box next to the “Disabled” line. After that, don't forget to click "OK" at the bottom of the window. This will allow the new settings to be applied.
- As a result, mandatory verification will be disabled and you will be able to install the software without a signature. If necessary, in the same window you just need to check the box next to the “Enabled” line.
Method 3: Command Line
This method is very easy to use, but has its drawbacks, which we will discuss at the end.
- Launch "Command Prompt". To do this, press the key combination “Win” and “R”. In the window that opens, enter the cmd command.
- Please note that all the ways to open Command Prompt in Windows 10 are described in our separate lesson.
- In the “Command Prompt” you must enter the following commands one by one, pressing “Enter” after each of them.
- As a result, you should get the following picture.
- To complete, you only need to reboot the system in any way known to you. After this, signature verification will be disabled. The disadvantage that we talked about at the beginning of this method is the inclusion of a system test mode. It is practically no different from usual. True, in the lower right corner you will constantly see the corresponding inscription.
- If in the future you need to turn signature verification back on, you only need to replace the “ON” parameter in the bcdedit.exe -set TESTSIGNING ON line with the “OFF” parameter. After this, reboot the system again.
Lesson: Opening the Command Prompt in Windows 10
bcdedit.exe -set loadoptions DISABLE_INTEGRITY_CHECKS bcdedit.exe -set TESTSIGNING ON
Please note that this method sometimes has to be done in safe mode. You can learn how to start the system in safe mode using our special lesson.
Lesson: How to enter safe mode in windows
By using one of the proposed methods, you will get rid of the problem of installing third-party drivers. If you have difficulties performing any actions, write about it in the comments to the article. We will jointly solve the difficulties that arise.
We are glad that we were able to help you solve the problem.
Poll: did this article help you?
Yes No
lumpics.ru
Digital signature of drivers - how to disable its verification (in Windows 10)
Good day.
All modern drivers usually come with a digital signature, which should minimize errors and problems when installing such a driver (in principle, a good idea by Microsoft). But quite often it is necessary to install either some old driver that does not have a digital signature, or a driver developed by some “craftsman”.
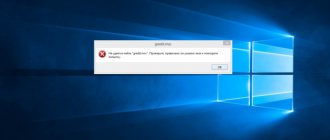
But in this case, Windows OS will return an error something like this:
"The digital signature of the drivers required for this device cannot be verified. The most recent hardware or software change may have installed an incorrectly signed or corrupted file or malware of unknown origin. (Code 52)."
To be able to install such a driver, you must disable driver digital signature checking. How to do this will be discussed in this article. So…
Important! When you disable digital signatures, you increase the risk of your PC becoming infected with malware or installing drivers that can damage your Windows OS. Use this option only for drivers that you are confident in.
Disabling signature verification through the Local Group Policy Editor
This is probably the simplest option. The only condition is that your Windows 10 OS should not be a stripped-down version (for example, this option is not present in the home version, while it is present in the PRO version).
Let's look at the settings in order.
1. First, open the “Run” window using the WIN+R .
2. Next, enter the command “gpedit.msc” (without quotes!) and press Enter (see screenshot below).
3. Next, you need to open the following tab: User Configuration / Administrative Templates / System / Driver Installation.
In this tab, the digital signature verification setting will be available (see screenshot below). You need to open this settings window.
Driver digital signature - setting (clickable).
4. In the settings window, enable the "Disabled" option, then save the settings and restart your PC.
Thus, by changing the settings in the Local Group Policy Editor, Windows 10 should stop checking the digital signature and you can easily install almost any driver...
Through special download options
To see these boot options, your computer will need to restart under certain conditions...
First, go to Windows 10 settings (screenshot below).
START menu in Windows 10.
Next, open the Update and Security section.
After that, open the “Recovery” subsection.
This subsection should have a “Reboot Now” button (to select a special boot option, see the screenshot below).
Then follow the following path:
Diagnostics—>Advanced settings—>Boot options—> (Next, click the restart button, screenshot below).
After restarting the computer, a menu for selecting parameters with which you can boot Windows 10 should appear. Among all the others, there will be a mode in which there is no digital signature verification. This mode is numbered 7.
To activate it, simply press the F7 key (or number 7).
Next, Windows 10 should boot with the necessary parameters and you can easily install the “old” driver.
PS
You can also disable signature verification via the command line. But to do this, you first need to disable “Secure Boot” in the BIOS (you can read about how to enter it in this article: https://pcpro100.info/kak-voyti-v-bios-klavishi-vhoda/), then, after rebooting, open the command line as administrator and enter a couple of commands in sequence:
- bcdedit.exe -set loadoptions DISABLE_INTEGRITY_CHECKS
- bcdedit.exe -set TESTSIGNING ON
Disabling digital signature verification via the command line
This method will only work if Secure Boot is disabled in the BIOS/UEFI!
Launch the command line with administrator rights and execute the commands one by one:
bcdedit.exe -set loadoptions DISABLE_INTEGRITY_CHECKS bcdedit.exe -set TESTSIGNING ON
After each of these commands, a corresponding message should appear indicating the successful completion of the command. Then, to complete disabling driver digital signature verification, you need to restart the computer.
Also, it is worth knowing that you can return everything as it was using the following command:
bcdedit.exe -set TESTSIGNING OFF
Error code 52 - What is it?
Error Code 52 is a Device Driver problem that users experience on any Windows 2000 operating system and later Windows systems.
The error occurs when the operating system does not allow the device connected to the computer to function properly and typically displays the following message:
“The digital signature for the drivers required for this device could not be verified. A recent hardware or software change may install a file that is incorrectly signed or corrupted, or that may contain malware from an unknown source. (Code 52) "
Download Available to completely restore error code 52
We recommend: Download driver Automatic assistant to fix this and other PC driver issues.
Certified safe, virus free. Error Tools Editor's Choice.
Additional information and repair instructions
Error code 52 can pose serious risks to the overall health of your PC and any negligence in correcting it can have disastrous consequences for your computer.
However, since the error code is like other device driver errors, resolving the error is relatively simple. Here are some ways to solve the error code.
Method 1 - Using System Restore
You can use the recovery system to roll back the system to a time when there was no error to fix the problem. Here's how you can use:
- Login with an administrator account
- Click the Start button and select All Programs > Accessories > System Tools > System Restore
- Click 'Restore my computer to an earlier time' and click 'Next'
- Select the latest Windows restore point from the "In this list, select item" restore list and click "Next"
- Click 'Next' in the confirmation window to continue
- Restart your computer after the recovery is complete
By restoring your system using the last saved system checkpoint, you can obtain intact Windows registry files, which can help prevent the error code.
Method 2 - Run the Troubleshooting Wizard
If restarting your computer does not help, you will have to find the exact nature of the problem by running the troubleshooting wizard for the device and resolving the problem accordingly. To do this, follow these steps:
- Launch Device Manager on PC
- Click on the program under the installed programs that is causing problems for you
- Click on the "General" tab
- Click the "Troubleshooting" button
- When opened, the troubleshooter will ask a series of questions regarding the error. Answer the questions and follow the instructions to resolve the error code.
After following the wizard and troubleshooting instructions, make sure to restart your computer for the changes to take effect. Then check if your device is still causing problems.
Method 3 - Manually Uninstall and Reinstall the Device Driver
Uninstalling and reinstalling the device driver may help resolve this error.
You can do this by first logging in as Administrator and opening Device Manager. Select the device that is causing the problem and double click on it and make sure that the peripheral device is connected to the computer.
When opened, go to the "Driver" tab and then select "Update Driver". Make sure to refer to the system documentation that you received from your PC or computer to check the details and features of the motherboard drivers.
Method 4 - Using Automatic Driver Download Software
Manually uninstalling and reinstalling the driver will do the trick, however it can be time consuming, especially when you have to resort to the hardware user manual.
So, using a program such as Driver Assist will help you save a lot of time and frustration in getting your device to work properly on your computer.
Driver Assist, with a friendly approach to help you fix your PC problems, comes with an integrated database that determines which drivers need to be reconfigured within seconds and loads it automatically.
Disabling Windows 7 driver signing through the Local Group Policy Editor
How to disable test mode in Windows 10 and remove the inscription
To completely disable signature verification on Windows Seven, you must do this through the Group Policy Editor. This is done like this:
- Enter “gpedit.msc” in the search bar and open the registry editor.
- A menu will appear where you need to go to “User Configuration”, then to “Administrative Templates”, then to “System” and finally to “Driver Installation”.
- Find the line with the name Code Signing for Device Drivers and double-click on it.
- A new window will open asking about, and at the bottom “Ignore” confirm your choice.
- Reboot your device.
Note! When you turn on the computer again using Group Policy, electronic signature verification will be completely disabled. The user will be able to install any software on their Windows 7 operating system.
Local Group Policy Editor
How to disable driver digital signature verification in Windows 7
In Windows 7, Microsoft has significantly tightened the requirements for installed drivers (we recommend that you read this interesting article about installing device drivers in Windows 7). Now any driver you install must be digitally signed, verified and certified by Microsoft. Before downloading and installing a driver for any device, Windows 7 verifies the digital signature of that driver. And if, when you try to install a driver for a new device in Windows 7, you see the message: “ Windows can't verify the publisher of this driver software ,” then this driver is not digitally signed. In the window indicated by the dialog, you can select the option “Install this driver software anyway” , but in any case, this driver will not be installed, which means the device will not work.
If you install an unsigned driver, the device will be marked with an exclamation mark in Device Manager and contain the following error message:
Windows cannot verify the digital signature for the drivers required for this device. A recent hardware or software change might have installed a file that is signed incorrectly or damaged, or that might be malicious software from an unknown source. (Code 52)
Also, problems with the digital signature of drivers may be indicated by the following errors: Device driver software was not successfully installed
The digital signature verification policy for drivers works in both 32 (x86) and 64 (x64) versions of Windows 7, and the main reason for the appearance of such a policy for installing third-party drivers is the desire to improve the stability and reliability of the Windows OS, ensuring that All released drivers passed through a certification test and compatibility test at Microsoft.
Fortunately, in Windows 7 you can disable driver digital signature verification. And you can do this in several ways:
- Sign the driver yourself (you can do this using special software, or according to the instructions described in the manual How to digitally sign a driver for Windows 7 x64)
- Disable driver signature verification using Group Policy
- Change OS boot mode to boot without digital signature verification (using bcdedit )
- Boot Windows 7 without checking the digital signature (via the boot menu using the F8 key)
Let's consider all the listed options for disabling driver signature verification
Disabling digital signature verification of drivers Windows 7, 8, 8.1, 10
Disabling digital signature verification of drivers in windows 7, 8, 8.1, 10 . Most of the problems of users who are faced with the fact that Windows OS cannot detect the device is due to the fact that starting from Windows 7 and up to the newest version of Windows 10, verification of the digital signature of drivers is enabled. How to bypass this obstacle and install the required driver, read in this material!
What is a signed driver?
A signed driver is a device driver with a digital signature.
A digital signature is an electronic security mark that identifies the publisher of the software and changes to the original contents of the driver software package. If the driver is signed by the publisher and verified by a certificate authority, you can be confident that the driver was released by that publisher and has not been modified. Windows will display one of the following warnings: the driver is not signed, the publisher's signature is not verified by a certificate authority, or the driver has changed since release. In short, if a driver has not been signed by MicroSoft, then such driver will not be digitally signed with Windows drivers. It is with such a driver that problems arise during installation.
In this article we will look at how to disable driver digital signature verification in Windows 10, Windows 8 and 8.1, as well as Windows 7.
Disable Windows 10 driver digital signature verification
Method number 1 - reboot menu
Before using this method, save all your work data on the computer and close the programs.
1.Go to “ START ” and select “ Settings ”
2. Go to “ Update and Security ” -> “ Recovery ” -> “ Special boot options ” -> “ Restart now ”
3. Next, the computer will reboot into a special Windows recovery mode; you will need to go to “ Troubleshooting ” -> “ Advanced options ” -> “ Boot options ” -> “ Restart ”
4. Windows will reboot again and a menu with boot selection options will appear in front of you, press the F7
5. Checking the digital signature of drivers in Windows 10 is disabled for a while (until the next reboot), install the necessary driver.
Method No. 2 - Local Group Policy Editor
1. Press the WIN + R and in the “Run” window that appears, write the command gpedit.msc and click Ok
2. In the Local Group Policy Editor , go to the menu “ User Configuration ” -> “ Administrative Templates ” -> “ System ” -> “ Driver Installation ” and select the option to change “ Digital signature of device drivers ”
3. Set the parameter to “ Disabled ”, if at the bottom of the window (If Windows detects a driver file without a digital signature:) changes are available, set the parameter to “ Skip ”
4. Confirm the changes and restart your computer; driver digital signature verification is disabled in Windows 10.
Method No. 3 - command line (test mode)
1. In the start menu, search - enter cmd
2. Run Command Prompt as Administrator
3. Enter the following commands one by one:
bcdedit.exe -set loadoptions DISABLE_INTEGRITY_CHECKS bcdedit.exe -set TESTSIGNING ON
4. Confirm the changes and restart your computer; driver digital signature verification is disabled in Windows 10.
Method number 4 - command line (Windows 7 download option)
1. In the start menu, search - enter cmd
2. Run Command Prompt as Administrator
3. Enter the command:
bcdedit /set "{current}" bootmenupolicy legacy
4. Restart your computer and press the F8 key as the computer boots up
5. In the menu, select “ Disable mandatory driver signature verification ”
4. Driver digital signature verification is disabled in Windows 10.
{rutube}556f64dc8299f3f67c89bb7cea093c50{/rutube}
Disabling digital signature verification of Windows 8.1/8 drivers
Method number 1 - reboot menu
1. Press the WIN + I
2. In the side menu that appears on the right, select “ Options ”
3. Hold down the “Shift” button and select “ Reboot ”
4. Next, the computer will reboot into a special Windows recovery mode; you will need to go to “ Diagnostics ” -> “ Advanced options ” -> “ Boot options ” -> “ Restart ”
4. Windows will reboot again and a menu with boot selection options will appear in front of you, press the F7
5. Checking the digital signature of drivers in Windows 8.1/8 is disabled for a while (until the next reboot), install the necessary driver.
{rutube}f24ddaa7f79a4e0bd0e046e68304d306{/rutube}
Method No. 2 - Local Group Policy Editor
1. Press the WIN + R and in the “Run” window that appears, write the command gpedit.msc and click Ok
2. In the Local Group Policy Editor , go to the menu “ User Configuration ” -> “ Administrative Templates ” -> “ System ” -> “ Driver Installation ” and select the option to change “ Digital signature of device drivers ”
3. Set the parameter to “ Disabled ”, if at the bottom of the window (If Windows detects a driver file without a digital signature:) changes are available, set the parameter to “ Skip ”
4. Confirm the changes and restart your computer, driver digital signature verification is disabled in Windows 8.1/8.
1. In the start menu, search - enter cmd
2. Run Command Prompt as Administrator
3. Enter the following commands one by one:
bcdedit.exe -set loadoptions DISABLE_INTEGRITY_CHECKS bcdedit.exe -set TESTSIGNING ON
4. Confirm the changes and restart your computer; driver digital signature verification is disabled in Windows 10.
Method number 4 - command line (Windows 7 download option)
1. In the start menu, search - enter cmd
2. Run Command Prompt as Administrator
3. Enter the command:
bcdedit /set "{current}" bootmenupolicy legacy
4. Restart your computer and press the F8 key as the computer boots up
5. In the menu, select “ Disable mandatory driver signature verification ”
4. Driver digital signature verification is disabled in Windows 8.1/8.
Disabling Windows 7 Driver Digital Signature Verification
Method number 1 - command line (permanent shutdown)
1. In the start menu, search - enter cmd
2. Run Command Prompt as Administrator
3. Enter the command
bcdedit.exe /set nointegritychecks ON
4. Restart your computer; driver digital signature verification is disabled in Windows 7.
5. To reactivate the scan, enter on the command line:
bcdedit.exe /set nointegritychecks OFF
Method number 2 - command line (temporary disabling)
1. In the start menu, search - enter cmd
2. Run Command Prompt as Administrator
3. Enter the following commands one by one:
bcdedit.exe -set loadoptions DISABLE_INTEGRITY_CHECKS bcdedit.exe -set TESTSIGNING ON
4. Confirm the changes and restart the computer; driver digital signature verification is disabled in Windows 7.
Method number 3 - reboot menu
F8 key as the computer boots up
2. In the menu, select “ Disable mandatory driver signature verification ”
See also - Android - General
Booting Windows 7 without verifying digital signature
It is possible to temporarily disable driver signature verification if you reboot the system and press the F 8 . In the menu that appears with system boot options, select Disable Driver Signature Enforcement .
After booting Win 7, you can install an unsigned driver and test its operation, but if you boot in normal mode, the driver will not work
WHY DISABLE DRIVER DIGITAL SIGNATURE CHECKING?
Obviously - to install a driver without a digital signature. It’s one thing when the software still has some kind of signature (even if it’s fake or modified), it’s quite another when it’s completely absent. In these cases, Windows may simply block driver installation without even offering the user the option to continue the installation.
Another reason is the installation of outdated drivers. The user may have a device at his disposal that is no longer supported by the manufacturer, i.e. New driver versions are no longer written for it. If, for example, the latest version of the software was written for Windows 7, and the user switched to Windows 10, then when trying to install the driver, the same error may appear. But this is not a reason to reinstall an old version of the operating system on your computer or purchase new equipment.
There is a simple solution to this problem - disabling the digital signature system verification function. And this can be done in several ways.
Disable driver signature verification in Windows 7 using Group Policy
If you want to completely disable driver signing verification in Windows 7, you can do this using Group Policy.
Open the Local Group Policy Editor by typing gpedit . msc
In the policies menu, go to User Configuration->Administrative Templates->System->Driver Installation.
In the right pane, find 'Code Signing for Device Drivers' and double-click on it.
In the window that appears, select 'Enabled', and in the lower menu - 'Ignore'. Click OK and restart your computer. After rebooting and applying the policy, you will completely disable driver signing in your Windows 7 and will be able to install any drivers, including unsigned ones.
Disabling driver digital signature verification in Windows 8.1 and Windows 8
In Windows 8, there are two ways to disable digital signature verification in the driver - the first allows you to disable it once for installing a specific driver, the second allows you to disable it for the entire subsequent time the system is running.
Disable using special boot options
In the first case, open the Charms panel on the right, click “Settings” - “Change PC settings”. Under Update & Recovery, select Recovery, then Special Boot Options, and then click Restart Now.
After rebooting, select Diagnostics, then Boot Options and click Restart. On the screen that appears, you can select (using the number keys or F1-F9) the “Disable mandatory driver signature verification” option. After loading the operating system, you will be able to install an unsigned driver.
Disable using Local Group Policy Editor
The next way to disable driver digital signature verification is to use the Local Group Policy Editor in Windows 8 and 8.1. To launch it, press the Win + R keys on your keyboard and enter the command gpedit.msc
In the Local Group Policy Editor, open User Configuration - Administrative Templates - System - Driver Installation. After that, double-click on the “Digital signature of device drivers” item.
Select Enabled, and in the If Windows detects a driver file without a digital signature, select Ignore. That’s all, you can click “Ok” and close the local group policy editor - the check is disabled.