Good afternoon Dear readers and guests of one of the largest IT blogs Pyatilistnik.org. Last time, we learned how to create backup copies of certificates and copy them to the location you need, two utilities helped us with this, robocopy and keytool. Today I want to tackle troubleshooting again, namely one of the unpleasant situations that has been present in the Windows Server operating system since 2012. We will look at methods to solve when your startup does not work in Windows Server 2016 . When you try to open it, nothing simply happens and you lose the great convenience associated with it.
Description of the situation
The enterprise infrastructure has a fault-tolerant RDS farm based on Windows Server 2020; on one of the RDSH servers, users had a problem that when they try to open the Start menu, nothing happens, the button simply does not respond. This has a very detrimental effect on the work of employees, since not all of them can run the programs they need and not everyone knows short commands for the “Run” menu, through which you can open a bunch of things. As I wrote above, this glitch has still existed since the days of Windows Server 2012 and can just as easily occur in Windows Server 2020, thanks to Microsoft.
Video on the topic
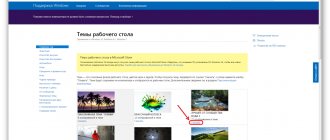
As it became clear from reviews on various forums, there is not much love for the Windows Store, and this is justified - it has bugs and an unfriendly interface. The whole UWP scheme that the store is based on seems like a harsh way to force people to use it. Whatever the Windows store is, there is some good in it - good free applications, mini games for children, and most importantly, the absence of viruses in applications. These fixes are not only useful for the windows store, but most of them can be applied to any UWP app. Let's look at solutions to why the store doesn't work in Windows 10, and how to reinstall and restore the windows store.
Before you get started with the correct fixes, there is a small list of things you should check before proceeding:
- Windows updated
- UAC (User Account Control) is enabled
- Your video cards/graphics drivers are up to date
The main reasons why the start button breaks in Windows Server 2016
I would like to note right away that in some cases you will have to work hard to restore the start menu, and sometimes it is faster to simply reinstall the server, unless of course there is nothing extraordinary on it. I would like to highlight the following list of reasons why the startup does not work:
- The process responsible for the Start menu has frozen in the system.
- Your system has damaged files and components, for example due to a virus
- In your system, the rights to the folder or registry branch responsible for opening the start button have been lost
- A buggy Windows update has arrived
- Third-party utilities, after installation of which there is a conflict in the system
Since it took me a lot of time to fix this error and I tried a lot of things, I decided to structure it all and write it down in the form of a separate article, in the hope that my path will be useful to someone
Why doesn't the Start menu work in Windows 10?
The causes of the malfunction may be the following:
- Damage to Windows system files responsible for the operation of the Windows Explorer component.
- Problems with the Windows 10 registry: important entries responsible for the correct operation of the taskbar and Start menu have been erased.
- Some applications that caused conflicts due to incompatibility with Windows 10.
An inexperienced user can cause harm by accidentally deleting service files and Windows entries, or malicious components obtained from an unverified site.
Restart the process responsible for the start button
It is logical to assume that in Windows operating systems, one or another process is responsible for any component, and the start button is no exception. Two processes are responsible for its functionality:
- Explorer.exe (Explorer)
- StartMenuExperienceHost.exe (Run)
Knowing this, I first of all always advise trying to restart them, since this is simple and does not require a server reboot. To do this, press three CTRL+SHIFT+ESC buttons at the same time; this will launch the task manager, through which you can complete our idea.
I remind you that I have already described these methods and additional ones in the article “Startup does not open in Windows 10”
Let me immediately note that you can find processes on the “Processes” tab, as well as on the “Details” tab. The difference is that on the first, almost everything will be in Russian, and on the second, everything will be purely system names. Explorer.exe process in the Russian version is called “Explorer”, right-click on it and select “Restart” or “End task” from the context menu, sometimes this is required.
The process StartMenuExperienceHost.exe in the Russian version is called “Run”
Well, on the “Details” tab you can find all the same things.
If you just remove the Explorer task, then everything will disappear and only the task manager will remain. Next, click in the top menu “File - Create task” and in the window that opens, enter explorer.exe and press “Enter”. This will get you back to explorer and won't require a server restart
In many cases, this helps to fix a critical error when the start button on your server does not work, this is such a light option.
Startup does not work in Windows 10 (video)
To better understand everything, watch the video instructions with step-by-step guidance and only then proceed with specific actions.
New programs will always have bugs and bugs. Sometimes they seriously interfere with normal operation of the computer. One of these is the Start menu not working. To fix the problem, you can download a troubleshooter or use the rollback options. Each case has its own pros and cons, but all of them easily eliminate the system bug. Updates in Windows 10 constantly cause inconvenience to users, forcing them to waste time searching for the causes of problems and fixing them. Many people, having restarted their computer after installing the next batch of unknown updates, were faced with the fact that the Windows 10 start button does not work.
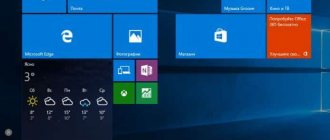
The menu does not open by clicking on the Start icon and does not respond to the Win key (with the window logo). Sometimes, in addition to this, the “Options” menu may not open and other graphical menus may not function. To fix the problem, read this article to the end and follow the instructions contained in it.
Interestingly, in the summer of 2020, Microsoft deigned to release an application for finding and getting rid of factors blocking the appearance of Start.
Explorer.exe is a file that is a graphical shell for Windows. Thanks to it, Explorer, all windows and menus of the operating system work. During its operation, a problem may occur (for example, conflicts with RAM addresses). If startup does not work in Windows 10, the first thing you should do is restart the “explorer.exe” process.
1. Call the “Task Manager” using the keyboard shortcut Ctrl+Shift+Esc or the taskbar context menu.
2. Go to the “Processes” tab if the window opens in a different one.
If the dispatcher is launched in a simplified window, click on the “Details” button.
3. Find the “Explorer” or “Explorer” process and call the “Restart” command.
4. We confirm our intentions to interfere with the functioning of the system process.
The method does not always work, so you should not rely on its success.
Restarting the search service
If the startup stops working, you can use quick solutions to check that your search service and the process itself are running. Go to the Services snap-in (services.msc) and find the “ Windows Search ” service there, make sure that it is running and that its startup type is “ Automatic ”.
Also open “Task Manager”, “Details” tab. Find SearchUI.exe there and remove the task from it, it will be restarted.
You can find the same thing on the “Processes” tab, there will already be “Search”
Restoring the startup using the diagnostic tool
The next method, I strongly recommend that you use the utility developed by Microsoft “Tool for diagnosing and fixing problems with the “Start” button (startmenu.diagcab)”.
Download “Start Button Diagnostics and Fixes Tool (startmenu.diagcab)”
We launch the utility, it will show that it will look for problems with the operation of the main Start menu. Click next.
The utility will begin scanning and detecting problems.
After some time you will get the result. If everything is fine, the status will be “ The troubleshooting module did not detect a problem ”
If you wish, you can view all completed checks in more detail through the item “ View additional information ”
What exactly does the troubleshooter check besides installing packages? Checks whether the current user has permissions to access the following registry key and corrects access control lists if necessary:
HKEY_CURRENT_USER\Software\Microsoft\Windows\CurrentVersion\DeviceAccess\Global
If there are problems, you may see error messages like these that cannot be fixed:
Reauired application are not installed correctly. Install the applications
It complains that the components are not installed.
Reauired application are not installed correctly “Microsoft.Windows.ShellExperienceHost” and “Microsoft.Windows.Cortana” applications are installed correctly”
As you can see, he subtly hints to us that it would be good to reinstall Microsoft.Windows.ShellExperienceHost.
More alternatives
If none of the above solutions to the problem helped, try fixing the registry key HKEY_CURRENT_USER\ Software\ Microsoft\ Windows\ CurrentVersion\ Explorer\ Advanced. Create or edit a key called “EnableXAMLStartMenu” of type DWORD and add the value 0 to it. Another alternative is to create a new user on the system and try the Start menu under it. The easiest way to do this is with the “net user” system command on the command line.
In short, if Start stops working, use one of the methods given.
How to re-register Start menu components in Windows Server 2020
Very often, the Start menu may not work due to a damaged or missing package. No one is stopping you from re-registering the Start menu. With the help of Windows PowerShell, you can make this possible, the instructions for using which are mentioned below. Note that you need to be logged in as an administrator , so if your system is part of a domain, this may not work as users typically have minimal rights on the workstation.
The first thing you must do in order to re-register the package responsible for your Start menu is to launch PowerShell in administrator mode. In the PowerShell window you need to enter the following command:
Get-appxpackage -all *shellexperience* -packagetype bundle |% {add-appxpackage -register -disabledevelopmentmode ($_.installlocation + “\appxmetadata\appxbundlemanifest.xml”)}
Once the command has completed successfully, you can close the PowerShell window and restart your computer. After restarting the system, the problems you were experiencing with the Start menu should be resolved.
If you then still cannot interact with the Start button and the scan tool still shows the missing components “Microsoft.Windows.ShellExperienceHost” and “Microsoft.Windows.Cortana”, then the cause may be your antivirus, for example Comodo Internet Security or Symantec.
Hotfix for Windows 10 version 1903.
This fix is exclusive to Windows 10 version 1903 , you can try it. In fact, it should be the first thing you do before you do anything else.
The Start menu is now a separate process that you can restart just like you can restart Explorer.exe . Open Task Manager and on the Processes , find Start (Run). Select it and click the "End task" button at the bottom.
Remove third party apps
Many Windows 10 users still don't like the look and functionality of the Start menu, so they tend to use apps to change it. For the most part, these apps are stable and rarely break anything, but you should uninstall them if the Start menu button stops working.
Also, if you have any apps that change how your keyboard works, such as an app that overrides your keyboard keys, disable it.
Include XAML
XAML is the language in which modern Windows 10 apps are written, and the Start menu is a XAML app that requires UAC access. Typically, UAC access is enabled by default, but you may accidentally disable it, or enabling it again may fix the problem. You can do this from PowerShell or from the command line.
PowerShell
Open PowerShell with administrator rights and run the following command;
Get-AppxPackage -all *shellexperience* -packagetype bundle |% {Add-AppxPackage -register -disabledevelopmentmode ($_.installlocation + “\appxmetadata\appxbundlemanifest.xml”)}
Command line
Open a new file in the text editor Notepad and paste the following into it. Save the file with the CMD extension and run it as administrator. It will make changes to the Windows registry to enable XAML.
REG ADD "HKCU\Software\Microsoft\Windows\CurrentVersion\Explorer\Advanced" /V EnableXamlStartMenu /T REG_DWORD /D 1 /F taskkill /f /im explorer.exe start explorer.exe
Delete Cortana files
If you're not using Windows 10 1903, the Start menu, Search, and Cortana are still closely related to each other, so deleting Cortana-related files may solve the problem.
Open a Command Prompt with Administrator rights and run the following commands, one after the other.
CD /d “%LOCALAPPDATA%\Packages\Microsoft.Windows.Cortana_cw5n1h2txyewy” Taskkill /F /IM SearchUI.exe RD /S /Q Settings
Using the Run command
1. Press the Win + R key combination to open the Run
2. Copy and paste the following command and press Enter:
REG ADD "HKCU\Software\Microsoft\Windows\CurrentVersion\Explorer\Advanced" /V EnableXamlStartMenu /T REG_DWORD /D 0 /F
This will create the EnableXamlStartMenu with a value of 0 .
3.Open the Run and copy and paste:
taskkill /f /im explorer.exe
After pressing Enter, the task will be completed - Windows Explorer .
4.Press the key combination Ctrl + Shift + Esc, in the Task Manager that opens, click the menu “ File” → “Run new task”
5.Type:
explorer.exe
And press Enter. This will launch a new instance of Explorer.
By editing the Windows registry.
Follow these steps:
1. Open the Registry Editor.
2. Go to:
HKEY_CURRENT_USER\Software\Microsoft\Windows\CurrentVersion\Explorer\Advanced
3. Create a new 32-bit Dword parameter named EnableXamlStartMenu .
4. Give it a value 0
5. Logout and login or reboot the system.
Your Start menu should now work.
Disable the “Use my login details...” option.
This solution is somewhat confusing, but it works for some users. Open the Settings and go to the Accounts . Select the Sign-in Options and turn off the Use my sign-in information to automatically complete device setup and open my apps after restarts and updates . Reboot your system.
Removing antivirus to repair the Start button
There are unpleasant situations when a program that is designed to protect you breaks your system or its components; there are plenty of such cases. If you have antivirus solutions in your OS other than Windows Defender, you can try removing them (Avast, Comodo).
By the way, Windows Defender can be removed in Windows Server
You can remove an antivirus like any regular program; if you wish, you can download a special utility for these things from the manufacturer’s website; usually every antivirus has them. After removing the antivirus, be sure to restart the server or computer. Next, when the system boots again, open PowerShell in administrator mode and enter the commands:
Get-AppxPackage Microsoft.Windows.ShellExperienceHost | Foreach {Add-AppxPackage -DisableDevelopmentMode -Register "$($_.InstallLocation)\AppXManifest.xml"}
Get-AppxPackage Microsoft.Windows.Cortana | Foreach {Add-AppxPackage -DisableDevelopmentMode -Register "$($_.InstallLocation)\AppXManifest.xml"}
Get-AppxPackage Microsoft.Windows.StartMenuExperienceHost | Foreach {Add-AppxPackage -DisableDevelopmentMode -Register "$($_.InstallLocation)\AppXManifest.xml"}
Or re-register all packages at once:
Get-AppXPackage -AllUsers | Foreach {Add-AppxPackage -DisableDevelopmentMode -Register "$($_.InstallLocation)\AppXManifest.xml"}
Next, open the Windows registry and go to:
HKEY_LOCAL_MACHINE\SYSTEM\CurrentControlSet\Services\WpnUserService
We find here the key with the name “ Start ”, double-click on it and change the value to 4 . Then be sure to reboot your system. This should fix the Windows Start menu not working.
Restoring damaged components in the system
Very often, one of the reasons why the startup does not work is damage to the Windows file system and its components, as a result of which you will also receive the error:
Critical Error: Start Menu and Cortana app are not working. We will try to fix this issue the next time you sign in.
Critical Error: Start menu and Cortana aren't working. We'll try to fix it the next time you sign in.
In such a situation, you need to run one script that will allow you to quickly check and restore everything. I already talked about the script in the article where we repaired errors “80244010 and C80003FB”.
After you download and extract it, you need to run the ResetWUEng.cmd file as administrator
As a result, you will have the script running, on the familiarization screen you need to confirm that you are running it, to do this, press “Y”.
All the capabilities of this Reset Windows Update Tool script will appear before you . We will be interested in points from 5 to 11.
Select the fifth item (Runs Chkdsk on the Windows Partition) to check our C:\ drive for software and physical errors. You will be notified that this can be done the next time you reboot the system, confirm by pressing the "Y" key.
Reboot your system. To do this, you can select item 19 “ Restarts your PC ”
This is what checking for errors in Windows will look like. After your system boots, immediately check whether your start button opens or not. If not, then move on to the next point in the script.
Select the sixth item “ Run the System File Checker Tool ”, essentially you will run the command ( sfc /scannow ). Using the System File Checker is quite a lengthy process, so you will have to be patient.
We are waiting for completion. If errors are found, sfc will try to fix them. There may be situations where this does not work and you need to move on to the next point. If integrity has been restored, then try rebooting and making sure that your Start menu is active again. I would like to note that the entire scanning process will be displayed in the logs, where you can also view individual errors:
Path to the log file %WinDir%\Logs\CBS\CBS.log
If your Start menu still does not work, then select item 8 “ Checks the image for component store corruprion ”. You will have the command (dism /checkhealth) executed. Ideally there should be no damage. If it is found, then go to step 9.
Launch the “ Perform repair operations automatically ” item. This is similar to the command (dism /online /cleanup-image /restorehealth). After some time, everything should be restored.
If recovery fails, then you need to open the log file and look for errors. You can find them along the following path:
C:\Windows\Logs\DISM\dism.log
If for some reason you are not able to download my script, or you do not have Internet access on the server, then simply run the commands one by one:
- sfc /scannow
- DISM /Online /Cleanup-Image /ScanHealth
- DISM /Online /Cleanup-Image /CheckHealth
- DISM /Online /Cleanup-Image /RestoreHealth
Don't forget to reboot later.
Let's move on to point 11 ( Deletes any incorrect registry values ) and try to delete old and incorrect entries in the registry.
Just in case, a backup copy of the entire registry will be created on your desktop. After that, diagnostics and cleaning of the Windows registry from junk entries begins. If the operation is completed successfully, I suggest you reboot and check whether Start is now working (Try not to immediately delete the folder with the registry backup, but keep it for at least a week, just in case)
If you do not have the opportunity to download the script described above, then you can also execute the code on the command line:
sfc /scannow & DISM /Online /Cleanup-Image /ScanHealth & DISM /Online /Cleanup-Image /CheckHealth & DISM /Online /Cleanup-Image /RestoreHealth
Restoring the TileDataLayer database
It happens that a user's local profile may be corrupted. Specifically, the TileDataLayer database, packages folder, and UsrClass.dat file may be corrupted. Let's try to restore them.
You must have an account that does not have problems with the Start Menu, as you need good copies of the TileDataLayer database to copy. This can be done from another server running Windows Server 2016
The algorithm of actions is as follows.
- You log into a server running Windows Server 2020, where the Start button works. Be sure to make sure that you have two accounts there with administrative rights, this is due to the fact that when the user session is active, it uses files from the TileDataLayer folder, they are locked, so you need to copy them from the second account, which is in is currently not active on the server. The folder is located on the path " %LOCALAPPDATA%\TileDataLayer\Database "
- Next, you go to a server where the start button does not work. You must be logged in with an administrator account with rights to both user profiles. Follow the path, replacing the login with the name of the failed one.
C:\Users\your login\AppData\Local
- Rename or delete the Packages folder, I personally renamed it to the Packages.old
- Delete or rename the UsrClass.dat along the path “C:\Users\failed account login\AppData\Local\Microsoft\Windows\UsrClass.dat”. I renamed it to UsrClass.old
- Next, you need to replace the broken TileDataLayer folder with a working one, the one you copied from another server. I remind you where to put it “C:\Users\login of the damaged account\AppData\Local\TileDataLayer\Database”
- Reboot and check the operation of the Start menu
How to fix ms-gamingoverlay Windows 10
Before using our solutions to the problem, make sure that you have the latest version of the Windows 10 operating system installed. If necessary, update the system and check for the current error. Installing updates can fix the current problem by replacing broken files and installing a new version.
Selecting standard applications
- Open the updated Settings by pressing the key combination Win+I .
- Next, go to Applications > Default Applications and click the Select default applications for protocols .
- In the current window, make sure that ms-gamingoverlay is associated with Xbox gaming overlay and ms-gamebarservices is associated with Xbox Game bar .
Even if you have the correct associations, you can select the same applications for the protocols and restart the computer. After a reboot, the problem may disappear forever.
Disabling Xbox DVR
One of the options for solving the problem with ms-gamingoverlay associations is to completely disable the Xbox service in Windows 10. For all methods of disabling Xbox DVR, see our instructions. If you wish, you can use other methods to disable the Xbox program.
- Make sure you have the latest version of Xbox Game bar .
Application re-registration
Before restoring all standard applications, you can check the integrity of Windows 10 system files.
- Run Windows PowerShell as an administrator.
- Run the following command to restore all standard applications: [stextbox >After executing the current command, reboot the computer. The team will restore the Xbox application if you previously deleted it. Then you can proceed to the implementation of the methods proposed above.
In this article, we looked at how to fix and disable the ms-gamingoverlay error in Windows 10. There are several ways to solve the problem, ranging from simple ones by simply disabling the Xbox program in Windows 10 to completely reinstalling the operating system or returning the system to its original state. You can also try to create a new account and check for the error, since most likely it will not exist on another account.
Checking Applocker Policy
Applocker is a really good feature, but like all security features, it has some pitfalls. One of them is that if you enable Applocker in Windows 10 or Windows Server 2020, the Start button will no longer work. If you left-click, nothing will happen.
If you have a Windows 2008 R2 domain controller, then you will not see " Rules for Packaged Applications " in the Group Policy Management Console. You will need to create this policy on a Windows Server 2012 or higher server with GPMC. To resolve this issue, you need to create rules for packaged apps in Applocker Group Policy. To do this, follow these steps:
- Go to "Computer Configuration - Policies - Windows Configuration - Security Settings - Application Control Policies - Applocker"
- 2. Right-click Application
Rules and select
Create Default Rules.
- After updating Group Policy to a Windows 10 workstation, the Start button will work again.
Restore manually using Registry Editor
Our third and final method for fixing the Start button not working is using Registry Editor. This method is essentially the same as the previous one, but you will have to make changes to the registry manually.
- Launch the registry editor by running the regedit in the Win+R window.
- Go to the path: HKEY_CURRENT_USER\ Software\ Microsoft\ Windows\ CurrentVersion\ Explorer\ Advanced.
- In the same place, right-click and select New - DWORD and set the parameter name EnableXAMLStartMenu and the value 0 .
If this parameter exists, then immediately change its value to the desired one. After these steps, check the functionality of the Start button on Windows 10.
conclusions
In this article, we figured out what to do when the Windows 10 Start button does not work. Write comments if this article helped you or if you know other ways to restore the Start button to work. Don't forget to subscribe to updates and share the article on social networks.
Create a new account
You need to find out whether the problem is at the server level or at the level of your account. To do this, in the case of domain computers, you can try logging in under a different account and check whether the launcher opens or not. In the case of a regular Windows Server 2020 server that is in a workgroup, I advise you to create a new account and check under it. To do this, at the command prompt in administrator mode, enter:
net user username password /add ( In my example net user pusk 123456 /add)
Next, we try to log in as a new user, if you are using a remote connection to your desktop, then do not forget to give the account administrative rights
Re-register Windows Store apps
Another way to reset a store app is to force it to re-register on your computer, laptop.
- Run Command Prompt as Administrator. Type in “ search ”, near start cmd and right-click and run as administrator .
- At the command prompt, type the following command to re-register the store app and press enter:
Recently, many users have encountered the error You will need a new application to open this ms-gamingoverlay in Winodws 10. After which the user is asked to select the application or search for the application in the Microsoft Store. The current error occurs, for example, after uninstalling the standard Xbox application or when using a non-original system image in Windows 10.
In this article, we will look at how to disable ms-gamingoverlay Windows 10. First of all, we recommend setting the correct associations for programs. And also to fix the error, you can simply turn off the Xbox DVR. Ways to solve the problem were discussed in the latest build of the Windows 10 operating system.
Disable some Start menu features
What else to do if the start does not work? You can check if you have the “Open Start screen in full screen” option activated. To do this, open the “Run” window and enter in it:
ms-settings:personalization-start
Remove the slider from the “Open Start screen in full screen” option.
If you have problems with the file system, you may receive the error:
ms-settings:personalization-start the wait operation timed out
You need to check it again for errors using the sfc and DISM utilities.
Startup does not work due to UPD disks
Very often, UPD disks are used on an RDS farm, due to which the launcher may not work, it seemed that this was solved before the Specter patch appeared, and then returned again. When this happens, there are only 1 or 2 folders in %localappdata%\Packages, there should be 15. Here is an example of a Powershell script that will help you fix this, you need to run it in the context of a user whose start button does not work.
$packages = Get-ChildItem -Path "$env:USERPROFILE\AppData\Local\Packages" if($packages.count -lt 14){
$apps = Get-ChildItem -Recurse -Path "C:\Windows\SystemApps","C:\Windows\ImmersiveControlPanel","C:\Windows\PrintDialog","C:\Windows\MiracastView" -Include "AppXManifest. xml"
Foreach($app in $apps){ Add-AppxPackage -DisableDevelopmentMode -Register "$app" -Verbose} } Else{ $NULL}
Download the finished script - https://cloud.mail.ru/public/5NZx/4rrcJzqNr
Restoring a damaged profile
So, what to do if the startup does not work even after all the methods described above. One of the reasons may be a damaged user profile; as a rule, a copy of it with problems is created in the registry; I already discussed this in the article “Unable to load user profile.” You first need to find out the SID of the user who has problems with the Start menu, and then follow the following steps step by step:
Be sure to save all data from the damaged profile
- Log in to the server with a different administrator account.
- Delete the user profile in c:\users\<corrupt profile>
- Go to the registry branch HKEY_LOCAL_MACHINE\SOFTWARE\Microsoft\Windows NT\CurrentVersion\ProfileList
- Examine each SID entry for "ProfileImagePage REG_EXPAND_SZ" C:\users<corrupt profile>"
- Delete SID entry.
- Go out
- Log in as user <damaged profile> to create a new profile.
Startup does not work due to firewall
I don’t know what the joke is, but in some cases you will need to delete the registry keys responsible for the firewall rules and recreate them again. Run the commands in PowerShell:
Remove-Item "HKLM:\SYSTEM\CurrentControlSet\Services\SharedAccess \Parameters\FirewallPolicy\RestrictedServices\Configurable\System" New-Item "HKLM:\SYSTEM\CurrentControlSet\Services\SharedAccess \Parameters\FirewallPolicy\RestrictedServices\Configurable\System" Remove-Item "HKLM:\SYSTEM\CurrentControlSet\Services\SharedAccess \Parameters\FirewallPolicy\FirewallRules" New-Item "HKLM:\SYSTEM\CurrentControlSet\Services\SharedAccess \Parameters\FirewallPolicy\FirewallRules" Remove-Item "HKLM:\SOFTWARE \Microsoft\Windows NT\CurrentVersion\Notifications" -Recurse New-Item "HKLM:\SOFTWARE\Microsoft\Windows NT\CurrentVersion\Notifications"
Download the finished script - https://cloud.mail.ru/public/3mKR/NZtmoQS95