Sometimes there is a need to automatically update pages or pages for special purposes. For example, before I had to layout a website in a text editor, and in the browser I needed to refresh the page in order to see the results in real time.
Of course, now there are special programs for such tasks under Windows. But in fact, such a necessity for the browser is needed for a variety of purposes. Setting up page refresh is easy in any browser.
How to set up auto-refresh pages in Opera
With the advent of the new version of Opera, the developers have cut down this functionality. Now, to set up page auto-refresh, you will need an additional extension, as for other browsers. In general, after the update, Opera greatly simplified its browser, which is why some features were cut by the developers themselves.
Setting up page refresh.
- For the old version of the browser, right-click the mouse directly on the page and select from the context menu that appears - Refresh page every;
- Specify the desired interval in seconds manually or select the suggested options from the list;
- For the new, updated version, install the extension - Page Reloader.
As already mentioned, the new version of Opera no longer has such a function.
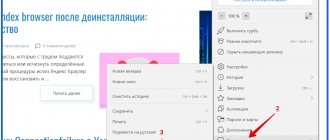
1.) Go to the extensions and add-ons page:
https://addons.opera.com/ru/extensions/
2.) In the search field, enter Page Reloader .
Page Reloader extension search results
Select this extension and go to the page for adding it to your browser.
3.) Click “ Add to Opera ” and the extension installation process will begin.
Adding Page Reloader to the list of extensions.
The installation of the necessary applications is complete and no additional configuration is required, except for the parameters that need to be entered manually to update the page of any Internet resource.
4.) Setting up the extension.
Right-click on the page and a function that was not previously available will appear in the context menu - Update every.
Set the update interval manually or select from the list.
Select the appropriate update option from the list:
- 30 minutes
- 1 hour
- 2 hours
- 6 hours
Naturally, if you need to set the update in seconds, you will have to set the interval manually.
Click " Set interval" and enter the time that is needed in your case.
Manually enter the page refresh interval.
Manually enter the interval you need. In the left cell you need to enter numbers in minutes, in the right cell, in seconds. If you only need seconds, enter a number of digits into the right cell.
How to enable auto-update: best plugins
It was noted above that there is no automatic update function in Google Chrome. To implement this option, you must download and configure one of the available extensions.
Let's highlight several options:
- Auto Refresh. This is one of the best extensions for Chrome that allows you to automatically refresh pages at a certain interval. The main functions are setting the timer directly in the application icon, changing the color, separate time intervals for different sites, etc. The program was created in 2020 by a team of young developers, and since then it has been constantly updated.
- Page Refresh. The extension is easy and quick to set up, as well as reboot automatically. As in most similar programs, here you can configure the extension’s operating time for auto-refreshing the Chrome page, set individual timers, and solve other tasks.
- Easy Auto Refresh. This is one of the best programs designed for auto-update and reboot. Options - the ability to restart the Chrome browser after a strictly set time, remembering the scroll position and settings. To get started, just install the program and set the number of seconds for automatic updating. You can also select a specific time of day, show notifications about text being found on a page, read the cache, etc.
You can find other programs on the Internet that allow you to solve the issue of auto-updating in Chrome - Free Auto Refresh, Auto Refresh Plus, Data Studio Auto Refresh, Tab Auto Refresh and others.
Setting up per-second page refreshes in Google Chrome
Here is the same thing that we did above, with the exception of expansion. Here it is different, it’s called Auto Refresh.
1.) Go to the page with plugins for Google Chrome:
https://chrome.google.com/webstore/category/extensions
2.) In the search field, type Auto Refresh and press Enter.
Installing the EASY AUTO REFRESH extension for the Google Chrome browser
3.) As in the previous step, install this extension.
Set the time before the page is reloaded in seconds.
Now in the Chrome browser a wheel will appear in the upper right corner, when clicked, a window with settings will open. Set the time in seconds. The default is 10 seconds, after which the page will reload each time.
Super Auto Refresh Plus
Another small extension that will help us solve the problem. Its interface is significantly different from what can be found in the previous add-on. But nevertheless, managing the plugin is quite convenient.
There is no Russian language in the product. But there is an intuitive interface, there are no ads and there is no paid version of the extension. And for some users this is precisely the decisive factor.
The user can select the time interval for updating a specific page. In fact, this is where the functionality ends. The plugin works perfectly with Yandex Browser, although it is written for Google Chrome.
It is worth noting that Super Auto Refresh requires very little RAM to operate. And this suggests that it can be successfully used on relatively old and weak machines. And now about the installation.
Installation and use
The installation process itself is exactly the same as in the previous case. The plugin will be installed from the Google Chrome online store. That's where you can find him. We will also talk about using the product.
It is worth noting that there are pre-configured time intervals here. Essentially, the user cannot enter any number of seconds. However, first things first. Here are detailed instructions.
- Go to https://chrome.google.com/webstore/detail/super-auto-refresh-plus/globgafddkdlnalejlkcpaefakkhkdoa?hl=ru.
- Next, click on the “Install” and confirm the action in the next window.
- After installation, the plugin icon will appear in the toolbar. We click on it.
- Select a time interval from the drop-down list and click “Start” .
- To stop auto-updating, click “Stop” .
This is how Super Auto Refresh Plus should work. Of course, in the previous plugin the interface was much more convenient. But this extension does not have a paid version. Although it is equipped with much poorer functionality. But for the average user this is quite enough.
Setting up page reload in Yandex Browser
In fact, Yandex.Browser supports all extensions that are suitable for Opera. There is one link to the plugin store for both Opera and Yandex Browser.
Therefore, the setting for auto-refresh of pages in this browser is the same as for Opera.
1.) First of all, go to the store page:
https://addons.opera.com/uk/extensions/
2.) Search for Page Reloader in the top right corner.
3.) Select the appropriate add-on from the store and go to the installation page.
Adding the Page Reloader extension to Yandex browser
On the installation page, click on the green button - Add to Yandx Browser.
Conclusion
In this article, you learned how to configure auto-refresh of pages in different browsers. Firefox yet . For him, everything is done almost the same. Instead of links, you can always go to browser add-ons and scroll to the very bottom until the More extensions button appears.
Since there are plenty of solutions, there was no desire to add information about other Internet browsers here. The opera was described here due to the fact that many Internet users are looking for an old function built into it that was once forgotten by many. So I had to describe it here because after the update, such an opportunity without the use of third-party development is impossible.
Automatic page refresh in Firefox using ReloadEvery and other addons
Sometimes users need browser pages to be reloaded frequently. Since manual updating gets boring, there is a need for automatic updating mode.
Automatic page refresh in Firefox cannot be configured using built-in tools. However, as you know, if the browser does not have any function, this loss is compensated by an extension that is downloaded from the official addon store. It is usually different for each browser.
When is the function needed?
For example, when you need to keep track of news, match scores, voting, auctions on trading platforms and the like.
Moreover, on some sites, sometimes after a certain period of inactivity the system takes you to the initial page for authorization - you have to log into your account again.
This function is also needed during site testing, when you need to monitor the presence of replies to your comments on the forums.
Download ReloadEvery
1. Find the extension in the add-on store or follow the direct link: https://addons.mozilla.org/Ru/firefox/addon/reloadevery/.
You can also: go to the “Add-ons” menu and enter the name of the plugin in the search bar.
2.Click on “Install” or “Add to Firefox” if this is a store.
3.Restart the program. Thus, the changes to the program will take effect.
Setting up ReloadEvery
The settings of this application allow you to set auto-update for several tabs or just one.
1.Click on a free page margin with the right mouse button. In the context menu, select the second item “Auto-update”.
2.Determine the amount of time between page updates.
3.If you need to cancel the function for any reason, right-click on the page again and remove it from the “Auto-update” section.
4.To set the option to run for all window tabs, check the “Enable in all tabs” checkbox.
Auto Refresh
This add-on also handles tab updates responsibly. Here, too, there are settings for each and all open tabs.
1.Follow the link: https://addons.mozilla.org/EN-us/firefox/addon/auto-refresh/. It leads again to the official add-on store for Firefox.
2.Click on “Add to Firefox”.
Please note that Auto Refresh is not suitable for newer versions of the browser. In this case, you need to download an older version or simply select a different extension.
3.Restart the program.
The add-on is installed. You can proceed to setting up periodic page reloads.
Interface in English. Another drawback, although everything is actually simple. Management can occur on an intuitive level.
- Right-click on the free field and select the last item Auto Refresh.
- In the menu, set the frequency of page auto-refresh for Firefox. You can enable the Randomize option. This means randomly selecting a period of time.
- To access additional settings, go to Customize.
Using the Tab Auto Reload add-on
The interface of this application is in Russian. You can set a fixed interval or enter your own.
What else makes this extension different from other similar ones? The user can set different refresh times for individual tabs.
Go to: https://addons.mozilla.org/ru/firefox/addon/tab-auto-reload/. The installation procedure is the same as for previous programs.
Right-click on the page and select the first option “Refresh Tab”. Set the interval. If no time period suits you, click on the “Custom” mode. Enter your interval in two fields (minutes and, if necessary, seconds).
To deactivate the option, click on the “Disable all” item. So, you will turn off auto-refresh for all window tabs. To disable it for a specific tab that you have active, put o.
This add-on has virtually no downsides. Even a beginner can understand it, since it is in Russian.
All missing browser functions are performed by extensions. In most browsers, auto-update can be turned on in the settings. There is no such option in Mozilla. Add-ons such as Auto Refesh, Tab Auto Reload and ReloadEvery come to the rescue.
brauzerok.ru
Instructions
Specialists from Google never got around to adding auto-refresh of pages, so the guys from the outside got down to business. As a result, they came up with a very simple and useful extension. And its name is Easy Auto Refresh. Let's take a look at the installation procedure, customization and practical use.
Installation process
Yes, it seems that everyone has already learned how to add plugins to Google Chrome, but it’s never too late to remind beginners of the common truths. Below is a step-by-step instruction that will answer all questions:
- Launch Google Chrome.
- Follow the link https://chrome.google.com/webstore/detail/easy-auto-refresh/aabcgdmkeabbnleenpncegpcngjpnjkc?hl=ru.
- Click on the “Install” on the plugin store page that opens.
- After a short check, the installation begins, we wait for the procedure to complete.
Upon completion, a new tab automatically opens, where the plugin developers thank you for using the product and offer to buy a paid version with an expanded list of features.
Among them the following stand out:
- any page on the site – any url or page in the entire domain is specified;
- random interval – after each update, the timer counts down a random number of seconds;
- clear cache – reloading the tab activates cleaning algorithms to get rid of temporary files;
- longer countdown - in some cases, more seconds are required between page updates;
- specific time of day – setting up auto-update by the hour in 12 or 24 formats;
- show notification – sound and visual alarm after finding an object based on a key request;
- refresh all tabs – global reload of all open pages;
- updates and functions – receiving the latest system updates and informing users about new functionality.