Windows 10 System Restore using DISM
As a rule, in case of problems with system files, use the SFC utility, which scans the hard drive for errors and fixes them. But still, this first aid remedy does not always bring the desired results. Another DISM utility is available in the system, which we briefly mentioned in previous articles, which can fix problems with damaged files in Windows 10. This time we will look at the full range of DISM functions, describe various use cases and show how to use it to restore damaged system files from the original system image (component storage).
This feature is designed to patch and prepare WIndows images such as OS boot disk, system recovery tools, etc. These images can be used to reinstall or restore the system in case of problems. When using the SFC utility to scan and repair a disk, problems with damaged files can only be resolved using the appropriate image from the component store on the hard drive. When this image is damaged, the system cannot retrieve system files from the component store and therefore cannot restore them using the SFC function. It is in this case that the DISM utility will help us, which will solve the problem with recovery images and allow the SFC function to complete its work correctly.
Check and Restore system files via PowerShell
We will use Windows PowerShell to show how to use the DISM to scan and fix corrupted system files in Windows 10. This method will be more effective for updating Windows 10 Anniversary than the command line.
Using the System File Checker (SFC) tool
Run PowerShell as an administrator. Click "search" and type windows powershell, then right-click and select as admin.
the sfc /scannow command in a PowerShell window . If the scan finds any problems, Windows will try to fix them. If Windows can't fix them, it will warn you that further investigation and action is needed. Move below if errors are found.
Using the Deployment Image and Service Management (DISM) tool
The DISM scan detects corrupted system files and Windows will try to fix them and give you a progress report at the end. If Windows is unable to find the files needed to repair damaged system files, you will also be provided with information on what to do next, with a link to Microsoft's website and troubleshooting options. Enter the below command into the PowerShell window.
DISM /ONLINE /CLEANUP-IMAGE /RESTOREHEALTH
If DISM fixed everything or did not reveal any errors, then restart your laptop or computer and run sfc /scannow .
See also:
- Start button not working in Windows 10?
- Why is the Sound Lost and Not Working in Windows 10?
- 9 Reasons Why Your Windows Computer Freezes
- Disk is 100% loaded in Windows 10 Task Manager
- Accelerated Windows loading, setting up Windows for fast work
comments powered by HyperComments
How to use DISM utility?
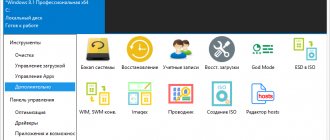
Restoring system files using the utility is not difficult. With this application you can restore components using the same principle as using SFC via the command line. To open the command line, press the Windows + X key combination and select “command prompt (administrator)” from the menu that appears. Then in the console you need to enter the DISM command with the appropriate parameters.
We can add additional parameters to the DISM command, with which you can check, scan and restore images in various ways. Let's look at the most important combinations.
DISM with CheckHealth parameter
In the command line console, enter the following command:
DISM /Online /Cleanup-Image /CheckHealth
Using this option, you can quickly check the image and individual components of the system installation that are stored on the disk for damage. This command does not make any changes - it is completely safe. CheckHealth provides information about the status of the operating system package. This is a very useful option when we want to check in a safe way whether any system file corruption has occurred in the component store.
KV.by
While the Internet is full of reviews of the newly introduced “top ten”, we will talk about a useful functionality of the most popular Windows 7, taken from the arsenal of Windows 8, namely the restoration of damaged components using the console utility DISM.exe
.
Moreover, this functionality is not the newest, but completely deprived of the attention of all Russian-language IT
resources.
about the reasons and, in fact, about Deployment Image Servicing and Management
(English: deployment image servicing and management system,
DISM
) in the short note below.
It's simple: the option appeared exactly a year ago with the release of update KB2966583
, about which literally a couple of words were said in the announcement, which became, due to dislike for
FAQs
, the reason for the silence of the “native people” (“the discoverer” of DISM for Windows 7 - blogger Vadim Sterkin). Well, let’s fill the gap in the education and capabilities of the beloved “seven,” but first, in one paragraph about why all this is needed.
Since Vista, the deployment and maintenance of Windows has been built on components and packages defined by manifests (screenshot). In the directory C:\Windows\winsxs
All operating system files are located, including previous versions - this is
Windows
component store And the package storage
in the system is represented by the folder
C:\Windows\servicing\Packages
, where you can see the available packages and their manifests.
To expand on what has been said, a package
can be an OS patch or a driver, and
a manifest
is an
XML
file that specifies definitions for components and deployment elements.
Due to the fact that the practice of updating the system is a necessary thing, and the most common reason for failure during an update is damage to the storage, the DISM.exe
is a real “
lifesaver
” for such bugs.
After the initiation of KB2966583, all users of the “seven” can appreciate today’s heroine in action, because Previously, this required a separate CheckSUR
(Check for System Update Readiness) solution, which is not correct.
Working with DISM.exe
Again, everything is simple: from an administrator account (if you are the only Windows user, then there is nothing to worry about) launch the Command Prompt ( Start
" →
cmd
in the search field → "
Enter
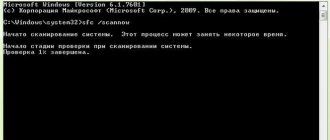
") and enter, with confirmation, the command
DISM /Online /Cleanup-Image /ScanHealth
be sure to look at
the results of
DISM C:\Windows\Logs \CBS
in the
checksur.log
.
The presence of a critical number of problematic components in the log will be a signal to look for a flash drive (disk) with a Windows image or the required recovery package System Update Readiness Tool
.
Ideally, you should see the text (“No errors detected”) as in the screenshot above, which is what I wish for everyone. And that’s all that any even more or less experienced Windows user needs to know on the topic.
Note: Owners of PCs running a later G8 can read the article “ DISM command line options for servicing operating system packages”
» from the Microsoft
MSDN
library.
Dmitry Evdokimov www.TestSoft.su
DISM with ScanHealth option
This option works similar to CheckHealth, but takes a little longer due to a more thorough scan, but also does not fix anything. It is worth using when the previous /CheckHealth option indicated that everything is fine, but we want to make sure that this is definitely the case. Enter:
DISM /Online /Cleanup-Image /ScanHealth
The scan may take much longer than with the previous option (approximately 10 minutes). If the scan stops at 20% or 40%, you need to wait - it may seem like the computer is frozen - but in reality the scan is in progress.
DISM with RestoreHealth option
If the first and second commands unloaded a message that the images were damaged, it is time to restore them. For this purpose, we use the /RestoreHealth parameter. Type the following command in the command prompt console: DISM /Online /Cleanup-Image /RestoreHealth
The option uses Windows Update to repair damaged files in the Component Store. The scanning and automatic recovery procedure may take approximately 20 minutes (sometimes more). DISM detects a failure, creates a list of damaged files, and then downloads them from Microsoft servers using Windows Update.
Check and Restore system files via CMD
System File Checker scans your computer for any damage or changes to system files that might otherwise interfere with the normal operation of your PC. From there, it replaces the file with the correct version to ensure smooth operation. Using the command line, you can try to scan and restore system files of later operating systems like Windows 10/8/7/Vista. Let's analyze two commands sfc /scannow and DISM using CMD.
Using the System File Checker (SFC) tool
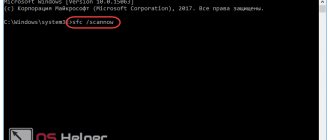
Run Command Prompt (CMD) as an administrator. Click “search” and simply write “cmd” or “command line”, then right-click on it and run as administrator.
Issue the command sfc /scannow and wait for the process to complete.
Note : After scanning your system, one of three results will be returned:
- There will be no system file errors.
- There will be system file errors and Windows will repair them automatically.
- Windows has detected errors but cannot repair some of them.
If option 3 shows you that an error has been detected and the system cannot recover, then boot into safe mode and repeat the procedure. I advise you to disable EFS and Bitlocker encryption, if they are available at the time of verification. Nothing succeeded? Let's move lower.
Using the Deployment Image and Service Management (DISM) tool
If the above doesn't work in Safe Mode, there is one last way to check for corruption in system files and fix them. We use the Deployment Image and Service Management (DISM) tool. The team works with Windows 8/8.1/10 systems. Open back up Command Prompt as Administrator and use the following command:
DISM /ONLINE /CLEANUP-IMAGE /RESTOREHEALTH
The process may take a long time and the percentage scale may freeze. When finished, restart your computer and run sfc /scannow again to make sure there are no errors or the error has disappeared.
How to restore files from a specified source using the RestoreHealth option
Sometimes it happens that damage to the operating system is much wider and affects the Windows Update service. In this case, the RestoreHealth parameter will not be able to repair damage to the image because the system cannot connect to Microsoft servers. In this situation, you should perform another operation - specify the path to the Windows installer, from which “working” files will be downloaded without using the Internet and the update center.
To do this, you need the Windows 10 installer on a DVD, flash drive, or ISO image format. The latter can be downloaded via the Media Creation Tool app for Windows 10.
Download the version for Windows 10 (32 or 64 bit), run the application and follow the wizard to download the ISO to your computer. After the image is downloaded and saved, go to the Explorer window and double-click on the ISO file with the installer to mount it. In the This PC window, check which letter was assigned to the mounted image (for example, the letter "E").
If you have a bootable DVD or USB drive with Windows 10 installed, then you don’t need to download anything - just insert the disk or connect an external drive, and see what letter was assigned to this drive in the “This PC” section.
After the drive with the Windows installation is detected by the system and we know the letter, it is time to use the appropriate DISM parameter, which will indicate the path to this media. To do this, enter the following command:
Dism /Online /Cleanup-Image /RestoreHealth /Source:wim:E:\Sources\install.wim:1 /limitaccess
Please note again that if in our case, the DVD, flash drive or ISO image is assigned a letter other than “E”, then change it in the above command. After pressing Enter, the damaged component store files will be restored from the original Windows Installer to the specified path.
DISM crashes on Windows 10. Could not find source files
If you are trying to restore a Windows system image and DISM fails with error 0x800f081f, no source files found , this post may interest you.
DISM crashes Source files not found
If DISM Tool fails, you have 2 options - clean up system components and specify an alternative Windows image recovery source, which will then be used to repair the damaged Windows image. You can do this using Group Policy.
Typically, during a recovery operation, automatic damage recovery provides files. But this itself is corrupted, you can use the specified recovery source on your network or use Windows Update to get the source files needed to enable the feature or restore the Windows image.
Clean up system image components
Open an elevated Command Prompt window, type the following and press Enter:
Dism.exe/online/Cleanup-Image/StartComponentCleanup
Once the operation is complete, enter the DISM Tool /RestoreHealth command and see if it works.
If this happens, great, otherwise you'll have to move on to the next option.
DISM failure Source file cannot be loaded
If you receive Error 0x800f081f or 0x800f0906 The source files cannot be loaded , you will have to install an alternative source file. Read on to find out how.
Set up an alternative Windows recovery source
You can configure your system to use an alternate recovery source using the Group Policy setting, run gpedit.msc to open the Group Policy Editor and navigate to the following setting:
Computer Configuration > Administrative Templates > System
Now, in the right pane, double-click Specify settings for installing additional components and setting up component recovery .
Select Enabled and enter Alternate Source File Path. You can also choose:
- Never try to download useful data from Windows Update
- Contact Windows Update directly to download recovery materials instead of Windows Server Update Service (WSUS).
This policy setting specifies the network locations that will be used to repair operating system corruption and enable additional functionality for which payload files have been deleted. If you enable this policy setting and specify a new location, the files in that location will be used to repair operating system corruption and enable additional features that have had payload files removed. You must enter the full path to the new location in the Alternate Source File Path text box. You can specify multiple locations when each path is separated by a semicolon. The network location can be either a folder or a WIM file. If it is a WIM file, the location must be specified by prefixing the path with "wim:" and including the index of the image to be used in the WIM file. For example, "wim:\\server\share\install.wim:3". If you disable or do not configure this policy setting, or if the required files are not found in the locations specified in this policy setting, they will be downloaded from Windows Update if the policy settings for the computer allow it.
Click Apply/OK and exit.
Remember that you will need to maintain and maintain a recovery source that is up to date with the latest service updates, etc. on your network.
Related Tip : To use a running Windows installation as a recovery source, or to use a parallel Windows folder from a network share or from a removable media such as a Windows DVD as a source from files, you can use the following command:
DISM.exe /Online/Cleanup-Image/RestoreHealth/Source: C:\RepairSource\Windows/LimitAccess
Here you will have to replace C:\RepairSource\Windows with the location of your repair source.
Read on: Fix DISM errors 87, 112, 11, 50, 2, 3, 87, 1726, 1393, 0x800f081f.