Description of Adobe Photoshop
Adobe Photoshop is software for editing photographs and graphics. It is used by both professional illustrators, photographers, and home practitioners on PCs (personal computers).
Compression and processing of various formats (JPEG, TIFF) are carried out using a raster (pixel) editor.
Features of the graphic editor
Graphic editor suitable for:
- retouching;
- color correction;
- creating collages;
- drawing illustrations.
It is not suitable for:
- layout of printed materials, websites;
- scaling icons, logos, etc.
Photoshop is suitable for retouching and color correction.
Version difference
The functions necessary for operation are transferred almost in their original form from version to version. So you don't have to chase the latest Adobe Photoshop CC update. It is recommended to start mastering the interface with Adobe Photoshop CS6 or Adobe Photoshop CS3. These programs perfectly solve all the problems that arise during photo retouching.
Available functions:
- selection of small, complex objects (hair, glare);
- masking elements;
- change of color scheme;
- brightness increase;
- skin tone correction;
- blending transparency;
- auto recovery.
What devices is it used on?
To install Photoshop, you need a laptop or computer with a powerful processor and video card. The program downloads easily on macOS and Windows. There are also special lightweight applications from Adobe that can be downloaded to your phone (Photoshop Lightroom, Photoshop Mix, Photoshop Sketch, Photoshop Express).
Photoshop Lightroom can be installed on your phone.
Installing Photoshop
Both the original version and pirated analogues are installed on PCs. But when working with the latter, you need to remember the danger of infecting the device with viruses or possible system “glitches”. Therefore, official editors of the Adobe family should be downloaded only from the original resource of the same name.
The instructions on how to download Photoshop are as follows:
- In the Creative Cloud catalog, select the required software (software) and click “Download”. Prepare and create an account in this service in advance (trial and paid subscriptions are available). After downloading, the Adobe Creative Cloud application for PC will appear on your desktop (further installation will go through it).
- To launch the editor, find the “Photoshop” icon among “Applications” and click “Open”.
Login to your account
You can sign in to your Adobe ID account by email or through your Google, Facebook, or Apple ID accounts. The profile will contain all possible subscriptions, paid applications and discount offers for other programs.
Login to your account occurs via email.
Can I use it on another computer?
The program cannot be used on several computers simultaneously. But with 1 Creative Cloud license it is possible to install several software on different PCs. Login to your profile is available from 2 devices.
Where is Photoshop used?
Many users ask the question: “where to start learning Photoshop?” This is an excellent program that allows you to turn your fantasy into reality. For example, on Adobe Photoshop CS6 you can perform the following manipulations:
- No designer can do without an editor. Therefore, you can easily create various projects.
- For most artists, Photoshop expands their creative space. Many talents who have adapted to the program create beautiful masterpieces and make money from it. This category of people is called graphic artists.
- If you have imagination, you can make catchy advertisements. The photo editor makes booklets, posters, calendars and posters. To do this, you need to know layout, color rendering and color profiles.
- All photographers process images in Photoshop and prefer color correction exclusively. More advanced ones can eliminate excess fat and unnecessary fragments in the photo.
Using the editor you can create comics, layouts, collages, drawing, retouching , making comics and infographics, optimizing images and converting formats. Now it becomes clear why Photoshop is needed.
We also advise you to read the article about ways to replace colors in Photoshop.
Shortcut keys
Hot key combinations (types of interaction with the computer system) allow you to speed up the process of calling tools or performing operations.
Shortcut keys allow you to speed up your work.
Basic combinations:
- Ctrl + O - open;
- Shift + Ctrl + S - save as;
- Ctrl + Z - step back;
- B - brush;
- E - eraser;
- H or Space - hand;
- L - lasso;
- M - selection;
- P - feather;
- T - text;
- V - movement;
- Shift + Ctrl + N - new layer;
- Ctrl + J - copy layer;
- Ctrl + E - connect the top layer to the bottom;
- Shift + Ctrl + E - merge visible layers;
- Ctrl + C - copy;
- Ctrl + V - paste;
- Ctrl + A - select (all);
- Ctrl + R - rulers;
- Alt + selection – deselect the selection element;
- Shift + selection – add element;
- Ctrl + L - levels;
- Ctrl + M - curves;
- Ctrl + B - color balance;
- Ctrl + U - saturation;
- Ctrl + Alt + I - image size;
- Ctrl + T - transform;
- Ctrl + Alt + G - create, cancel a mask;
- Ctrl + “+” - zoom in;
- Ctrl + “-” - decrease.
Initial settings
The initial settings include arranging the working environment. The program allows you to select and display any tools and functions on the main panel (via the “Window” menu button).
A convenient arrangement of icons (graphical interfaces) will speed up the learning process for those who are starting from scratch and do not know hot keys.
Customizing the interface
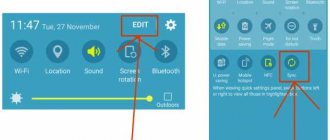
There are 4 options for the color of the interface (working background of the program). Initially there is a dark gray option. For greater color accuracy, set a light gray through the Edit window. White and black will disrupt the natural harmony of the source. The fill around the picture can also be set to “Medium Gray”.
There are 4 options for the program's working background.
Program performance
The Performance menu sets the amount of free space that Photoshop will take up. 8 GB is considered the optimal value for the full functioning of the software. There is no need to give your entire computer to the editor.
When a need for a free disk arises, the program sends part of the data to a backup disk. Install a “Temporary disk” (do not install the system “C” disk, as this will slow down your device).
To increase speed, an SSD (solid state drive) is connected.
Adjusting the brush
Paint brushes are a separate group of tools. To customize their appearance, you need to go to the “Cursors” tab. As the main option, select “Normal brush tip” (it will just be a circle that indicates the boundaries of the stroke), and as an additional option, select “Precise” (similar to a sight, it will allow you to accurately select the right place).
You can customize your painting brushes.
Displaying panels
Turn off unnecessary windows:
- Go to the “Menu” of the “Editing” section.
- Turn off the “eye” (visibility) of those functions that you will not use.
- Frequently used commands (“Save”, “Open”) are highlighted in color.
- Reset the settings in the same section.
Selecting units of measurement
To change inches to millimeters, go to Units and Rulers. This manipulation will facilitate further orientation on the sheet.
You are given the opportunity to change the units of measurement and rulers.
System requirements
The latest version of the program is Adobe Photoshop CC (2015.5.0), released in 2020. To install it on your machine, you will need a processor with a clock frequency of at least 2.2 GHz, at least 2 GB of RAM (recommended 8 GB), and at least 2.1 GB of free hard drive space. The screen resolution must be at least 1024x768 (recommended - 1280x800). Photoshop is available for Mac OS X and Windows platforms.
The latest versions of Photoshop feature a simpler and more intuitive interface, in addition to added features and improved capabilities. Starting from version CS4, it is possible to work with 3D files.
The program also provides for working with video. Photoshop is a popular tool for creating GIF animation.
Main menu of the program
The main menu consists of 11 groups of commands, the elements of which are combined based on similar functions:
- "File". Includes commands that are aimed at working with external documents (“Save”, “Export”, “Print”, etc.).
- "Editing". The options in this group are collected together and are responsible for both general settings and for working with the edited object.
- "Image". This section combines the main tools for color correction of photographs and pictures.
- "Layers". The most extensive group with teams.
- "Text". List of actions that the program allows you to perform with fonts.
- "Selection". Working with boundaries and adjusting object clarity.
- "Filters". A list of effects that can be applied to a raster image. If necessary, additional resources can be downloaded from the Internet.
- "3D". When performing those simple functions that are built into Photoshop for interacting with three-dimensional images, the program can freeze a lot. Therefore, it is recommended to perform this type of operation in 3ds Max.
- "View". Affects how an object will be displayed on the screen.
- "Window". Here you adjust the number of tools on the working field.
- "Reference". The group in which all information about the program is stored.
Using the "File" menu you will work with documents.
How to use Photoshop
If you are reading this article, then you are obviously a novice user of the Photoshop program and are trying to find extremely useful information about how to work in Photoshop, all the main nuances of how this program works, etc. I will say right away, without lying, that you can get such information from 1 or even 10 articles is simply impossible, since Photoshop is a fairly serious program that contains a huge number of functions, each of which can be studied separately for a long time.
In this article I will try to convey the main points of working with the program, how to use Photoshop, the initial settings and “go through” the main tools and capabilities of the product.
First of all, you need to understand that Photoshop is a raster graphics editor that is designed specifically for working with raster images. Raster and vector graphics are fundamentally different from each other and are used for different purposes. If vector is mainly used for printing, then raster is mainly used for working with photos and in web design. That is, you need to understand that if you need to process photos or draw website designs, then Photoshop is what you need, but if you want to draw and then print business cards, banners, drawings, then you need a vector editor.
I won’t tell you how to install Photoshop and where to get it; if this information is needed, it is available on the website in a separate article. I’ll immediately move on to the essence of the program and the nuances of working in it. At first glance, when you open the program, its interface seems complicated and incomprehensible, in fact, the main thing is to understand the principle of Photoshop, then the panel will be intuitive.
The program panel can be divided into 3 main parts:
- Main menu
- Main Toolbar
- Layers panel
To make the panel intuitive, you must first understand how to use Photoshop, namely the principle of the program. The essence of the program is to work with layers that are located one above the other in the layers panel. For example, by opening several images, we can place them in the layers panel one above the other, the top layer will overlap the lower ones. For clarity, you can take several photos and put them on top of each other - this is how layers are arranged in Photoshop. If we cut off some part from the top photo, then under it we will see the bottom photo, etc.
All editable images are located in layers (they are layers), and this is what the program’s work is based on. Then you can perform various manipulations with the layers, for example, cut out parts, make them transparent, draw on them, etc. The tools menu on the left contains the basic tools for working with layers. The main menu at the top contains various functions, filters for working with layers.
To understand how to use Photoshop, you need to understand the very principle of working with layers; this requires practice, of course. Then you can study each tool and the rest of the program’s functionality separately. In my opinion, it is ideally impossible to know the entire program, it is very large. The simple fact is that each user requires a certain set of tools and functions. For example, a photographer needs a number of tools and various filters to process photos, but he will not use a good half of the program’s tools in real life. A web designer needs other tools and functions, for example the function of creating animation, which is absolutely useless for a photographer. In general, you will select the set of necessary tools and functions for yourself only based on work experience, but there are also basic tools and functions that all users have to use very often, regardless of their field of activity. These tools include the Lasso selection tool, as well as the Pen and Eraser tools.
I think I answered the question “How to use Photoshop?” At least from this article you understand that you can’t just answer this question and this topic won’t fit into one or 10 articles. The main thing is to start correctly - 1) understand the principle of the program; and 2) Learn each instrument one by one, then you will achieve mastery.
Windows and position saving
If you are opening the software for the first time, leave the basic set of tools. As you work, it will become clear what should be left and what should be removed (through the “Window” section).
Function panels are located on the right side of the screen. They can be moved, enlarged, reduced, grouped, and placed in the desired order. To “glue” the windows, you need to pull one to the other (a blue stripe will appear, and the rectangle with the name will fade), after which they will be magnetized and will work together.
The toolbar is on the right edge (vertical stripe).
You can attach all the necessary elements to it.
In the program you can customize the layout of panels and windows.
The resulting layout is saved like this:
- Go to the “Work Environment” tab.
- Click New.
- Save (using the button of the same name).
Main functions
The main functions are responsible for navigation in PS (Photoshop) and initial work with the document. Mastering them will help speed up the process and add confidence to the new user.
Opening photo
There are hotkeys that bring up a window with folders (Ctrl + O). This operation can be carried out through “File”, then “Open”.
There are hotkeys that open photos.
Scaling and size
4 ways to scale:
- through the “View” group;
- Alt + mouse wheel;
- “Ctrl -” and “Ctrl +”;
- "Navigator".
The Magnifying Glass tool (located on the right side of the workspace) solves the same problems.
After creating a sheet, its parameters are changed through “Image Size”. In the table that appears, specify the necessary adjustments.
Changing the resolution
The resolution changes in the same window as the size. It is important to check this parameter before starting work so that when printing the image does not come out in poor quality (for printing you need 300 pixels/inch).
Layers: varieties and working with them
Virtual layers allow you to overlay one image on another, make stencils, and adjust individual elements without affecting the main image.
Key Actions:
- Create. This is done through the icon of the same name at the bottom of the panel or through “Ctrl + Shift + N”.
- Name it. Double click on the horizontal bar with the inscription.
- Delete. Once selected, it is dragged to the trash can icon.
- Move. This is done through the “Move” option.
- Swap. You can change the order in the list of layers by holding the bar with the cursor and moving it higher or lower.
- Copy. Hot keys “Ctrl + J” or the “Copy” button in the menu caused by right-clicking the mouse.
- Reduce saturation. In the “Opacity” column the required percentage of image density is set.
Layers allow you to layer one image on top of another.
The rest of the actions are performed through calling the list (“Merge”, “Create an offset mask”, “Rasterize”, etc.) or on the panels located at the top of the window (“Overlay effect”, “Fill”, etc.) .
Types of layers:
- raster;
- background (can be locked);
- text;
- corrective;
- smart object (a closed folder that can only be acted upon separately by double-clicking).
Saving an image
The combination “Ctrl + A” will allow you to consolidate the changes made. You can set the document format (JPEG, TIFF, PSD, PDF) and place it in the desired folder using “Save As” in the “File” group.
You can save images using the menu or hotkeys.
Moving
To move around the image, hold down the space bar. The cursor will become the Hand tool. With it, you can move around the entire worksheet without moving parts.
Cancel actions
The combination “Ctrl + Z” will help you go back a step. In the “History” section, you can cancel any action while saving others (for example, those that were done after, but do not need adjustment). The combination "Alt + Ctrl + Z" will undo several steps, and "Shift + Ctrl + Z" will restore them.
Adobe Photoshop Review
Photoshop is one of the most multifunctional professional image editors, which is used to solve a different range of tasks related to digital graphics: photo processing, design creation, modeling, etc. Now this is the most popular program that is commonly used in professional circles. New versions are becoming increasingly easier to learn for novice users, plus they are constantly adding new features and improving existing ones.
Unfortunately, Photoshop is not a free program. On the developers' website you will be offered several options for using the program. All of them involve purchasing a subscription for a certain period of time. Depending on the type of subscription, the functionality of the program may change. You also need to understand that within one article it will not be possible to consider all the functions of this program, since this will require a whole series of articles. Therefore, we will consider only the most important of them.
Toolbar
It contains the most basic tools for working in the program. However, they may change depending on which working environment you previously selected. Working environments allow you to quickly adapt the program interface to solve any typical tasks, for example, those related to drawing, 3D modeling, printing, etc. Most of these tools will remain on this panel no matter what workspace you select.
Initially, it may seem that there are not many tools here and each of them could be considered in more detail. However, behind almost each of them there will be some additional tool hidden that corresponds to the general theme. For example, hidden behind the “Brush” tool are the “Pencil”, “Color Replacement”, and “Mix Brush” tools.
Almost every tool you choose can be configured in the top panel. For example, for a brush you can specify its size, hardness, transparency, shape, direction, type, etc. In fact, “Brushes” has a lot of parameters that don’t fit on the top settings panel. Even with such a seemingly simple tool as “Cropping” (cropping an image), you can set crop proportions, percentages, adjust perspective and many other parameters.
Interacting with layers
The presence of layers and functionality for working with them is the main feature of the program. All the layers you are working with in the current document are located in the lower right part. Layers are divided into several types. Here are the main ones:
- A regular layer with a raster image;
- Layer with a smart object. In his case, you can make changes to this layer as a separate document;
- Adjustment layer. Some kind of mask, brightness/contrast parameters, levels and much more may be located here, depending on the user’s settings;
- Text layer. Here you work directly with the text.
Each of the existing layers can be assigned its own name and distributed into folders (called “groups” in the program). You can also adjust the transparency of a specific layer or group, and set the overlay type.
In fact, there are a lot of functions related to working with layers in Photoshop. Here you can add various masks, with which you can hide/crop/make visible only a certain area of the image or apply some effect to this area without affecting the rest of the document. Also, quick adjustment masks are added to the regular layer, which will be applied only to it. For example, this way you can change the brightness/contrast of a certain object, adjust its color scheme, etc. Additionally, for each of the layers you can set your own style - shadows, patterns, textures, gradients, etc.
Of course, when working with layers, you can block a certain element for editing, highlight it with some color in the layers panel, add a special mark, or hide the display of a layer in the image.
Image adjustment
Photoshop has a wide range of options when it comes to image correction. All available functions and tools can be viewed using the “Image” tab, which is located at the top of the program interface. Some of these options are applied to the image using keyboard shortcuts specified in the program. There are also those that have to be called from a special menu. There are many image correction parameters, so there is simply no point in describing each of them. You can briefly familiarize yourself with all available ones in the screenshot below.
If you need to perform advanced image correction, for example, apply not only a black and white filter, but also adjust color parameters, then it is still recommended to call the tool you need from the “Image” - “Correction” menu. The fact is that in this case a special window will be called up, in which you can configure all the necessary parameters as you need. If you use a tool using a keyboard shortcut, the last settings you set will be automatically applied. Almost each of the items in the screenshot above has an impressive list of settings that can change depending on your preferences.
Also in this title it is worth mentioning the possibilities regarding image transformation. You can find them if you open the “Editing” tab, which is located at the top and there you go to the “Transformation” section. In addition to the most banal functions, such as image reflection horizontally/vertically, rotation by n-degrees, there are interesting functions. For example, the Perspective tool will allow you to change the proportions of an object.
Normal object transformation is caused by the Ctrl+T key combination. You can access the transformation tools by right-clicking on the object you are changing.
Working with filters
They are given a separate tab in the top section of the program, since there are a lot of them. In addition to the “standard” filters used in many photo editors, such as drawing with a pencil or watercolor, there are other, more interesting ones. For example, you can add “Lighting Effects” to a photo. This filter involves placing virtual light sources on the image. True, it is not available to all users, since there are specific requirements for the video card.
All filters presented, be it a simple blur or an advanced arrangement of light sources, can be customized to suit your needs. For example, the degree of blur, the sharpness of the blur, the degree of brush pressure in the case of artistic filters, etc. are adjusted. Among other things, you can apply filters not only to an image, but also to a separate layer and even to each other. In this case, they become somewhat similar to ordinary layers - you can specify their opacity and set the blending mode.
However, it is worth understanding that some filters may not be available to you due to specific requirements for hardware and/or the file being processed. Problems may arise with other filters, where they take a long time to apply and/or are ultimately applied incorrectly. This most often occurs due to high computer performance requirements or incorrect display of some file elements.
Adding text
Thanks to advanced tools for working with text, Photoshop has become interesting not only to photographers, but also to designers. The available tools are quite enough to create a professional printing house. Text is added using a special tool located in the left toolbar. Having selected this tool, you will need to either simply click the cursor on the desired area of the image and start writing, or select an area for text with the left mouse button held down and write in this area.
The written text will be displayed as an editable text layer in the Layers panel. It can be rasterized if necessary. This will allow you to apply certain filters and effects to the text, but in this case, editing the text itself will become impossible. For the text layer, you can adjust the font size, the font itself, the indents between letters, words, the height and width of characters, and also apply standard effects like bold, italics, underlining, etc. Text can also change color, and you can set a different color for each character on the same layer. Plus, shadows, gradient fills, internal and external glows can be added to text without any problems.
Working with 3D
This program is not a full-fledged 3D editor, so working with complex 3D objects and scenes in it will be difficult. However, if you need to convert text into a three-dimensional object, apply some styles to it, add light sources and carry out other small procedures, then the software’s functionality will be quite sufficient. Among the main features when working with 3D it is worth noting:
- Changing the color of an object;
- Adding textures;
- Inserting a background from a file or several separate files (combining several images as a background);
- Adjusting lighting and shadows.
Working with animation
Photoshop also cannot be called a full-fledged editor for creating animation, but it has the necessary tools for small GIF images. With the right level of skill or proficiency in the program, you can make beautiful animated images here.
By default, the animation mode is hidden. To open it you need to open the “Window” tab. There, select the “Timeline” option from the context menu. At the bottom of the interface, a special field will then appear in which you can set animation for various layers, linking it to time. Additionally, various effects can be applied to the animation, for example, smooth appearance, etc.
Adding plugins and extensions
Photoshop itself turned out to be a very multifunctional program. However, due to the fact that it supports working with third-party plugins and extensions, you can significantly expand the existing functionality and/or customize it to suit your needs.
The development of plugins is carried out by both ordinary users of the program and entire studios, including a special division of Adobe, the developer of the program. The add-ons themselves are distributed on both a paid and free basis. The installation process may also differ for different types of add-ons. For example, you just need to add new brushes to the program from a special interface.
Workspaces
If you already use Photoshop professionally as a work tool, then you may be interested in the workspaces that the program has to offer. A workspace is a specially configured program interface for performing certain tasks. In total, the program contains the following workspaces by default:
- "Basic work environment." Runs by default. More suitable for beginners who are just mastering the program or for people performing various actions in it that are not closely related to any of the areas of activity presented below;
- “3D” adjusts the program interface to work with 3D objects. Appropriate instruments are displayed in prominent places;
- "Graphics and the Internet". This version of the program interface is more suitable for web and printing designers;
- "Movement". A workspace designed specifically for working with GIF animation;
- "Drawing". Most often used by artists;
- "Photo". Creates optimal interface settings for photo processing.
Setting up automatic saving
In fact, Photoshop has a lot of different settings that affect the program’s performance, its interface, ease of working with files, and some other parameters. However, in this paragraph we will only consider the possibility of autosaving a file.
The fact is that in older versions of the automatic saving program there was either no automatic saving at all, or it was quite difficult to configure. In modern versions it is enabled by default. A backup copy of the file you were working on is created by default with all changes once every 10 minutes. In the program settings there is a separate item dedicated to the autosave function. Here you can set values from 5 minutes to 1 hour. True, the automatic saving function still does not work entirely correctly, therefore, sometimes the file may not be saved, so it is better to save it yourself.
Text and fonts
A raster editor is not suitable for layout of printed materials, but the creation of leaflets, business cards, advertising banners, and posters is within the scope of its main tasks.
The development of layouts with a corporate style or identity (corporate identity) is easily done in PS.
Setting and writing
Using the “Text” tool, click on the work field, and then start typing. You can adjust the font and letter size in the line that appears at the top when working. For detailed corrections, call the “Paragraph” - “Character” - “Glyphs” (letter elements) window.
Change the font of your texts.
Where to get fonts
Missing fonts are downloaded from third-party resources. By downloading and unpacking the archive with the required outline, you will automatically install it in all programs on your computer (no need to download it separately to PS).
Selection tools
Photoshop has many different tools that can be used to select any object. This feature is due to the need to minimize the time that the user can spend on the monotonous process of tracing.
Lasso (free)
The lasso is used to “outline” details, because... it works like a pencil.
The Lasso tool allows you to create a selection.
pen tool
The pen allows you not only to outline an object, but also to create a full-fledged new figure (can be used to draw vector graphics). Anchor points that are placed on the contour can be edited after the drawing is completed.
Quick selection
The size of the cursor when working with Quick Selection affects the amount of pixels that will be captured by the selection. The hotkey for calling the tool is W.
Select by color
In the “Selection” group there is a “Color Range” mode. It displays all elements of a photo of 1 shade.
You can select by color.
Magic wand tool
The magic wand is used when you need to quickly separate areas of similar tonality. In the “Tolerance” column the percentage of stroke accuracy is set.
Working with Regions
Manipulations carried out with areas:
- transformation;
- changing blending modes;
- modification;
- adding adjacent pixels to an already outlined area;
- inversion (changing shades to opposite ones on the Itten color circle);
- moving;
- cutting or copying;
- filling.
Useful things / Photoshop
167788 20-01-2011
The Toolbar is typically the most heavily used panel.
This panel appears on the left side of the screen when you launch Photoshop. At any time while working with the program, a tool is selected. To make it easier to work with the palette, I have compiled a list of basic tools in Russian and English. You can also read in detail about how each tool works and how they are formed into groups. List of tools in Russian and English Often there is a need to quickly translate toolbar terms into Russian. Here I have brought together the Russian and English names of the toolbar commands. There is also a hotkey with which you can activate the tool.
The small black triangle in the lower right corner of the tool icon indicates the presence of a tool submenu. If you hover over a tool, a tooltip will appear with the name of the tool and its function key on the keyboard.
All the tools on the tool palette can be logically grouped into five large groups. These are the groups “Selecting”, “Cropping”, “Retouching”, “Coloring”, “Drawing and Text”. Let's look at each group in more detail. This is a set of tools for the CS3 version of Photoshop.
1. Group of tools “Selection” (Selection tools) This group contains tools for selecting areas of various shapes, moving the selected area, quickly and accurately selecting areas of irregular shape.
The Marquee tool group is used to select rectangular, oval, one-row, and one-column areas.
The Move tool moves selections, layers, and guides.
The Lasso tool group is used to create freehand, polygonal (straight-edged) and magnetic (snap) selection areas.
The Quick Selection tool lets you quickly “paint” onto a selection using an adjustable round brush tip.
The Magic Wand tool selects areas that are colored similarly.
2. Group of tools “Crop” (Crop and slice tools) Tools for cropping an image and creating fragments are collected here.
The Crop tool crops images.
The Slice tool creates slices.
The Slice Select tool selects slices.
3. Group of tools “Retouching tools” Using these tools, you can remove defects in the image, Erase and restore the image, adjust sharpness and blur, tone and saturation.
The Spot Healing Brush tool removes spots and objects.
The Healing Brush tool removes imperfections in an image by painting over them with swatches or patterns.
The Patch tool repairs defects in a selected area of an image using a pattern or pattern.
The Red Eye tool removes red highlights caused by flash photography.
The Clone Stamp tool is used to draw from a sample image.
The Pattern Stamp tool lets you draw using part of an image as a pattern.
The Eraser tool erases pixels and restores parts of the image to the state it was in when it was last saved. You can read more about the Eraser tool in the post “What are the differences between the Eraser, Background Eraser and Magic Eraser tools.”
The Background Eraser tool erases areas of the image until they are transparent by dragging.
The Magic Eraser tool erases solidly colored areas of an image to transparency with one click.
The Blur tool softens the hard edges of an image.
The Sharpen tool sharpens the soft edges of an image.
The Smudge tool smudges the data in an image.
The Dodge tool brightens areas of the image.
The Burn tool makes areas of the image darker.
The Sponge tool changes the color saturation of an area.
4. Group of tools “Painting tools” All kinds of tools for coloring, replacing colors, and stylizing an image are collected here.
The Brush tool applies brush strokes. You can read more about the Brush tool in the post “How to properly set up brushes in Photoshop, experimenting with the parameters.”
The Pencil tool draws lines with sharp edges.
The Color Replacement tool replaces the selected color with another.
The History Brush tool paints a copy of the selected state or snapshot in the current image window.
The Art History brush tool paints stylized strokes that emulate various artistic styles using a selected state or snapshot.
The Gradient tools create straight, radial, cone, mirror, and diamond transitions between colors.
The Paint Bucket tool fills similarly colored areas with the foreground color.
5. Group of tools “Drawing” and “Text” (Drawing and type tools) This group contains tools for selecting an outline, printing text, and creating arbitrary shapes.
The Path selection tool selects shapes or segments by displaying anchor points, direction lines, and direction points.
The Type tool creates text on an image. You can read more about tools for working with text in the post “Basic tools for working with text in Photoshop.”
The Type mask tool creates selection areas in the form of text.
The Pen tool group allows you to draw paths with smooth edges.
The Shape tool group and the Line tool draw shapes and lines on a regular or shape layer.
The Custom Shape tool creates custom shapes selected from a list of custom shapes.
Other features and tools
The remaining functions are responsible for precise, delicate elaboration of photographic elements. With their help, photographs are retouched for glossy magazines or social networks.
Image color correction
The tools used for color correction are located in the “Images” - “Corrections” section. To understand the numerous toggle switches, diagrams and graphs, you need to set the maximum values on the test picture and monitor the changes.
Use color correction tools.
While working, you do not have to use all possible options at once. Choose clear and effective modes that you can study completely.
Color palette
To open the “Palette” window, you need to double-click on the square of the main color (it is located on the left side of the working field at the bottom). The color can be selected either using the scale (on the right) or by moving the cursor across the main field.
Gradient and photo overlay
A gradient, or a smooth transition from one shade to another, can be created using the tool of the same name. This action is also available in the Blending Options panel. So it can be set as a layer effect, made transparent, etc.
Gradient is a smooth transition from one shade to another.
Brushes: how to set up
The shape, size, level of pressure, type of stroke can be selected in the “Brush Settings” section. There is also a list of possible changes and modifications (tilt angle, textures, noise, etc.).
Shapes and lines
Shapes and lines are on the left side of the toolbar. To select “Ellipse”, you need to hold down the “Rectangle” icon (the shape used last will be there). Afterwards, a list of available styles will appear (line will be one of them).
Shapes and lines are on the toolbar.
Removing and moving elements
To move an element, you need to go to its layer and press the hot combination “Ctrl + T”. If you need to move 1 part, you must first select it using one of the methods described above, and then use the key combination.