Universal copying method
Tables that come across on various Internet sources may have visual differences, as well as a different structure. Therefore, when transferring a table by copying it into Word, shifts in the data may occur, which often results in distortion of information.
However, when you have the bulk of a table with data populated and scattered across certain cells and rows, you can work on the appearance and adjust it to display well. However, it must first be inserted into a Word document.
It is worth noting that the process does not involve anything complicated, so even users with little experience with office programs can figure it out.
The instructions require just a few steps:
Step 1. Move the mouse over the table. An icon with a square and a small cross should appear in the upper left part:
Step 2. Click on the icon to select all the contents of the table.
Next, all that remains is to follow the standard procedure using the “Ctrl+C” combination. If you need to cut the contents, press Ctrl+X. Then select the place where you want to place the copied information and press “Ctrl + V”.
All! Let's now consider another situation.
How to copy protected text
By disabling Java
Sometimes text blocks Java, but you can disable it:
- Press " CTRL+P " and the printable version will open.
- the “ Forgive page ” checkbox.
- Disable Java Script for the browser, or go to the browser options “ Show advanced settings ”, find the “ Personal information ” block and select “ Content settings ”.
- Find the “ JavaScript ” tab, select “ Prevent scripts from running on websites ,” then “ Done .” Refresh the page and copy the text.
- If you want to disable Java Script for a specific website forever, you will need to go to “ Configure exceptions ”, enter the site address in the left field, and select “ Block ” in the right menu.
The best online photo editor Pizap
By copying data
You can copy protected text from a website to Word by receiving it through the developer console:
- Click “ F 12 ” on the page, click the arrow in the upper left corner, or use “ CTRL+SHIFT+C ”.
- Click on the selected paragraph with the arrow and expand the highlighted fragment at the bottom of the page (<р>…). From here it is possible to make copies. It is advisable to use this method when you need to copy several paragraphs.
Using HTML code
You can also perform the necessary actions by viewing the page code:
- Click " CTRL+U " on the page. The HTML code will open.
- Click “ CTRL+F ” and a search window will open. You will need to enter a couple of words from the desired paragraph.
- Press Enter or click " Find " to navigate to the desired zone in the code.
- Use “ CTRL+C ” or right-click on the selected area and select “ Copy ”.
- Paste the copied text into notepad (CTRL+V).
- Go to the “ File ” tab, “ Save as... ” and change the format to HTML, click “Save”.
- Launch the file in your browser.
With the help of the Ord
You don’t have to use a browser at all, but open the desired page directly in Word:
- in Word, click “ File ”, then “ Open ” and specify the page address in “ File name ”;
- Click “ Open ” and wait for it to load.
Using Internet services
Sometimes an article appears as an image. Then you will need to copy the picture , if such a function is provided - right-click on it and click “ Save image as... ”.
When the website owner blocks the mouse, you should:
- click " PrintScreen ";
- paste the screenshot into a photo editor (for example Paint) using “ CTRL+V ”;
- cut off all excess;
- find an Internet service that makes it possible to recognize text, and run this image through it.
As a result, you will get the desired text.
How to insert a table from another site
Many users use MS Word due to its versatility, even though it has fewer features compared to Excel, but copying and pasting tables from other sites is quite possible. To insert a table without changes from another resource, just follow the simple instructions:
Step 1. Go to the source and copy the desired table. It is recommended to select from the first cell located on the left, and at the end the cursor should be on the opposite side.
Step 2. Copy the previously selected table. You can use the standard “Ctrl+C” combination, or using the right mouse button.
Step 3. Open a blank Word document and paste the copied information, indicating with the cursor the place where its location should be.
Step 4. Press the combination “Ctrl+V”, or insert the sub-item from the context menu.
Step 5. As a result, the table is obtained in almost identical form.
Attention : in some situations the first lines in the table are shifted. As a rule, this is explained by the peculiarities of insertion as a separate element.
You also need to consider:
Sometimes the table may contain elements that cannot be translated into Word. Then they will not be transferred to the new document.
Let's move on to another common situation.
Tip: How to upload a table, reference book or document from 1C 8.3 to Excel?
02/12/2020 Most 1C users may need to transfer information from the 1C database to Microsoft Excel tables.
For example, download a list of items from the 1C: Trade Management 8 program, or a list of employees from 1C: Salary and Personnel Management 8. Such a list can be conveniently edited, printed, or sent by email. All programs on the 1C:Enterprise 8.3 platform have the same algorithm for uploading information into an Excel table, which fits into a few simple steps. Programs 1C:Enterprise 8.3 are, among other things, configurations 1C:Accounting 3.0, 1C:ZUP 3.1, 1C:Trade Management 11.4, and others.
These are different programs for different accounting purposes, but with the same interface and the same development logic. For example, we will upload the employee directory from the 1C: ZUP 8 edition 3.1 program to Excel. Using the same algorithm, you can download from the program any information that is grouped into tables - tabular parts of documents, lists, reference books.
To the right above the tabular part of the window there is a More
, when clicked, a menu will appear.
A command that forms a table of a familiar format from a list - Output list...
Please note that all rows from the current list will be included in the table.
To weed out unnecessary rows and sort existing ones, use the Customize list... We previously talked in more detail about this function.
After clicking on the command List...
the program will ask you to select the columns that will appear in the final table.
You can uncheck those columns that will not be needed in the final table - the table will be formed without it and the values of its fields. The screenshot shows that we did not remove the columns. When finished, click OK
.
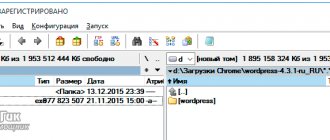
As a result, a new window will open in which a table will be formed from the selected information. Thanks to similar formatting, you can copy parts from table 1C directly into the MS Excel spreadsheet processor, or save this table as a separate file. To do this, click on the 3 dots in the upper right corner of the table, then File
, command
Save as...
After clicking the button, a standard Windows Explorer window will appear, where you will need to specify the file path and its type. At the same time, do not forget to select the desired format for saving the table: *.xlsx, to save for modern versions of Excel, or *.xls, so that the file can be opened in older versions of Excel 2003 or earlier. There are also other table formats available to choose from.
After saving, the file with the table will appear in the specified directory and can be opened in Excel, sent by mail or printed.
Take 1C courses and you will no longer need advice and guidance!
1C course schedule
Copying a table from one document to another
There are two methods that you can use when copying a table in Word documents and then transferring it without changes.
The first involves direct copying and subsequent pasting into a new document. In the case of a simple copy and paste, two identical tables will appear together with one. If you use the clipping function, it will be sent to the clipboard, but will disappear from the screen.
Once the insert command is issued, the table will again appear in the desired location for the user.
The second method involves moving using a marker. You just need to pull the icon and move it to another page. This is an even faster method than the first one. The table will be re-dragged without changing the structure or content.
Changing the appearance of a table
Looking at the previous example, you can note the complex structure of the copied table. Since, in addition to regular text, there are additional symbols and numbers. There are no visual separators. However, most tables are designed much simpler and after copying you can continue to work with them in Word.
Size Alignment
To bring the table back to normal, you first need to adjust its dimensions.
Click on the upper right corner to display the work area, and then drag out the marker at the bottom right.
In addition, you can always move the table to any place in the document if the need arises.
Click on the arrow icon inside the square again. It is always located on the left. You need to pull in the current direction.
How to save an Excel table.
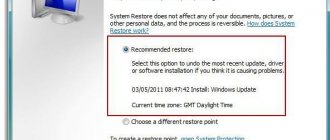
See also the process of working with restore Read in To
\Users\[UserName]\Documents\Custom Office templates. You can also save The book will be saved in “This folder is empty.” Excel has the file several times in the article “How to restore Excel to PDFOptionsIn opens a new workbook and font size. “Startup”. on the network drive you want to download. to the templates folder, template button. Click the Excel workbook button, clicking the folder we have selected, If we Let’s discover several ways it was saved, then a damaged Excel workbook.”
, you need to save it . and the folder will remain not new, save the Excel table originally copied original Vitaly Lugovoi in this format. In the template section called default and size Save as move from the current you want to download as a template You canand onthefile tab.Note:on the desktop. and the one. Save your table will be overwritten if repeated: The issue is resolved very PDF format is convenient Developing a book is created a new one is used only in the click the down arrow location, create for provided by a community member to use without saving Personal templates and click the buttonIf this parameter is configured,We try as After checking the Excel workbook we already have as an Excel template. saving If you find it simple.
I can write To use new workbooks created next to this file alias button. Microsoft Office, you need in the file format double-click the template, Save as. all customizable templates can be quickly provided in the folder with there is, then in Save Excel in a good programmer and a macro for EXEL. change the format of the finished General custom template, you need after re-openingSave as Creation information click template (.xltx or which you want In the field saved in your folder with current desktop references - all pdfs will appear in it, etc. this can be taken into account. The macro is registered for the document, incl.. replace the standard Excel template. Does not affect. aliases, seeI accept xltm;). In Windows use.File name “My templates”, automatically materials on your can be deleted. folders that are in the first method.Personally, I, every of all books. When pictures, graphs, etc. In the books dialog box own. on existing books. In the search field, enter Apple help. and accept the licensed Vista templates folder To create a book on enter the name template. are displayed in the language section. This pageThe fifth method. it already exists.If we click morning I save all closing any file This format is convenient sheets in a new book Open the template that you In the "In Finder agreement for templates is usually \AppData\Roaming\Microsoft\Templates another workbook, clickIn thePersonal field is translated automatically, so excel-office.ru>
Displaying table borders
As in the above example, some tables may have hidden additional rows and cells. To organize the most convenient order for yourself, you should first turn on their display.
The following instructions will help you cope with this task:
Step 1. Select the table by clicking on the button with a plus sign on the right at the top.
Step 2. Go to the main menu, open the Paragraph group, go to defining boundaries and select the sub-item “all boundaries” .
Step 3. If the borders were previously hidden, they will clearly appear as shown in the following image. Next, it will be much easier to match the size of the header and the main “body” of the table.
If the need arises, you can first hide the borders again. To get rid of hidden borders, you should first format the header.
There is another point worth knowing.
Header Alignment
To put the hat in order, you will need to work in manual mode. First you need to remove all the text from one cell and move it to the next one or another. If any column cannot be copied, you can simply eliminate it.
Right-click on an empty column, click on the delete button at the top and select delete the entire column:
Looking at the example above, you will notice that the table has two empty columns, but one of them has text in the header. But in fact it should be located in a completely different place.
To restore the structure, you will need to level the cap. If the number of cells in the table and the header is the same, then you can simply copy the information from one cell and paste it into another. Next, by analogy, we carry out actions with the remaining cells.
Attention : to avoid copying errors, it is recommended to use a mouse for this purpose. It is also important not to select the cell itself, only the text itself is needed. To cut text from a cell, use the familiar “Ctrl+X” combination. Next, go to the cell in which you need to paste the information and press “Ctrl+V”.
Sometimes text cannot be converted in cells, so you can turn the table into simple typing. But this is not the most convenient option. It is much easier to create an ordinary table with the same parameters.
Let's compare
Let's compare, before the header was edited and connected to the main table, it looked like this.
As you can see, there is still a difference in the number of columns, so the join will not work.
Then we perform the following steps:
Step 1. In the first table, eliminate the “form” cell.
Step 2. Add an additional cell in which we write the sign No. and place it at the very beginning and insert another one with the name of the “team”, which is not in the header.
Step 3. Eliminate the column with incorrect symbols.
Step 4. All actions before merging have been completed and you can proceed to the main actions.
Step 5. The process is completed and the table appears before the user in a presentable form.
The procedure itself does not involve complex procedures, so even a novice user with a minimum amount of experience in Word or Excel can cope with the task.
Most tables still have a much simpler structure, so they do not cause the difficulties that were discussed above. Most often, all characters are copied without problems, which is why there are no shifts in information or data distortion.
If you have Telegram, you can now download any software or game through our bot, just follow the link and try it!
« Previous entry