Hello to all readers of the moikomputer.ru blog!
As statistics show, quite a lot of users do not know how to insert footnotes in Word and often ask the corresponding question on the Internet. If you are one of them, then now you will learn everything. I will also show you how to delete and format.
A footnote is a note or explanation, usually appearing at the bottom of a page in a smaller font than the main font. It is indicated by numerical or letter marks in the text near words that require explanation.
Typically, writers use footnotes in their books as additional or explanatory information to the main content. They are also successfully used by students in diploma coursework or other works completed in the Word text editor.
How to Make Footnotes in Word 2010, 2013, 2020 and 2007
It is worth noting that footnotes are divided into two types:
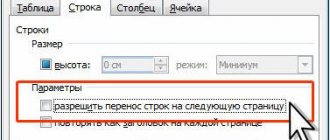
1. Normal - explanatory text will be displayed on the same page of the document as the labels.
2. End – show explanatory text at the very end of the document (last page) regardless of the location of the labels.
Not a very clear definition? You'll understand everything now.
It is possible to use both types of footnotes simultaneously in one document.
I will show all the actions in Word 2020. For those who have earlier versions, don’t despair, there are practically no differences, so you can figure it out starting from 2007.
Regular
In order to add a regular footnote, place the cursor in the text where you think it should be
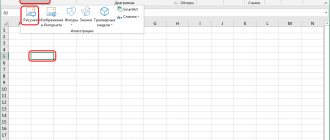
1. Open the Links tab Press AB1 or use the hot keys Alt+Ctrl+F…
2. A label with number 1 will appear, the cursor will be redirected to the bottom of the document page in a special field where you need to write the footnote itself.
Each newly created footnote will be assigned a sequential number corresponding to the label number (1, 2, 3...).
End
The actions are almost the same, only instead of “AB1 ” you need to select “Insert endnote”, which appears at the very end of the document.
To see the contents of a footnote in Word, you don’t have to scroll down, just hover over the marker.
To move through footnotes, both footnotes and endnotes, use the Next Footnote tool.
Remove all notes
Sometimes there are a lot of comments in the text that should be removed. For example, when work on a Word document is completely finished and notes in the margins are no longer needed. In such a case, removing them one by one may not be the best option. Then, all tags must be deleted at the same time.
Also, as in the case of a single footnote, you need to go to the “ Review ” tab. Next to the creation command is the delete command. But by clicking on it, only the selected item . Therefore, you should click on the arrow, which will display additional functions . From the list, you need to select the command “ delete all notes in the document ” and all tags that are in the text will be deleted.
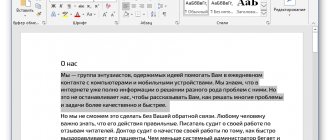
When several people work on a document in the Microsoft Word text editor (one wrote it, the second checks it, the third adds material), then during the work it is very convenient to create notes in the text to indicate what needs to be changed or corrected. The result is one corrected file, which takes into account all the comments. But what to do now with these comments that remain in the margins of the text?
Let's figure out in this article how to delete them, whether it is possible to simply hide this area, and how to get rid of such remarks in Word made by a certain user.
If you want to view the file without any corrections made, then you can simply hide the callouts. To do this, go to the “Review” tab and click on the “Show corrections” button. Then, in the drop-down list, uncheck the box next to “Notes”.
After this, all blocks with them on the fields will disappear.
If you have Word 2013 or 2020, then you can do as written above, to remove the field, you can simply use the “Show notes” button on the “Review” tab.
When it is greyed out, comments in the margins are shown; when the button is not highlighted, they will not be displayed in the document.
If you need to not just hide, but rather delete remarks that are displayed on the side of the document page in Word, then click on the unnecessary one to select it. Then, on the Review tab, click Delete and it will disappear from the document.
You can immediately select the one you want to get rid of, right-click on it and select “Delete note” from the context menu.
Cross references
Sometimes in a document it is necessary to make footnotes on the same information from different pages, so in order to avoid duplicating them, there is an interesting “Cross-References” tool. It allows you to place as many markers as you like in the text on the same source, which is present in the footnote field.
• Place the cursor in the text where the link should be.
• In the Insert tab, open the Links tool, where we select Cross Reference.
The following window will open where you need to perform some simple setup steps:
• Link type – select Footnote.
• Insert a link to – select Footnote number (form).
• The “Insert as hyperlink” checkbox must be checked.
• Select which footnote the link will be for.
• Click the Insert button.
We see that the marker number for the footnote is also duplicated with the number 1. Now, to follow the link to the cursor unit, a tooltip will pop up with the phrase: Press CTRL and click the link.
You will be transferred to the place in the document where the marker will be located, and not the footnote, where you can go directly to the footnote itself or by hovering the cursor over the marker to read the information in the pop-up window.
It’s not very convenient, of course, but it can be used as an option.
How to comment a note?
In some cases, the user needs to comment on the footnote . For example, you need to answer a question or confirm that a tag in a Word document has been taken into account.
Text alignment in Word - all existing options
To create a comment on text in the margins, select it. By right-clicking, you need to select “ Answer Note ”. Then, another field for replying to the footnote will appear. You only need to enter the required text .
In addition, it is possible to show or hide the reply field by clicking on the corresponding icon. It is located next to the comment itself, near the time it was sent.
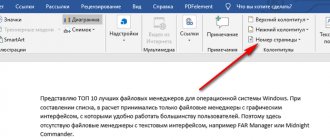
How to Remove All Footnotes in Word at Once
The described method is good for single deletion, but for mass deletion it will be ineffective, so there is another one if you need to get rid of several footnotes at once using the Replace function.
See how it works.
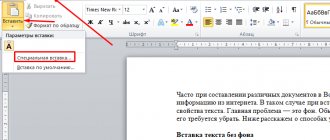
On the main page, go to the Replace section (located in the right corner of the editor) or use the hotkeys Ctrl+H.
A window with formatting tools will open, where you need to click the “More” button, then the “Special” button and select the type (end or regular) from the list that opens.
Now a special character will appear in the search field, click the “Find Next” button and all footnotes will be deleted.
How to Create a Note in Word 2010
To insert a note:
Step 1. Open a Word document, type or paste text.
Open a Word document, paste or type text
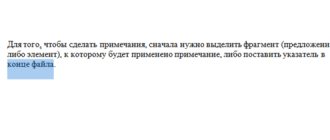
Step 2: Select a character, word, sentence, paragraph, chapter, or other text space.
Select the text for which you want to create a note
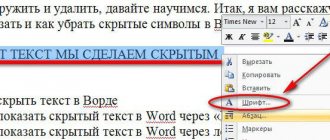
Step 3: Click on the “Create Note” icon in the “Review” menu.
Go to the “Review” menu, click on the “Create a note” icon
Step 4. In the comment field that opens, enter the text of the comment.
Enter the text of the comment in the notes field
Step 5: Click on any free text area to exit the comment field and continue working on the document. If you need to change the text of a saved note, just click on its text - you will immediately go into editing mode and can add or rewrite it.
Click on any free text area to exit the comment field
If you start making a note but change your mind, press Ctrl+Z on your keyboard to exit note-taking mode without saving.
Attention! If you erase text from a note in edit mode and return to work on the document, the note will not disappear. It will be “tied” to the text, but will not contain useful information.
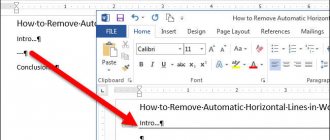
How to Remove a Footnote Separator in Word
• Go to the View tab.
• Select Draft.
Double-click on any footnote or endnote and its description will appear. From the drop-down list, select the item Separator.
• The description will disappear and a horizontal separator line will appear, with a cursor on the left side of it. Press one of the Backspace or Delete keys.
• Then select the desired Document Type (usually Page Layout).
Now we see that the separator has disappeared.
Manual removal
First you need to determine whether a given figure is a footnote. This is quite easy to do: when you click on a number, the page scrolls down to the footnote under the corresponding number. If the number is entered in the usual way, then nothing will happen when pressed.
You can remove footnotes either automatically or manually. If you erase only the text at the bottom of the page or at the end of the section (depending on your settings) that is located under the horizontal line, the footnote mark itself will remain in the main document. Also, the bottom strip can only be removed if you get rid of all the marks. You can delete footnotes in the usual way. You need to place the print cursor after the character and press the Backspace key twice. After the first click, the footnote mark will be highlighted, and after the second click it will be erased. And if you want to erase a character with one click, then select the number with a double click of the mouse and use the Delete key.
However, this option is extremely inconvenient in cases where we are talking about a voluminous document with many notes. Manual processing of each page will take a lot of time.
In addition, a person may miss some footnotes due to inattention. But the automatic character replacement function in Word, when configured correctly, cannot make mistakes. Let's take a closer look at it.
How to change the separator line
We will carry out all actions through the same Draft.
You can change the color and visibility of the separator using the usual text formatting options
See what can be done:
1. Change the color from black to any of your own.
2. Increase the thickness of the separator.
3. Make a double line.
Before you begin, do not forget to select the separator by holding LMB, after which the formatting options tool will appear.
The result obtained from the described actions:
• The color of the line changed from black to red.
• Thickness size increased to 48.
• Thanks to the underlining, a second line appeared.
How to make footnotes in Word 2003/2007/2010 and 2013
Footnotes can be useful in almost any document. It doesn’t matter what you are writing, an essay, a thesis or a fiction novel in general, the need to explain something or refer to something can appear at any moment. In Microsoft Office products, the process of placing footnotes is automated and quite convenient. The required actions vary slightly from version to version, so it is better to consider all versions of this program.
Microsoft Word 2003
You can also determine how the footnotes will be numbered; there are many options: letters, numbers, and footnotes can also be marked with any symbol you like by entering it in the appropriate box.
Links can be numbered starting from a new page, or they can be numbered starting from a new section:
How to Change Color, Font Size, and Footnote Marker in Word
On the editor-in-chief, using the Options tool, everything is very easy to implement. As you can see, in the screenshot what I got:
• Changed the color of the marker (I do not recommend changing the size more than the main one, otherwise the gap between the lines in relation to the entire text will be different).
• Changed the text size to twice that of the main text of the document, but it’s better not to do this.
• Changed the color and also highlighted it with another color scheme.
Adding an endnote
Move the cursor to the place where you need to add an endnote, go to the “REFERENCES” tab to the “Footnotes” group and select “Insert Endnote”.
Footnotes in Word 2010 - Inserting an Endnote
Word will insert an endnote marker into the text and add it at the end of the document or section. And we enter the text of the endnote.
How to remove notes in Word
If a user sends a document in Word for review for the first time, he will most likely see footnotes and notes for correcting the text. This method of contacting the editor is convenient and fast. If necessary, you can always delete them by first accepting or rejecting them. In this article we will take a closer look at how to remove comments in Word.
Step-by-step instructions on how to remove
To work with comments, you need to go to the Review tab on the toolbar.
To make a comment on the text, you need to select the required area and click Create a note. A new field will appear on the right in which you need to indicate the shortcomings.
The easiest way to delete comments located on the right is to select them and in the Review - Notes tab and click Delete.
Quickly delete a note
To quickly get rid of the leader, you can right-click on the note and select Delete note from the drop-down list.
You can also remove the reviewer's comment from the Review Area menu. To activate this field, you need to click on the corresponding button in the reviewing tab and a new zone will appear to the left of the document.
By right-clicking on a note inside this area, you will be able to eliminate the callout.
Microsoft Office Word has the ability to hide all comments that will be needed when printing a document. To do this, go to the Review tab, click Show corrections and uncheck the Notes line.
Then the document will return to its original state
After reading the comments and making the necessary amendments, you need to return a regular document, without various footnotes and additions from reviewers. To do this, in the Notes block, click the Delete button and select Delete all from the drop-down list
Important! For versions of Microsoft Office Word 2007, 2010, 2020, adding and deleting notes is identical.
Deleting notes in Word 2003
But for version 2003 the process is more complicated. In the Service tab, you must select Correction. A small panel will appear on top of the document.
In it you need to click on the Folder icon and the note will be added. You can also edit all callouts in this toolbar.
As you can see, edits, comments and notes can be removed in several ways. Using the Review tab in Word helps multiple people work on the same document and provide each other with hints or changes to the text. This method of work is very convenient when writing large articles in various specialized areas and speeds up the publication of the document.
- Share with your friends!
- Watch the video on how to clear text from notes in Word 2013.
Source: https://mir-tehnologiy.ru/kak-ubrat-primechaniya-v-vorde/