The article is a free translation of the manual for working with Apple Push Notification Service from the site raywenderlich.com and some of my additions. iOS apps cannot stay in the background for long periods of time. To conserve battery power, apps running in the background are allowed to perform a limited set of actions.
But what if something interesting happens and you want to let users know about it, even if they don't have your app running? For example, the user received a reply on Twitter, or his favorite team won the game, or his lunch is ready. Since the application is not running, it cannot check and retrieve this data.
Fortunately, Apple has provided a solution to this problem. Instead of constantly checking for events or performing actions in the background, you can create a server-side application that performs these actions.
And when an event of interest occurs, the server side will be able to send a push notification to the application! Absolutely any push notification can perform the following three actions:
- Show short text message.
- Play a short beep.
- Set a number on the application icon badge.
You can combine these actions as you see fit; for example, play a sound and set a number on a badge, but do not show a message.
Short review
Scheme of operation of the push notification mechanism:
Once the app is installed, a pop-up message will appear confirming that you have accepted the push notifications.
- iOS requests the Apple Push Notification Service (APNS) server for a device token.
- The application receives the device token. We can think of a token as an address for sending push notifications.
- The application sends the device token to your server.
- When any event occurs for your application, the server will send a push notification to APNS.
- APNS will send a push notification to the user's device.
When the user receives a push notification, a message will appear and/or a sound will be played and/or the badge on the application icon will be updated.
The user can open the application from the notification. The app will receive the push notification content and be able to process it. Should you still use push notifications when iOS 4.0 introduced local notifications and multitasking? Still would!
Local notifications are time-limited events. Only VOIP, navigation, and background audio applications have the ability to run unlimited in the background. If you need to notify app users (while it's closed) about some external event, you should still use push notifications.
This guide will describe in detail how the push notification system works and how to integrate it into your application.
What you need for push notifications
To integrate push notifications into the application you need:
iPhone, iPad or iPod touch. Push notifications do not work in the simulator, so you need a device for testing.
Registration in the iOS Developer Program. For each application in which the push notification mechanism will be integrated, you must create a new App ID and provisioning profile, as well as an SSL certificate for the server. These steps are performed in the iOS Provisioning Portal.
If you want to fully follow the examples in this tutorial, you will need to create a provisioning profile and an SSL certificate. I will explain in detail how to do this.
A server connected to the Internet. Push notifications are always sent by the server. During development you can use your own Mac as a server, but for release you need something like a VPS (Virtual Private Server).
To work with push notifications, cheap shared hosting is not enough. You need to run background execution on the server, install an SSL certificate, configure an outgoing TLS connection on certain ports. Most shared hosting providers won't let you do this. Although if you contact technical support, they will most likely help you solve all your problems. But I still strongly recommend using VPS.
Apple ID and iCloud re-authorization
If you have an internet connection and rebooting doesn't help, try signing in to your Apple ID again.
- Open settings.
- Go to the iTunes Store and App Store section.
- Click on your authorized Apple ID and select Sign Out.
- Click Sign In and sign in again with your Apple ID.
The next method to fix the problem with the arrival of push notifications in Viber and other applications on the iPhone is to reconnect the device to iCloud. This can also be done through the settings:
- Open the "iCloud" section in iOS settings.
- Click "Sign Out" at the very bottom of the page.
- Sign in to iCloud again on the same page.
Users report that they were helped by rebooting the device between logging out of iCloud/Apple ID and logging in/authorizing again.
Anatomy of push notifications
Your server is responsible for creating messages for push notifications.
Therefore, it is useful to know what these messages look like. A push notification is a short message consisting of a device token, payload and some other information. The payload is the actual data that will be sent to the device.
Your server must convert the payload into a JSON dictionary. The payload for a simple push message looks like this:
{ "aps": { "alert": "Hello, world!", "sound": "default" } } The block delimited by curly braces contains a dictionary, which consists of key-value pairs (same as in NSDictionary).
The payload is a dictionary that consists of at least one key-value pair "aps", the value of which is itself a dictionary. In the example above, "aps" contains two fields: "alert" and "sound". When a push notification arrives on your device, a pop-up message with the text “Hello, world!” will be displayed. and the standard beep will be played.
In addition, you can add other fields to “aps” to configure notifications. For example:
{ "aps": { "alert": { "action-loc-key": "Open", "body": "Hello, world!" }, "badge": 2 } } Now the value of the "alert" field is a dictionary. "action-loc-key" contains alternative text for the "Run" button. The “badge” field contains the number that will be displayed on the application icon badge. The push notification will not be accompanied by a sound.
There are quite a few ways to generate a JSON payload. You can change the notification sound, add your own fields. For more information, see the Local and Push Notification Programming Guide page on the Apple developer site.
Push notifications are something quite small; The payload size cannot exceed 256 bytes. This is about the same amount as an SMS or Tweet can fit. The push server will not waste time on newlines and spaces, but will generate something like this:
{"aps":{"alert":"Hello, world!","sound":"default"}} This view is less readable, but provides plenty of space for more valuable information. APNS will reject push notifications that are larger than 256 bytes.
What to do if you don’t receive notifications on your iPhone
It is quite difficult to immediately determine what exactly caused the problem. Therefore, a special algorithm has been developed to return notifications regardless of the specific reason. The owner of the device is recommended to check all iPhone settings to rectify the situation.
Check your phone settings
Most often, the problem occurs due to the inclusion of restrictive functions. In this regard, you need to open the settings and check whether specific modes work. In the “Do not disturb” column, you should check whether it is disabled. If the mode is activated, notifications will not be received.
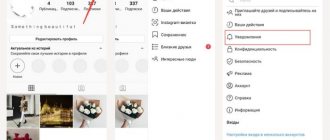
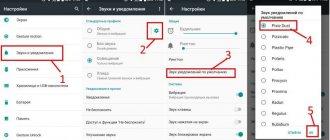
In addition, it is necessary to clarify whether a ban has been established for a specific program. To fix the problem you will need:
- Open iPhone settings.
- Go to the notifications section.
- Click on the name of the problematic application.
- Check the operation of the “Allow notifications” slider.
To always receive information messages, activate the display of banners on the locked screen.
If the remaining conditions are met and permission is activated, notifications should work again. For certain programs, you can set a forced ban so that important messages do not get lost in the list of useless ones.
Restart iPhone
It is possible that the problem occurred due to a system failure. In this case, it is difficult to determine how simple its solution will be. But first you should use the most accessible solution.
Try restarting your iPhone. To do this, you need to hold your finger on the power button for 2-3 seconds, and then confirm the operation.
As soon as your iPhone starts up, you should check that notifications are working. If they begin to appear again, do not rejoice. A one-time occurrence of a system failure indicates that a similar situation may occur again in the future.
Check your internet connection
Perhaps someone will think that lack of network access is the stupidest reason for the problem. But still, this option also needs to be explored.
If you use Wi-Fi to access the Internet on your iPhone, you need to go to the appropriate section of the device settings. There the slider opposite the “Wi-Fi” item should be activated. In addition, you should make sure that there is a checkmark next to the network you are using.
Of course, many people do not use Wi-Fi to access the Internet. They use a mobile network that is provided by the telecom operator. In this case, you need to open the “Cellular Data” section of the iPhone settings. Opposite the item of the same name, the slider should be activated.
When you are abroad, the Internet may not work due to the fact that the “Data Roaming” item is deactivated in the settings. It should also be enabled if you are currently not in the country where the SIM card was issued.
For higher Internet speeds, it is recommended to set the “Voice and Data” item to 4G. But notifications can also come when setting up 3G.
Often, simply activating Internet access may not be enough. It happens that an active connection is displayed on the screen, but in practice the mobile network or Wi-Fi does not work. You can check the functionality by opening Safari and going to any page. If it loads without any problems, then the Internet is working.
But if the page failed to load, there is reason to wonder what happened to the Internet. It is possible that the subscription fee for the tariff was not paid on time. The presence of a received payment must be checked both in the case of cellular data and Wi-Fi.
Also, do not exclude the fact that technical work is being carried out on the server. To be completely sure, you can reboot the router if you are using Wi-Fi. And when the Internet starts working, notifications will begin to arrive without any difficulties. Of course, if the ban was not previously set in the settings.
Re-authorize your Apple ID
Be that as it may, the most common cause of the problem is actually a system failure. If all the previously suggested solutions did not help, then you should check your account settings.
In particular, it is recommended to sign out and then sign back in to your Apple ID. To do this, you need to open your smartphone’s settings and click on the account icon. A menu will open where the “Exit” option will be available.
Don't try to restart your Apple ID if you don't remember your account password.
To sign in again, you'll need to open your iPhone's settings again.
Instead of an icon, 2 empty fields will appear there:
- Apple ID;
- password.
You must fill in the appropriate information and then click the “Login” button. This will log you back into your account and perhaps all notifications will work again. And if you were unable to log into your account because you forgot your password, watch the video where a 100% solution to the problem is presented.
Reconnect iPhone to iCloud
Apple ID combines access to many services, among which ICloud stands out. This is cloud storage that allows the device owner to store personal data and files on Apple servers.
Research into the problem with notifications shows that if you sign out and sign back into iCloud, all errors are eliminated. To perform the operation you will need:
- Open settings.
- Go to the iCloud section.
- Press the exit button.
To re-authorize, as in the case of the previously discussed method, you must enter your Apple ID details. This is the identifier itself, as well as the access password. After following all the recommendations, you can check the operation of notifications.
Use the ReiBoot program
Third-party developers have prepared a bunch of different programs for iPhone owners that can resolve various types of problems. For example, there is ReiBoot. This is universal software for a computer, which, after connecting, gives the user the opportunity to reset settings or simply try to fix errors when operating the iPhone.
You can download the program to your PC from the official website of the developers. The installation will take very little time, since the size of the utility does not exceed a couple of tens of megabytes. Once the entire distribution is downloaded and ReiBoot is installed, all you have to do is follow a few simple steps:
- Connect your iPhone to your computer using the included Lightning-USB cable.
- Open the program and wait until it detects your mobile device.
- From the options provided, select “Solve all iOS freezes.”
- Wait a few minutes while the program looks for possible errors.
- Confirm troubleshooting.
In addition to difficulties with notifications, the program can also correct other errors in the process. Therefore, using ReiBoot is a very useful procedure that is not available in other similar utilities.
Understanding Push Notifications
They are not reliable! There is no guarantee that push notifications will be delivered even if APNS accepts them.
Once your server has generated a push notification, it sends it to APNS without response. There is no way to know the delivery status of the notification to the end user after it is sent. Delivery time can vary from a few seconds to half an hour.
In addition, i-device users may not be able to receive push notifications all the time. For example, there is no Wi-Fi network nearby with Internet access, or the device may be completely turned off.
APNS will attempt to deliver the last notification sent when the device becomes available for reception. But these attempts are limited in time. After a timeout, the push notification will be lost forever!
They can be expensive! Adding push functionality to your app is quite easy and inexpensive if you have the data. However, if you have many users or need to query data, the costs increase dramatically.
For example, you can easily notify users about changes to the RSS feed because you control the feed and know when changes are made - when the content on the site is updated - your server will instantly send a notification.
But what if your app is an RSS reader that allows users to enter their feed URLs? In this case, you need to come up with a mechanism for monitoring the updates of added feeds.
In practice, this means that your server needs to constantly check the tapes for changes. If you have many users, you may need to install additional servers to handle all the processes and maintain stable throughput. For applications such as an RSS reader, implementing push functionality can be quite expensive and may not be of value to you.
Okay, enough theory. Now is the time to learn the process of implementing all these push things. But before we get to the “delicious” part - programming! — you need to do a few boring settings on the iOS Provisioning Portal. Well, let's make them as quickly as possible.
How to temporarily disable all notifications?
iOS has an amazing Do Not Disturb feature.
It allows you to block all or part of notifications on a permanent or temporary basis. The nice thing is that it can work on a schedule, automatically activating restrictions. For example, you will not be disturbed by any insignificant reminder in the game after 23:00, your boss or family will always get through, but other subscribers will only be able to get through if they persistently call a second time within three minutes. Do Not Disturb is very simple, straightforward, flexible, and important.
Immediately with the advent of iOS 11, the “Do not disturb the driver” function was established, which prevents distractions while driving.
If you are not receiving notifications on your iPhone, the reason for this may be a lack of Internet connection, system malfunctions, incorrect iOS settings and other software factors that you can fix yourself.
Provisioning Profiles and Certificates
In order to connect push notifications to an application, you need to sign it with a correctly configured provisioning profile.
In addition, your server needs to connect to APNS using an SSL certificate. The Provisioning profile and the SSL certificate are closely related to each other and are only valid for one App ID. This is protection that ensures that only your server can send push notifications to users of your own application.
As you know, applications use different provisioning profiles for development and release. There are two types of server push certificates:
- Development. If the application is running in debug mode and is signed with a provisioning profile for development (Code Signing Identity - “iPhone Developer”).
- Release (Production). Applications created as Ad-Hoc or prepared for upload to the App Store (Code Signing Identify - “iPhone Distribution”) must inform the server that they use a Production certificate. If there are inconsistencies between them, then push notifications will not be able to arrive in your application.
This tutorial will only use the development certificate.
What are push notifications and why do iPhone users and developers need them?
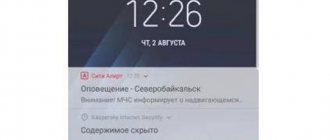
Push notifications are messages that pop up even when your screen is locked. They may contain information about the status of the phone, messages from instant messengers, news and promotions from various sites.
Push messages are supposed to contain data that is important to the user, which is why they pass through all ad blockers and appear on top of all windows. They come only from installed applications and sites to whose newsletters the user has subscribed.
The technology first appeared in iOS 7 (iPhone 4), but gained popularity on later models: iPhone 6 and iPhone 7. Developers use push messages to warn about a ready application update and possible problems, and provide details of the technical condition of the phone. Push notifications are also used to stimulate app purchases through promotions and discounts.
So-called web-push, that is, messages from websites, are used to inform subscribers about the latest company news, reminders about an order that has not been completed, messages about upcoming promotions and other advertising purposes. In order to receive these notifications, the user must manually subscribe to them.
Generating Certificate Signing Request (CSR)
Remember when you went to the iOS Provisioning Portal and created a Development Certificate after joining the iOS Developer Program?
The next steps will be similar. But still, I advise you to perform them exactly as described below. For developers, most of the problems with push notifications are related to certificates. Digital certificates are based on public-private key encryption. You don't need to know anything about encryption when working with certificates, but you should be aware that a certificate is always paired with a private key.
The certificate is the common part of this key pair. The private key must be kept secret. Only you own it and no one else should have access to it. I note that it is impossible to use a certificate without a private key.
Whenever you request a digital certificate, you must make a Certificate Signing Request [CSR]. When you create a CSR, the new key will be added to the keychain. You then need to submit the CSR to a certificate authority (in this case, the iOS Developer Portal), which will generate an SSL certificate based on the information in the CSR.
Open the Keychain Access utility (“Applications → Utilities (Other)”) and select the “Request a certificate from a certification agency...” option.
If you do not see this menu option or a message appears that says “Request a Certificate from a Certificate Authority with key,” then you will need to download and install the WWDR Intermediate Certificate. It is also necessary to check that no private key has been allocated.
You should now see the Certification Assistant window:
Enter your email here. The developers recommend using the same email as the one you used to register in the iOS Developer Program, but this is not necessary.
For the common name, enter "PushChat". You can type anything you want, but choose something descriptive. This will make it easy to find the private key later.
Select the “Saved to disk” radio button and click “Continue.” Save the file as "PushChat.certSigningRequest".
Force reboot
Apple Support recommends that you force a reboot after a normal reboot. What is this? When you restart your iPhone using the Power button, it is a soft reset that works at the software level. Force Restart, on the other hand, works at the hardware level. This is especially useful if your iPhone is not responding at all or is in recovery mode.
A force restart will completely power down the system, then power it back on, and then reboot. Again, do this after a normal reboot and make sure there are no files or applications open when you do this. Otherwise, you risk losing data.
Press and hold the Power and Volume Down buttons at the same time. The combination may vary slightly depending on your model.
Creating an App ID and SSL certificate
Log in to the iOS Provisioning Portal.
First, let's create a new App ID. Each application that uses the push notification mechanism needs its own unique ID.
Click on the “App IDs” item in the sidebar and click on the “New App ID” button.
I filled in the fields as follows:
Description: PushChat Bundle Seed ID: default Bundle Identifier: me.evgeniy.PushChat
It will be better if you specify your own Bundle Identifier - com.yoursite.PushChat - instead of mine. You must set the same bundle ID in your Xcode project.
A few more things: We will generate an SSL certificate that your push server will use to securely connect to APNS. This certificate is associated with the App ID. The server can only send push notifications to your application and no other.
Once the App ID has been created, it will appear in the list:
In the “Development” and “Production” columns opposite “Push Notification” there are two orange circles with the inscription “Configurable”. This means that App ID can use push notifications, but they still need to be configured. Therefore, follow the “Configure” link.
On the page that appears, check the box next to “Enable for Apple Push Notification service”. Next, click the “Configure” button in the line with Development Push SSL Certificate. The “Apple Push Notification service SSL Certificate Assistant” window will open:
The first thing you need to do is generate a Certificate Signing Request. We've already done this, so click Continue.
The next step is to upload the CSR to the Apple server. Select the CSR file you generated earlier and click "Generate".
Generating an SSL certificate will take a few seconds. When ready, click "Continue".
To download the certificate, click “Download” - it will be saved under the name “aps_development.cer”. Then click “Done”.
Now we have a valid certificate and the push notification mechanism is available for development. If necessary, you can download the certificate again.
When your application is ready for release, you need to repeat the entire process to generate a Production certificate. All steps are similar.
Comment. The production certificate is valid for a year, but you can regenerate it before the expiration date.
There is no need to add the certificate to your keychain. If you want to do this, then double-click on the previously downloaded aps_development.cer file (after this the certificate will be associated with the private key).
Creating a Provisioning Profile
Visit the Provisioning Portal. Follow the “Provisioning” link and click on the “New Profile” button.
I filled in the fields as follows:
- Profile Name: PushChat Development
- Certificates: select a certificate
- App ID: PushChat
- Devices: select your device(s)
This process is no different from generating any other provisioning profile.
We create a new profile because each application that supports the push notification mechanism needs its own profile, which is associated with a specific App ID. Click "Submit" and the profile will be generated. The new profile will have the status “Pending”. Reload the page and you will see that the status has changed to “Active”. Now you can download the provisioning profile (file called “PushChat.mobileprovision”).
Add a provisioning profile to Xcode by dragging the file onto the IDE icon or double-clicking on the file.
If your app is ready for release, then you need to repeat the process described above to create an Ad Hoc or App Store distribution profile.
Do Not Disturb Mode
Do Not Disturb mode silences notifications and, with certain settings, incoming calls.
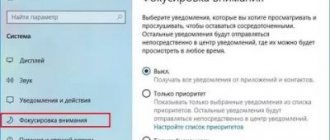
How to check if a feature is enabled:
- On iPhone X and older models, swipe down from the top right corner of the screen; on other models, swipe up from the bottom. In the control center that opens, find the button with the crescent symbol. When enabled, the button background is white and the crescent moon is purple. To stop the mode, you need to press the button (it will turn dark and the month will turn white).
- Go to your device settings and open the Do Not Disturb . When the top switch is in the on position, it is colored green. Click on the switch to turn off the function.
Do not disturb mode may turn on automatically when you select the Scheduled setting.
Simple application
The previous activities weren't really exciting, but they are a must-do.
I wanted to show in detail how to generate a certificate, because a developer does not do such things every day, and without them, push notifications will not work. Now we will create a simple application that will receive push notifications.
Open Xcode and create a new project. In the assistant, select "Single View Application" and proceed to the next step.
I filled in the fields as follows:
- Product Name: PushChat
- Company Identifier: me.evgeniy
- Class Prefix: PC
- Device Family: iPhone
- Checkboxes: “Use Storyboards” and “Use Automatic Referance Counting”
Together, the Product Name and Company Identifier form the Bundle ID.
In my case it is “me.evgeniy.PushChat”. You must enter the Product Name and Company Identifier corresponding to the App ID that was previously created in the Provisioning Portal (com.yourname.PushChat). After creating the project, open PCAppDelegate.m. Change the didFinishLaunchingWithOptions method as follows:
- (BOOL)application:(UIApplication *)application didFinishLaunchingWithOptions:(NSDictionary *)launchOptions { // For iOS 7 and below [ registerForRemoteNotificationTypes: (UIRemoteNotificationTypeBadge | UIRemoteNotificationTypeSound | UIRemoteNotificationTypeAlert)]; // For iOS 8 and higher // [ registerUserNotificationSettings:]; // [ registerForRemoteNotifications]; return YES; } Calling registerForRemoteNotificationTypes tells iOS that this app wants to receive push notifications.
Build and run the application. To do this, you need to use a device because the simulator does not support push notifications. Xcode will automatically select the new provisioning profile. If an error occurs during application launch, make sure that the correct profile is selected in Code Signing Identity.
When the application starts, a message will appear confirming the acceptance of push notifications.
The app will only ask for permission once. If the user clicks “OK”, push notifications will arrive; if “Deny”, they will not. You can change your decision in the settings.
Your app name will be added to your push notification settings. Here the user can enable or disable push notifications for your application, as well as customize badges, sounds, and messages.
Your app can determine which types of push notifications are enabled:
UIRemoteNotificationType enabledTypes = [ enabledRemoteNotificationTypes]; There is one more thing that you must add to the application in order to be able to receive push notifications. Add the following code in PCAppDelegate.m: - (void)application:(UIApplication *)application didRegisterForRemoteNotificationsWithDeviceToken:(NSData *)deviceToken { NSLog(@"My token is: %@", deviceToken); } - (void)application:(UIApplication *)application didFailToRegisterForRemoteNotificationsWithError:(NSError *)error { NSLog(@"Failed to get token, error: %@", error); } When your application registers to receive push notifications, it attempts to obtain a device token. This is a 32-byte unique number that uniquely identifies your device. The device token can be compared to the address to which push notifications will be sent.
After launching the application, the token of your device will be displayed in the Xcode console:
My token is: <740f4707 bebcf74f 9b7c25d4 8e335894 5f6aa01d a5ddb387 462c7eaf 61bb78ad>
A token is an opaque binary data structure that is an object of type NSData. For our purposes, it is enough to know the 32-byte device token. The token can be represented as 64 hexadecimal characters. We will use exactly this format.
If you run the application on the simulator, the didFailToRegisterForRemoteNotificationsWithError: method will be called, which will display an error with information that the simulator does not support push notifications.
We are done with the application. Now let's try push notifications in action!