What is TightVNC and how to use it
TightVNC is the next VNC client-server.
TightVNC is a free remote control software package. With TightVNC, you can see the remote computer's desktop and control it using your local mouse and keyboard, as if you were sitting in front of that computer. TightVNC is:
- free for personal and commercial use, with full source code,
- useful in management, technical support, education and many other purposes,
- cross-platform, available for Windows and Unix, with Java client included,
- Compatible with standard VNC software, in accordance with RFB protocol specifications.
General scheme
First we will install a regular VNC server on port 5900.
Then we will install noVNC and WebSockify on port 5901.
The goal is for it to look something like this:
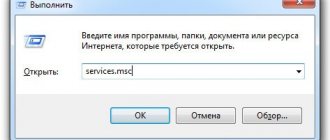
Now run command prompt with administrator rights:
Launch WebSockify:
C:\> cd c:\noVNC\websockify c:\noVNC\websockify> websockify.exe 5901 127.0.0.1:5900 –web c:\noVNC\noVNC-master WARNING: no “resource” module, daemonizing support disabled WebSocket server settings: - Listen on:5901 - Flash security policy server - Web server. Web root: c:\noVNC\noVNC-master — No SSL/TLS support (no cert file) — proxying from:5901 to 127.0.0.1:5900 The first parameter above is the port on which noVNC will listen: 5901
. This port must be made available to clients.
The second parameter is the IP and port where the VNC server is located: 127.0.0.1:5900
Third parameter -web
instructs noVNC to serve the contents of the
c:\noVNC\noVNC-master
over HTTP(s). By default, noVNC provides only a VNC websocket, but this option allows you to have an HTTP server on the same port.
In the directory c:\noVNC\noVNC-master
rename the
vnc.html
to
index.html
to make it the default.
Now the noVNC client should be available on port 5901:
Also try opening the noVNC page from another computer/smartphone to make sure it is accessible from outside. If not, check:
That your Windows Firewall does not block external connections to this port - that your router correctly redirects requests to this port to the desired computer; If necessary, google “port forwarding”.
We connect (Connect), enter the VNC password and see the desktop of the remote computer!
If something went wrong, then errors should appear in our console.
You can stop the noVNC server by pressing Ctrl-C in the console. The configuration described above works over HTTP (and over WS).
Installing TightVNC
Download TightVNC: https://www.tightvnc.com/download.php
Typical installation is suitable in most cases:
Additional tasks during installation:
- Associate .vnc files with TightVNC Viewer - associate .vnc files with the TightVNC viewer
- Register TightVNC Server as a system service (recommended) - register the TightVNC server as a system service (recommended)
- Configure system to allow service simulate Ctrl+Ald+Del - configure the system to allow simulation Ctrl+Ald+Del
Immediately after installation, you are prompted to set 2 types of passwords:
- Password for Remote Access - password for connecting to a computer via VNC
- Administrative Password - password for accessing the TightVNC interface and editing settings
Options:
- Do not change - do not change
- Do not use password protection (DANGEROUS!) - do not use password protection (DANGER!)
- Require password-based authentication (make sure this box is always checked!) - Require password-based authentication (make sure this box is always checked!)
VNC and X server architecture
Linux® uses the X Window System (X for short) as its graphical user interface (GUI). X is an unusual GUI in several respects, particularly because it is natively a network interface. X server is essentially a network server program. Network server programs provide client programs with access to local resources, and this is true for the X server as well. The peculiarity is that in the case of the X server, “local resources” are the display, keyboard and mouse with which the user works. In the most common configuration, X client programs run on the same computer as the server. Thus, LibreOffice, the GNU Image Manipulation Program (GIMP), or other programs are X clients that use X network protocols to accept data from the user and display the results on the same computer.
However, when X is used on a network, the user sits at an X server computer, and the X clients are programs that need to be run on another computer. This configuration requires a second network protocol to establish the connection. This second protocol could be telnet, Secure Shell (SSH), or X Display Manager Control Protocol (XDMCP). The server for this remote login protocol runs on the X client computer, and the remote login client runs on the X server computer. The remote login server runs X clients, which in turn establish a connection to the X server. Figure 1 illustrates this interaction. Dotted arrows indicate the beginning of the session. (With XDMCP, the XDMCP client is built into the X server program.)
Figure 1: Remote Access X requires a client and server on both computers
Click to see larger image
This configuration works great on many local networks, but is not without its drawbacks. For example, it requires a two-way network protocol to be initiated, which may be prevented by a firewall or Network Address Translation (NAT) router. (SSH eliminates this obstacle by allowing X sessions to be tunneled.) Additionally, although X servers exist for most platforms, they are not typically installed on Windows® computers. For these and other reasons, many people prefer to use another protocol, Remote Frame Buffer (RFB), which is implemented in the Virtual Network Computing (VNC) family of programs.
VNC is a cross-platform tool that allows remote access to Linux, UNIX®, Mac OS X, Windows and other systems from any type of client. The user sits at a client computer and accesses a remote server computer. On Linux, a VNC server either mirrors the contents of the local X server screen to a remote computer, or hosts its own X server that can run independently of whatever is controlling the local screen. The result is shown in Figure 2. Again, the dotted arrow indicates the start of the session. This configuration eliminates the need for a reverse network connection, and since VNC clients and servers are available for many operating systems, the same client program provides access to any server.
Figure 2. The VNC server includes an X server that can interact with local programs through the X client
Click to see larger image
The disadvantage of VNC is that RFB authentication is based on passwords without usernames. So each user must start an independent VNC server session and establish a connection to that VNC instance by specifying the correct port number. This requirement is tolerable for a single-user system, but causes extreme inconvenience when working on a multi-user computer.
To solve this problem, you can combine these two approaches: reconfigure the local XDMCP server so that it helps the X server built into VNC provide the missing multi-user authentication. (The resulting configuration is illustrated in Figure 3. The dotted arrow indicates the start of the session.) Now, when remote VNC users access the VNC server computer, they can enter usernames and access passwords for their own unique VNC sessions, so that the computer can be used for as long as any users.
Figure 3: Adding XDMCP to a VNC configuration provides increased flexibility
Click to see larger image
TightVNC Shortcuts
After installing TightVNC, the following shortcuts are created to launch and control VNC.
TightVNC Server (Application Mode) - TightVNC server (application mode)
- Run TightVNC Server - start the TightVNC server
- TightVNC Server - Control Interface - control interface of the TightVNC server
- TightVNC Server - Offline Configuration - offline configuration of the TightVNC server
TightVNC Server (Service Mode) - TightVNC server (service mode)
- Register TightVNC Service - register the TightVNC service (if you did not do this during installation)
- Start TightVNC Service - start the TightVNC service
- Stop TightVNC Service - stops the service
- TightVNC Service - Control Interface - control interface of the TightVNC service
- TightVNC Service - Offline Configuration - offline configuration of the TightVNC service
- Unregister TightVNC Service - unregister the TightVNC service
Launching the client
- TightVNC Viewer - launch the TightVNC viewer (client)
Setting up a TightVNC server
Please note that TightVNC Server settings in application mode and service mode are configured individually! The TightVNC Server service settings are system-wide, and the TightVNC Server application settings are individual for each user! But at the same time, the settings for access passwords are common for the service and application!!!
To configure the TightVNC server, you can open the settings window using a shortcut or find its icon in the system tray (next to the clock) and right-click:
Then select Configuration and go to the Server :
Here set Primary password (Set, Change, Unset) - the main password (install, change, delete).
Known issues
Keyboard layout
I discovered that the Russian keyboard layout works in a rather unusual way: If the client has the Russian language selected, then keystrokes are not transmitted to the remote computer at all.remote desktop Add tags |
VNC (Virtual Network Computing) is a remote access system that allows you to use a keyboard and mouse to interact with a graphical desktop interface on a remote server. With its help, you can manage files, software and settings of a remote server without accessing the command line.
This guide will help you install VNC on an Ubuntu 16.04 virtual private server and set up a secure connection using an SSH tunnel. The VNC server will use TightVNC, a fast and lightweight remote control package that supports operation even on slow internet.
Requirements
- Configured Ubuntu 16.04 server (refer to for this).
- Non-root user with sudo access.
- A local computer with a pre-installed VNC client that supports VNC connections over an SSH tunnel. Windows users can install TightVNC, RealVNC or UltraVNC. Mac OS X users can use the built-in Screen Sharing package or use cross-platform applications (such as RealVNC). Linux users can choose vinagre, krdc, RealVNC, TightVNC, etc.
Quick start with TightVNC
If you want to enable the TightVNC server, then just start the TightVNC server service or application, this is the TightVNC Server or the Start TightVNC Service .
If you haven't already done so, set a password for connecting via VNC.
Provide your IP address to users who need to connect to your computer.
If you want to connect via VNC using TightVNC, then launch TightVNC Viewer .
Enter the IP address and click the Connect :
Enter password:
How to use TightVNC
There is a toolbar at the top left of the screen:
- New connection - new connection
- Save session to a .vnc file - save the session to a .vnc file
- Connection options - connection options
- Connection info - connection information
- Pause - pause
- Request screen refresh - request a screen update
- Send Ctrl+Alt+Del — send Ctrl+Alt+Del
- Send Ctrl+Esc — send Ctrl+Esc
- Ctrl key down - pressed Ctrl button
- Alt key down - holding down the Alt button
- Transfer files - transfer files
- Scale in - zoom in
- Scale out - delete
- Scale: 100% - scale 1:1
- Scale: Auto - automatic scale
- Full screen - full screen mode
To exit full screen mode, press Ctrl+Alt+Shift+F .
When you select Transfer files, you can transfer files from a remote computer to your local one and vice versa: