Advantages of a home network using a WI-FI router
It has both pros and cons. Let's look at the benefits first:
- wireless networks allow you to arrange any interior and placement of devices, place computers
- at any distance from the communication source;
- the speed will be approximately the same on all devices;
- you can connect a TV and portable gadgets (smart watches, automatic systems in the house)
Minuses:
- a data leak will result not only in the loss of traffic, but also in the loss of personal data;
- if the router breaks down, all devices will be left without connection (only 1 PC can be connected to a cable).
Overall, the system is good, but if handled carelessly it can play a cruel joke on users. In a big city, it is much easier to come under attack from hackers and scammers, the number of which is growing every day.
What you need to organize a local group
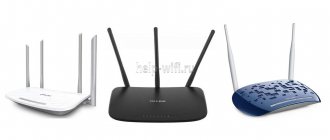
The task at hand - creating a network through the use of a router - will require certain equipment:
- Directly the router;
- A personal computer, which will serve as the center of all subsequent manipulations;
- Laptop or netbook;
- Tablet computer or smartphone;
- Printer
- Other devices that support data transfer via Wi-Fi
DHCP
Before you do and implement your plan, it is important to make sure that the DHCP : the protocol will allow you to automatically set network parameters for all devices in the group. In the DHCP there is a subsection “DHCP Clients List” in which you will see all the devices connected to the router. Of course, you can do without deploying DHCP, but in the absence of automatic distribution of addresses, to connect to the router, you will have to manually set the network parameters on each device .
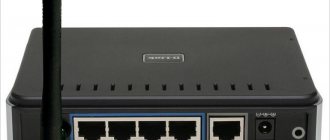
Switch
Appearance of the D-Link switch
The router has ports on the side or back for connecting your devices. One of the ports is highlighted in color (usually yellow) and is intended for connecting an Internet provider cable; it is called the WAN port. LAN ports are intended for connecting devices. If there are not enough sockets to connect all your gadgets, you can purchase a special switch with eight ports . Then you connect the switch to the router, and then connect all your devices to the switch. Switches can be:
- Megabit;
- Gigabit (if you need a higher speed connection to the disk).
What is needed for a home WI-FI network?
First of all, you need to make sure that there is a wired connection to the house. The router itself acts as a “plug”, which divides the flow into several separate lines. If there is no wire, the router will be able to distribute the Internet from a mobile device.
A traditional local network requires a router and a wired connection. The Internet will be distributed over a specific area.
There are also wireless 3G and 4G modems with the function of broadcasting a wireless connection. Such modems can be either wired or wireless. These devices completely change all ideas about wireless networks that are tied to one point.
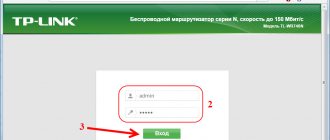
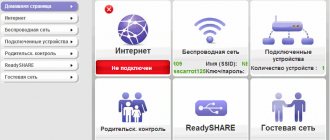
To administer and configure the device, you will need to go to the control panel. The address that needs to be entered into the address bar is in the instructions for the router. If the instructions are not at hand, you can find information on the Internet by entering the router model.
Typically, the network does not require additional settings other than setting a password. It is recommended to create a long, complex password, with numbers and letters of different case. Write down several places or memorize. This is the basis for security and successful operation of the router.
Learn more about creating and configuring a local network
So, how is a home network created via a router? Let's present all the required actions in the form of a list:
Before carrying out all the necessary manipulations:
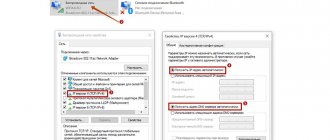
- You will need to check the continuity of the connection between devices that receive the network signal through the wifi router. By accessing the router's options menu (by entering the equipment address in the address bar of your browser), you will need to find a map or list of all devices that receive a signal from the network equipment. Next, remembering the device address, you need to access the command line, in order to call the command line you need to press the key combination Win (Start) + r
To open the command line, press the key combination Win+r and enter cmd in the window that appears + OK
The Windows Command Prompt window will appear.
Command line
and enter the command – ping + device address separated by a space. If the data packets are successfully exchanged, you can proceed to the next step;
- Now you need to check the names of the devices and their membership in a particular group. In the computer properties in the “advanced system settings” tab
right click and go to "Properties" as shown in the diagram
Advanced System Settings
we configure and organize all devices by groups and names: there should be one group, but the device names should be different. It is recommended to carry out this procedure for all devices of the future home group. The setup can be considered complete;
To set up a home network correctly, as well as for its proper functioning, you need to provide shared access to certain folders or drives - the network through a router must be open for access of one technical device to another and vice versa. To do this, in the properties of the object - file, folder or disk - set general access and select the ability to write and read.
What's next: connection
Once the HomeGroup is ready, installed, and organized, it is recommended that you restart the central PC.
Now you can check whether everything was done properly. To do this, it is recommended that from another device of the created group, for example, a laptop connected to wi-fi, go to the “network management” menu and in the “home group” option connect to it.
Then, after entering the security password and carrying out the manipulations described in the previous paragraph - opening access to disks and files, folders - we reboot the laptop. Communication between the internal networks of individual equipment must become available. In this case, the required “bridge” between the computer and the laptop is built correctly.
What you need to connect your tablet or smartphone to your HomeGroup
To connect to a Home Local Group from a tablet or smartphone (which should preferably be able to install applications and run on the Android operating system), you will need to perform a number of steps:
Install the “ES Explorer” application on the device from which you plan to connect;
After installing the program, you need to connect to a wireless Wi-Fi network;
“ES Explorer” has an option (tab) LAN – access to your home local network. By accessing this tab, we initiate the search procedure;
The search result will display a list of computers available for connection;
By selecting any of the homegroups, you can safely access it and exchange data packets between your tablet or smartphone and your computer.
Checking connection and operation
To make sure the newly created home network is working, you can use two ways:
Go to “Network Neighborhood”. If all of the devices required for connection are found in the list that opens, then everything is in order;
Use the command line and the command “ping + device address”. We build a chain of checks according to this command. If satisfactory results are obtained and responses are received from each of the home or workgroup devices (depending on the previously specified settings), the process can be considered completed normally.
Step-by-step instruction
Let's look at what steps are needed to connect a wired connection to the router:
- Find the bus connector and connect it to the router.
- Plug the router into a power outlet.
- Launch it.
- Activate antennas.
- Go to the control panel and set a password.
- Test from different devices.
ATTENTION! Some devices do not connect to certain router models. In order to connect, you need to adjust the gadget settings manually. As a rule, this picture is typical for mobile phones with the Android operating system.
Connecting the device
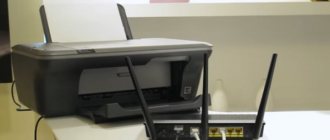
So, you bought a router in a store (or purchased it as part of an agreement with your provider). What to do with this miracle of technology? We offer brief instructions for connecting the device:
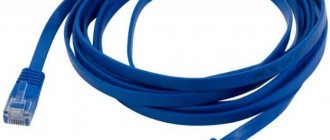
- The router comes with a power supply with a plug for a regular household outlet, a crossover - a special cable for connecting the computer and the router, as well as an instruction manual. The ADSL router kit may also include other things - for example, a splitter. But we are not considering ADSL modems here.
- We take all these components out of the box and place them in close proximity to the computer (it could be a laptop).
- We remove the provider cable from the connector of the PC’s network card and insert it into the connector on the back wall of our device, labeled “WAN”. By doing this, we make the router a member of our network and, moreover, its source for other devices.
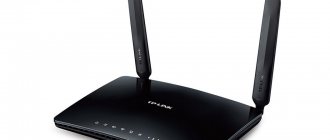
- Now we take out the crossover and insert one end of it into the PC’s network card, and the other end into the LAN port on the back wall of the router. There are usually four such LAN ports (you can choose any one for connection) and they are all marked with the same color, as in the picture below:
All that remains is to connect the power supply and plug it into the outlet. After this, the indicators on the front panel of the device will notify us with light that everything is in order. The picture above should give a good idea of what it all looks like in reality. True, the number of antennas on a router may vary (from one to three). Now it's time to figure out another thing: how to set it all up. After all, without additional configuration of the local network through a router, this entire structure will not work.
Let's consider connecting a wireless router to create a local WI-FI network:
- activate the portable modem;
- install a SIM card;
- start broadcasting a signal;
- check connection from other devices.
- Create a home group
This group involves the use of other computers on the network as repeater points, which also distribute the signal further. Each computer provides an additional security gateway that prevents data from spreading outside the network.
To create a group you will need the Windows Control Panel. You need to find the created network and enter the MAC addresses of all the necessary devices there. From here you can view the current status of the network and all devices included in it, see which of them are active and which are offline.
Next, you need to connect to the network from each device. For mobile devices and smartphones, you need to “Remember the device” so that the smartphone connects to it without the user’s participation.
The need to create a local network via a router
You can do it the old-fashioned way by copying files from one computer or smartphone to another, using cords and flash drives. However, in order not to waste your time and not create unnecessary inconvenience, it is best to combine all devices by creating a home network via a Wi-Fi router.
Having a single network storage will allow you to acquire the following advantages:
- prompt exchange of information between devices;
- access to all files on different devices;
- connection for use within the network of a printer, scanner, camera and other devices;
- participation in intranet online games.
How to make a homegroup accessible via WI-FI from an Android mobile device
To do this, you will need to download additional software or use standard system functions. Not all types of connections can be distributed through the standard menu.
Applications work on the “WI-FI hotspot” principle. The connection is transmitted to the phone and then transferred to other devices via the WI-FI or Bluetooth protocol.
The standard way to create a local WI-FI network:
- Go to the "Settings" menu.
- Select "Modem and access point".
- We need the “WI-FI access point” item.
- Here you can establish the Internet connection that the user wants to distribute, write a password and confirm the action.
Advantages of a home local network
A local network is a group of devices (computers, laptops, smartphones, tablets, etc.) connected to each other using a wired or wireless connection. The main advantages of such a group:
- direct transfer of data and files between objects without the need to use removable media (flash drives, external HDD or SSD drives);
- Internet access;
- access to shared network resources (the printer can print information from any device connected to the network);
- building a common gaming area (many modern games have a network play function).
Setting up network access to printers and files
To do this, you will need to go to the “Control Panel”, where the “Printers and Faxes” section will be located in the connection settings. This section contains active printers that support the WI-FI protocol, which will allow you to configure them automatically. If the reader’s printer does not allow you to configure this automatically, then you will need additional software or a script that will first transfer data to the PC and then to the printer.
There are 2 ways to access files:
- create a shared folder and upload files there. You can also open access to the necessary folders in the context menu. Right-click on the desired folder and select “Open network access” (or a similar item with similar meaning);
- install the necessary software, which will automatically allow access. TotalCommander or similar file managers will do.
Most modern routers, when connected, automatically prompt the user to select those devices that will act as repeaters, select those devices that will have access to files, and select those printers that will receive signals within the network.
Printers also need to be verified, otherwise the signal will be sent to the personal computer itself, but the security system will not allow it further and will not redirect it to the printer. If the printer or fax supports the WI-FI protocol, then you need to add it to the home group and verify it so that data can flow to it.
How to connect a computer or laptop to a homegroup on a Windows 7 local network?
Now you need to connect another computer or laptop to this group. We connect to our wireless network and go through the chain “Start - Control Panel - Network and Sharing Center - Home Group”. And click the “Join” button.
Next, we set up the second computer in exactly the same way - enter the password, indicate the folders to which we want to open access from other devices. Reboot.
If you cannot connect, then disable the third-party firewall that you installed. It may also be built into some antivirus.
That's all. Now, when you log into the network, you will see all devices connected via wifi to the local network. By clicking on the icon of any computer, you will see all the shared folders and devices, such as a printer.
Changing the PC name
This item is optional, but it is better to replace the PC name, since it is automatically assigned in the form of an alphanumeric code, then it will be difficult for you to navigate the names. To configure the laptop name, follow these steps:
- Right-click on the “My Computer” icon on the desktop (Windows 7) or launch Explorer - My Computer (on Windows 8–10).
- System properties - Advanced system settings - Computer name - Edit.
- Come up with a convenient name - OK - Apply, and then restart Windows.
- Repeat the procedure on each device.
- Create a HomeGroup
- Go to Network Sharing Center.
- In the “Home Group” line, select “Ready to Create”.
- Create a homegroup - Next - Select files and devices to share - Next.
- Write down the password and click "Done".
The group with access via the router is ready. You can connect other devices.
Changing the network type
In Windows 7, the network types are “Home”, “Enterprise network” and “Public”, and in Windows 8, 8.1, 10 - “Private” and “Guest or public”. It is possible to create a home group only if the type is “Home” or “Private”. When you connect for the first time, the OS makes a discovery request, agree to it.
- In the tray, right-click the connection icon - Network and Sharing Center.
- In the line “View active networks” you will notice the name of the connection and its type.
- To configure the required type:
- Windows 7
- Click on the Internet icon - “Home Network”.
- Windows 8, 8.1
- Open the side menu by pressing Win+I or moving the mouse cursor to the right edge of the screen.
- Changing computer settings - Network - Connections - name of the connection.
- Activate "Search for devices and content."
- Windows 10
- Start - Settings - Network and Internet - Ethernet (Wi-Fi is the name of your connection).
- If connecting via cable, click on the name of the connection and activate the “Make this computer discoverable” slider.
- When communicating via Wi-Fi, under the list of connections, click “Advanced settings” and make the computer discoverable.
From now on, it is possible to set up a local group through a router at home.