What does this malfunction mean?
There are many reasons why a laptop won't boot after turning it on. Often when this malfunction occurs, the laptop's indicators light up and you can also hear its fans running.
Sometimes you may also hear one or more beeps immediately after switching on.
If the problem appears while booting Windows with a flashing black or blue screen, the problem is related to loading the operating system itself. In this case, you need to go to the “Laptop freezes while loading Windows” section at the bottom of the article.
If you suspect that your device is being stopped at POST before booting into the operating system, you will need the information below.
Reference! POST is a procedure for checking the functionality of a PC, carried out immediately after turning it on.
The meaning and process of the POST procedure
This type of malfunction also does not mean that the information on the laptop’s hard drive has disappeared forever. Typically, once the problem is resolved, this data becomes available again.
Make sure the laptop is completely turned off
There is a common problem with booting personal computers running Windows OS - sometimes PCs have difficulty resuming from Sleep Mode or Hibernation.
To solve this problem, you need to completely turn off your PC by pressing and holding the Power button for about 5 seconds.
Press and hold the power button for about 5 seconds
After completely turning off the power, turn on the laptop in the usual way and check that it boots.
Video card problem
If you have a separate monitor, try connecting it. To do this, you can use: DVI, HDMI or VGA cable and connector. If you see an image on the monitor, then most likely the problem is in the video card or in the screen itself - for example, the cable has come loose or has oxidized.
The image problem may be due to a banal shutdown. Some laptops have a special key combination that, when pressed, turns off the screen. When the system is turned on, the screen may also turn off. Find the icon with a crossed out screen on the keyboard in the “F” button row. Press the “Fn” button and this very key.
If anyone knows, the image can be transferred to a second connected monitor when the main screen is turned off - this is a normal mode that is found on almost all laptops.
But sometimes a bug occurs when this mode is activated when the laptop is not connected. In this case, the image is supplied to the output port of the video card, but there is nothing on the screen. To enable this mode, find the icon in the top line: “laptop crossed with screen.” Next, press the “Fn” button and this key.
There may also be a problem when you see peculiar “artifacts” on the screen: sticks, dashes, stripes, squares. At the same time, the BIOS loads, the Windows screen loads, but after that the screen is black and the system does not boot. Before this, the laptop turned off and will not turn on again. In this case, the shutdown may occur during operation.
NOTE! In safe mode, the system boots quietly, but “artifacts” are still visible on the screen.
This is a hardware problem that can be completely resolved at home and is related to the chip on your video card. Soon I will write a separate article to solve this problem and leave a link here. The article is currently under development.
Addition to the article!
First, let's check that the problem is with the video card and not with the monitor. Turn on the monitor menu - if everything is displayed correctly, then move on. Another symptom is that the system does not want to boot beyond the Windows boot screen, and the screen goes completely blank.
Result: failure of the central GPU crystal due to oxidation of the contact balls. As I said, the problem can be solved at home. I have already written detailed instructions about this, and you can read it here.
Laptop stops at POST self-test
Disconnect external devices from the laptop
If your PC is having trouble booting, there is a possibility that external devices may cause it to freeze during POST, especially if it occurs without a BIOS error message.
Reference! BIOS is a set of microprograms for activating the hardware of a personal computer.
To troubleshoot the problem, start the laptop with only the most necessary equipment.
Before turning on the laptop, disconnect all external devices connected to it
Fault checking via POST messages
When starting up, the laptop can produce an audio message in the form of a special code consisting of long and short beeps.
If the POST check is successful, there is usually one beep, and in case of failures, several beeps are issued in different sequences.
Step 1. Record the output signal when you turn on the laptop.
We record the signals generated when the laptop is turned on
Step 2. Find out what type of BIOS the laptop supports in the documentation for the device or via the Internet.
Common laptop BIOS types:
- Intel;
- AMI;
- UEFI;
- Phoenix-AWARD.
Step 3. Refer to the documentation on your laptop or via the Internet to decipher the sound code. Read detailed information about what BIOS beeps mean when you turn on your computer in our new article on our portal.
Reference! POST errors are quite specific and if the user is lucky enough to receive such an error, it is necessary to try to resolve the said problem.
However, the laptop may turn on, freeze, or reboot without achieving POST results or producing any errors.
Disable unnecessary storage devices
If your laptop tries to boot from a USB device or optical drive that has no bootable data, it may hang during POST. Therefore, it is necessary to disconnect all storage devices from the laptop, if they were connected.
Disconnect all storage devices from the laptop if they were connected
Change device boot order
If possible, set the BIOS as the first boot device to be the laptop's hard drive instead of a USB, CD/DVD drive, or other boot devices.
Step 1. After turning on the laptop, repeatedly press the “Del”, “F2” (or “F1” buttons, holding down “Fn” first) until the BIOS menu appears on the screen.
Note! The key or key combination to enter the BIOS menu can be found in the documentation for the laptop.
Step 2. Use the keyboard arrows left and right to go to the “Boot” tab.
Use the keyboard arrows left and right to go to the “Boot” menu
Step 3. Use the up and down arrows to move to the “Boot Device Priority” line, press “Enter”.
Use the up and down arrows to move to the “Boot Device Priority” item, press “Enter”
Step 4. Next, use the up and down arrows to go to the “1st Boot Device” sub-item. Press “Enter” and select the hard drive in the menu that opens. Press “Enter” again.
Using the up and down arrows, go to the sub-item “1st Boot Device”, press “Enter”
Select the hard drive using the keyboard arrows and press “Enter”
Step 5. Go to “Advanced”, expand “SATA Operation” and select compatibility mode for IDE or ATA drives. Press "Enter".
Go to the “Advanced” item, select “SATA Operation”, set the compatibility mode with IDE or ATA drives, press “Enter”
Step 6. Press “F10” on the keyboard, then “Enter” to save the settings and exit the BIOS.
Press “F10” on the keyboard, then “Enter”
Software reset BIOS settings
Incorrect BIOS settings are a common cause of PC locking during POST. To do this, they need to be reset to stable factory values.
Step 1. After turning on the laptop, repeatedly press the “Del”, “F2” (or “F1” buttons, holding down “Fn” first).
Step 2. Go to “Exit”, select “Load Optimal Defaults” and press “Enter”.
Go to the “Exit” item, select “Load Optimal Defaults”, press “Enter”
Step 3. Press "Enter".
Press “Enter”
Step 4. Make changes to the BIOS, if necessary - for example, set the date and time.
After resetting the settings, change the date and time in the main tab “Main”
Step 5. Go to “Save Changes and Exit” and press “Enter”, then press “Enter” again to exit the BIOS.
Go to the item “Save Changes and Exit” and press “Enter” twice
Hard reset BIOS settings
If you cannot enter the BIOS menu using the keys, you can clear its hardware configuration by removing the battery from the laptop motherboard.
In many laptop models, you can get to the battery by removing a special cover on the bottom panel of the laptop. If there is no such cover, you will need to partially disassemble the device.
Important! Before disassembling the laptop, you must make sure in its instructions that the device is not under warranty. Otherwise, you need to contact its technical support service.
Step 1. Turn off the laptop, disconnect all wires from it, turn it over, and slide the battery latches.
Turn off the laptop, unplug it from the power supply, turn it over and slide the battery latches
Step 2: While holding the latches (if necessary), slide the battery and remove it.
Move the battery and remove it
Step 3. Remove the bottom panel by removing the necessary screws.
Remove the bottom panel by unscrewing the necessary screws
Step 4. Carefully remove the battery, paying attention to its polarity.
Carefully remove the battery, paying attention to its polarity
Step 5: Press and hold the laptop's power button for 15 seconds to remove charge from the laptop's capacitors and speed up the reset.
Press and hold the power button for about 5 seconds
Step 6. Wait 40 minutes and insert the battery back, observing the polarity.
Checking contacts, modules and devices
In addition to BIOS settings, problems with booting a laptop can be caused by:
- power cables inside the laptop;
- memory modules and expansion cards;
- loose cables, especially the screen and hard drive cables.
Step 1. Check all available connections, their fastening and replace faulty equipment, if identified.
We check all available connections, their fastening and replace faulty equipment
Step 2. Reassemble the laptop in the reverse order and turn it on, checking if it boots.
Reassemble the laptop in reverse order and turn it on
Step 3. If necessary, go into the BIOS and make the necessary settings.
It is also necessary to check and, if necessary, replace the laptop's power supply, because it is a common cause of these problems.
Check the laptop power supply and change if necessary
POST test card
You can check the operation of the laptop hardware when it boots up using the POST self-test card. It will help you determine what is causing it to stop downloading.
The POST test card is a diagnostic tool that displays error codes generated during PC startup to identify problems with its memory, hard drives, keyboard, etc.
For laptops, POST cards are available with miniPCI or USB connection options.
POST cards with miniPCI or USB connection options
When you turn on the laptop, codes are displayed on the map screen indicating which device is currently being tested.
Having reached the problematic hardware, POST stops working and a code for the faulty hardware of the device is displayed on the screen.
The POST card screen displays a device hardware fault code
The decoding of the codes can be found in the instructions for the test card.
For example, if the test card displays error number 28 on a Dell laptop, it means the CMOS battery is bad and needs to be replaced.
Replacing laptop parts to identify faults
If the user does not have a POST card, but has spare parts, one can try replacing each piece of laptop hardware with an equivalent working one, one at a time.
For example, replacing RAM, as well as a hard drive, is not very difficult, and is usually carried out after removing the cover covering the compartment intended for this.
Replacing RAM and hard drive on a Samsung Series 3 NP305E5A-A03US laptop (example).
Step 1: Remove the 3.5mm screws securing the bottom cover of the laptop.
Unscrew the 3.5 mm screws securing the bottom cover of the laptop
Step 2. Using a thin plastic piece, insert it into the slot and slide the cover to the side.
Using a thin plastic piece, insert it into the slot and slide the lid to the side
Step 3. Pull the cover out of the guide slots and remove it.
Pull the cover to remove it from the guide grooves, remove it
Step 4. Remove the screws securing the hard drive.
Unscrew the screws securing the hard drive
Step 5. Gently pull the cable to disconnect the hard drive from the laptop motherboard.
Pull the cable to disconnect the hard drive from the laptop motherboard
Step 6: Remove the hard drive from the slot by lifting it up.
Remove the hard drive from the slot by lifting it up
Step 7. Install the replacement hard drive.
Installing a replacement hard drive
Step 8: Place your thumbs on the RAM module latches to release them from the slots.
Place your thumbs on the latches of the RAM module
Step 9. Carefully remove the memory module by pulling it out of the connector.
Carefully remove the memory module by pulling it out of the connector
Step 10. Replace the module with a new one by carefully inserting it, aligning the tab or cutout in the module with the tab in the connector.
Step 11. Reassemble the laptop and try to turn it on.
Assembling the laptop and turning it on
Reference! For instructions on replacing components of a specific laptop model, please refer to its instruction manual.
Malfunction of the cable or laptop screen
A laptop screen (matrix) malfunction is usually caused by mechanical damage or manufacturing defects.
Signs of matrix malfunction:
- reddish ripples appear on the display, which may be caused by a malfunction of the matrix or its cable;
- a normal image is present only on one part of the screen, and multi-colored stripes appear on the other;
- There is a violation of the color rendering of the matrix with replacement of the displayed colors (black-white, red-yellow, etc.).
The probability of a breakdown of the matrix cable connecting the screen to the laptop motherboard is quite high, because... it crosses the movable hinge and bends when opening and closing the laptop screen.
A laptop screen (matrix) malfunction is usually caused by mechanical damage or manufacturing defects
Signs of a matrix cable malfunction:
- There is no image on the screen due to the noise of the fans and the hard drive loading the OS.
- Blackouts, distortions and ripples on the screen. If you move the screen, the image is restored.
However, the listed symptoms are not always associated with a defect in the laptop cable or matrix. In the cases described, professional diagnosis of the malfunction is necessary.
Reference! It is better to repair the cable and matrix of a laptop in a service workshop, because This is due to technical difficulties that can cause additional malfunction if handled incorrectly.
The fans are noisy, but the laptop screen does not work
Maybe the laptop itself turns on, but the screen does not work. Take a closer look at the monitor, maybe there is something there, but the backlight does not work. Find the hotkeys for turning on the backlight on your laptop and press them. For example, on many Lenovo models these are the “Fn+F2” buttons.
The screen may indeed not work, and there may also be various artifacts instead of an image. The surest way to check whether the screen or laptop is to blame is to use an external monitor by connecting it to the VGA/HDMI output. If there is a picture on it, then the laptop screen will definitely not turn on. Read more about this in the article about stripes on laptop screens.
Often the cause of a malfunction can be a discrete video card, especially for those who like to play games on a laptop. Due to a poor cooling system, dust/contamination, or improper use of its “friend,” video cards overheat and break down faster. This especially affects nVidia video cards (GeForce 8400M, 8600M, 9300M and others).
Do not play with the computer on your lap, on your stomach, or in any position that would block the ventilation holes. It is advisable to use cooling pads for laptops. And in general, if the laptop is not positioned by the MANUFACTURER as explicitly GAMING, then it is not recommended to play heavy toys on it for a long time, even if it carries them. Monitor the temperature of the video card.
So, if the problem is with the video card, then try to remove it, if the design allows, or turn it off using the switch that is present on some models. Without a discrete video card, the "book" can work, it just won't run demanding games.
There may be more serious reasons: the processor or memory is missing/not working, broken BIOS firmware, non-working north bridge of the laptop (problems with the motherboard).
Laptop freezes while loading Windows
In addition to faulty PC hardware, stopping, freezing, or rebooting without an error can also occur due to problems with the operating system.
Solving the problem of freezing while loading Windows
These problems may occur on the Windows splash screen or on a black screen, with or without a blinking cursor.
Reference! Before following the recommendations below, it is important to follow the steps in the “Make sure the laptop is completely turned off” at the beginning of the article.
Go to Safe Boot Mode
For Windows 7:
Step 1. When turning on the laptop, press and hold the “F8”, “F1” or “F12” key.
When turning on the laptop, press and hold the “F8” key
Step 2. When a special menu appears, select “Safe Mode” with the cursor arrows and press “Enter”.
Use the cursor arrows to select “Safe Mode” and press “Enter”
For Windows 8 and 10:
Step 1. Boot from a recovery disk or bootable USB flash drive.
Step 2. In the language selection window, press “Shift+F10”.
In the language selection window, press “Shift+F10”
Step 3. Type the sequence: “bcdedit /set {default} safeboot minimal” and press “Enter”.
Type the sequence “bcdedit /set {default} safeboot minimal”, press “Enter”
Remove conflicting drivers
Step 1. After Windows has booted securely, press the key combination “Win+R”.
Press the key combination “Win + R”
Step 2. Type “devmgmt.msc” in the menu and click “OK”.
Type “devmgmt.msc” into the menu and click “OK”
Step 3. Identify conflicting and uninstalled devices in the Device Manager, marked with a question mark or exclamation mark, by opening the device branches by clicking on the triangle icon.
Expand the device branches by clicking on the triangle icon to identify a conflicting or uninstalled device
Step 4. Delete the marked devices by right-clicking on them and selecting “Delete” with the left mouse button.
We delete the marked devices by right-clicking on them and selecting “Delete” with the left mouse button.
Step 5. When asked about deleting, click “Yes”.
Scan your PC for viruses
A virus or other malware may cause problems starting Windows. NOD32 antivirus is well suited for scanning in safe mode.
If problems arise with the system, scan it with the installed antivirus
Check your hard drive for errors
Step 1. Press “Win+R”, type “cmd” and click “OK”.
Type “cmd” and click “OK”
Step 2: Type “chkdsk /f /r” and press Enter. The system will check the disk for errors and correct them.
Type “chkdsk /f /r” and press “Enter”
Start from last known known good configuration
If Windows won't boot, loading the Last Known Good Configuration may help.
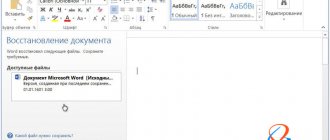
Step 1. Press “Win+R”, type “control panel” and click “OK”.
Type “control panel” and click “OK”
Step 2: Select Large Icons and click Recovery.
Select “Large icons” and click “Recovery”
Step 3. Select “Start recovery...”.
Select “Start recovery...”
Step 4 : Click Next.
Click “Next”
Step 5. Select a restore point and click Next.
Select a restore point and click “Next”
Step 6 : Click “Done.”
Click “Finish”
Windows recovery will start.
We are waiting for the recovery process to complete
Step 7: A message indicating the restoration has been completed will appear. Restart PC.
Click “Reboot”
Reference! When troubleshooting Windows problems, recommendations related to the laptop hardware are also suitable.
For example, you can replace the hard drive data cable, which affects the stability of loading the operating system, and the CMOS battery after 3 years of operation of the device.
Perform a clean installation of Windows
If, despite the steps taken, Windows still freezes, perform a clean installation from the installation disk or USB flash drive.
If all else fails, perform a clean installation from the installation disk or USB flash drive
Laptop won't turn on? Eating problems
The most obvious answer to the question why the laptop does not turn on after being turned off lies in power outages. Turning on is not possible if the cord is broken or the contacts on the power supply or start button are damaged. The first thing you need to do to resolve the issue of why the laptop does not turn on after a reboot is to check whether the power supply is working and how reliable its contacts are.
Among other reasons, we note the following:
- a short circuit may occur in the bridges, south or north;
- The power supply in the laptop could be broken;
- BIOS corruption.
If you encounter one of the problems mentioned above, it is better to contact specialists from the service center to solve it; independent repairs in such a situation are often ineffective. Often the laptop refuses to work on battery power and does not turn on precisely because of it.
There are two options for this malfunction:
- The built-in battery has stopped working;
- The battery on the motherboard caused a problem.
If you encounter the second version of the problem, you will need special equipment to solve it. If users are wondering why their laptop won't turn on, a black screen is the only thing they see. At the same time, the computer may make desperate attempts to make money: the operation of hardware elements can be heard, indicators and the cooler are activated. However, there is nothing to indicate that the hard drive is working.
Let's look at the main reasons for this failure:
- memory or processor problems;
- BIOS malfunction;
- The north bridge is out of order.
If you are faced with the question of why the laptop does not turn on, a black screen may indicate a problem with the backlight or matrix inverter. Symptoms of an impending breakdown can be detected in advance, including flickering of the display, its uneven operation, and the occurrence of extraneous noise. Sometimes the machine tries to turn on, but is interrupted almost immediately. In this case, the problem may lie in the BIOS initialization. Sometimes the matrix may need to be replaced.
BIOS initialization may be difficult for the following reasons:
• reboot caused by the southbridge overheating;
• periodic shutdowns due to processor overheating;
• difficulties with a discharged battery and power supply;
• BIOS failure.
To understand why the laptop takes a long time to turn on or does not turn on at all, you need to take a closer look at the process of getting into working condition. When power is supplied to the motherboard, a number of hardware elements are activated, as a result of which we see a running operating system in front of us.
The motherboard has a number of chips that store instructions that allow the operating system to start working. Thus, the laptop may refuse to work precisely because of problems with the BIOS.
Black screen problems
Sometimes the laptop refuses to work during startup, although it is obvious that the operating system has already started. As a result, we may see the mouse pointer on a dark background or a frozen operating system screensaver. It is most likely that in such a situation the south bridge or hard drive has failed. Separately, it should be said about the hard drive that it may not be connected, contain bad sectors or incorrect formatting.
Difficulties with the OS
The easiest way to get your laptop working is if it doesn't turn on due to a software glitch. Problems in the operating system and viruses cause such difficulties. You can try to cure your laptop with an antivirus system, or erase all existing programs and reinstall the operating system.
Laptop won't turn on after Windows update
Do not miss:
- Which computer to choose for home, games, office. Useful tips and...
- All the ways to connect a laptop hard drive to a computer...
- Windows 7 error code - all the most common ones, causes and solutions
Separately, you should look into the question of why the laptop does not turn on after the update. Such a failure rarely occurs, but any user should know what to do in this situation. After installing the updates, we can see a black screen with a mouse cursor in its center and nothing else. In some cases, it is enough to wait a little or reboot the device and everything returns to normal without additional intervention.
But this doesn't always happen. Incompatibilities may occur due to the installation of updates. You can solve the problem by switching to safe mode. From there we remove the video card driver and return to normal work. Unplugging the network cable in some cases may help resolve the problem. It should be remembered that during a large-scale update, such as the transition to a new operating system, the old one can be stored on the hard drive for a month, so that if failures occur, you can always return to it.
If the laptop does not start the operating system, it is possible to rollback using a Windows disk. A rollback is also possible through safe mode, the main thing is to gain access to the system. If there is a failure caused by BIOS updates, find the No-execute memory protect parameter and set it to Enabled. When all other options have failed, you should use a hard reset.
The algorithm is as follows:
- turn off the laptop;
- disconnect disks, flash drives and other devices;
- remove the battery;
- hold the power button for fifteen seconds;
- without a battery, connect the power;
- turn on the laptop.
After the first successful start, the battery can be returned to its place.